
Domain and Accounts
Last updated on:
In this page
Overview
The Domain and Accounts page in ManageEngine Log360 serves as a centralized console for managing all integrated Active Directory domains, workgroups, and cloud accounts. From this interface, administrators can easily add, update, reload, or remove domains, workgroups, and cloud accounts as needed.
Log360 automatically discovers all the Active Directory domains and workgroups available in your network, while also allowing you to manually add new ones. For cloud environments, it supports integration with major platforms like Amazon Web Services (AWS), Salesforce and Microsoft 365 (M365) to collect and analyze log data from various services.
This page explains how to add, update, and manage domains, workgroups, and cloud accounts in Log360.
Domains
The Domain Accounts section allows admins to manage Active Directory domains integrated with the product.
The product discovers Active Directory domains available in your network when:
- The product is installed on a machine that is part of the domain environment, and the logged-in user is a domain user.
When the above mentioned conditions are met, the product automatically identifies and lists the accessible domains under the Configure Domains tab.
How it works:
- The product uses the credentials of the logged-in domain user or the configured domain account to query the network and perform domain-related operations.
- The discovery uses standard Windows discovery mechanisms and LDAP queries to identify domain controllers and associated objects.
After a domain is added, you can:
- Update authentication credentials to switch to a dedicated service account for secure access. For detailed steps, refer to Updating a Domain.
Refer to the following sections to:
Prerequisites
Before adding a domain, ensure the following requirements are met:
- The machine logged in user must be a domain user and should not be a local user.
- The Domain Controller must be reachable from the product server to enable automatic identification and addition of the domain during discovery.
- Verify that the required ports for domain discovery and communication are open.
- Use an account with Domain Admin privileges or a service account that has the required permissions to access and read domain controller objects.
Adding a Domain
To add a new domain:
- Log in to the product.
- Navigate to Settings tab. Go to Admin Settings. Under Management, select Domain and Accounts.
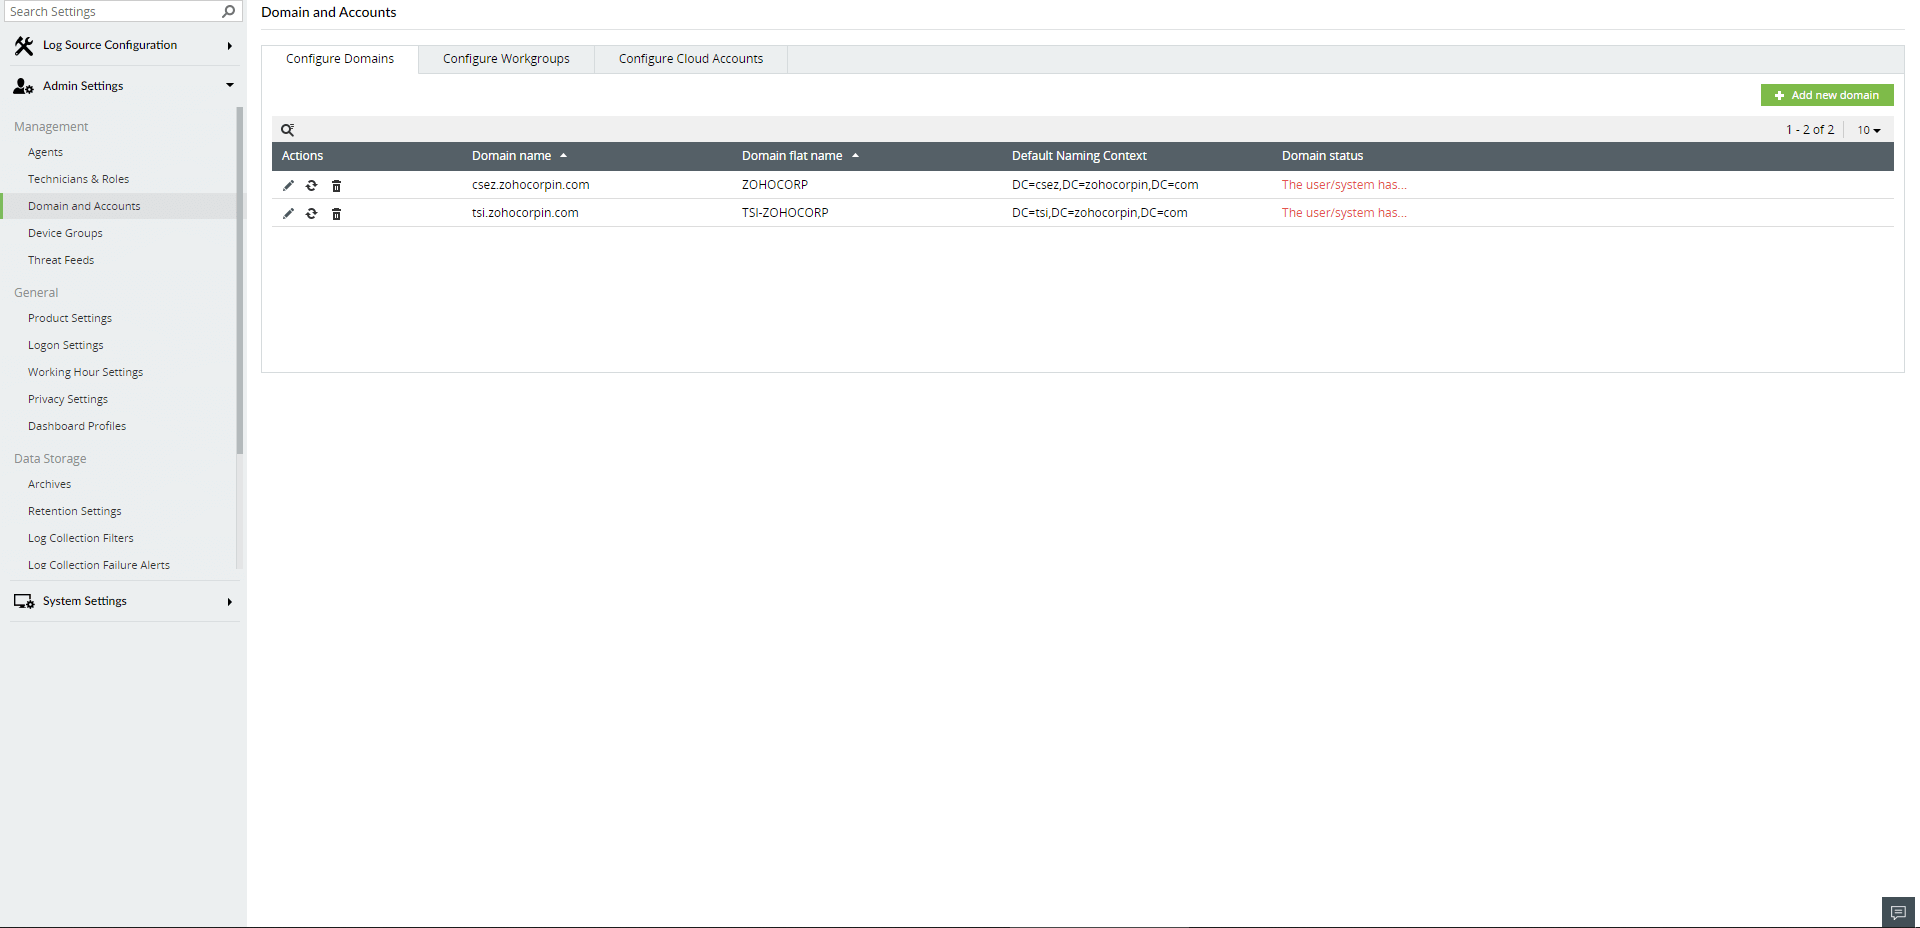
Figure 1: Navigating to Domain and Accounts - In the Configure Domains tab, click Add New Domain in the middle of the page or top-right corner.
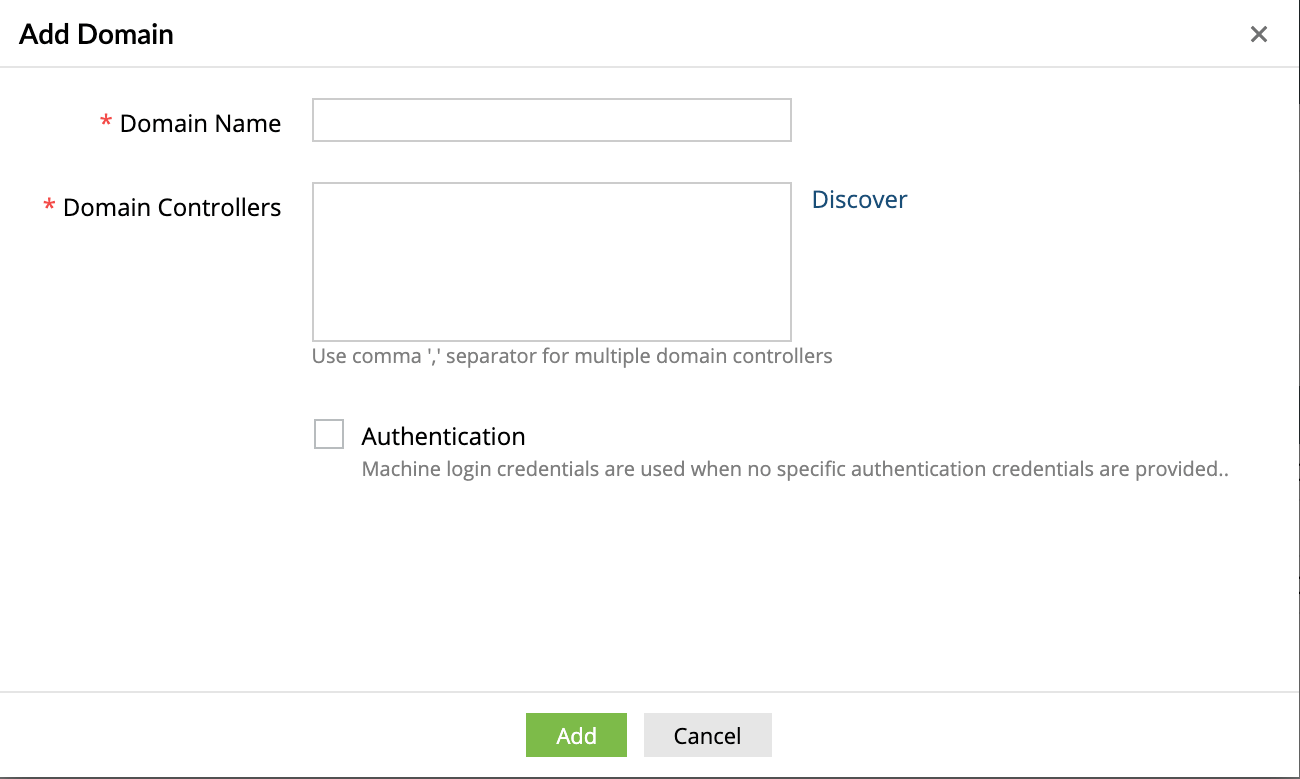
Figure 2: Adding a new domain - In the Add Domain window, enter the Domain Name.
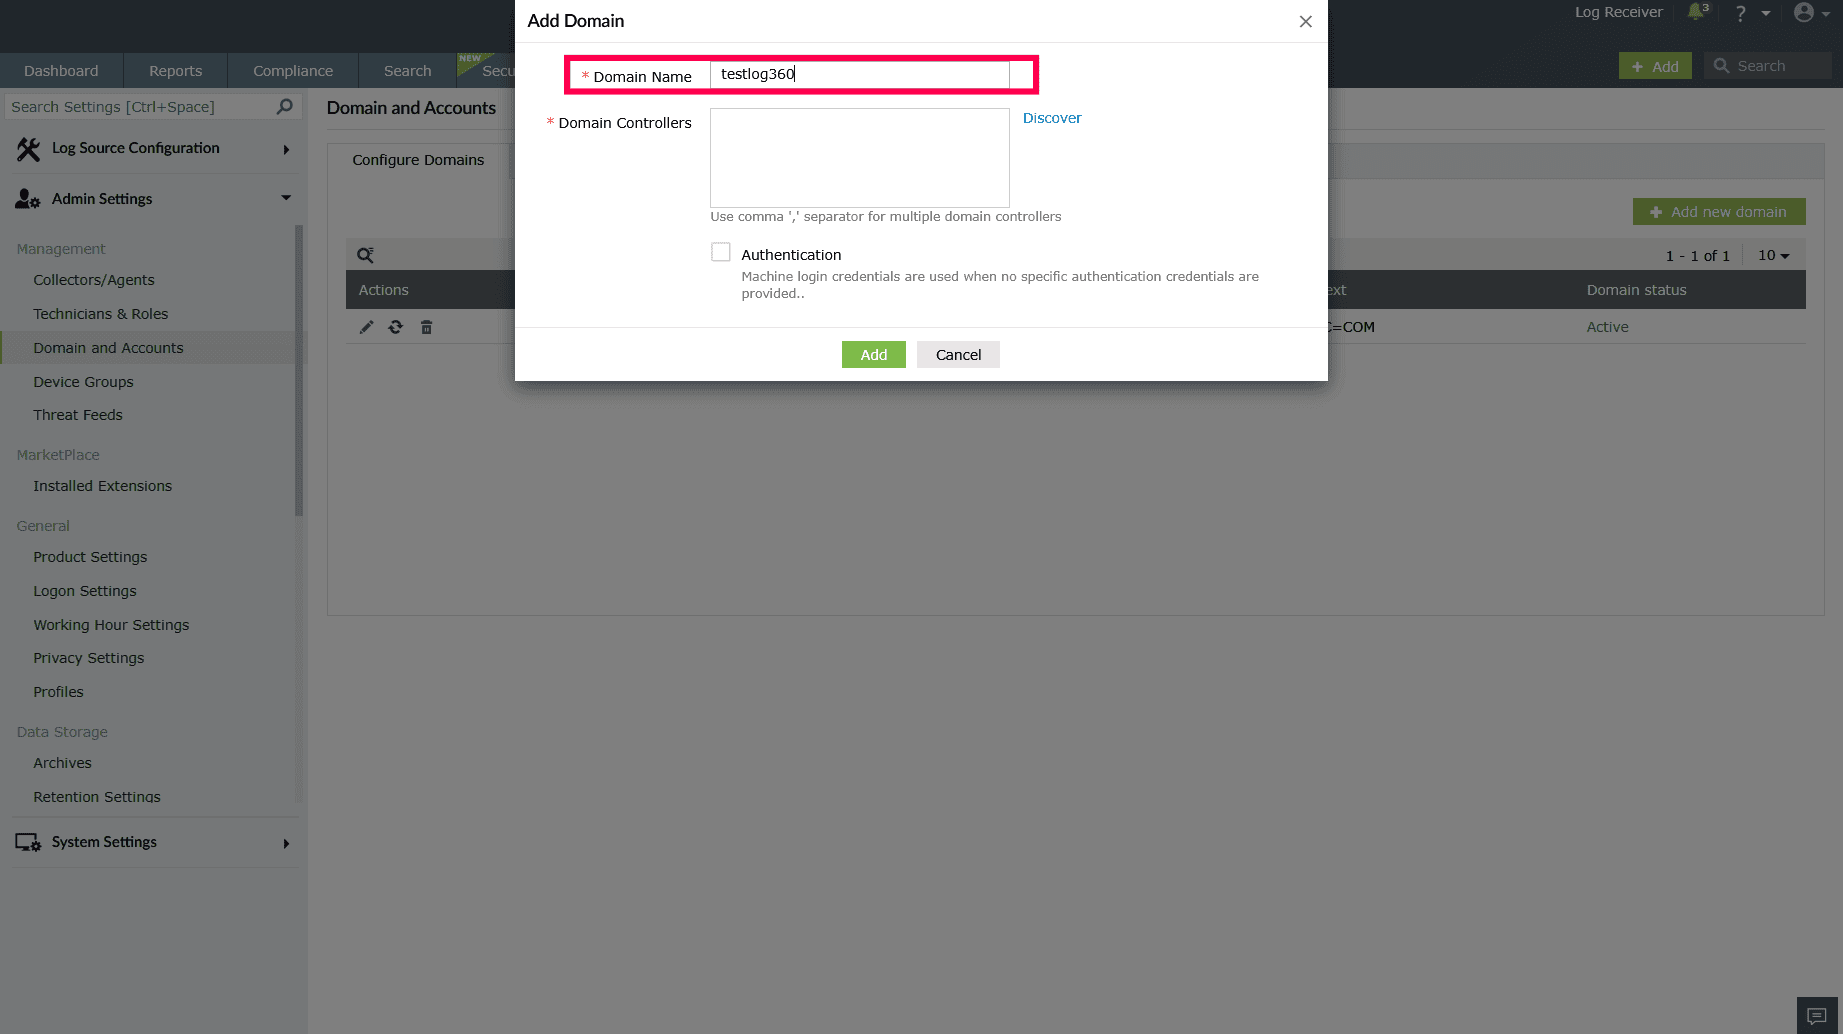
Figure 3: Entering the domain name - Click Discover to detect the domain controllers automatically. Ensure the pre-requisites are met for automatic addition of domain controllers.
- Alternatively, manually enter the domain controllers' names in the Domain Controllers field, separated by commas.
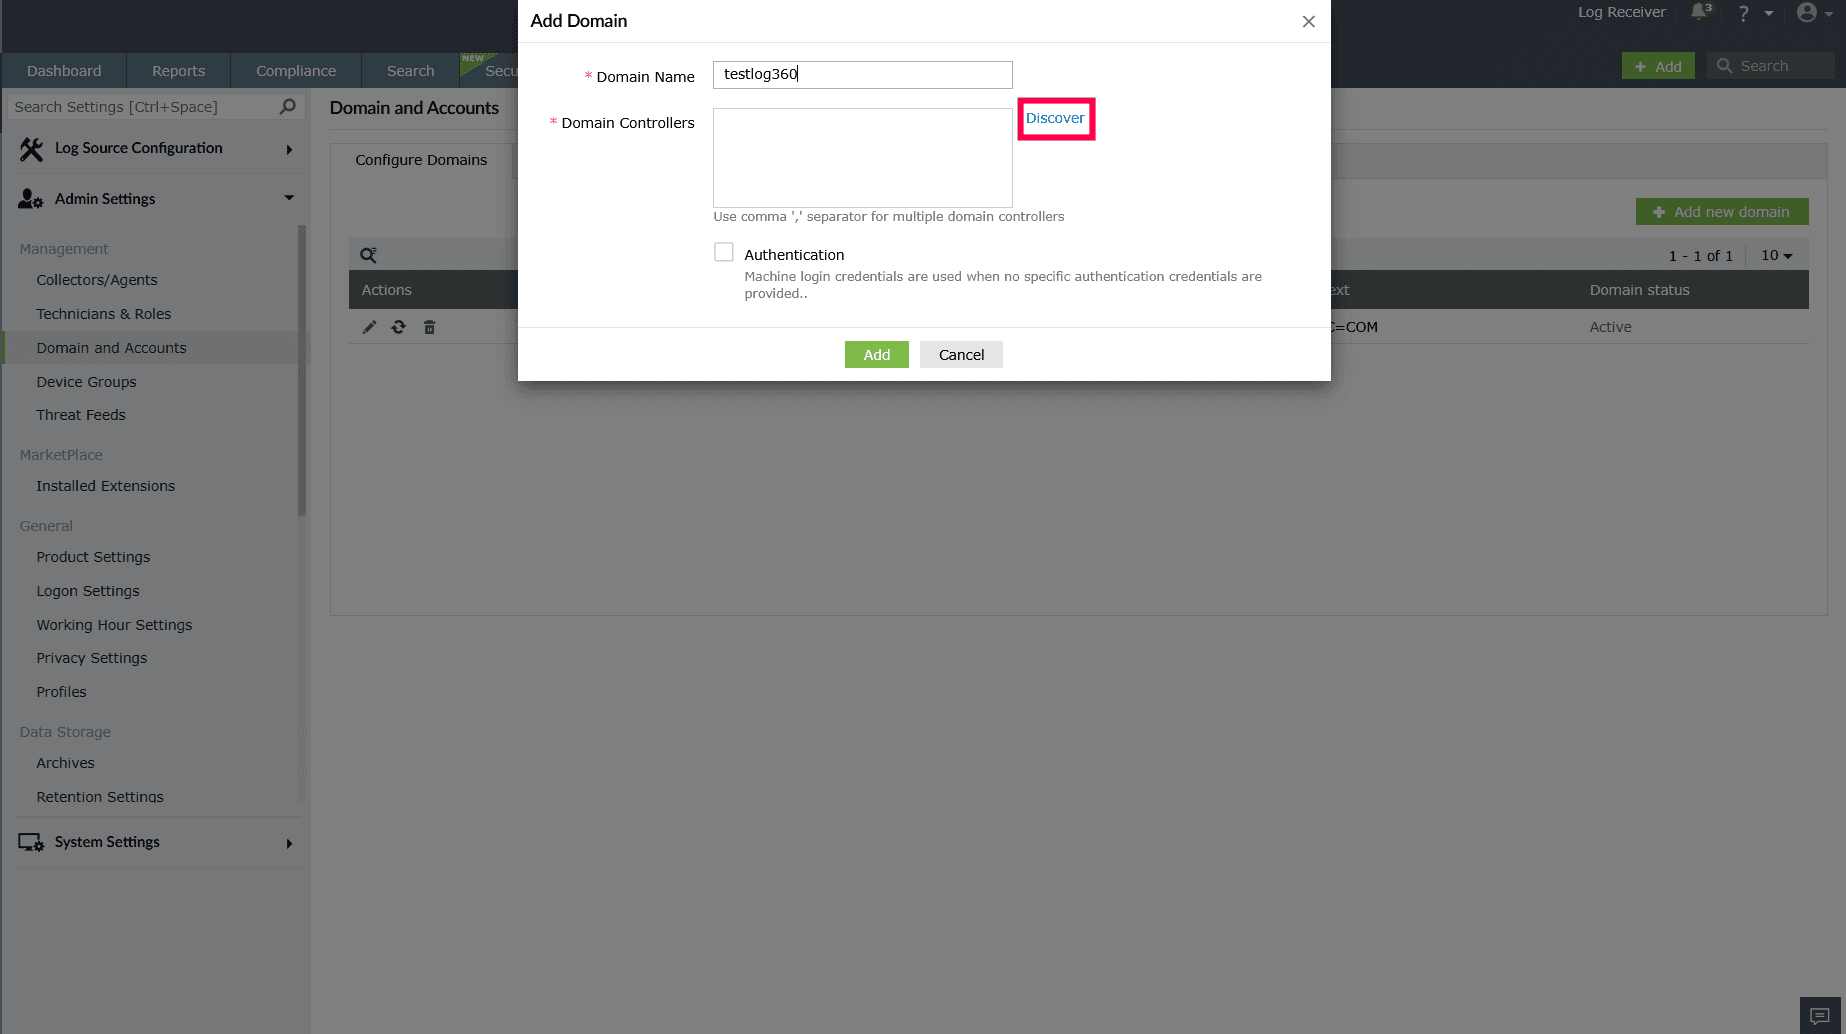
Figure 4: Detecting domain controllers - Select the checkbox next to Authentication and enter the username and password.
NOTE Use one of the following types of credentials:
- Domain Admin account
- Service account with the least privileges required for domain discovery and access. For detailed permission requirements, refer to Service Account Permissions
- The username can be in the following formats:
- DomainName\Username
- Username
- If no credentials are provided, the local machine’s login credentials are used by default.
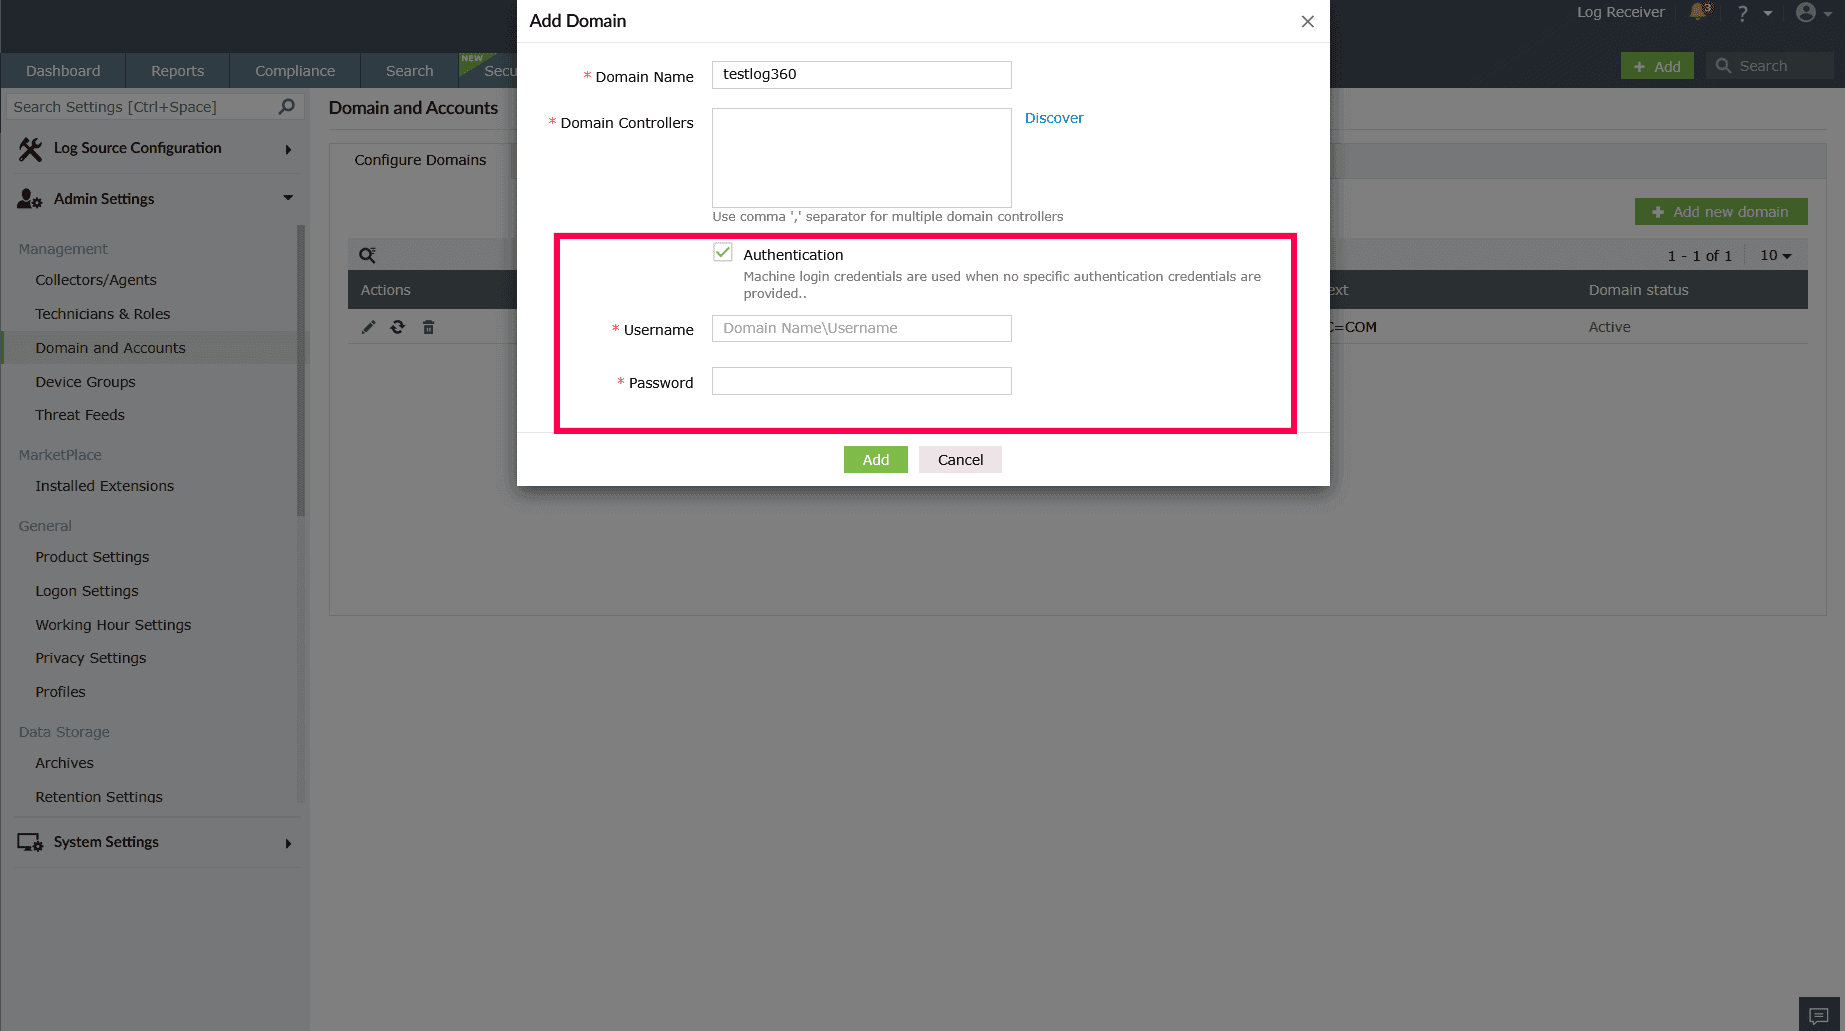
Figure 5: Entering authentication credentials - Click Add to complete the process.
Updating a domain
Follow the below steps to update the authentication credentials or to manage domain controllers for an existing domain.
- Navigate to Domain and Accounts page.
- Click the
 icon in the Actions column corresponding to the domain.
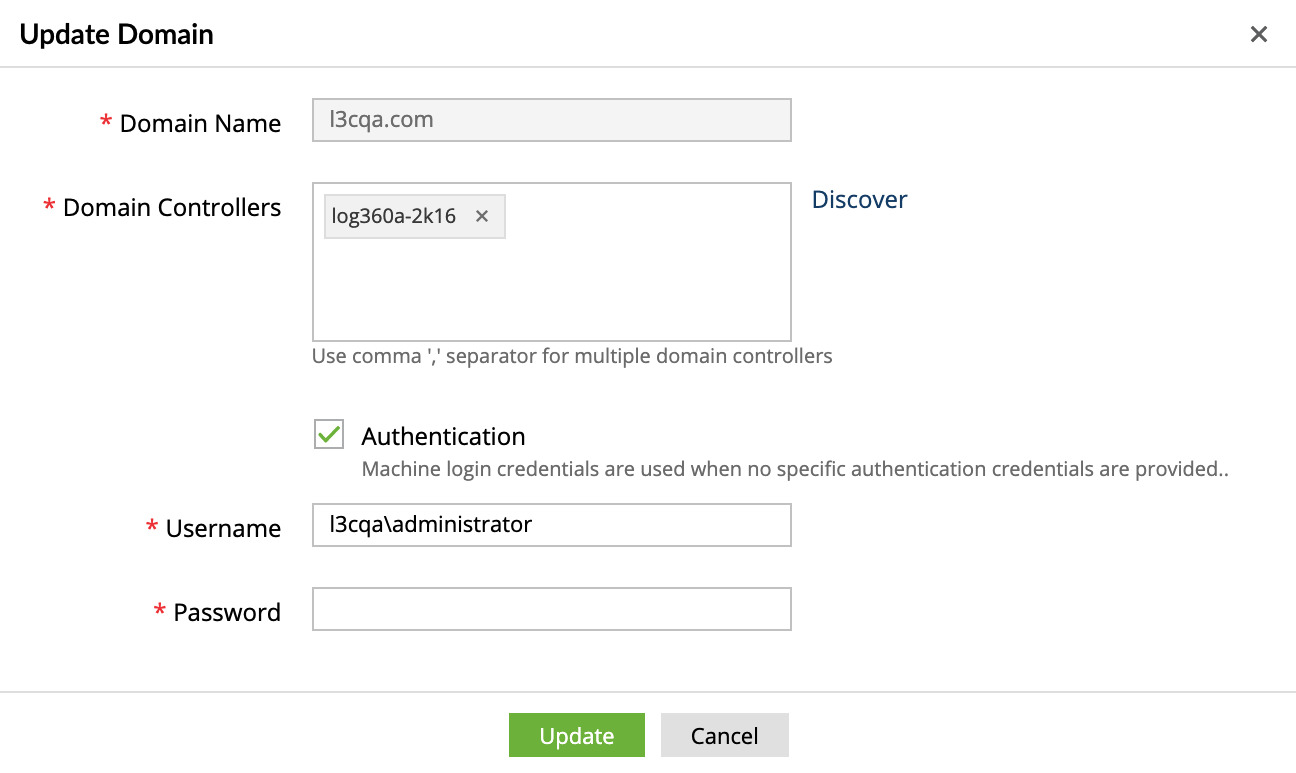
Figure 6: Updating domain credentials - To add additional domain controller, click Discover to detect the domain controllers automatically, or manually enter the name in the Domain Controllers field.
- To remove a domain controller, click the
 icon next to the domain controller.
 - Select the checkbox next to Authentication and modify the authentication credentials as needed.
NOTE If no credentials are provided, the local machine's login credentials are used.
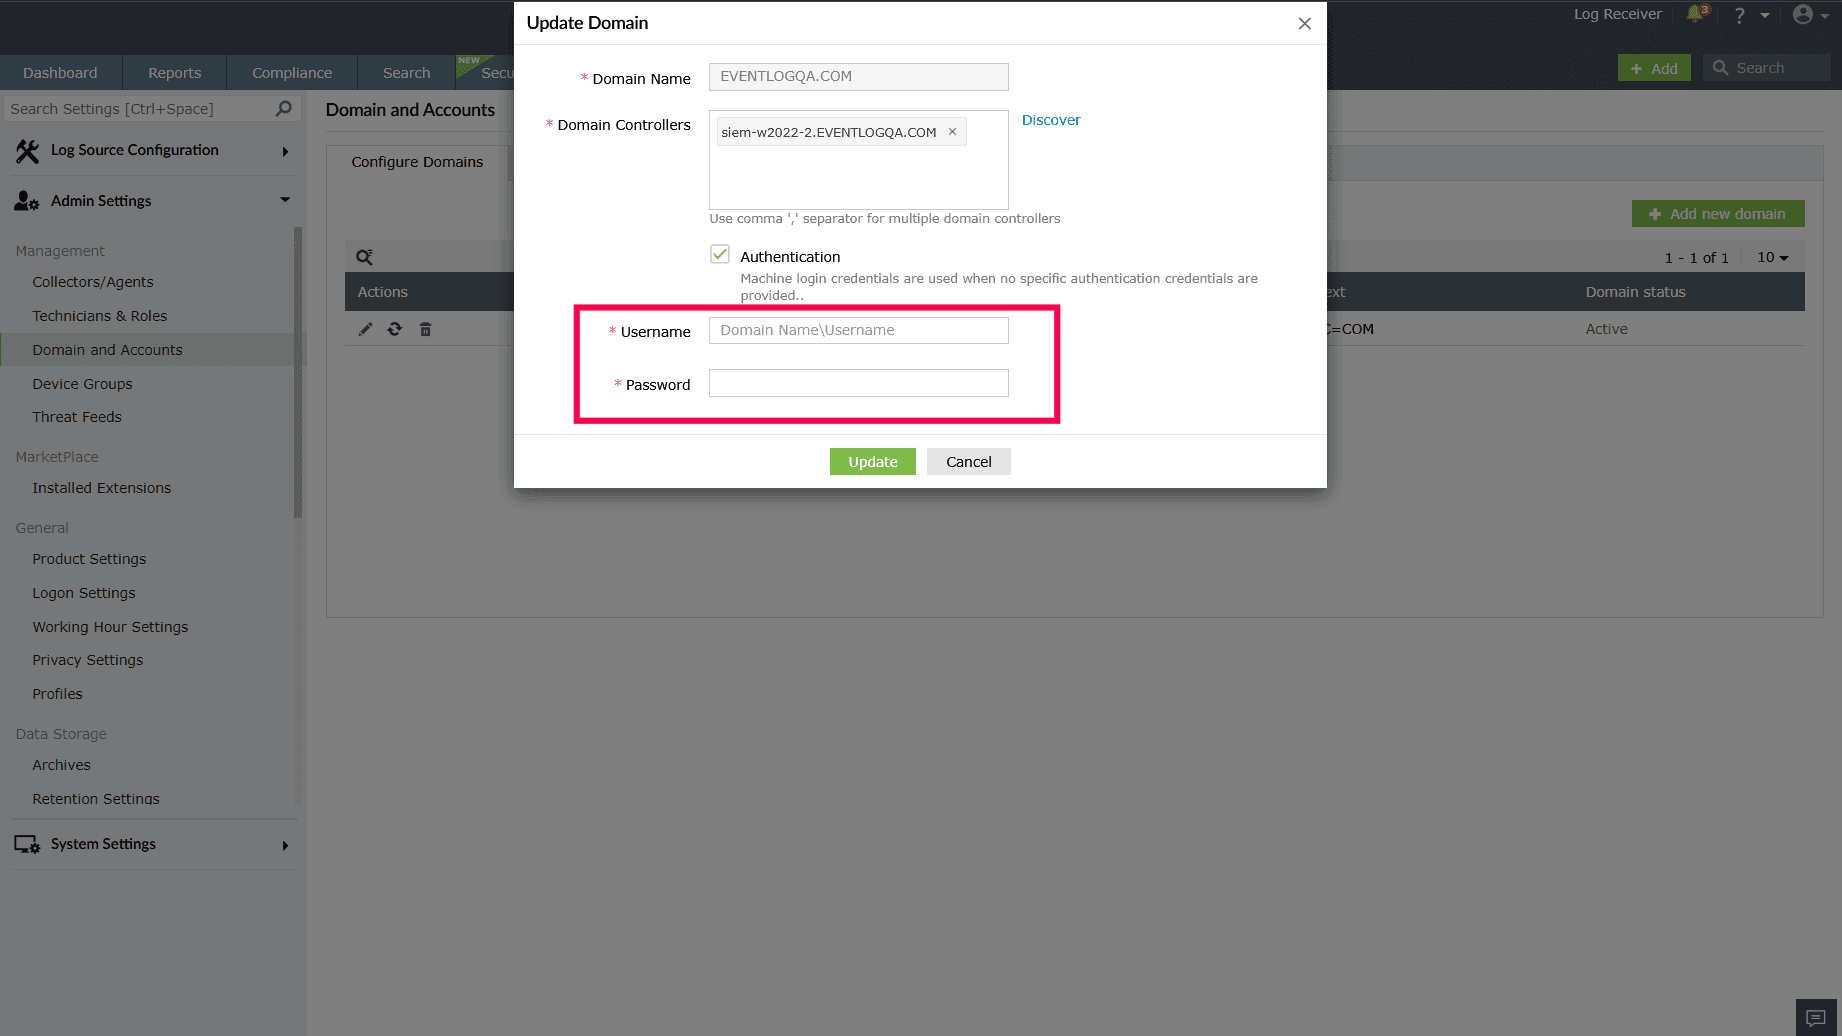
Figure 7: Updating username and password - Click Update to apply the changes.
Reloading domain objects
Reloading domain objects from the selected domain in the product updates the system to reflect any recent changes in your domain, such as newly added users, groups, computers, or organizational units.
The product automatically reloads domain objects once every 24 hours to keep the data in sync with your Active Directory. Admins can also manually trigger a reload at any time from the Domain and Accounts page.
- Go to the Configure Domains tab, click the
 icon next to the domain you want to reload.
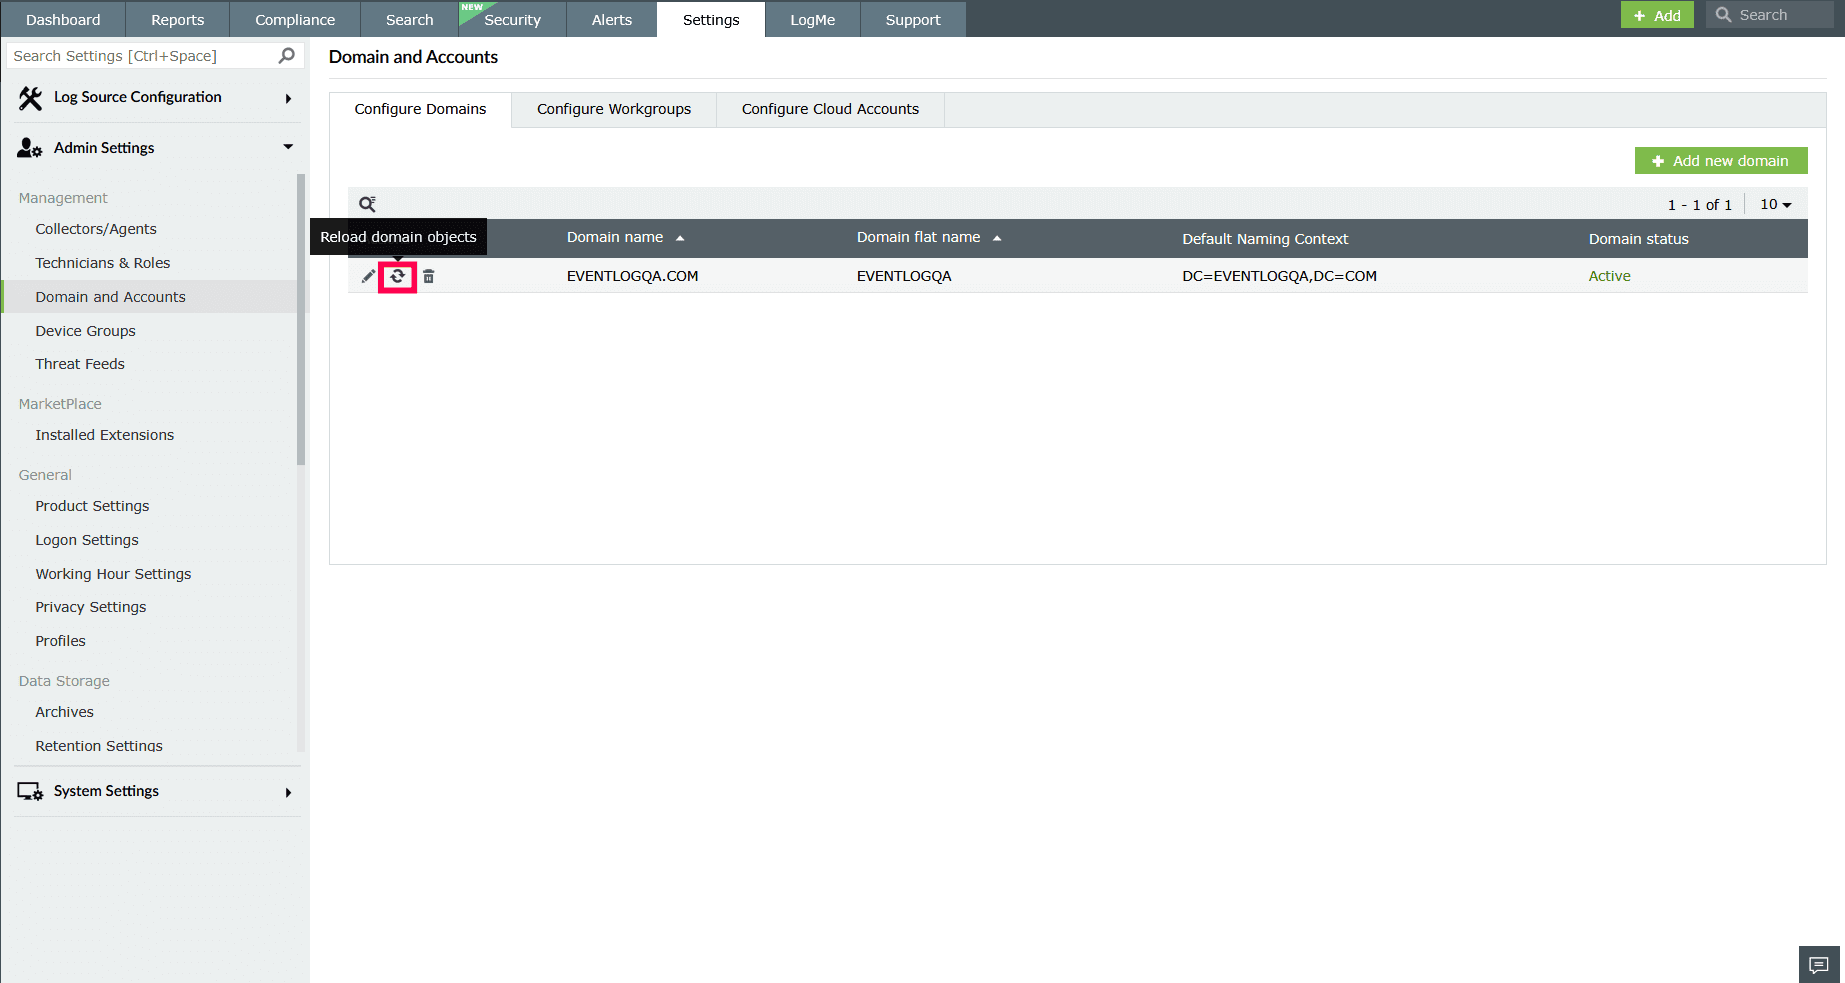
Figure 8: Reloading domain objects - In the Reload Domain Objects window, select the checkboxes for the objects you want to reload, then click Reload.
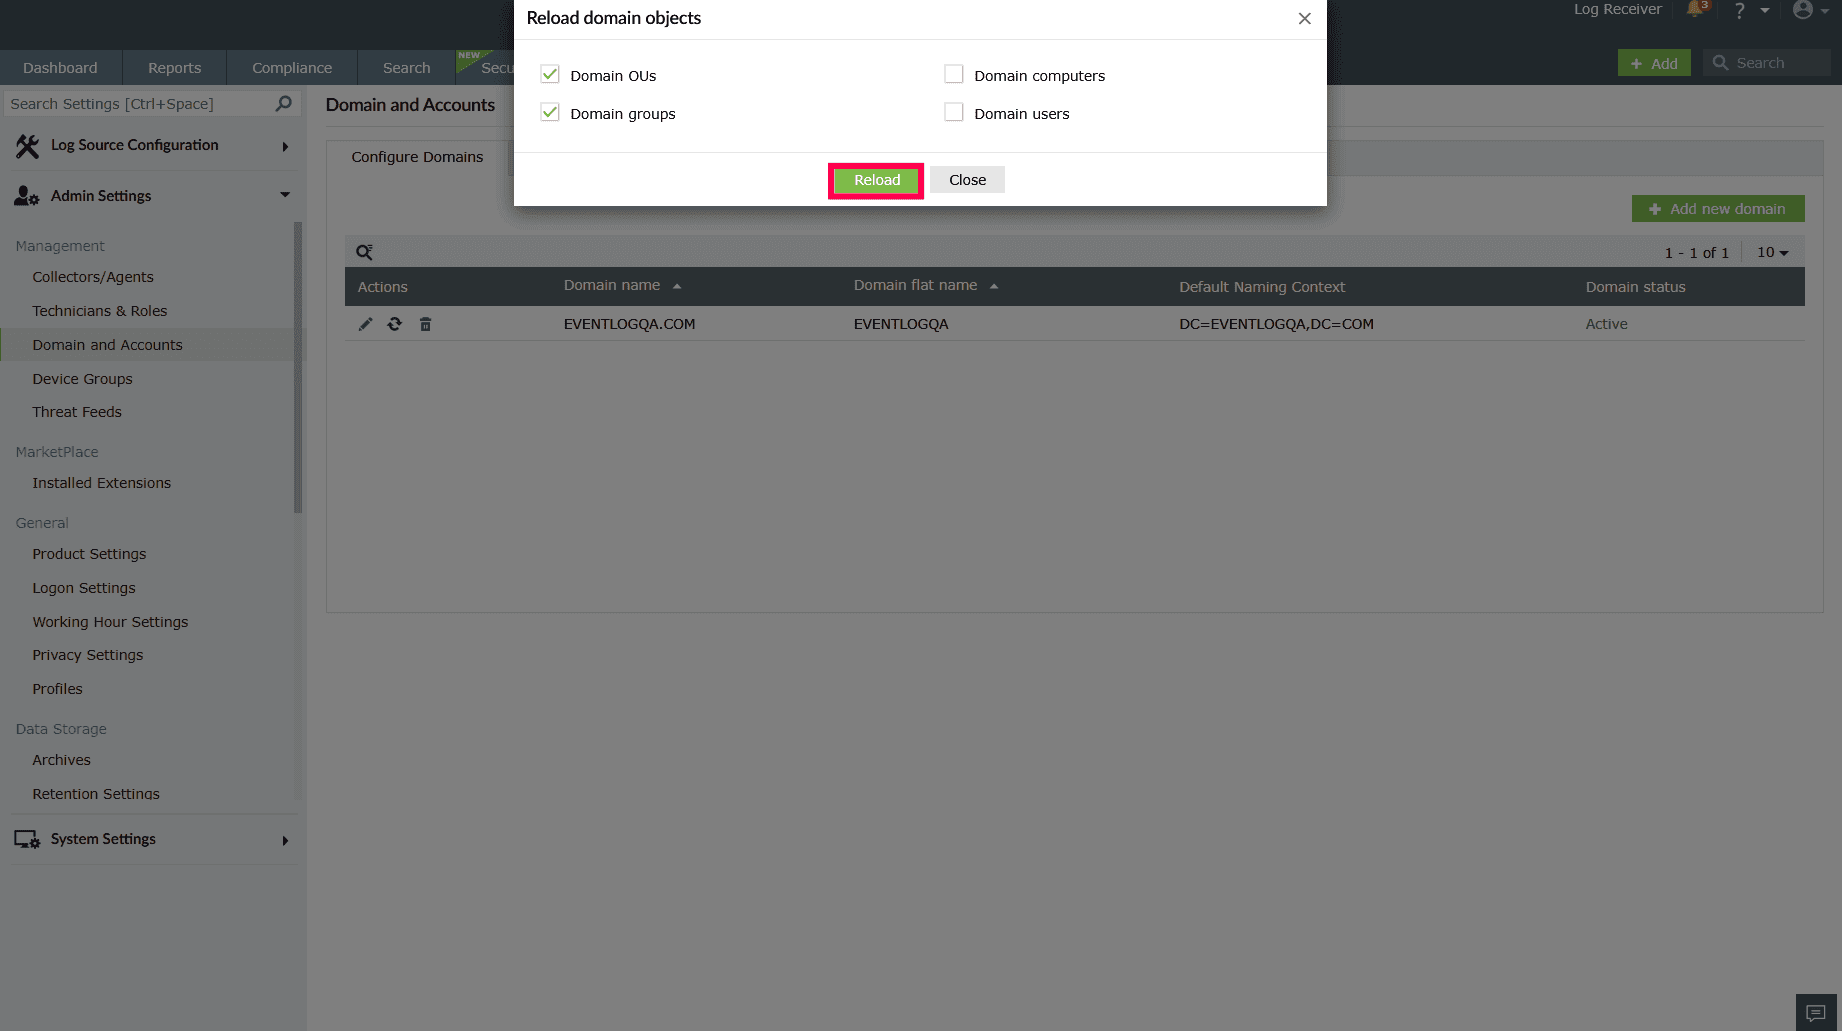
Figure 9: Reloading domain objects
Deleting a domain account
Before deleting a domain, ensure that all associated devices linked to that domain are removed from the product. AD technicians associated with the domain must be removed before deleting the domain.
When a domain is deleted, the following changes take effect across the product:
- Compliance (AD Risk Posture) - Domain-specific values configured in AD Risk Posture compliance rules are removed. A warning message indicating “Source not available” appears for the affected compliance entries.
- Security Analytics (SA) rules (AD object filters) - The deleted domain is removed from the configured object filter values in SA rules.
- If the rule was configured with multiple domains, only the deleted domain is removed.
- If the rule was configured with a single domain, the rule will no longer have a domain configured and must be manually updated before it can be used.
- Alert profiles mapped to SA rules - Alert profiles associated with SA rules follow the same behavior as the corresponding rule configuration. If the underlying rule does not have a domain configured, the alert profile will not function until the rule is updated.
These changes do not prevent domain deletion but may require admins to review related configurations after deletion.
- In the Configure Domains tab, click the icon next to a domain you want to remove.
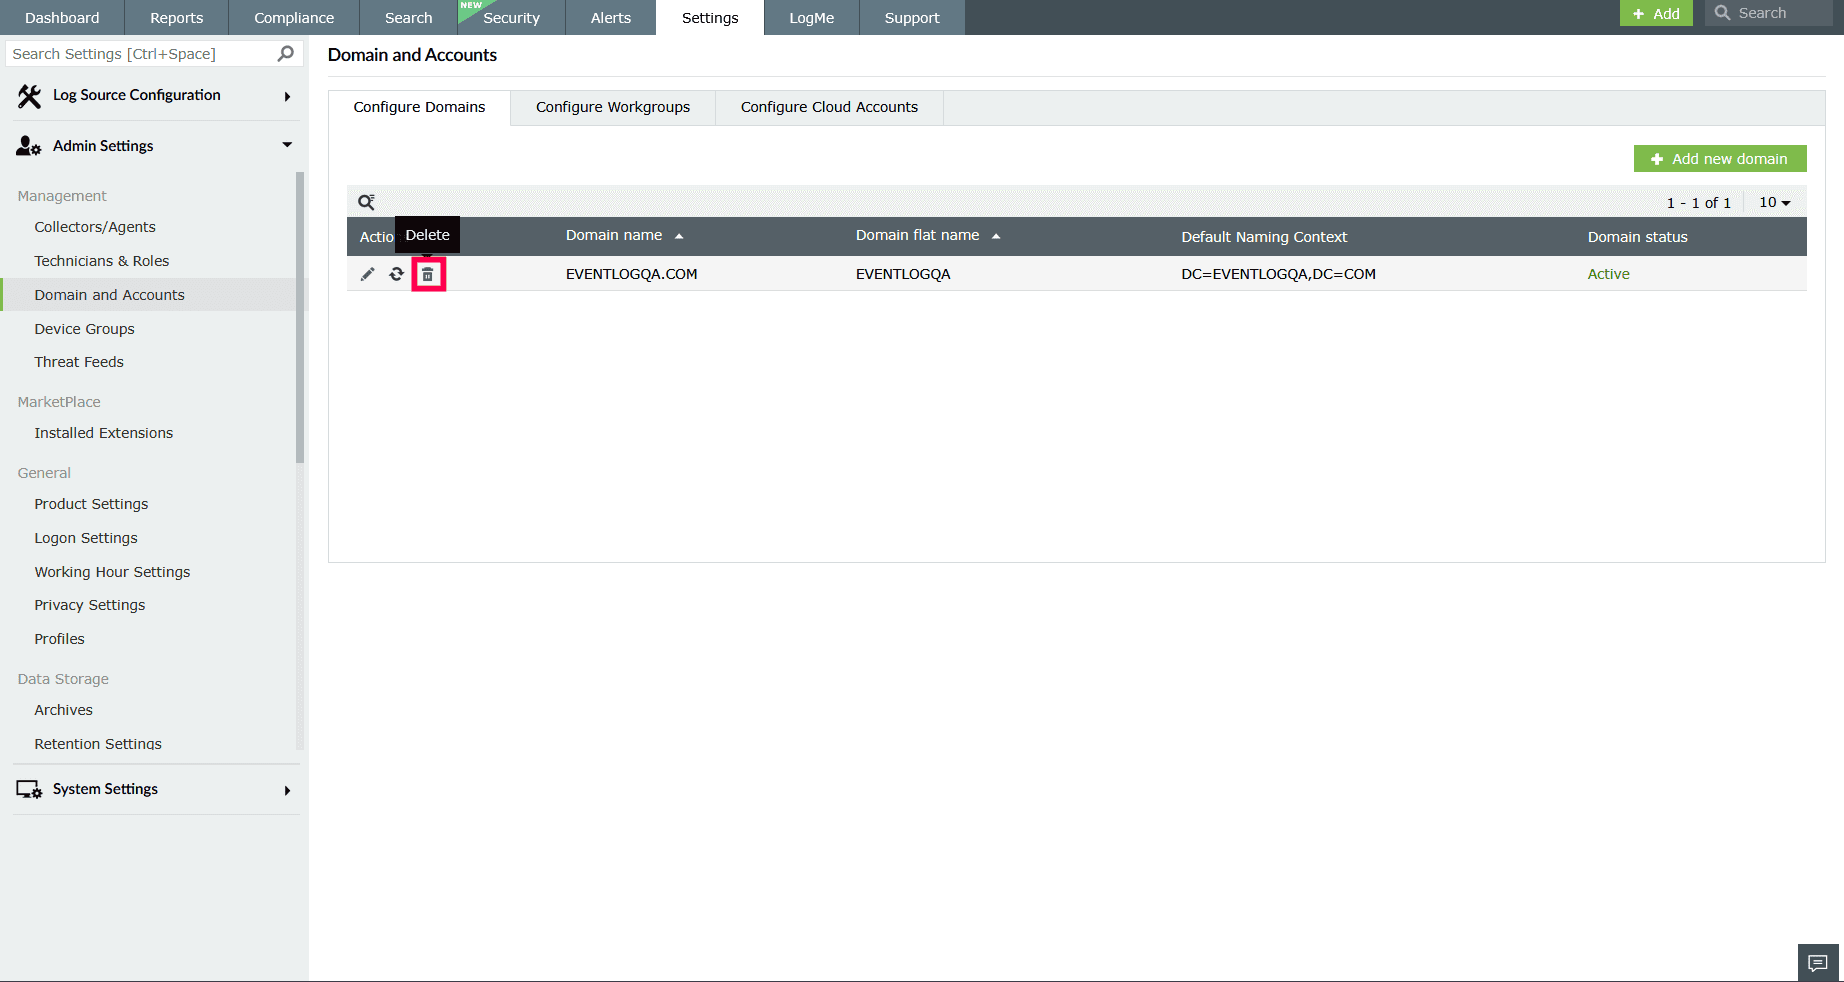
Figure 10: Deleting an account - You can also use the
 icon to locate an account using the domain name.
 - In the confirmation pop-up that appears, click Yes to delete the account.
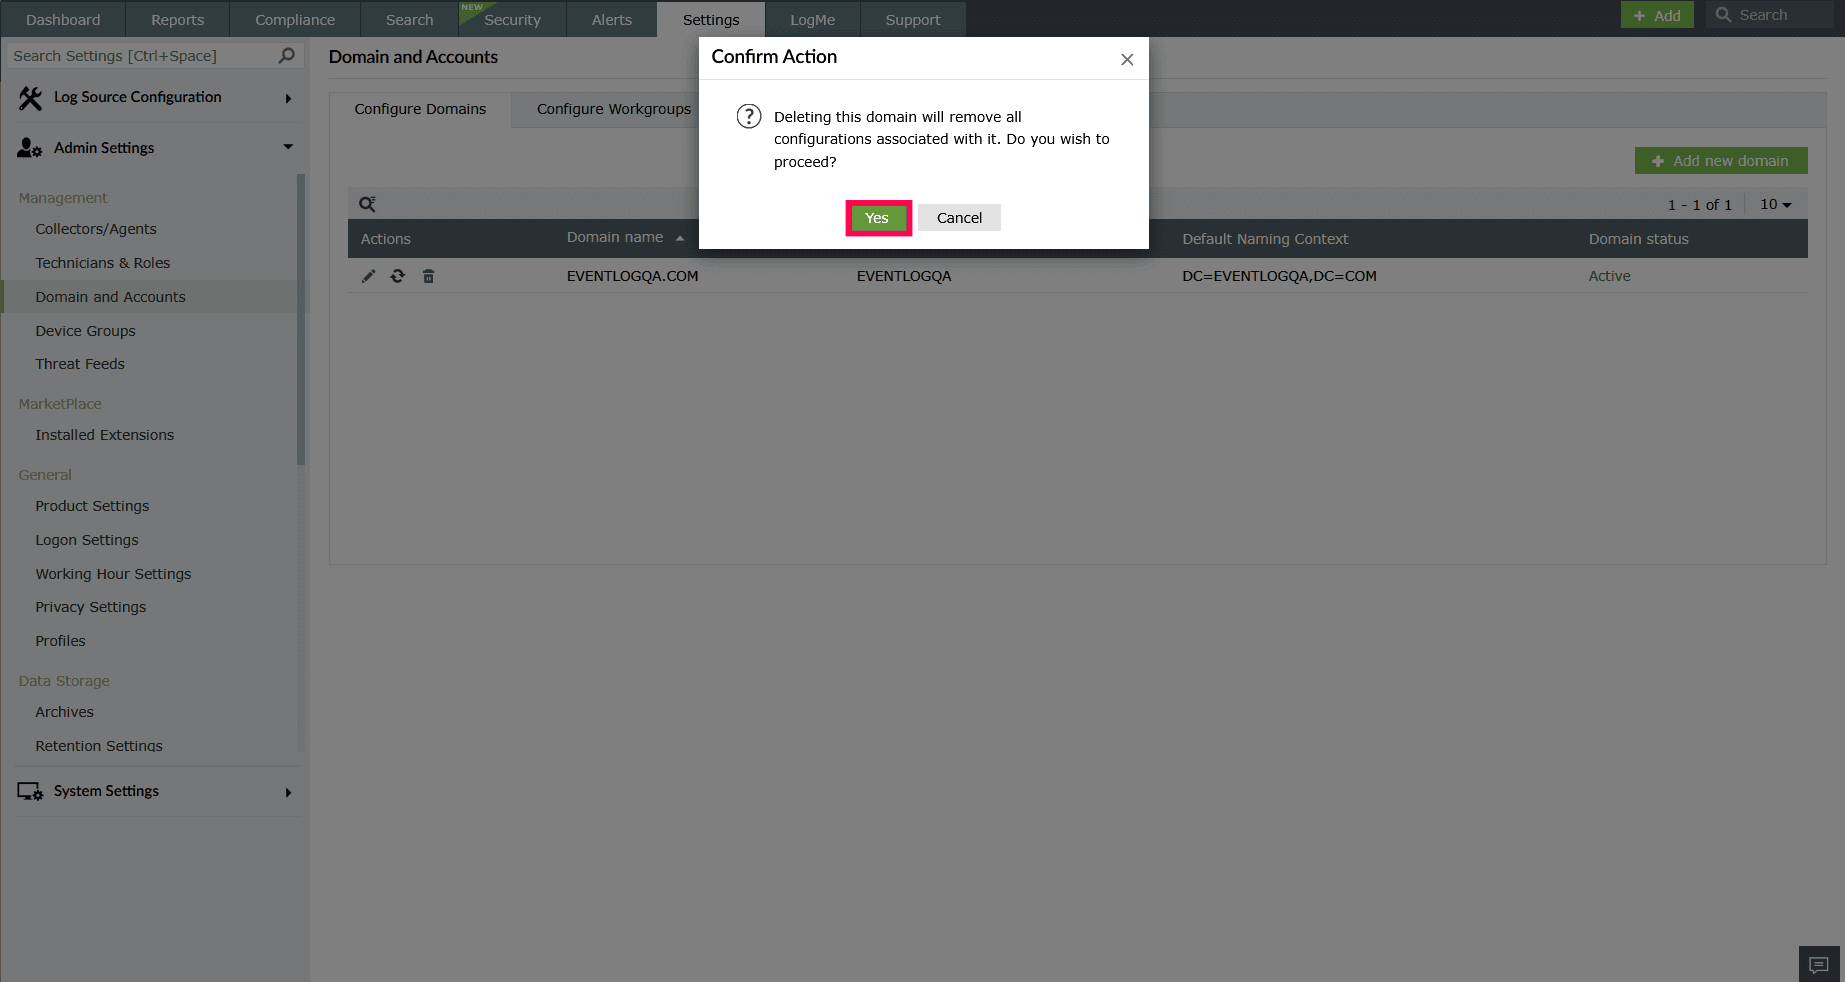
Figure 11: Confirming deletion of an account
Workgroups
The Workgroups section helps administrators update authentication credentials, rediscover devices, and delete workgroup configurations. The Workgroups section allows administrators to manage workgroup configurations. You can:
Pre-requisites
- Ensure that the required ports for communicating with workgroup devices are open.
- The workgroup should be in the same network as the product.
Adding a workgroup
The product will automatically discover all the workgroups available in the network during the initial startup. Users can manually reload workgroups when required.
Updating workgroup's credentials
- Log in to the product.
- Navigate to Settings tab. Under Admin Settings, select Domain and Accounts.
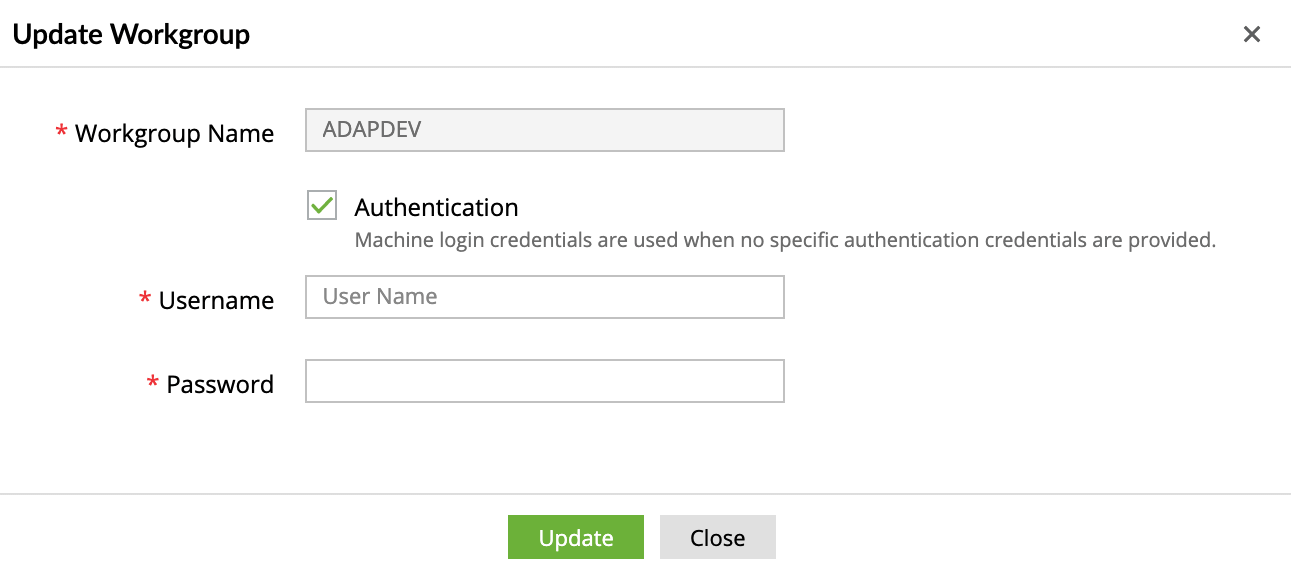
Figure 12: Navigating to Domain and Accounts - In the Configure Workgroups tab, click the icon in the Actions column corresponding to the workgroup.
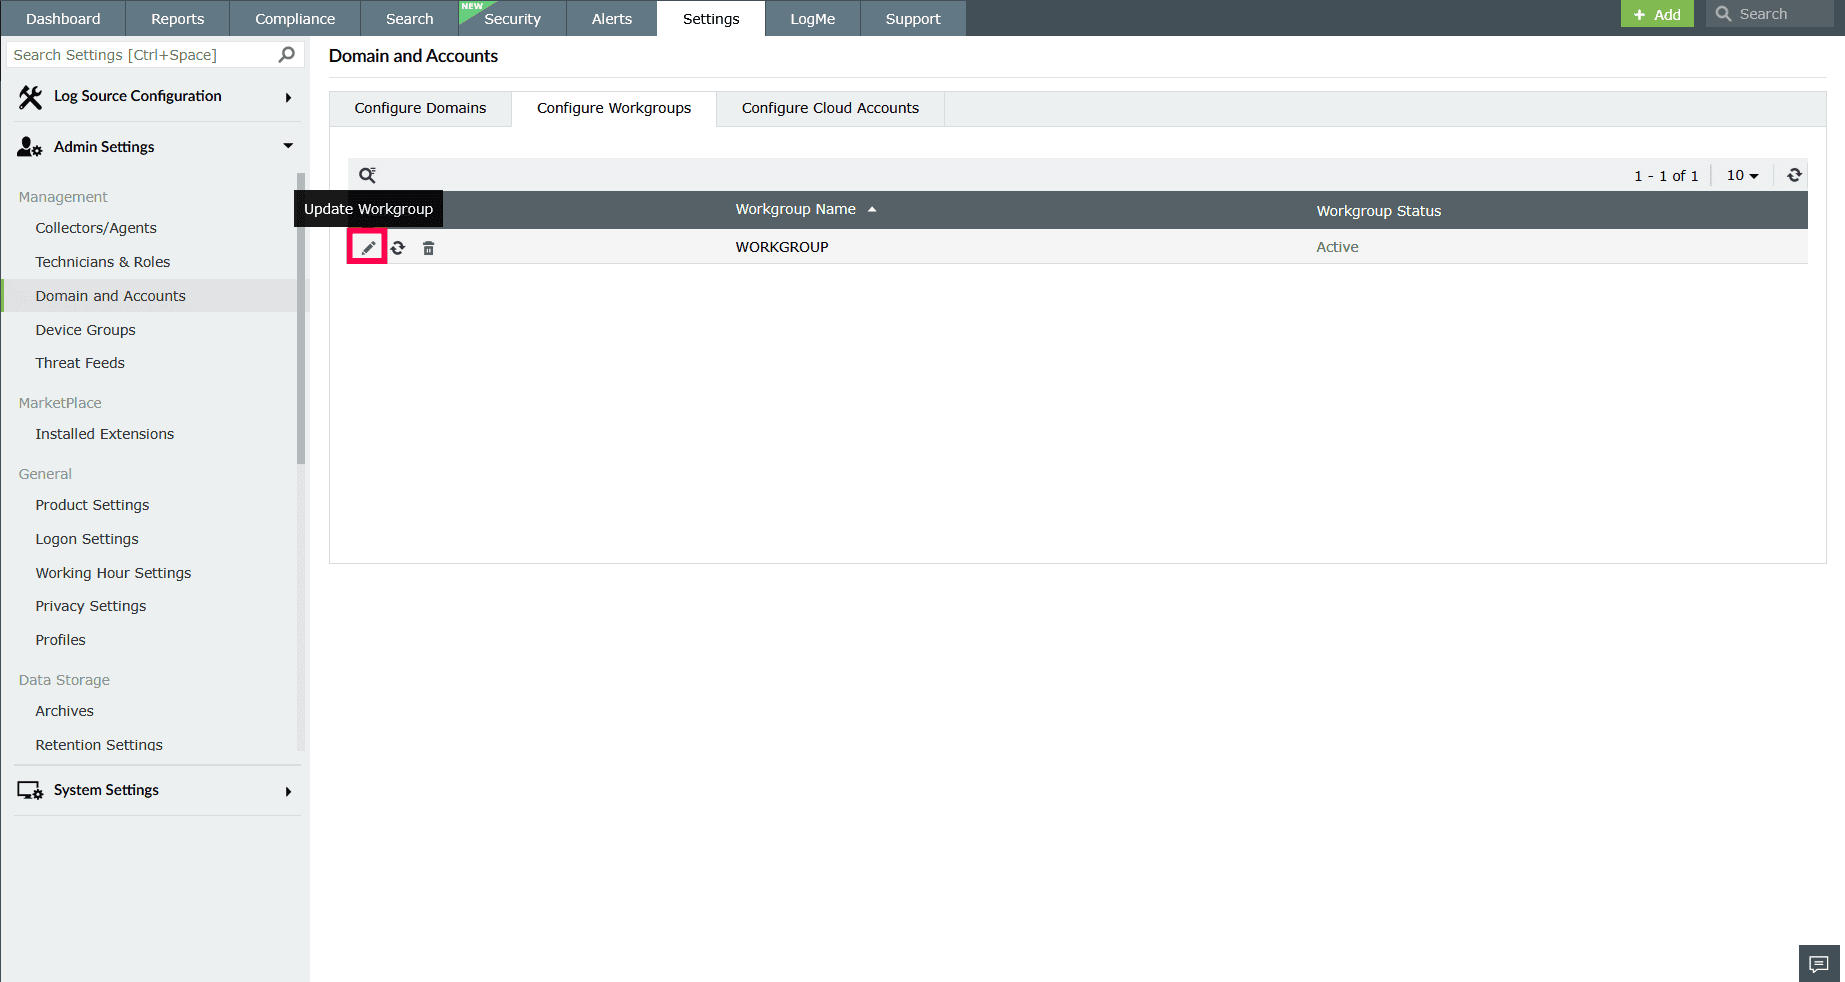
Figure 13: Updating workgroup credentials - Select the checkbox next to Authentication and modify the authentication credentials as needed. A local account with WMI access can be used, and the username should follow the format: Username.
NOTE If no credentials are provided, the local machine's login credentials are used.
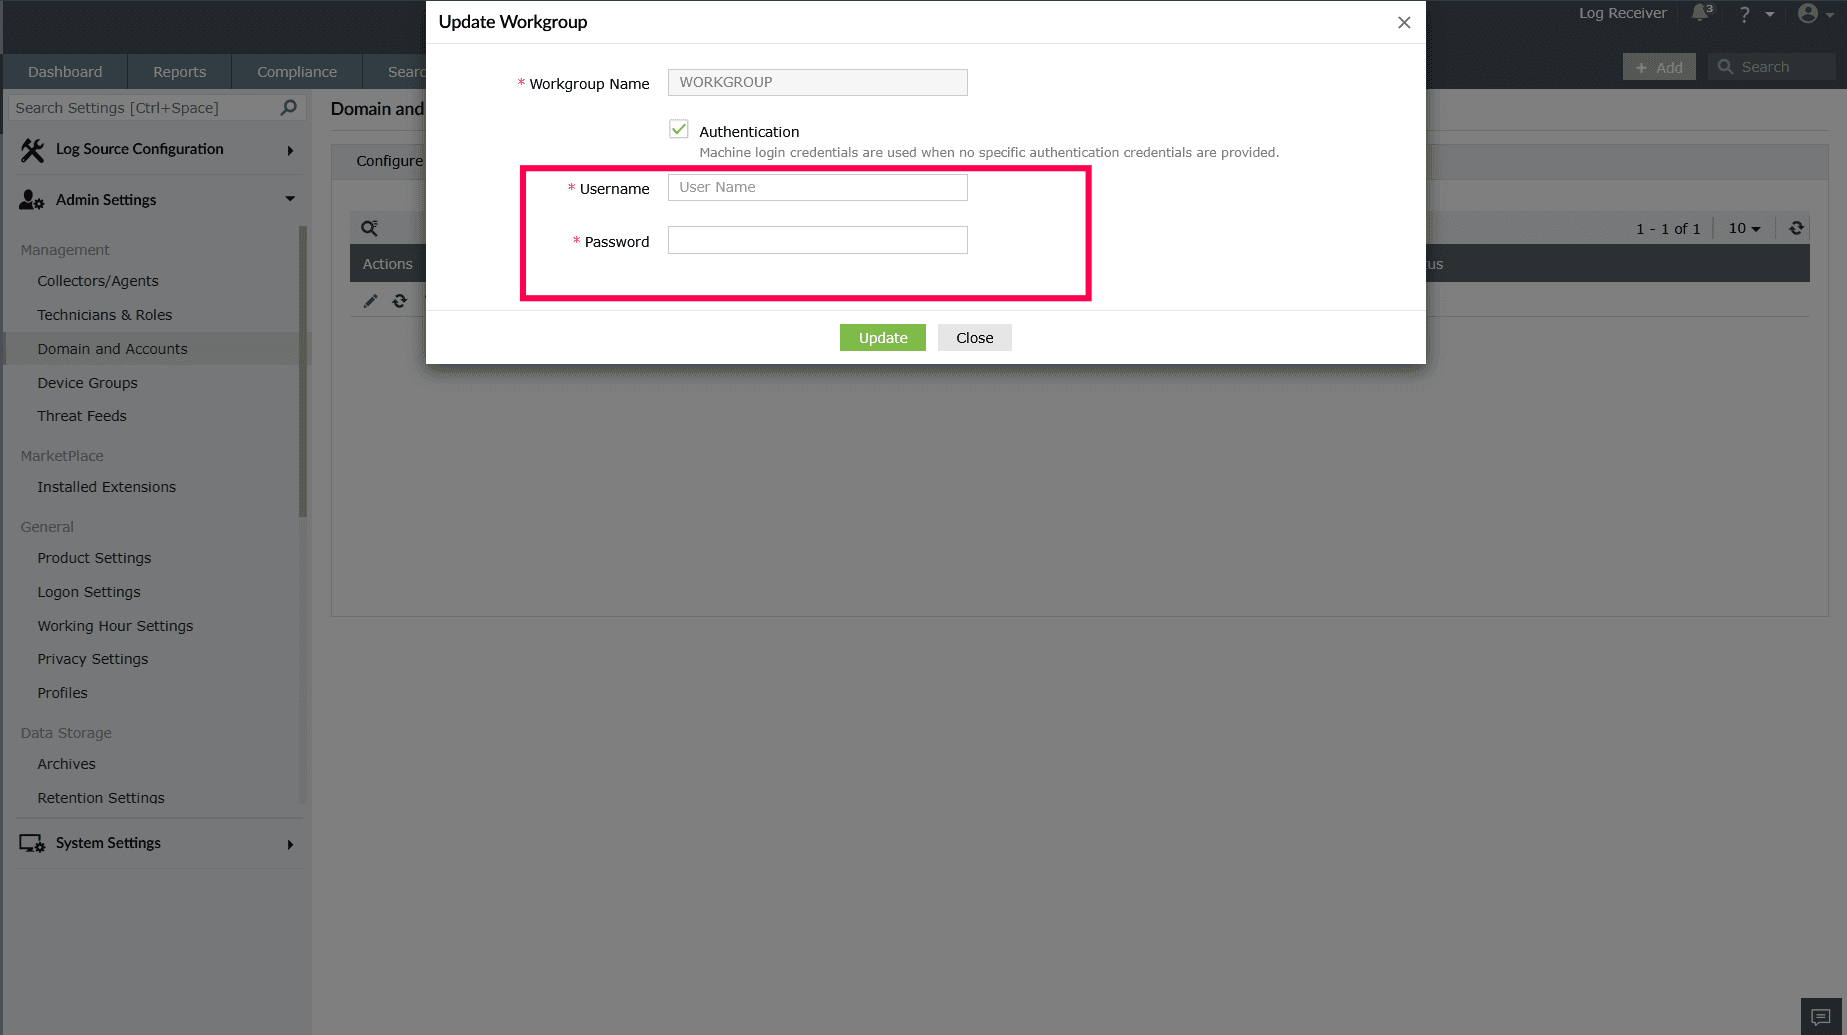
Figure 14: Updating workgroup credentials - Click Update to apply the changes.
Rediscovering workgroup devices
Rediscovering workgroup devices syncs the system with your network by updating the list of devices in a workgroup, reflecting any new, removed, or modified devices.
- In the Configure Workgroups tab, click the icon in the Actions column corresponding to the workgroup to rediscover workgroup devices.
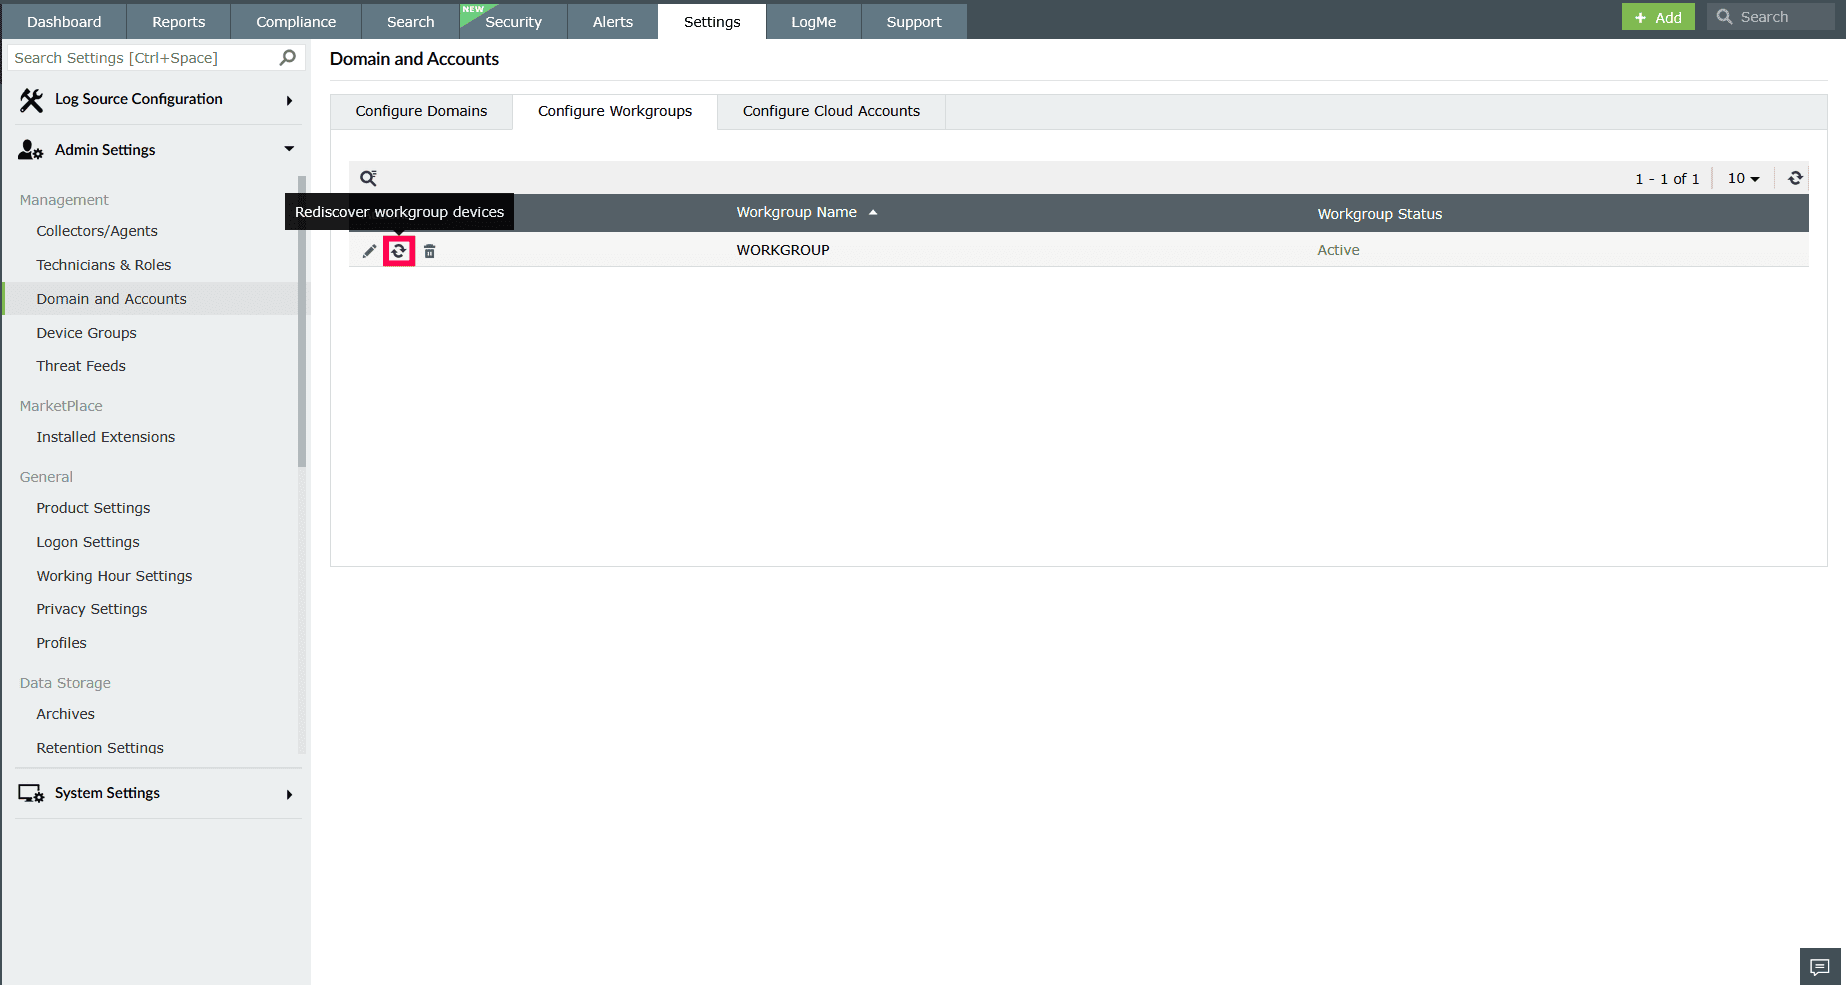
Figure 15: Rediscovering workgroup devices - Discovery of workgroup devices will take place in the background.
Deleting a workgroup
- In the Configure Workgroups tab, click the
 icon next to a workgroup you want to remove.
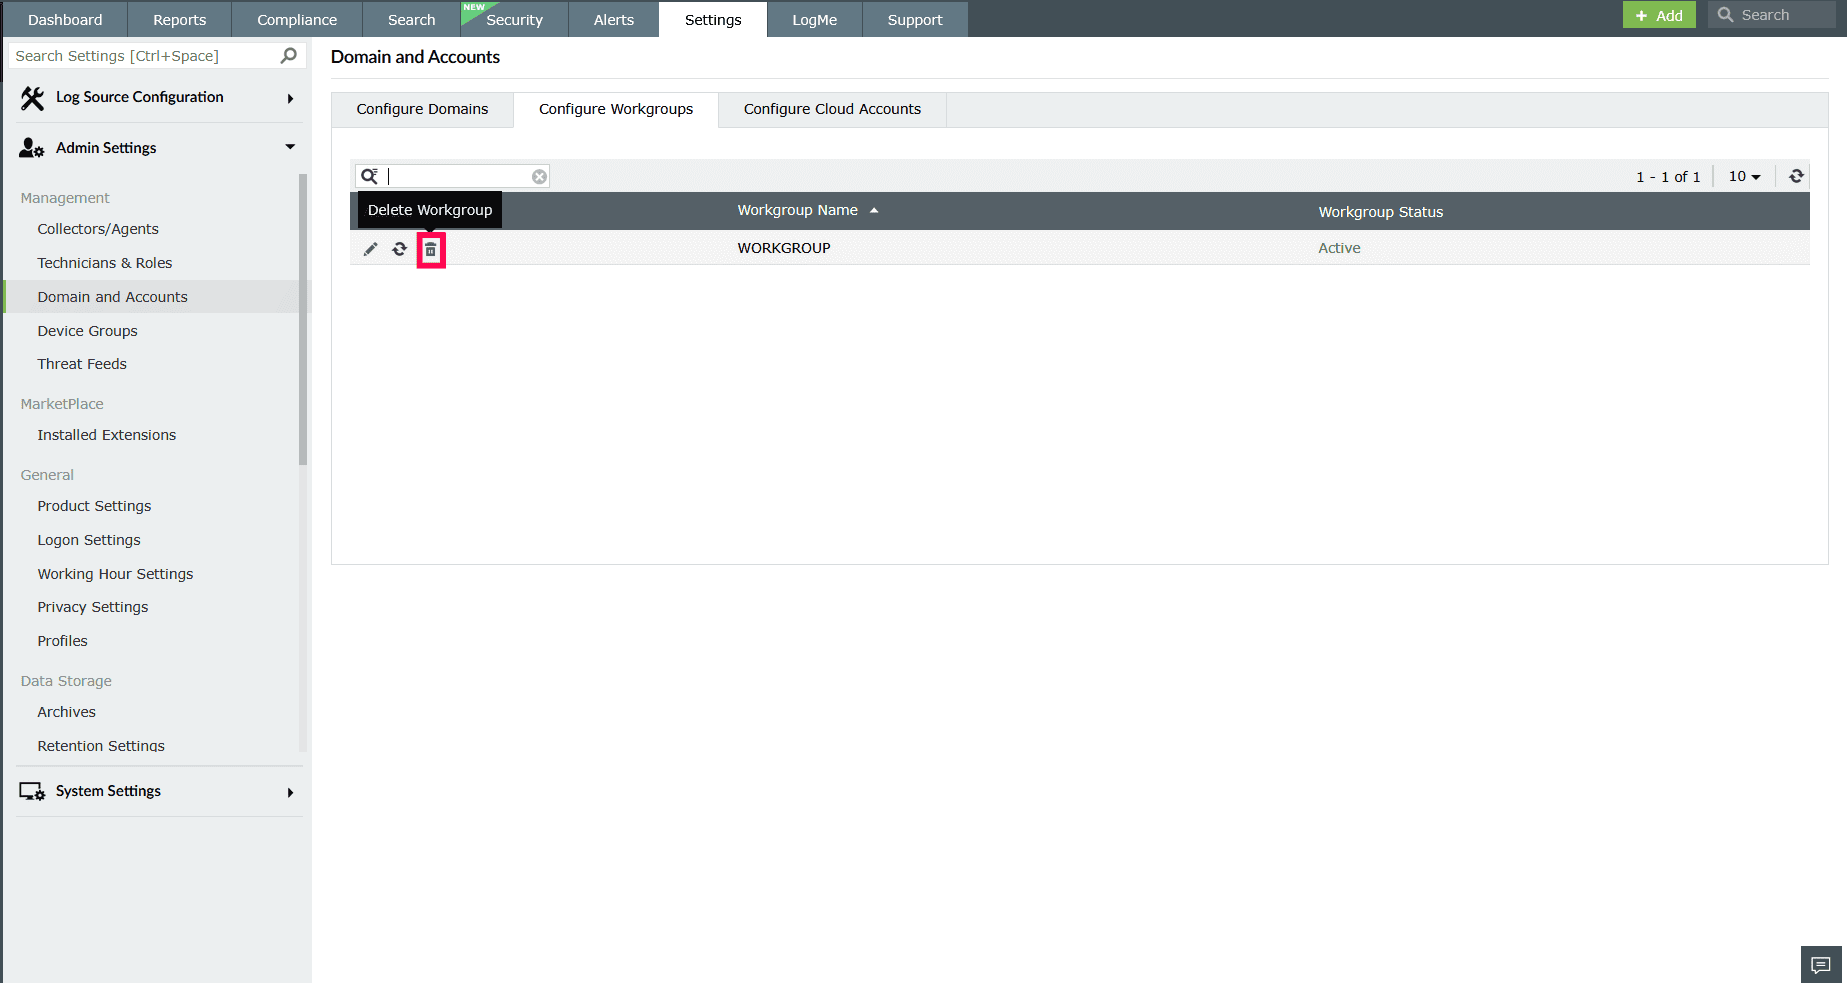
Figure 16: Deleting a workgroup - You can also use the icon to locate a workgroup by its name.
- In the confirmation pop-up that appears, click Yes to delete the account.
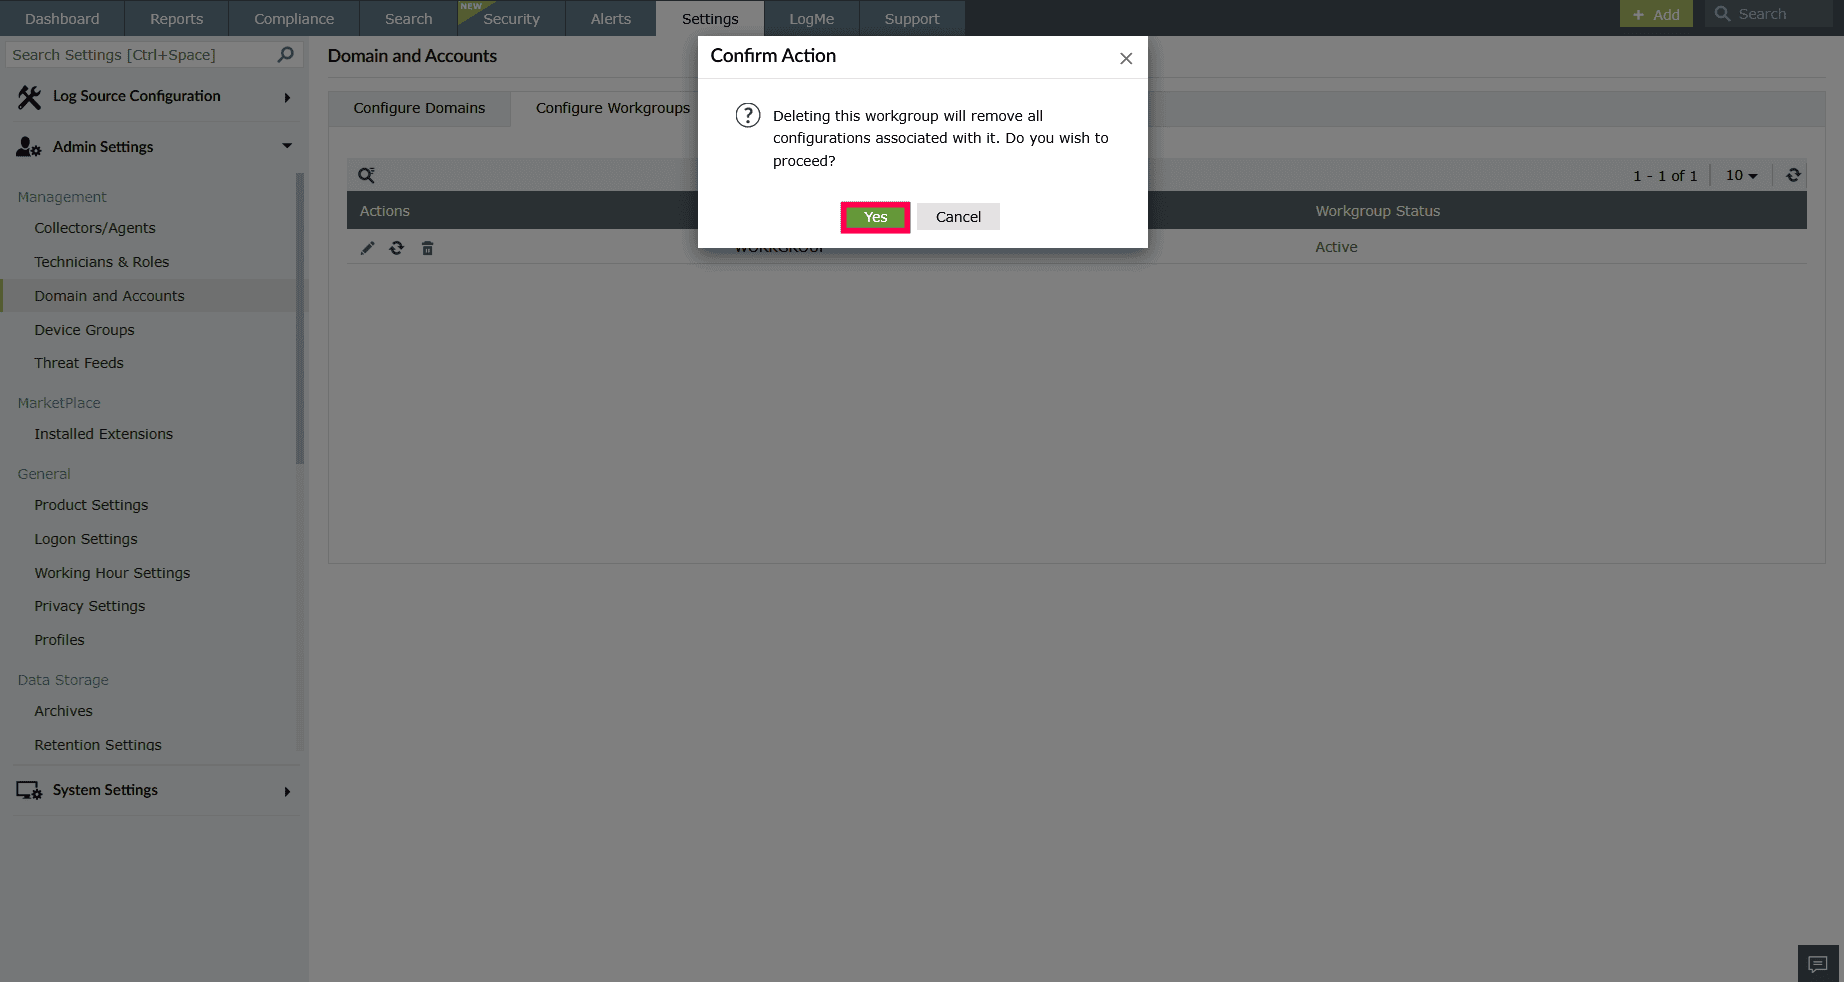
Figure 17: Confirming deletion
Cloud accounts
The Cloud Accounts section allows admins to manage integrated cloud accounts. You can:
To add new cloud accounts, refer to the following pages:
Updating a cloud account
- Log in to the product.
- Navigate to Settings tab. Under Admin Settings, select Domain and Accounts.
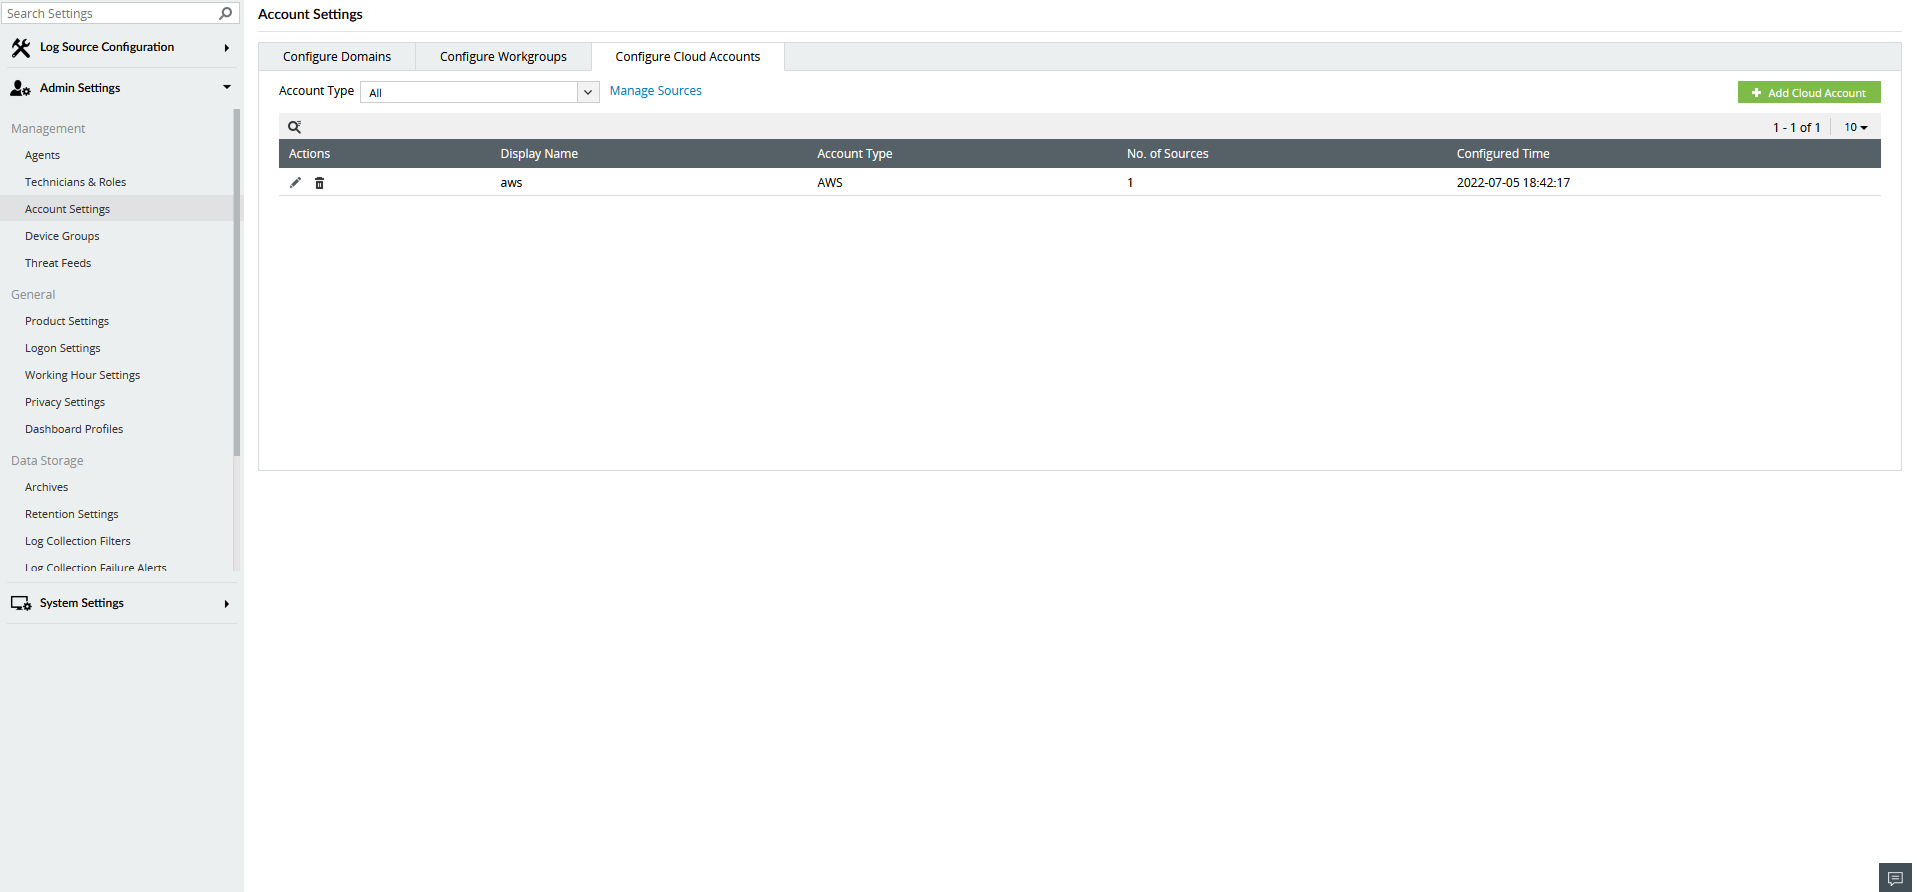
Figure 18: Navigating to Domain and Accounts - Go to Configure Cloud Accounts tab and click the icon corresponding to the desired cloud account.
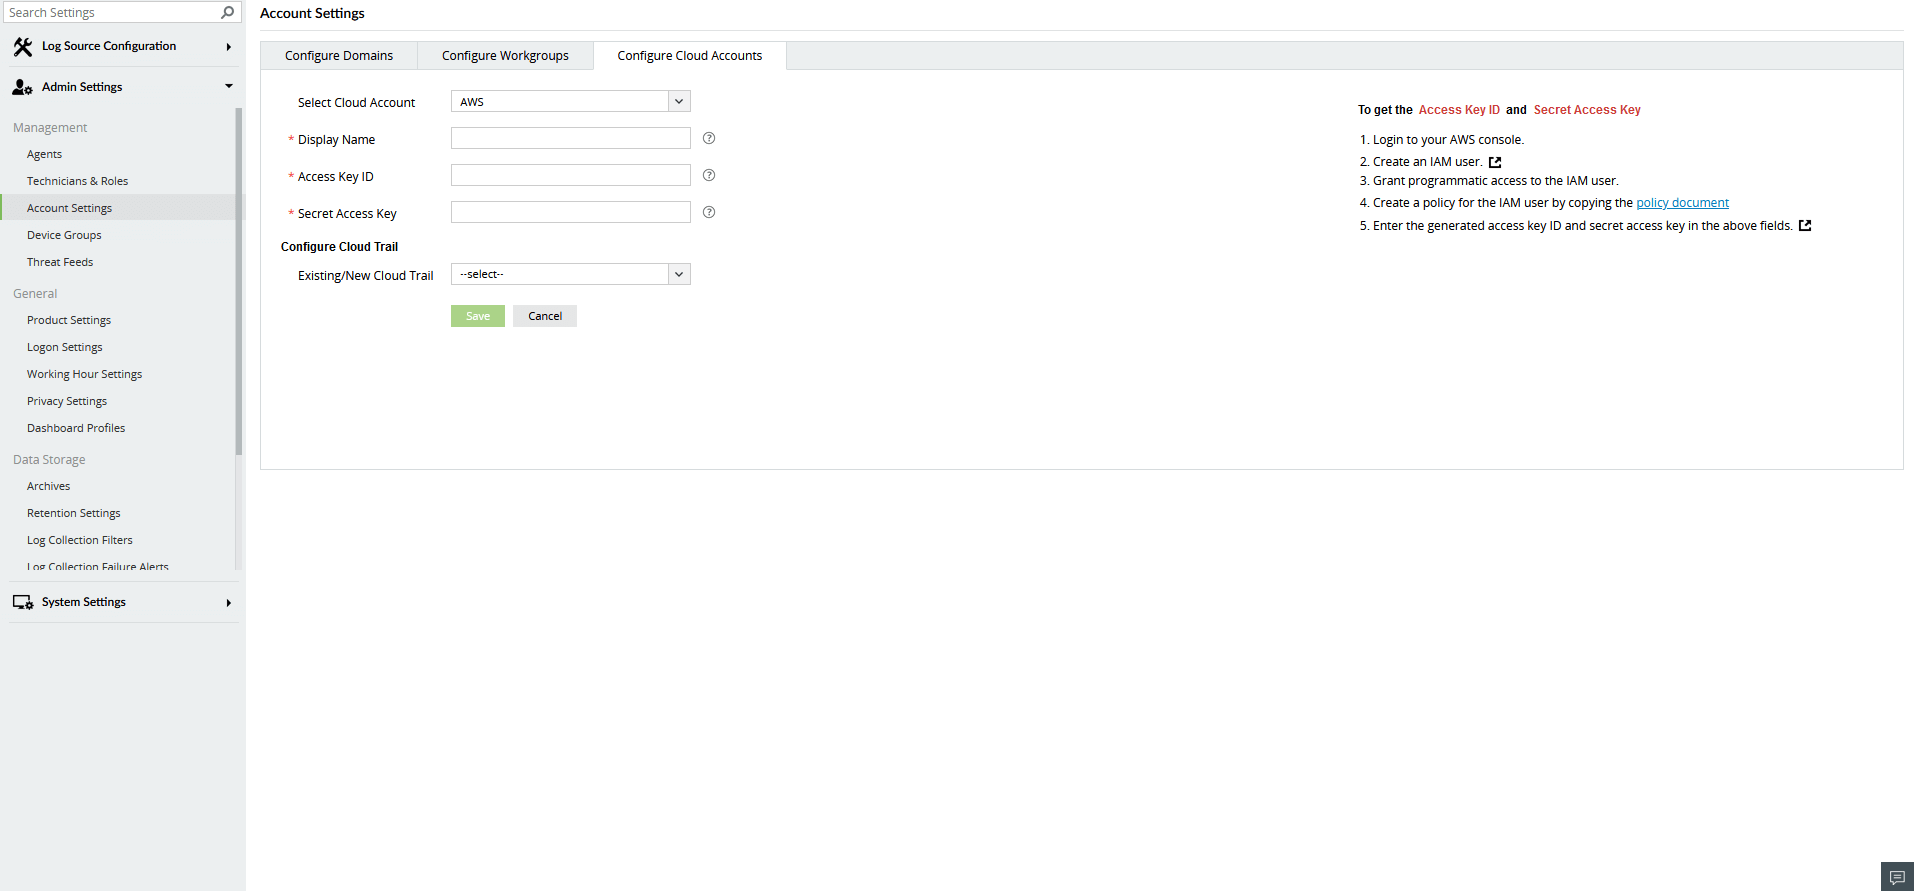
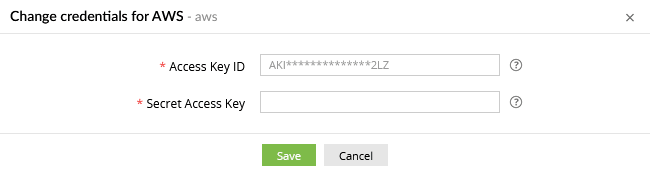
Figure 19: Updating cloud account - Update the required credentials.
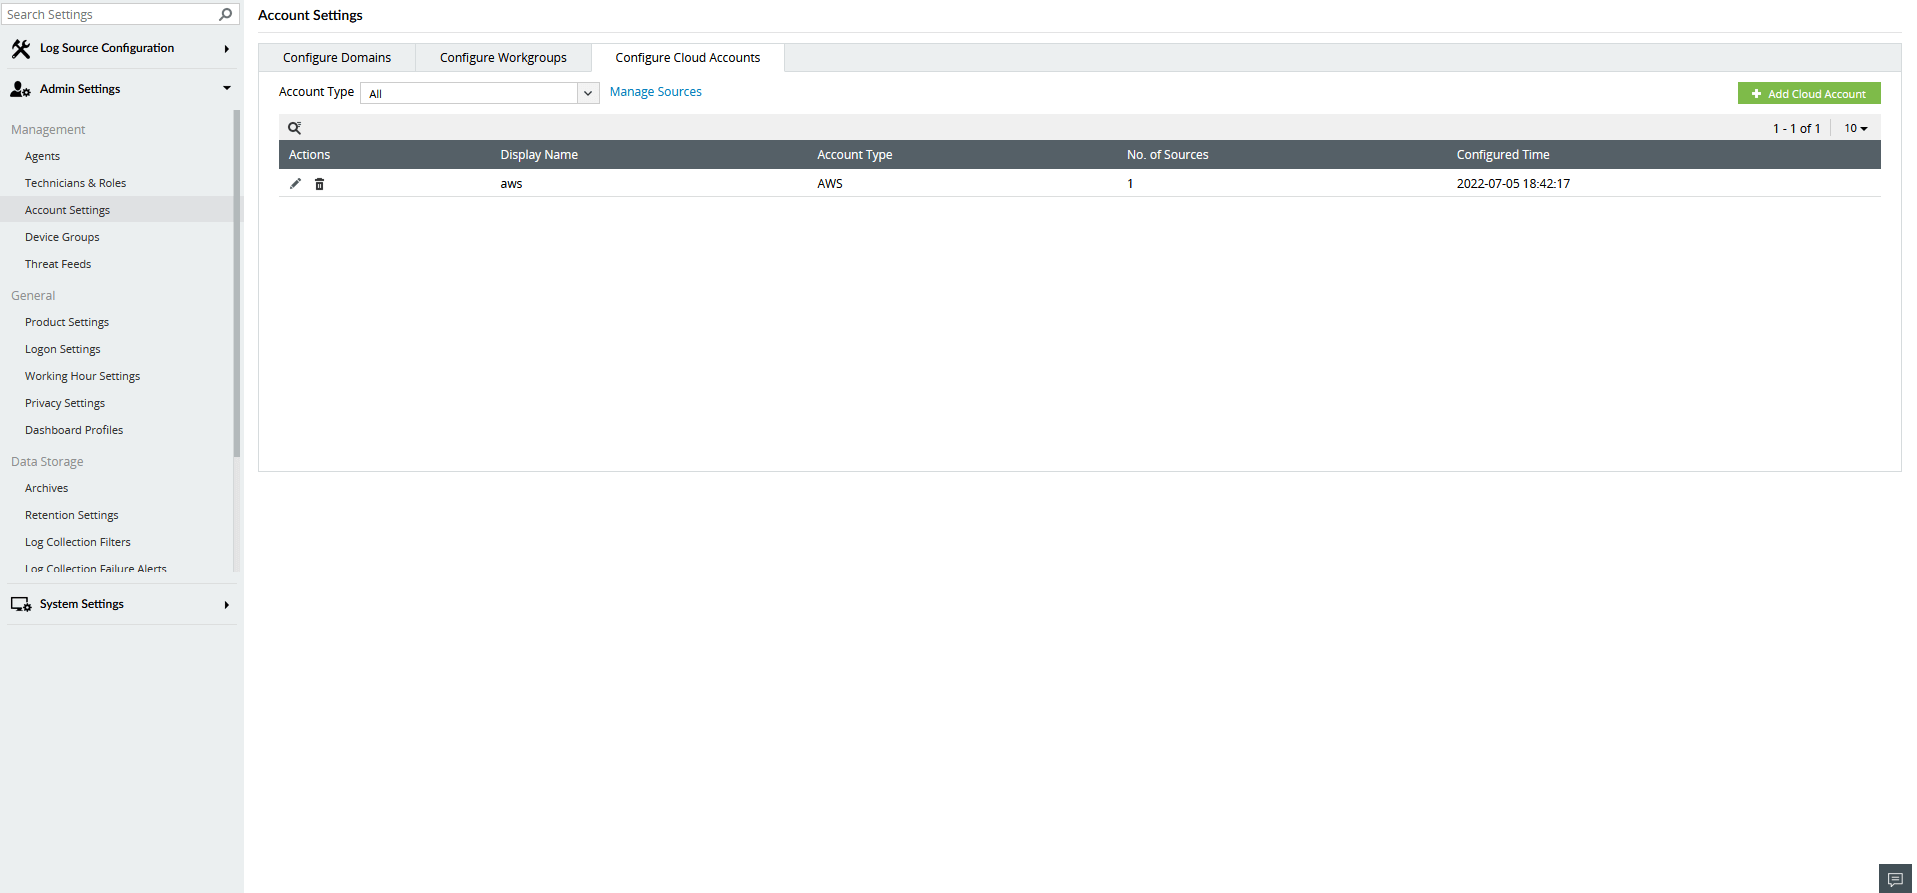
Figure 20: Updating cloud account - Click Save to apply the changes.
Deleting a cloud account
If the archive ZIP location is an S3 bucket, the following warning is shown when attempting to delete the cloud account.
Ensure to change the ZIP location from the S3 bucket to delete the cloud account.
- In the Configure Cloud Accounts tab, click the icon corresponding to the desired cloud account.
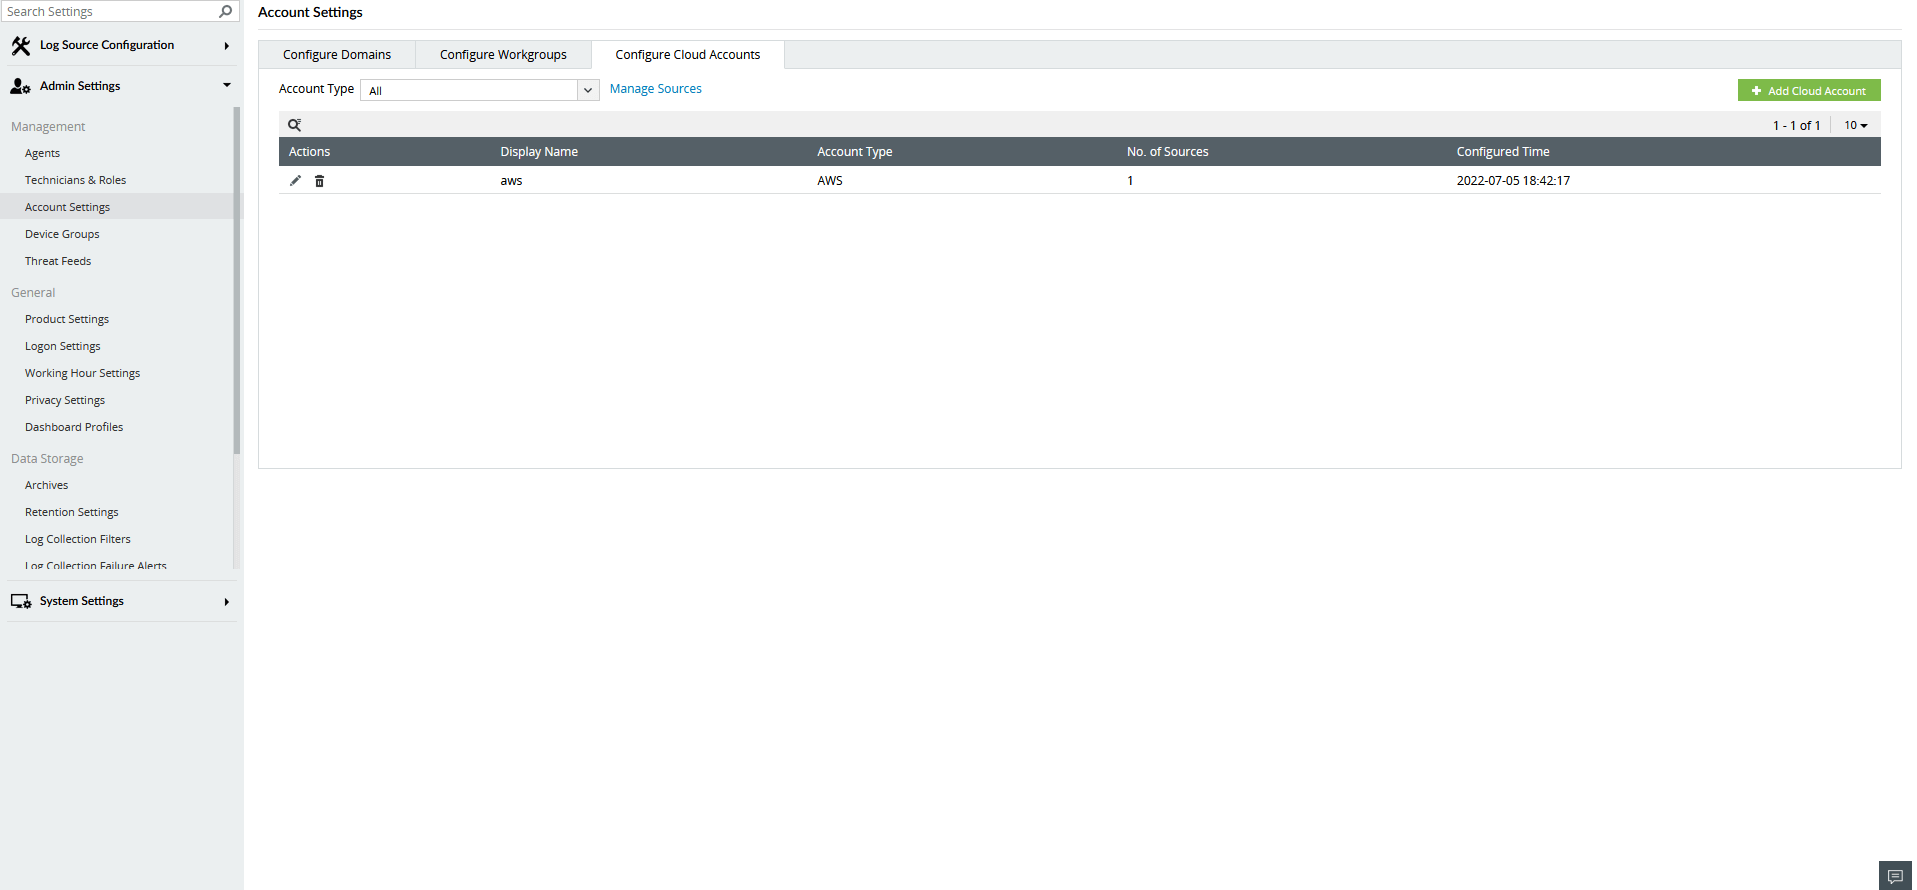
Figure 22: Deleting a cloud account - In the confirmation pop-up, click Yes to proceed.
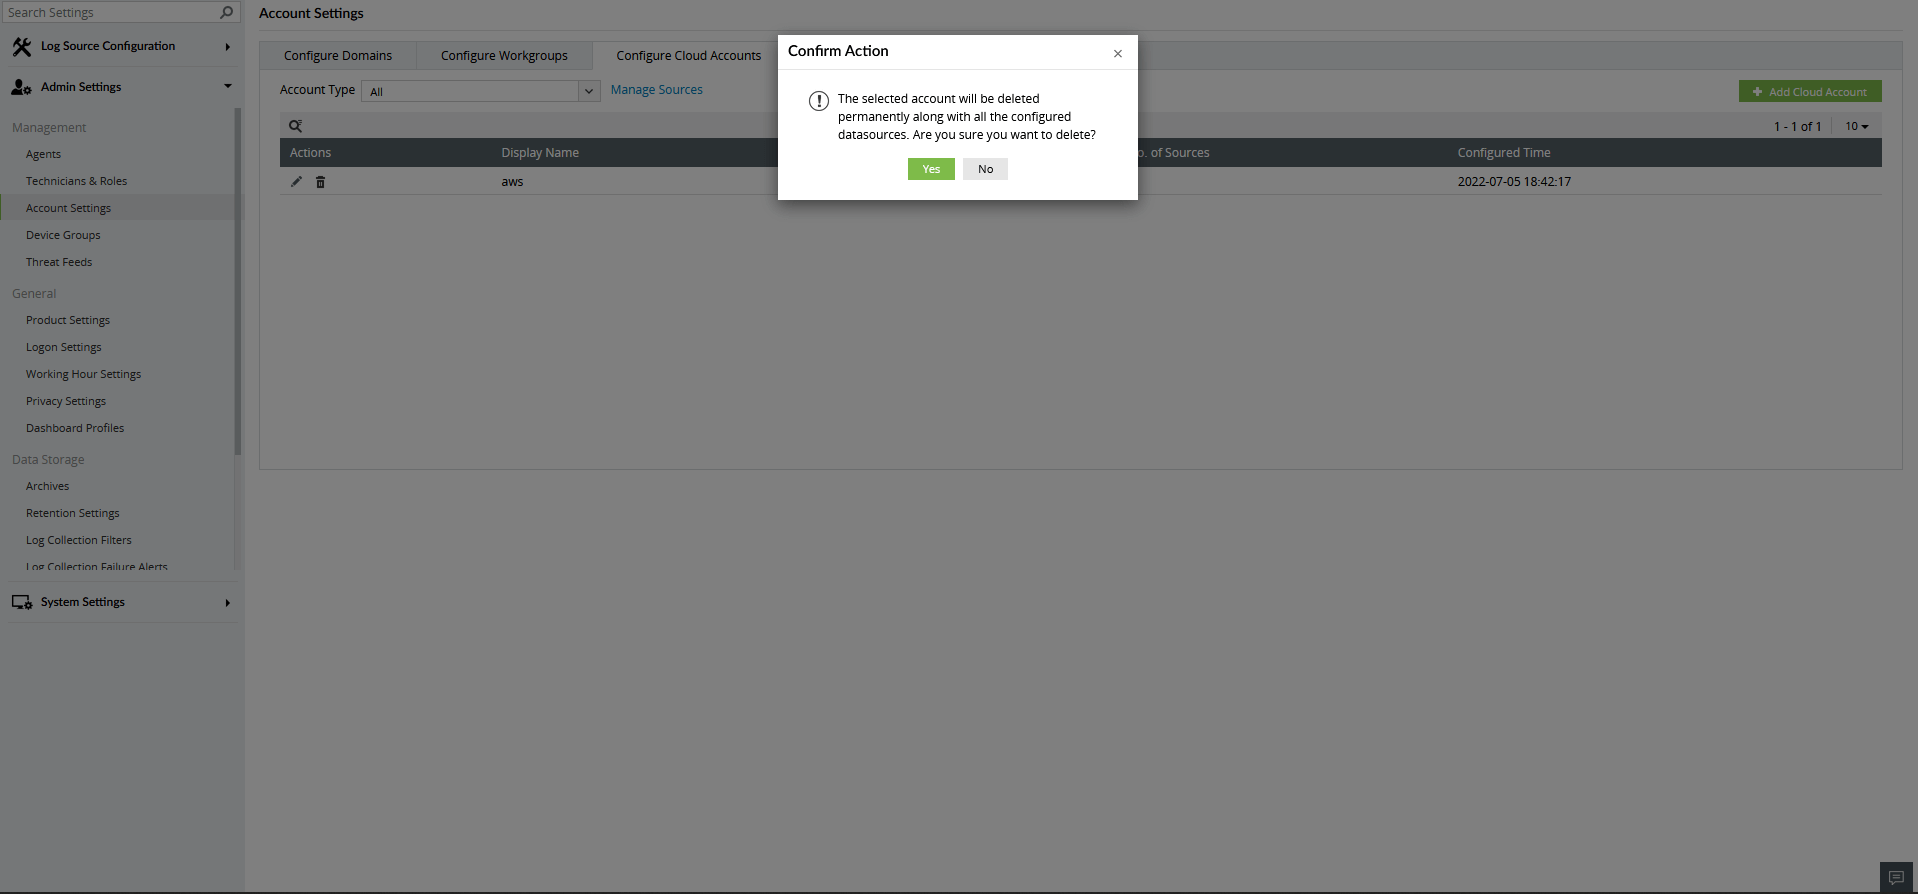
Figure 23: Confirming deletion
Read also:
This page explained how to manage Active Directory domains, workgroups, and cloud accounts in ManageEngine Log360.