Direct Inward Dialing: +1 408 916 9890
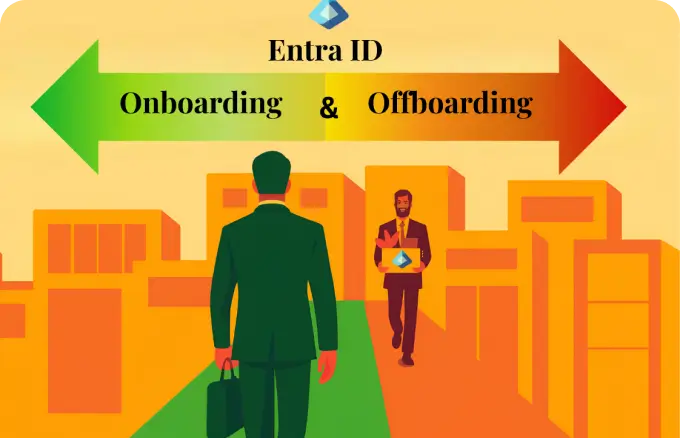
Onboarding a new user in Microsoft 365 is no longer just an IT task but a strategic function. Every new employee needs the right tools, access, and identity settings on day one. Every departing employee needs a clean, secure offboarding process that protects company data and reclaims unused resources.
When this process is manual, it strains IT teams and exposes the business to operational and security risks. The more users you onboard, the more complex and fragile the process becomes. Plus, when offboarding isn't just slow but incomplete, the risks grow, from wasted licenses to security vulnerabilities.
That’s where user onboarding automation comes in, not just to save time but to build a scalable, policy-driven foundation for workforce identity and access management.
In this article, we’ll walk through how to automate Microsoft 365 onboarding and offboarding using tools available in the Microsoft 365 ecosystem. Each approach offers a different level of control, governance, and technical flexibility so you can align your automation strategy with your business needs, not just your technical constraints.
Every time a new employee joins your organization, the faster they’re equipped with the right tools and access, the faster they can start contributing. Every time someone leaves, lingering access, misused licenses, or audit gaps quietly erode security and compliance.
Manual onboarding and offboarding are slow, inconsistent, and error-prone. This is where the automation of your mundane admin activities delivers real returns:
If your organization is growing and evolving, automation isn't an option; it’s mandatory.
User onboarding and offboarding in Microsoft 365 involves more than just creating or disabling accounts. It's a multi-step process, and automating it improves consistency, reduces errors, and strengthens your security posture.
With the right approach to Microsoft 365 automation, you can:
When employees leave, you can also:
Automating onboarding and offboarding in Microsoft 365 involves a blend of identity life cycle triggers, access policies, and system integrations. Depending on your organization’s needs, automations can be configured to run based on specific events (like a user joining, changing roles, or leaving) and perform tasks such as license assignment, group membership changes, and access removal.
Microsoft provides several tools to enable this, from policy-based automation to custom workflow design. These solutions support common onboarding and offboarding actions and can scale to include application provisioning, notifications, data retention, and more.
In the sections that follow, we will explore how automation works using two core approaches:
Lifecycle Workflows are Microsoft’s built-in solution for automating the identity life cycle of users in Entra ID. They give IT teams a powerful, no-code way to manage Microsoft 365 onboarding, role changes, and offboarding across multiple services and applications (via Logic Apps) using Entra ID as the source of truth. This requires the Entra ID Governance add-on (or any bundle that includes it, such as Microsoft 365 E5). Each active human user who benefits from the workflow needs the license.
Actions are divided into three categories: joiner when onboarding new users, mover when the properties of your users are modified, and leaver when a user needs to be removed from the organization. You can trigger actions based on events (like user creations or attribute changes) or using time-based criteria (e.g., scheduled start and end dates).
In the Microsoft Entra admin center, navigate to Identity Governance > Lifecycle workflows.
This is your central hub for creating, managing, and monitoring workflows tied to user life cycle automation events.

Step 2: Choose a workflow template
Click + New workflow and select Use template or Start from scratch.
Templates cover common cases, such as Onboard new hire employee, Real-time employee job change, and Offboard an employee, with best practice tasks and execution conditions, cutting down on the build time.

Step 3: Define the trigger
You’ll need to set the event that activates the workflow. Common triggers include:
You can also run workflows on demand for ad hoc scenarios.
The trigger defines when the workflow runs, eliminating manual work. Scheduled and on-demand modes can coexist.

Step 4: Add tasks
Click Tasks > + Add task. Choose from over 25 built-in options (like assign licenses, add to groups, send an email, or generate a TAP), use a custom task extension that calls a Logic App, or use a REST API call to execute your custom actions. This is where the workflow comes alive. You can add multiple sequential tasks, such as:

Step 5: Assign a scope
Under Execution conditions > Scope, you can define which users this workflow applies to. You can target users based on:
This prevents the workflow from running on unintended users and keeps your Microsoft 365 automations working with accuracy.

Step 6: Review and publish
Verify the configurations for your workflow on the Review and create tab and finish creating the workflow.
Step 7: Monitor and audit
All workflow executions are logged, including the success or failure status for each task. View this list of actions from the Workflow history tab for troubleshooting or compliance audits. You can export them to Azure Monitor for long-term retention or alerting.

By this point, you’ve seen how Lifecycle Workflows can completely automate activities inside Entra ID and other Microsoft 365 applications. However, organizations rarely live in a Microsoft-only bubble. There are other applications that may be preferred, or custom applications that have not been enrolled in Microsoft yet. HR operations may run in Workday, laptops might be tracked in ServiceNow, and audit logs could be analyzed by third-party SIEM tools.
To reach those systems, you need Microsoft’s broader automation fabric: Power Automate Premium for low-code application flows and Logic Apps for cross-platform and custom workloads.
Think of Power Automate as drag-and-drop automation for everyone. You open a browser and chain a few blocks together, then your flow can ping and collect employee data from Workday, wait for a manager’s click to proceed with the next action, dump data into an Excel file, or even automate legacy UI actions where no APIs exist.
Logic Apps is the developer-grade iPaaS that shares the same connector runtime as Power Automate but runs as an Azure resource. You have more control over the actions you can configure in Logic Apps, allowing you to create your own functionalities within the scope of the application you're automating. However, this requires the skill set of a developer since these configurations are based on JSON-based definitions, Azure Resource Manager parameters, and Azure RBAC—which can be daunting for business power users.
Once you configure a Power Automate flow or a Logic App, you can integrate it into your Lifecycle Workflows by following these steps:


Native Microsoft tools are powerful, but they still leave you jumping between portals (Entra ID, Exchange, Teams, SharePoint, etc.) and writing custom scripts for anything slightly out of the ordinary. Moreover, to access native automation solutions, such as Lifecycle Workflows, Power Automate, or Logic Apps, you need separate licenses. After all of these expenses and the labor to configure them, you still end up hopping between multiple admin centers, losing track of what you were supposed to do. What you need is a single Microsoft 365 administration solution that bundles your administrative requirements into a user-friendly, economical package. That solution is ManageEngine M365 Manager Plus.
M365 Manager Plus is a comprehensive administration and security solution for Microsoft 365. It's used for reporting on, managing, monitoring, auditing, and creating alerts for critical activities in your Microsoft 365 environments.
In addition to Microsoft 365 administration, M365 Manager Plus goes a step further with its built-in Microsoft 365 automation policies. It turns every repetitive Microsoft 365 chore, like onboarding , license cleanup, and mailbox hygiene maintenance, into a policy-driven, zero-code workflow that runs at a set interval.
Here’s where M365 Manager Plus' automation policies turn the routine tasks you dread into set-and-forget workflows.


There are even more benefits to using M365 Manager Plus to manage and monitor your Microsoft 365 environment:
Download the free, 30-day trial of M365 Manager Plus to explore these features and capabilities for yourself. Contact us for a free, personalized demo to discover how to best secure your Microsoft 365 environment using these features.