Importing Users from Azure AD
Azure AD is a cloud-based application that helps in identity and access management. It allows you to access any registered application from any location. In Azure AD, you can register your Access Manager Plus and can import users and user groups from there. Now, the users will be able to sign-in into Access Manager Plus using their Azure AD credentials in both Windows and Linux platforms. Apart from Azure AD, you can also import users from your Active Directory.
Summary of Steps
- Registering Access Manager Plus in Azure AD portal
- Steps to import Users from Azure AD
2.1Importing Users from Azure AD
1. Registering Access Manager Plus in Azure AD Portal
To integrate Access Manager Plus with Azure AD and import users, Access Manager Plus should first be added as a native client application in your Azure AD portal. Follow the steps given below to register Access Manager Plus as an application:
- Login to your Microsoft Azure portal.
- Click App registrations from the left pane under Manage.
- Click + New registration from the top bar.
- In the Register an application page, enter the following attributes:
- Enter Name as Access Manager Plus or any name of your choice
- Choose Supported account types - Accounts in this organizational directory only - Single tenant)
- Enter the Redirect URI of Access Manager Plus application
- Click Register. Access Manager Plus will be added as an application in Azure AD.
- You will be taken to the page with the details of the newly registered Access Manager Plus application.
- Click API permissions under Manage in the left pane. In the API Permissions page, click +Add a permission.
- In the Request API Permissions page, choose Azure AD Directory Graph under Supported Legacy APIs.
- Click Delegated Permissions and search for "read" in the Select Permissions search bar to populate relevant permissions. Select the options Directory.Read.All, User.Read and click Add Permissions.
- Now, click the Grant admin consent button under Grant Consent.
- In the pop up that opens, click Yes to grant consent for the requested permissions.
2. Steps to Import Users from Azure AD
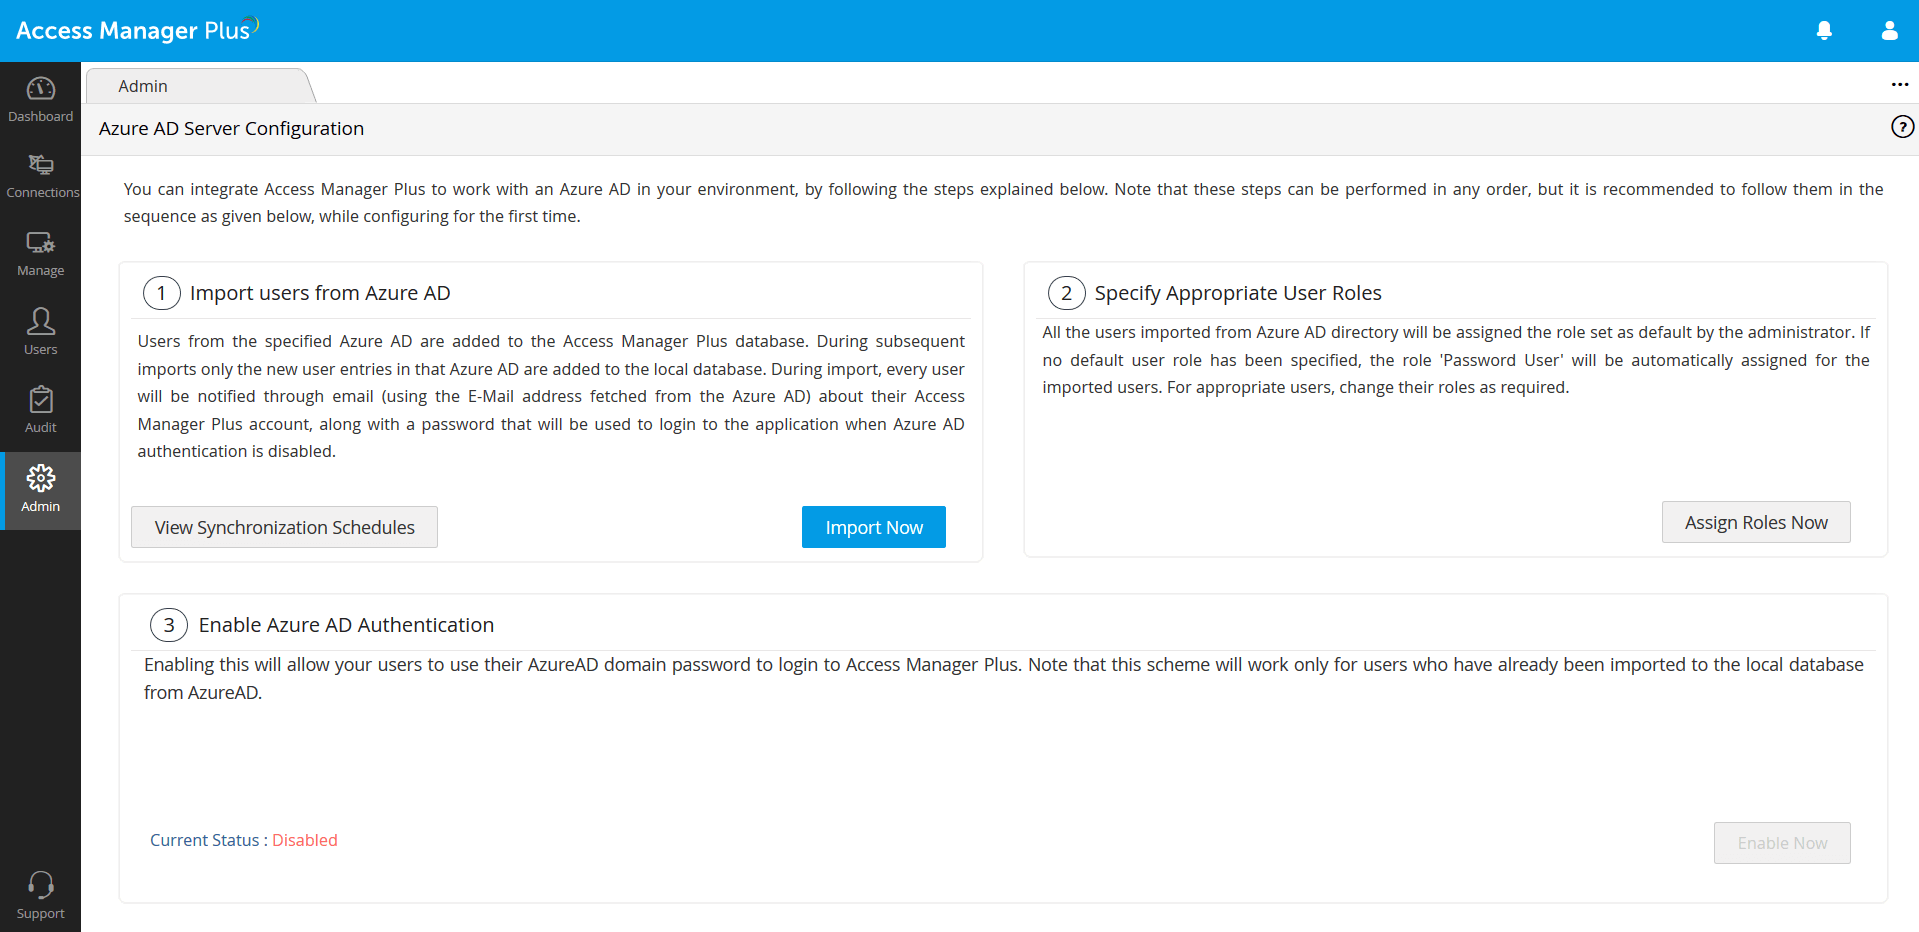
- Log in to Access Manager Plus and navigate to Admin >> Authentication >> Azure AD.
- The Azure AD Server Configuration page will be displayed, from where you need to perform the below sequence of steps:
- Importing users from Azure AD
- Specifying appropriate user roles
- Enabling Azure AD authentication
2.1 Importing Users from Azure AD
- In the Azure AD Server Configuration page, click Import Now. In the Import From Azure AD dialog box, enter the following attributes:
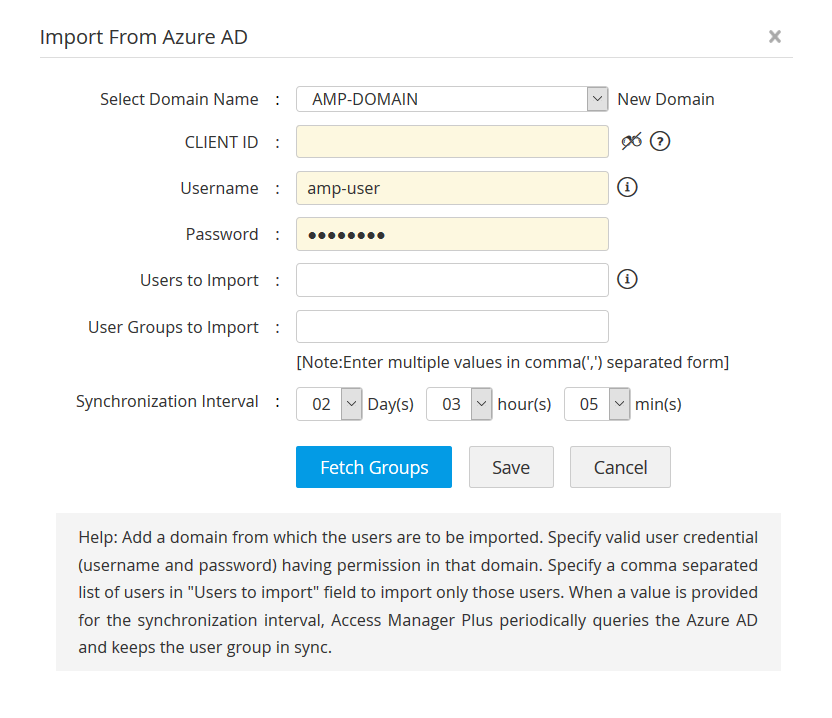
- Select Domain Name: Click the New Domain and add the Azure AD domain from which users and groups are to be imported.
- CLIENT ID: Enter the CLIENT ID generated in the Azure AD server while registering Access Manager Plus as a Native client application in your Azure portal.
- Username and Password: Enter a valid username and password with sufficient permissions to perform user import. Usually, the username will be a part of the domain name in the format: <username@domain.onmicrosoft.com>. For instance in testuser@ampdemo.onmicrosoft.com, <testuser> is the username. After entering the CLIENT ID and domain details, click Save to keep them auto-populated for future import operations.
- Users to Import/User Groups to Import: To import only particular users and groups from Azure AD directory, enter the required user name(s) in comma separated form, in the field Users to Import, and required group names in User Groups to Import. [Optional Step]
- Synchronization Interval: Add a synchronization schedule to keep the user database constantly in sync with your Azure AD. In this field, enter the time interval at which Access Manager Plus has to query Azure AD and keep the user database in sync. [Optional Step]
- After entering the required details, click Fetch Groups. In case you have specified users/groups to import then click Import. Access Manager Plus will list all the user groups available in your Azure AD domain. Select required groups using the check boxes beside them and import users.
- Once the import is complete, Import Summary will be displayed with the number of users imported successfully and the ones failed. Once you click Close, you will be automatically taken to Step 2: changing appropriate user roles.
Note: To view the synchronization schedules created for Azure AD user import, click View Synchronization Schedules in the Azure AD Server Configuration window.
2.2 Specifiy Appropriate User Roles
After import, all the users imported from Azure AD will be assigned the Standard User role as shown in the Change Roles for users dialog box.
- Click Change Role button against the users for whom you wish to change the role and choose an appropriate role from the drop-down.
- To change roles for users in bulk, select the users using the check boxes and click Change Role at the top and choose an appropriate role from the drop-down. The changes will be saved as and when the roles are assigned.
Note: You can change the assigned roles anytime in the future by clicking on Assign Roles Now as shown in the image.
2.3 Enable Azure AD Authentication
The third step is to enable Azure AD authentication; enabling this will allow users to login to Access Manager Plus using their Azure AD domain password. Note that this feature will work only for users who have already been imported to the local database from Azure AD. Before enabling Azure AD authentication, ensure that AD authentication is disabled.
- Navigate to Admin >> Authentication >> Azure AD and click Enable Now under Enable Azure AD Authentication.
Note: Once Azure AD authentication is enabled, you can disable local authentication under Admin >> Settings >> General Settings >> User Management.