Email Verification
When Email Verification is enabled, a verification code or secure link is sent to the user's registered email address, which the user must provide or click on to complete authentication.
How it works
For verification codes: ADSelfService Plus validates the user-provided code against the generated code stored in its database, granting access only upon successful verification.
For secure links: ADSelfService Plus validates the unique token embedded in the URL when the user clicks it, granting access only upon successful verification.
Prerequisites
- An email server must be configured in ADSelfService Plus.
- Email attributes must be configured.
- Configuration can be done only via ADSelfService Plus' default admin account or a product technician account with Super Admin privileges.
Configuration steps
- Log into ADSelfService Plus with admin credentials.
- Navigate to Configuration > Self-Service > Multi-Factor Authentication > Authenticators Setup.
- From the Choose the Policy drop-down, select a policy.
- Click Email Verification.
- From the Select Type drop-down, choose from the listed options which will be used for email verification:
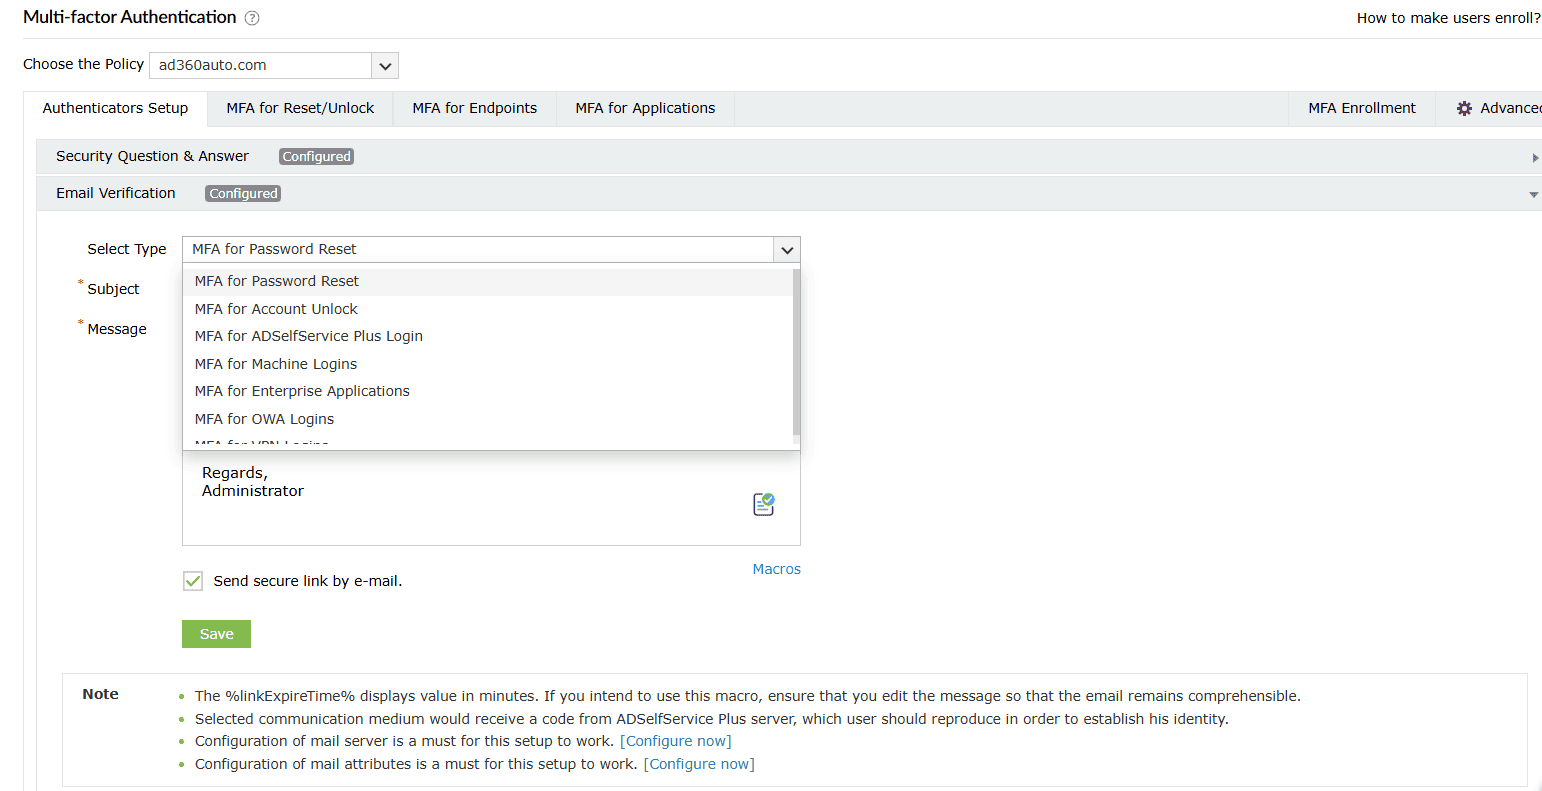
- MFA for Password Resets: For when the user performs self-service password resets.
- MFA for Account Unlocks (AD-specific): For when the user performs self-service account unlocks.
- MFA for ADSelfService Plus Logins: For when the user logs in to the ADSelfService portal.
- MFA for Machine Login: For when the user logs in to a Windows, macOS, or Linux machine physically or remotely.
- MFA for Cloud Applications: For verification when the user accesses their enterprise applications.
- MFA for OWA Login (AD-specific): For when the user attempts to access the Outlook on the web portal.
- MFA for VPN Login (AD-specific): For when the user attempts to access the corporate network through a VPN.
- Select Send secure link by e-mail to send the authentication link to users' emails instead of sending the verification code. Users simply need to click the authentication link to prove their identity.
Note: The Send secure link by e-mail option only works for password self-service actions (password resets and account unlocks) through a web browser or the login agent, not for ADSelfService Plus' iOS and Android mobile apps.
- Click Save.
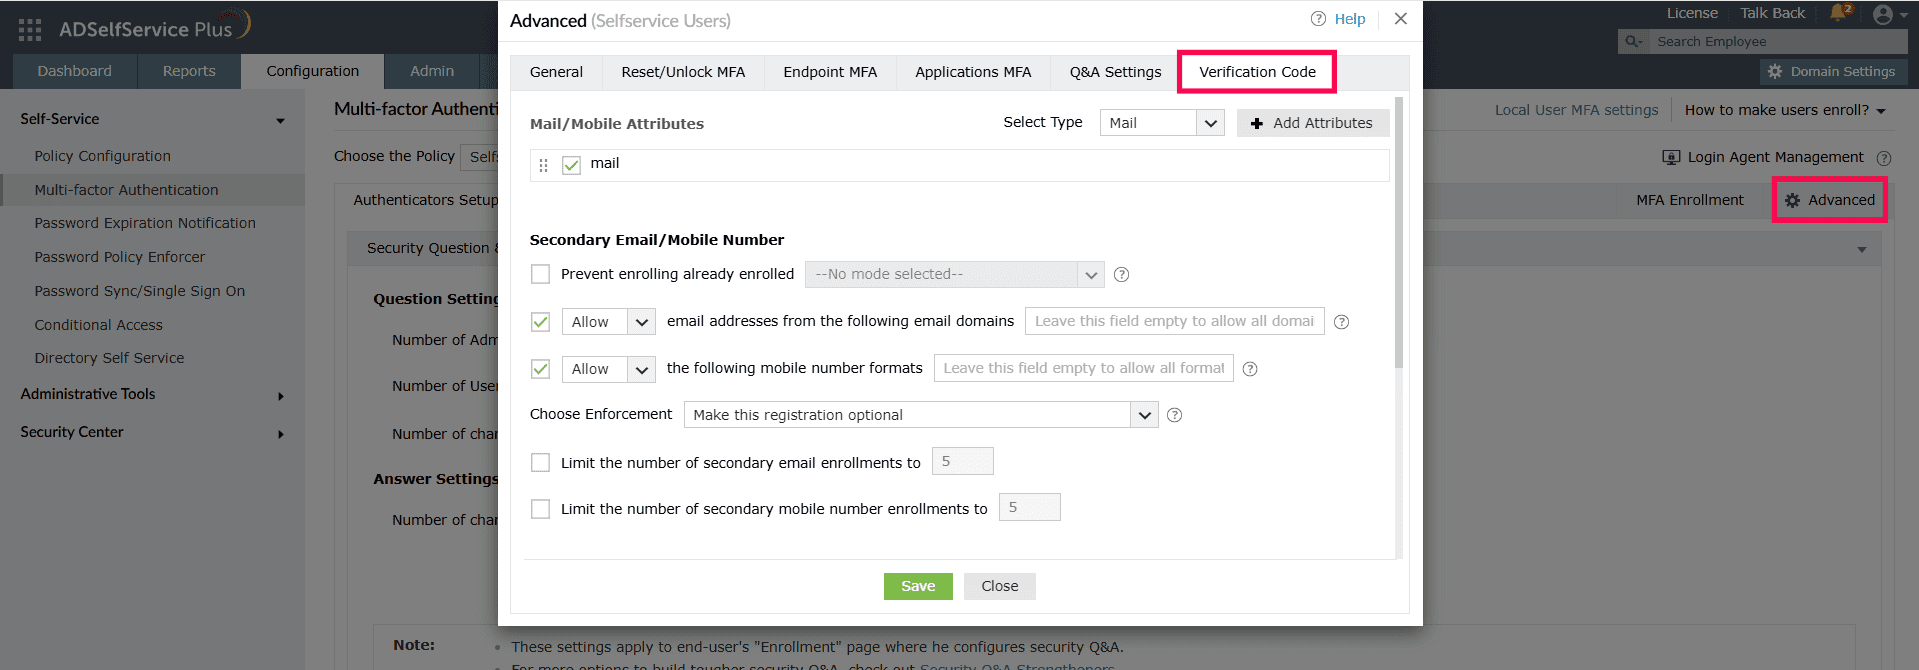
Advanced settings
Email Verification has additional advanced settings using which you can customize security parameters. To access these settings, navigate to Configuration > Self-Service > Multi-factor Authentication > Advanced. In the pop-up window that opens, go to the Verification Code tab. Click here to learn more about each setting under this tab.
Deploying the authenticator for MFA
Once the authenticator is configured, you can deploy it as an MFA method to secure sensitive actions like password resets and unlocks, protected endpoints, and logging into ADSelfService Plus. Click on the respective links to learn how.
Setting up user enrollment
The last step is setting up the process for users to enroll for and utilize this authenticator. Administrators can choose from the following enrollment methods:
- Use the AD/Entra ID mail address: The user's official email address, as configured in AD, is automatically used for verification. No additional user enrollment is required.
- Enable user enrollment: Prompt users to register one or more secondary email addresses during MFA enrollment. During MFA, users can then select which of their enrolled addresses should receive the verification code or secure link.
- Perform bulk enrollment: Administrators can pre-register secondary email addresses for multiple users simultaneously by importing a CSV file, streamlining the deployment process for large groups.