Request Custom Menu
Using the Request Custom Menu, you can customize the Actions menu of the Requests page with the use of your own script. You can create different action menus and associate custom classes or script files with the menus to execute the relevant actions. The menus created here get listed under the Actions menu in the Requests Details page.
The following topics are discussed in this document:
Add New Menu
-
Go to Admin
 > Incident Management > Request Custom Menu. The Request Custom Menu List View page is shown. From here, you will be able to add, edit, enable/disable and delete the custom menus.
 -
To add a new request custom menu, click Add New Menu at the right corner of the Request Custom Menu List View.

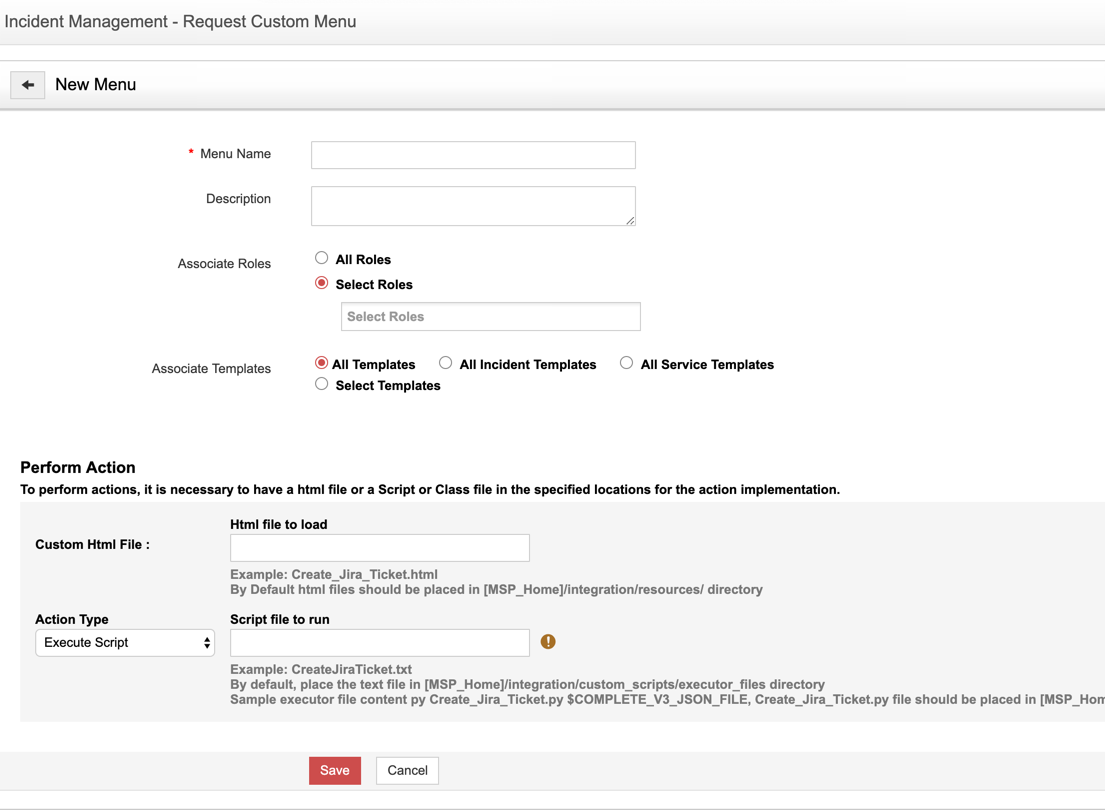
- The New Menu form is shown.

-
Provide the following details:
Basic Details:
-
[Mandatory] Menu Name: Specify a unique name for the menu being created. (The menu name will be displayed under the Actions menu in the Requests Details page)
-
Description: Describe the menu indicating its purpose.
-
Associate Roles: Decide Technician roles that will get access to this menu. You can choose either of the below options:
-
All Roles: Simply choose this option.
-
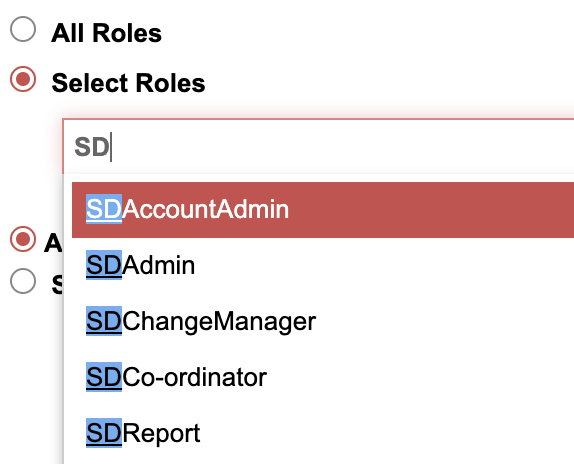
Select Roles: Select the required roles by typing the role (e.g., SDAdmin, SDGuest, etc.,) name in the available textbox, as shown below:

-
-
Associate Templates: Choose any one among the following templates to associate: 'All Templates', 'All Incident Templates, 'All Service Templates', or 'Select Templates'.
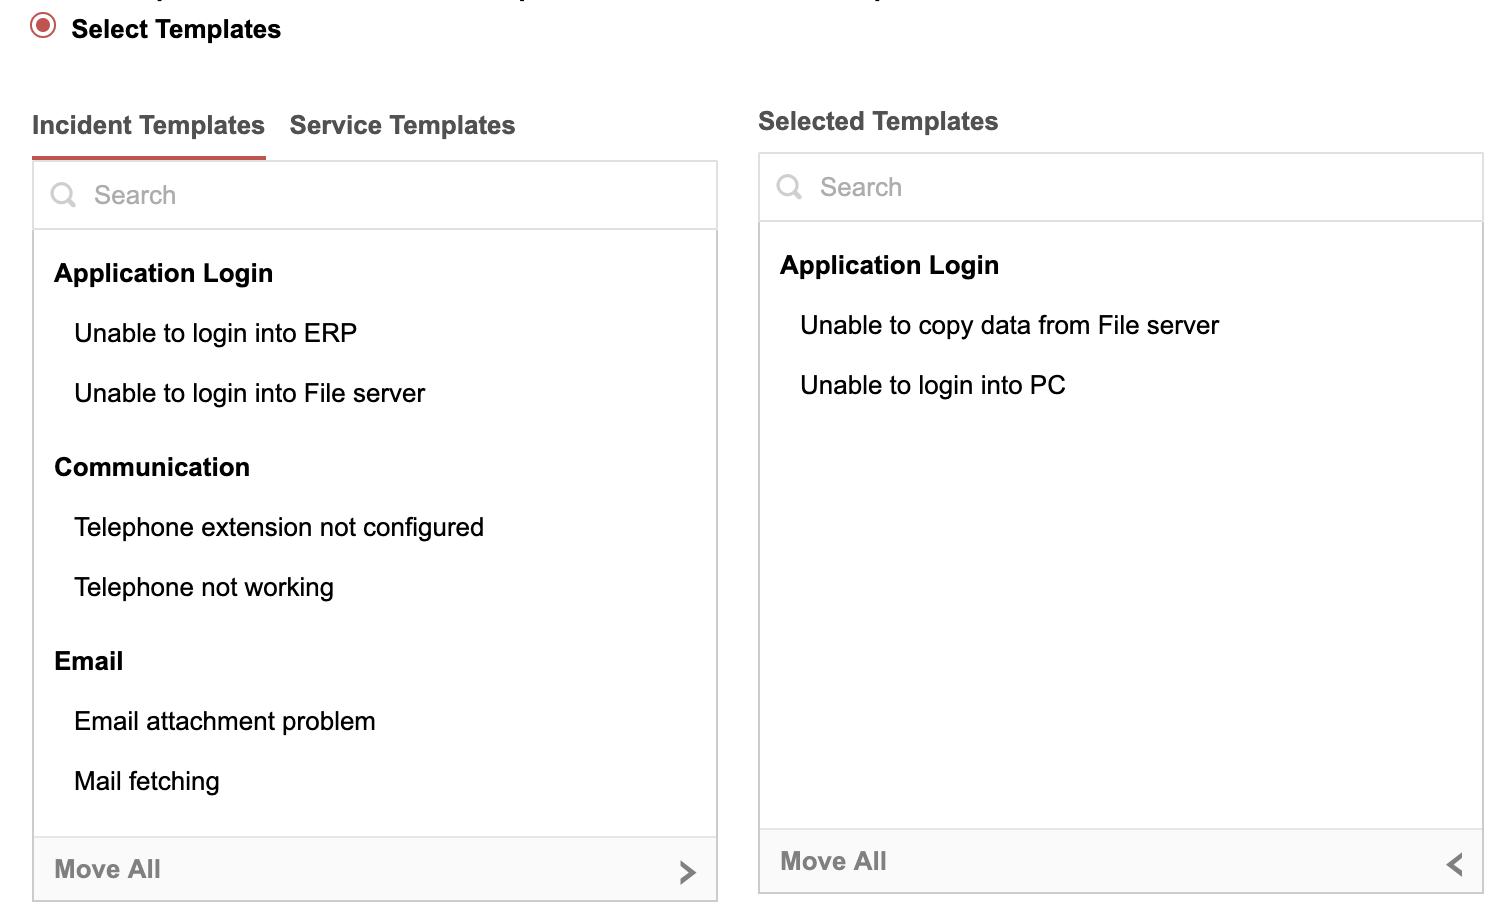
Select Templates: If you choose this, the below options will be shown. Choose either Incident Templates or Service Templates. Then, move the required template options from left to the right panel (Selected Templates), as shown below:

Perform Action:
To perform an action, it is necessary to have a HTML file, or a Script file, or a Class file, in the specified location for the action implementation. You can perform the below actions:
Custom HTML File:
To load a Custom HTML file when menu is invoked, you need to place that file in the [SDPMSP_Home]/Integration/resources/ directory. Only the files with htt/htx/htm/html/htmls extensions are supported for invocation. Also, dependency files like, JavaScript and CSS have to be placed in the same location.
Example: Create_Jira_Ticket.html
Action Type - Execute Class:
To execute a class, you need to specify the Executor class in the field provided. You need to manually place the required Class/Jar file to the [SDPMSP_Home]/integration/lib directory.
Example: com.servicedeskplusmsp.integration.JiraActionImplementation
Action Type - Execute Script:
To execute a script, you need to specify the Name and Path of the script file in the field provided. By default, the scripts will run from the [SDPMSP_Home]/integration/custom_scripts/ directory. You need to manually place the required Script file to the directory.
Example: cmd /c CreateJiraTicket.bat
You can also pass arguments for Custom Script/Class. All API parameters are supported as arguments.
Examples:
For Script: cmd / c Index.bat $SUBJECT $PRIORITY $STATUS
For Class: com.servicedeskplus.integration.JiraActionImplementation
Other Parameters Supported:
$COMPLETE_JSON_FILE ---> Complete Request Object will be saved to a JSON file and the file path will be passed as String Object.
JSON File Path:
(SDPMSP_Home\integration\custom_scripts\request\12_1426143538036.json)$HTML_DATA_JSON_FILE ---> Ajax call request "data" parameter will be saved to a JSON file along with menu name, request json and xml file path, and the file path will be passed as String Object. Used with Custom Html File.
Example: (SDPMSP_Home\integration\custom_scripts\request\12_1426143538036.json)$HANDSHAKE_KEY ---> Handshake key will be passed as String Object.
-
Click Save.
Now, the menu is created and can be viewed under the Actions menu in Requests Details page.
View List
You can access this option, while adding a new menu. You can do the following from here:
Enabling/Disabling a Menu:
Click the
icon beside a menu to disable it.
Click the
icon beside a menu to enable it.
Editing a Menu:
From the Request Custom Menu List View, click the Edit icon
beside the menu you wish to edit.
Modify the required details.
Click Save to save the changes performed.
Deleting a Menu:
From the Request Custom Menu List View, click the Delete icon
beside the menu you wish to delete. A confirmation window pops up.
Click OK to proceed with the deletion. The menu is removed from the list.
If you do not want to delete the menu, then click Cancel.

