
Viewing Workstation Details
To view the list of discovered workstations in your network
-
Log in to the ServiceDesk Plus MSP application using your user name and password.
-
Click the Inventory tab in the header pane. If you are already in the inventory module then click the View Workstations link in the Views block in the left menu or from the inventory home, click Show All link under the Workstation dashboard. The list of discovered workstations are displayed.
-
To view the details of an individual workstation, click the corresponding Workstation Name. The workstation details are displayed under 5 headings, each in separate tabs: Workstation, Hardware, Software, Assets, History, and Requests.
To view the hardware details of a workstation
-
In the workstations list page, click the Workstation Name for which you wish to see the hardware details. The workstation details such as the drive details, network adaptors, and other information are displayed.
-
Click the Hardware tab.
-
The center pane itself is divided into two sections. The various hardware components are listed in the left side. Clicking each of these displays the corresponding properties in the right side.
Viewing the Installed Software
To view the list of software that are installed in a specific workstation
-
In the workstation list page, click the Workstation Name for which you wish to see the list of installed software.
-
Now click the Software tab. The default view lists all the software inclusive of Managed, Excluded, Prohibited, and Unidentified.
To know more about the software types, refer to the View the entire Software List topic. The list displays the Software Name and the Software Type.
Delete Software from Workstation
You can also delete the software from this list. To delete software in the workstation
-
In the Software tab view of the workstation details, select the check boxes available beside the software name column for the software that you want to delete.
-
Click Delete. A confirmation dialog opens up.
-
To proceed with the deletion, click OK, or else click Cancel.
Search Software in Workstation
An option to search specific software that is installed on the workstation is available. Just above the software list, there is a search field. Enter your search string in that field and click Go. The page is refreshed with software list that match the search string.
Other than the hardware and software details specific to a workstation, there may be other assets that have not been grouped under hardware or software, but are associated with the workstation. To view these assets
-
In the workstation list page, click the Workstation Name for which you wish to see the list of the installed software.
-
Now click the Assets tab. The assets associated to the workstation will be listed.
If there are no associated assets, you can associate or add assets yourself. To add new assets, refer to the Adding New Asset topic. To attach existing assets, refer to the attaching assets topic.
To view the workstation history
-
In the workstation list page, click the Workstation Name for which you wish to view the workstation history. The details of the workstation are displayed with the workstation tab selected by default.
-
Click the History tab.
The workstation history tab provides the information about the audits/scans performed on the workstation and if there are any changes between the previous scan and the latest scan in the installed software list in the workstation, then the changes are displayed just below the scan date and time.
To view the requests that were generated for a particular workstation
-
In the workstation list page, click the Workstation Name for which you wish to see the requests generated. The details of the workstation are displayed with the workstation tab selected by default.
-
Click the Requests tab. The list of requests sent for the workstation will be displayed.
-
To view the individual request details, click the request title.
The workstation request history will help in analyzing the kind of issues that have been reported from a particular workstation and this information can be used for scheduling the workstation maintenance or in making replacement decisions based on the request history.
The scheduled audit of the workstations and network retrieves the necessary information about each of the workstations connected to the network. ServiceDesk Plus allows you to scan individual workstations apart from the scheduled audit. This enables you to update the latest workstation details.
To scan a workstation
-
In the workstation list page, click the Workstation Name that you wish to scan.
-
On the right side in the Actions block, click Scan Now. Alternatively, you can also click the Scan now link at the bottom of the page. A pop-up window will open to show the status of the scan.
You can copy the details of the workstation that you are viewing:
-
In the workstation list page, click the name of the workstation that you want to copy.
-
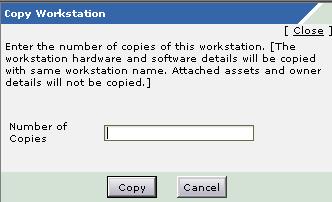
In the right side Actions block, click the Copy Workstation link. The copy workstation window is opened.
-
Enter the number of copies that you need.
-
Click Copy. A message is displayed stating that the copies are created successfully. Clicking Cancel closes the window without creating the copies.
-
Click Close on the top right of the window.
You can view the copies of the workstation in the workstation list view. All the details of the workstation, except the workstation ID and workstation name, will be the same. You can edit the details of the workstation.
|
|
Note:
|
Editing the Workstation Details
To edit the workstation details that are displayed in the view page
-
In the workstation list page, click the name of the workstation that you want to edit. The details of the workstation are displayed with the workstation tab selected by default.
-
On the right side, in the Actions block, click Edit Workstation. The Edit Workstation form is displayed where the various fields are grouped under Computer, Network, Input/Output Devices, and General Info. These fields in form are already filled with the information that was fetched while scanning the workstation or with the information that was entered while manually adding the workstation details. You can now modify the values in the fields or add entries to the empty fields.
-
On completely editing the details, click Save. If you wish to cancel the edit operation, click Cancel.
Adding Software to Workstation
If you notice that some software are missing from the workstation software list, you can add them yourself.
To add software
-
In the workstation list page, click the name of the workstation for which you want to add the software.
-
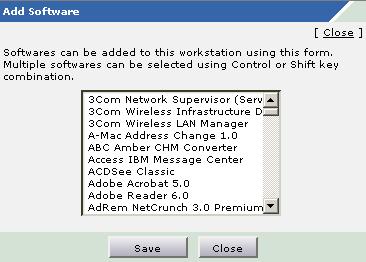
On the right side, in the Manual Additions block, click Add Software.
-
The Add Software window opens. This has the list of software. You can select the software from the list. To select more than one software, use Shift or Ctrl key in your keyboard.
-
After selecting, click Save. The selected software is appended to the existing workstation software list.
You can associate various assets with workstations while viewing the workstation details itself. When you attach assets, you will be associating a specific asset with the workstation. For example, a network card has been added to a workstation and you want to make that association in the ServiceDesk Plus application also. You can do that using the attach asset option.
To attach assets to the workstation that is being viewed
-
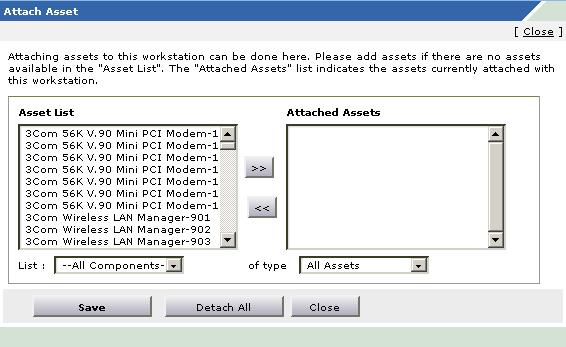
In the workstation details page, click the Attach Assets link in the Manual Additions block on the right side. The Attach Asset window opens. By default, the asset list will have all the unassigned asset components.
-
If you want only specific assets to be listed, you can choose them from the list combo box, which is a filter for the asset list values.
-
Select the assets that you want to associate with the workstation and click the >> button to move them to the Attached Assets list. To select multiple assets from the asset list, use Shift or Ctrl key of your keyboard while selecting the assets.
-
Click Save. A message is displayed stating that the assets are attached successfully.
-
Click the Close link available at the top right corner of the Attach Asset window.
To dissociate the assets, select the assets from the Attached Assets list and click the << button. If you want to detach all the assets from the workstation, then in the Attach Asset window, click Detach All button.
To associate a owner with the workstation
-
In the workstation list page, click the Workstation Name for which you wish to associate the user. The details of the workstation are displayed with the workstation tab selected by default.
-
On the right side, in the User details block, click Assign Owner. The Owner Association window opens. Here you can allocate the workstation to either a department or an individual user.

-
From the first combo box, choose either User or Department as values. This populates the second combo box with the relevant values of either the available user names or department names based on your choice.
-
From the Choose Owner combo box, select the user name or department name to which you wish to assign the workstation.
-
Click Assign. A message is displayed stating that the owner is assigned successfully.
-
Click Close. In the workstation details view page, in the top right corner of the center pane, the user details are displayed.
Alternatively, you can also associate the user from the workstation list view page.
-
In the workstation list view page, click the icon displayed in last column. The owner association window opens.
-
From the first combo box, choose either User or Department as values. This populates the second combo box with the relevant values of either the available user names or department names based on your choice.
-
From the Choose Owner combo box, select the user name or department name to which you wish to assign the workstation.
-
Click Assign. A message is displayed stating that the owner is assigned successfully.
-
Click Close in the pop-up window.
You can change the user who is associated with the workstation.
To re-associate or dissociate a user of a workstation
-
In the workstation list page, click the name of the workstation for which you wish to re-associate or dissociate the user. The details of the workstation are displayed with the workstation tab selected by default.
-
On the right side, in the User details block, click Change Owner. The owner association window opens with the associated user chosen in the combo boxes.
-
Select the user name or department name to which you wish to re-associate the workstation and click Assign. A success message is displayed in the pop-up. In the workstation details view page, in the top right corner of the center pane, the modified user details are displayed.
-
If you just want to remove the user association, instead of selecting a new user and associating, click De-assign. The user association is removed and the workstation is free to be associated with any other user.
-
Click Close.
Alternatively, you can also re-associate or dissociate the user from the workstation list view page.
-
In the workstation list view page, click the icon displayed in the last column against the workstation whose owner you wish to change. The owner association window opens with the associated user selected by default in the combo boxes.
-
To remove the owner for the workstation, click De-assign.
-
To re-associate, select the user name or department name to which you wish to re-associate to the workstation and click Assign. In either case, a success message is displayed in the pop-up and simultaneously the workstation list view page is refreshed to display the user name or department name in Assigned To column.
-
Click Close in the pop-up window.
To view the user profile of the user associated with a workstation
-
In the workstation list view page, the user name is displayed in the Assigned To column. Click the user name. A pop-up window with the user details opens.
-
Click Close in the pop-up window once you have viewed the user details.
Alternatively, you can also view the user details as follows:
-
Click the Workstation Name from the workstation list view page.
-
On the top right corner of the center pane, the User Details are displayed. Click the user Name that is hyperlinked, or click the View User Profile link available in the User details block on the right side. A pop-up window with the user details opens.
-
Click Close in the pop-up window once you have viewed the user details.
You can e-mail the owner associated with a workstation from the workstation view, only if the owner is an individual user.
-
Click the E-mail owner link on the right side of the workstation details page. It opens a pop-up window for sending a mail. The E-mail owner link will be available only if the user has been already associated with the workstation.
-
The To field of the form has the e-mail ID of the user. If you wish to send the mail to anyone else other than the user, add the e-mail IDs of the users separated by a comma.
-
Enter a subject for the mail and the content in the Subject and Description fields respectively.
-
Click Send E-mail. A message is displayed above the form if the mail has been sent successfully. If there is a problem, a failure message will be displayed. In such case, please verify if the e-mail settings configured in the admin configuration are correct.