How to add third-party catalogs to SCCM using Patch Connect Plus
In this document, we give you a step-by-step overview to adding third-party update catalogs, subscribing to an added catalog, and finally publishing your desired updates to SCCM server
Steps to add third-party catalogs to SCCM
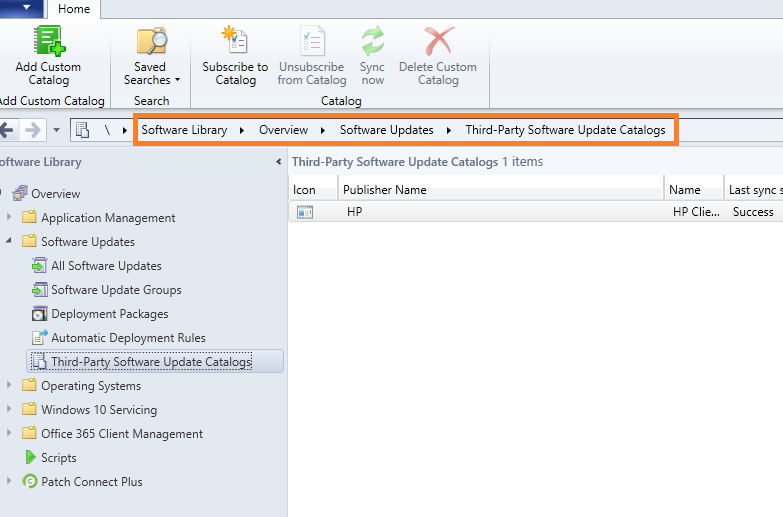
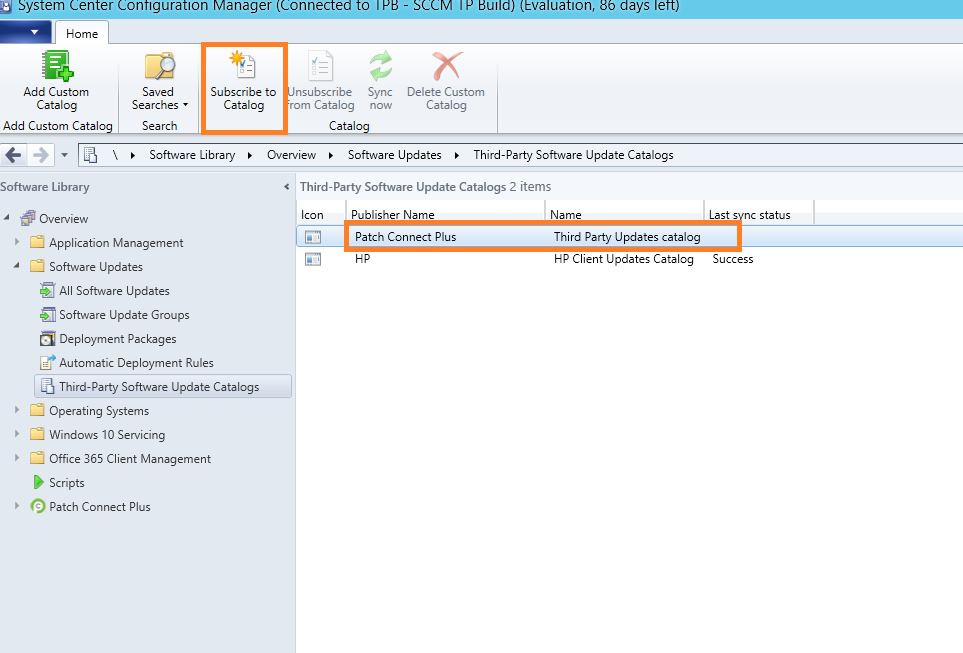
- Open SCCM Console and navigate to \Software Library\Overview\Software Updates\All Software Updates and Select 'Third-Party Software Update Catalogs'. Third-party application catalogs are listed here.
- Select 'Add Custom Catalog' option from top menu,
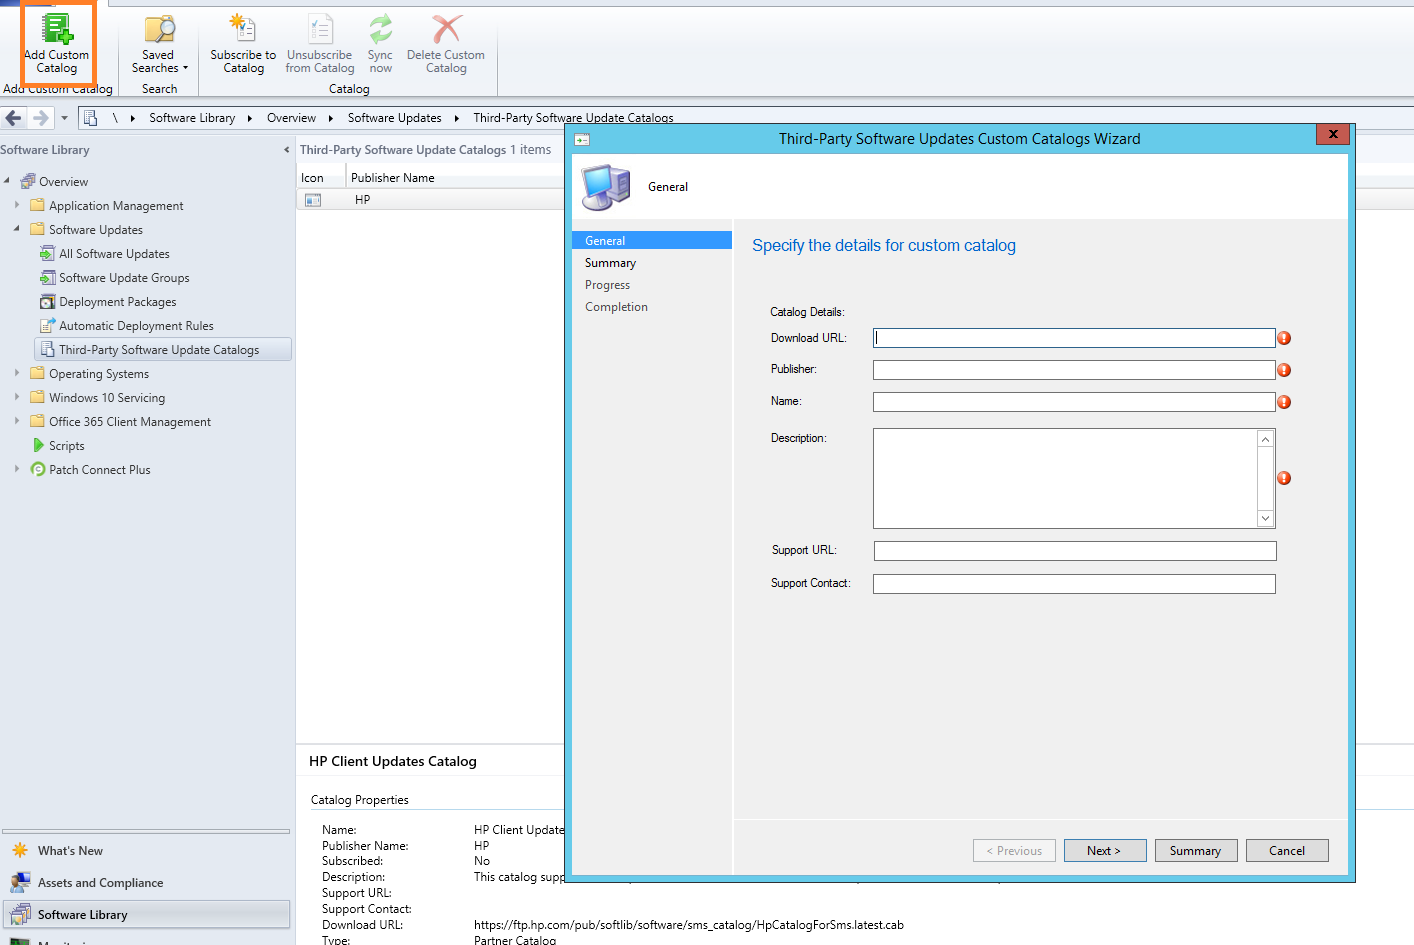
- Enter 'thirdpartyupdate' catalog file URL in the 'Download URL' field and provide other required details. In order to access the download file, you will need to subscribe to the Standard Edition. Note: For a smooth operation you will first need to add the following domain to your Proxy list.
https://pcp.manageengine.com/
Once all details have been entered, click Next
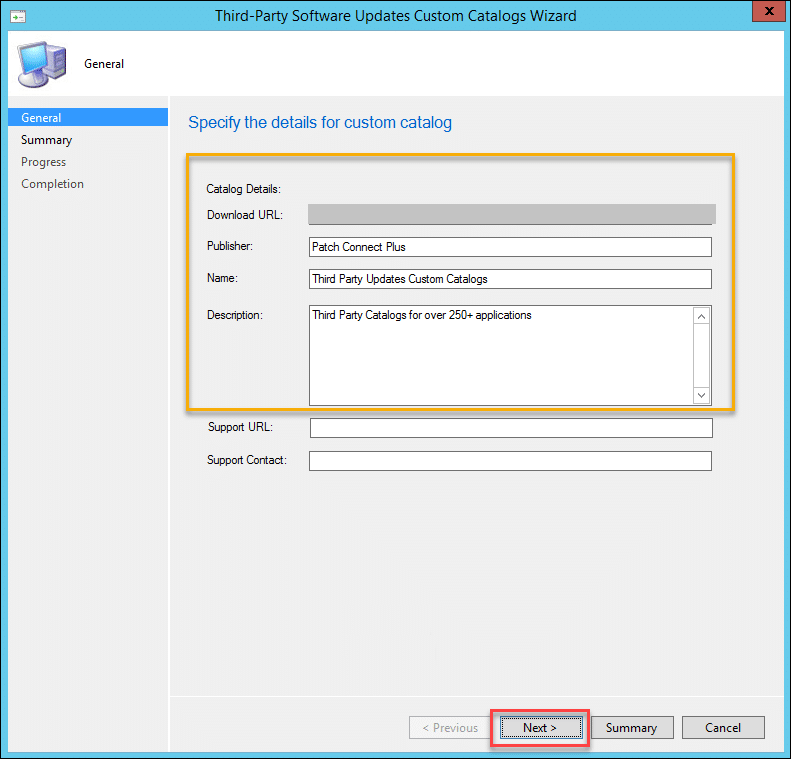
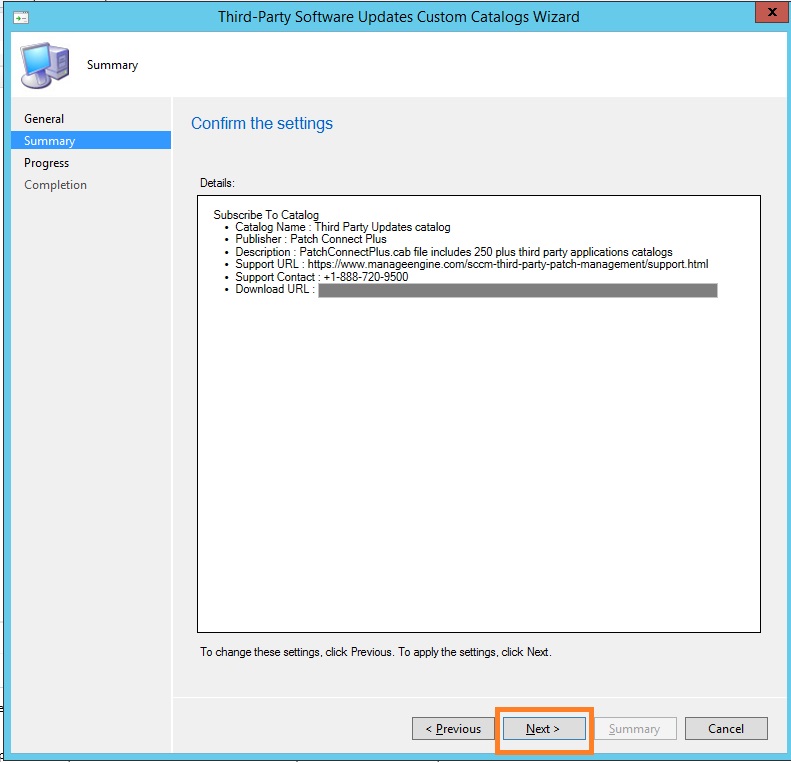
- Verify the given details and proceed.
- Now the Catalog file is successfully added to SCCM.

Steps to Subscribe PCP Third Party Catalog
- Select the newly added PCP catalog and select Subscribe to Catalog option.
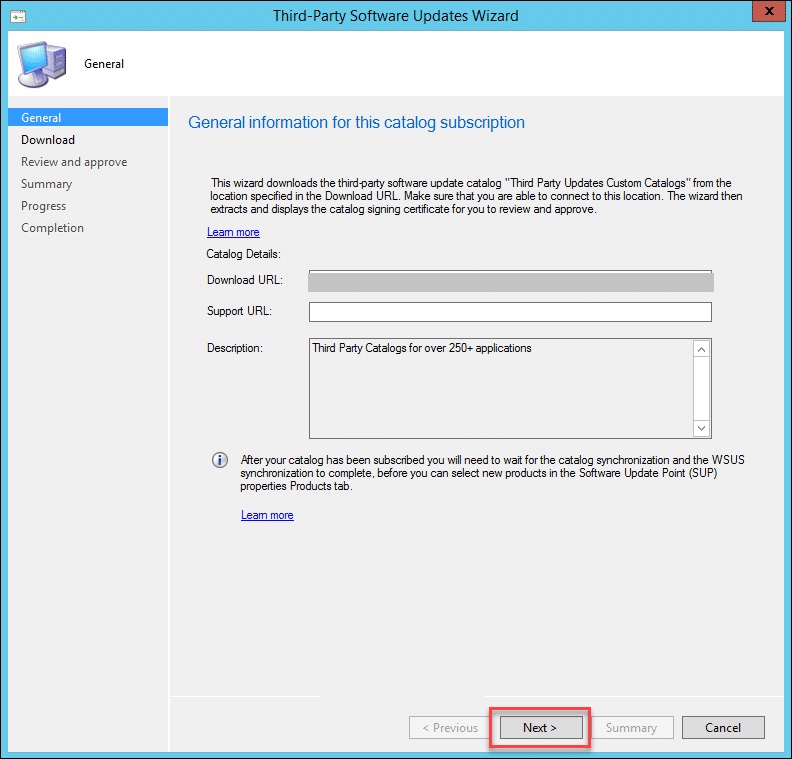
- Click Next to continue.
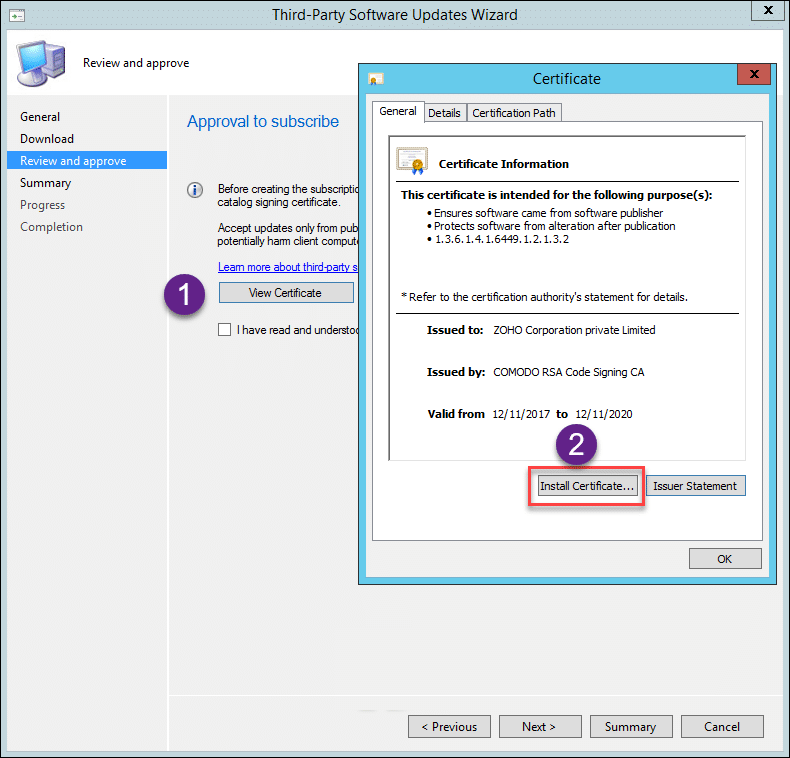
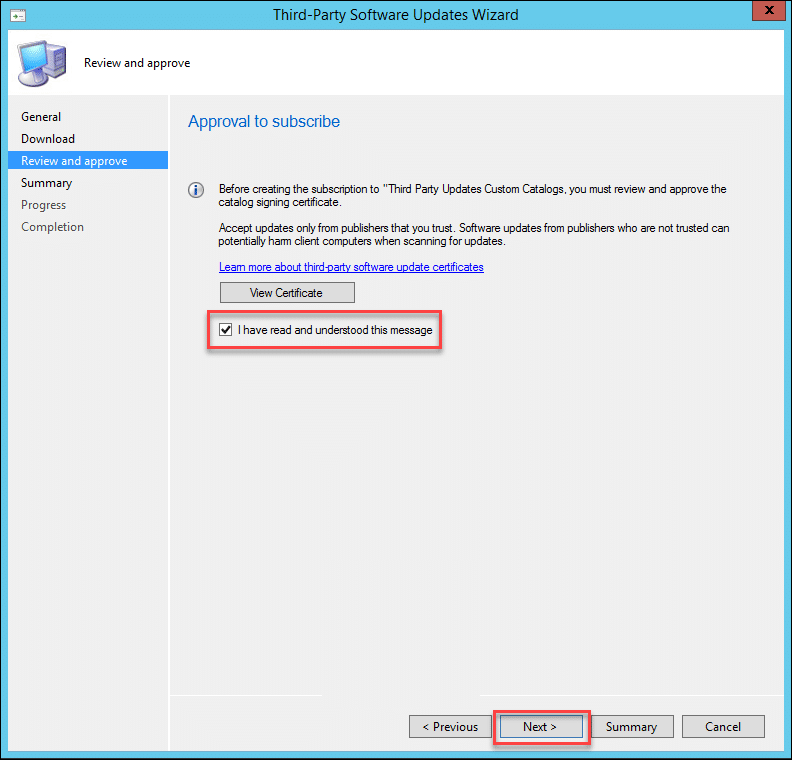
- Verify the certificate, select checkbox and then continue.
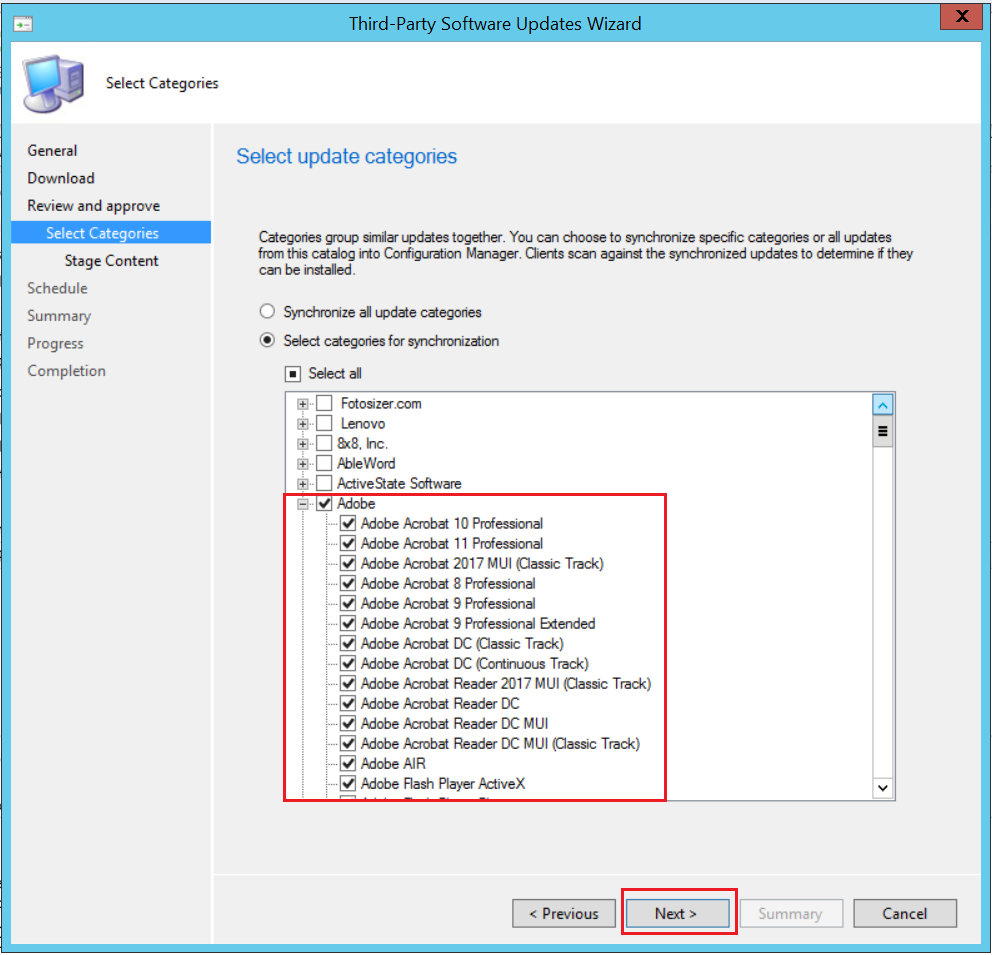
- From Select Categories, choose the updates or group of updates that you want synced from the catalog to Configuration Manager. Once this is done click Next
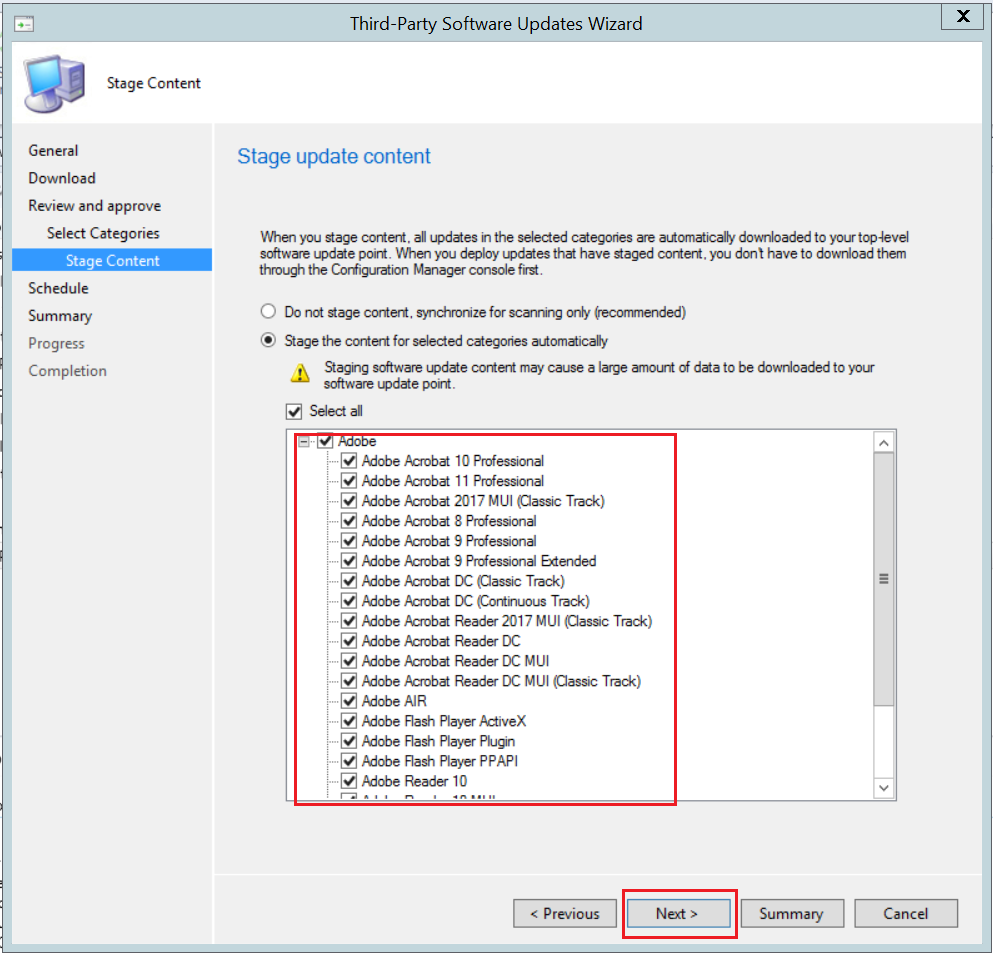
- Alternatively, you can also Stage Content. When you choose to stage content, all the updates under the selected category are downloaded to the update point directly. This process can be automated by choosing the option as shown below. Once it is done, click Next
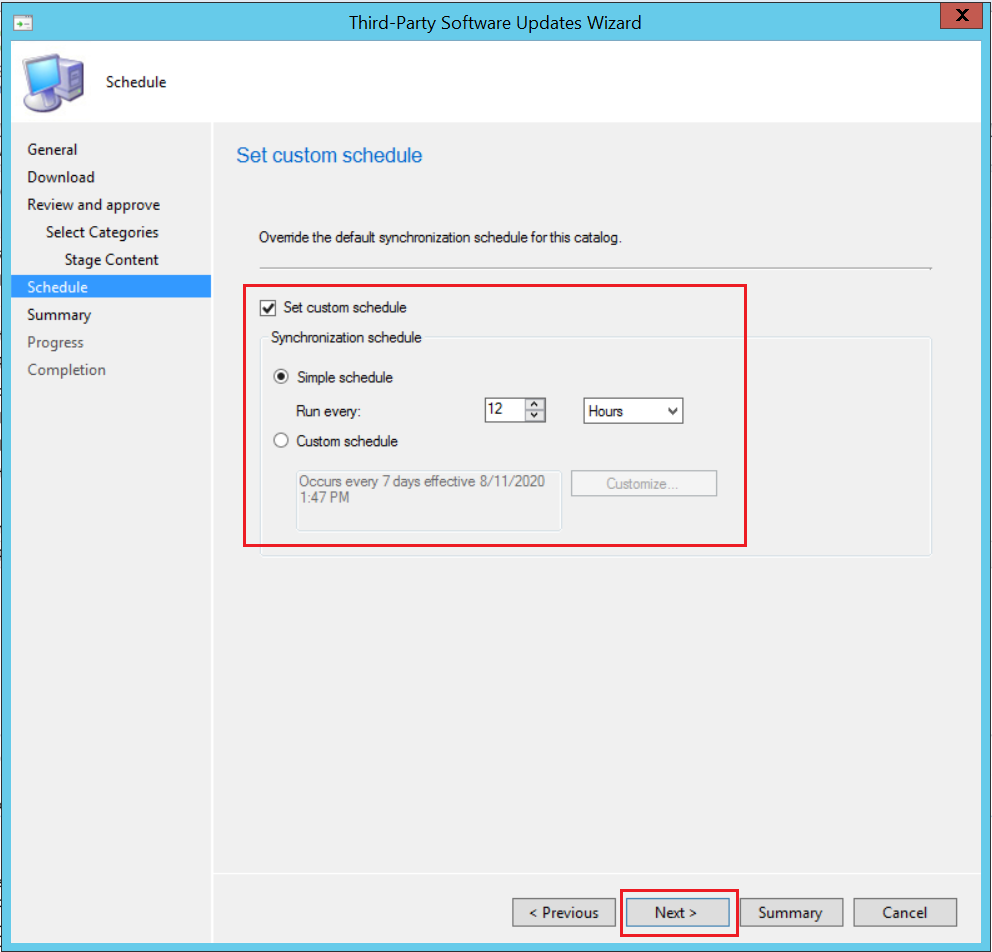
- The next step is to synchronize schedule. Under Schedule tab, you have the option to customize the synchronization schedule. Once the schedule is set according to your requirements, click Next
- The next step is the Summary that shows you the details of the Catalog and the Selected Categories. To confirm the settings, click Next. To change the settings, click Previous

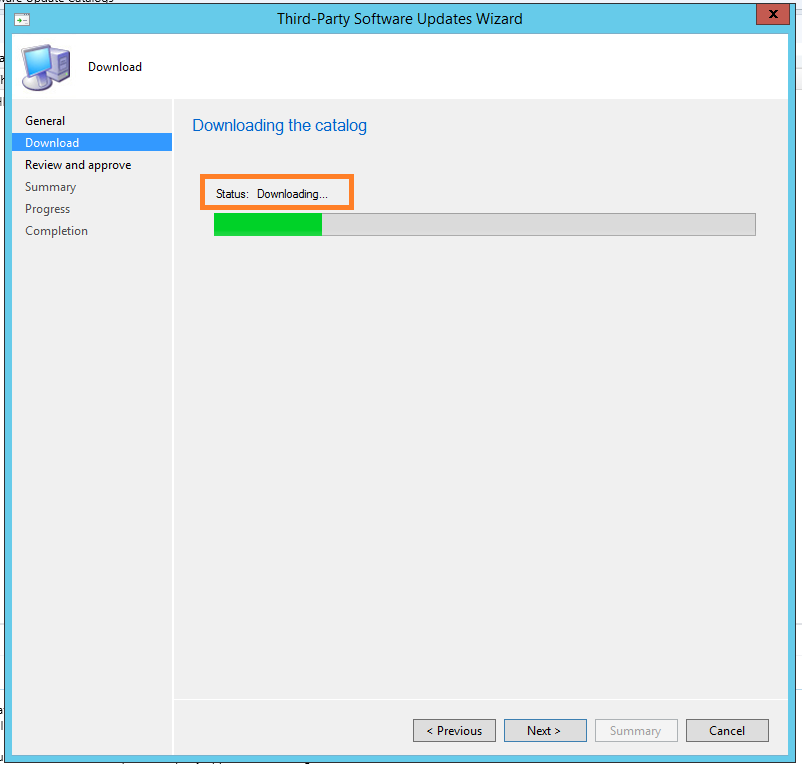
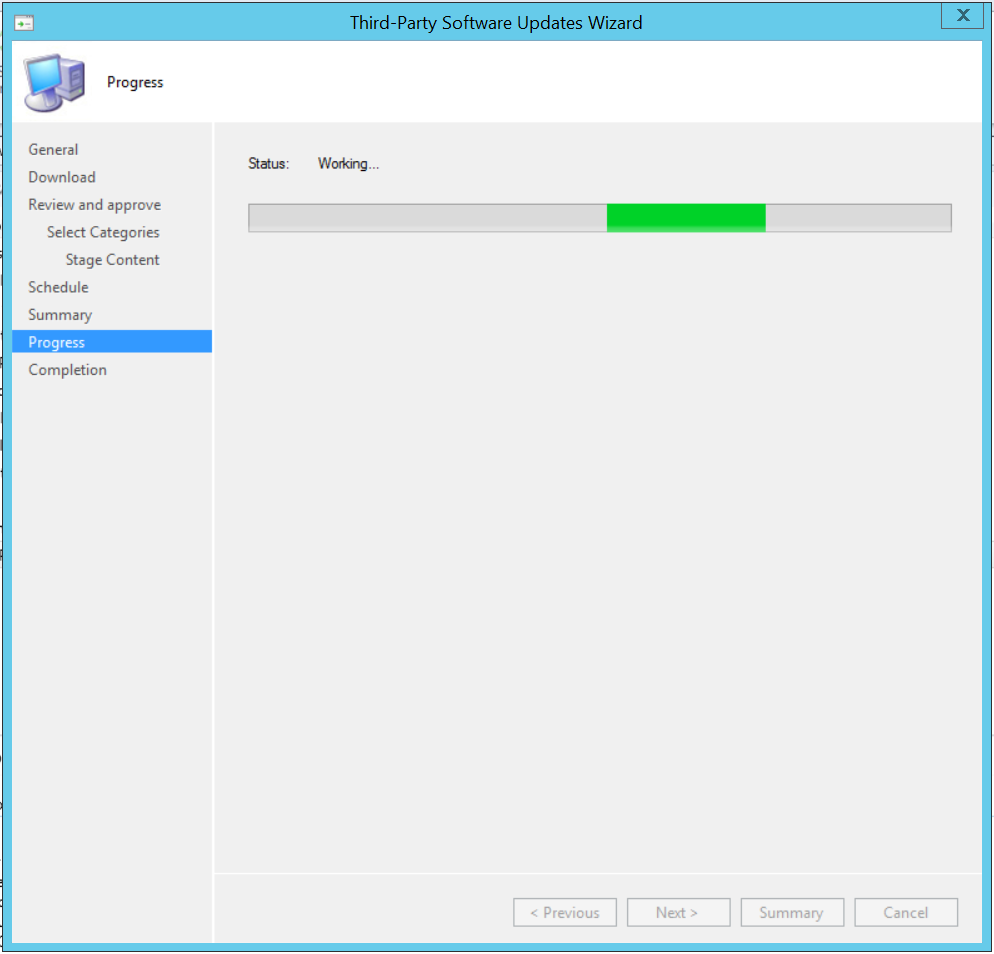
- In the next window under Progress, you can view the status
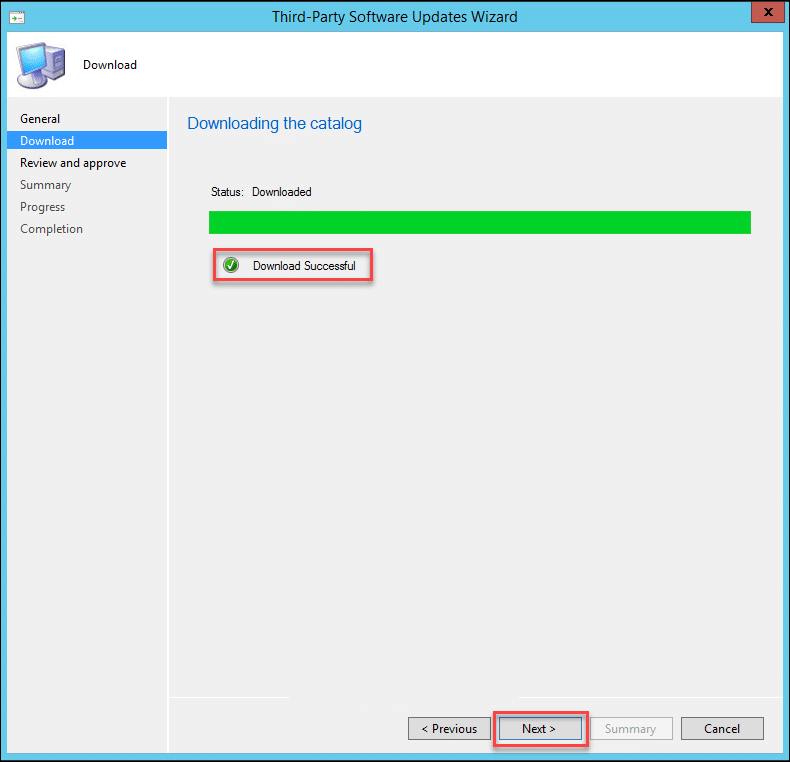
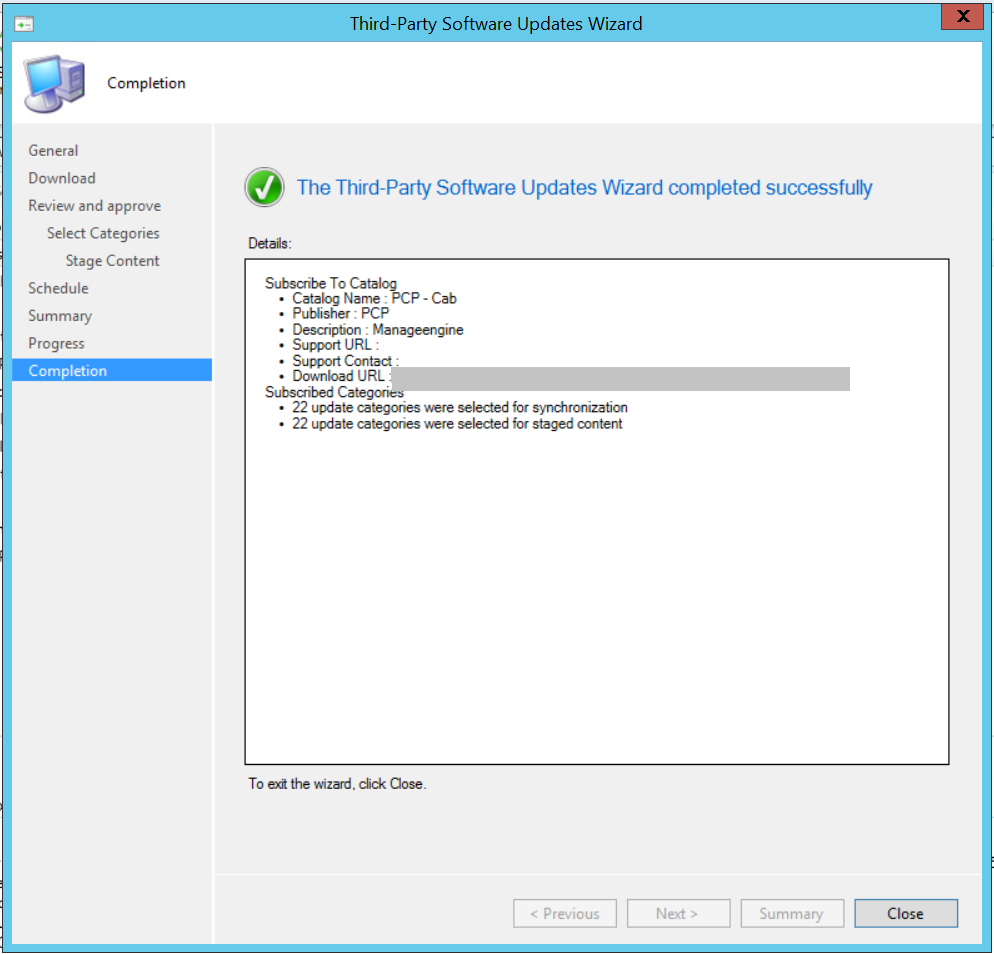
- Upon successful completion of the catalog download, you will get a completion window as shown in the screenshot below
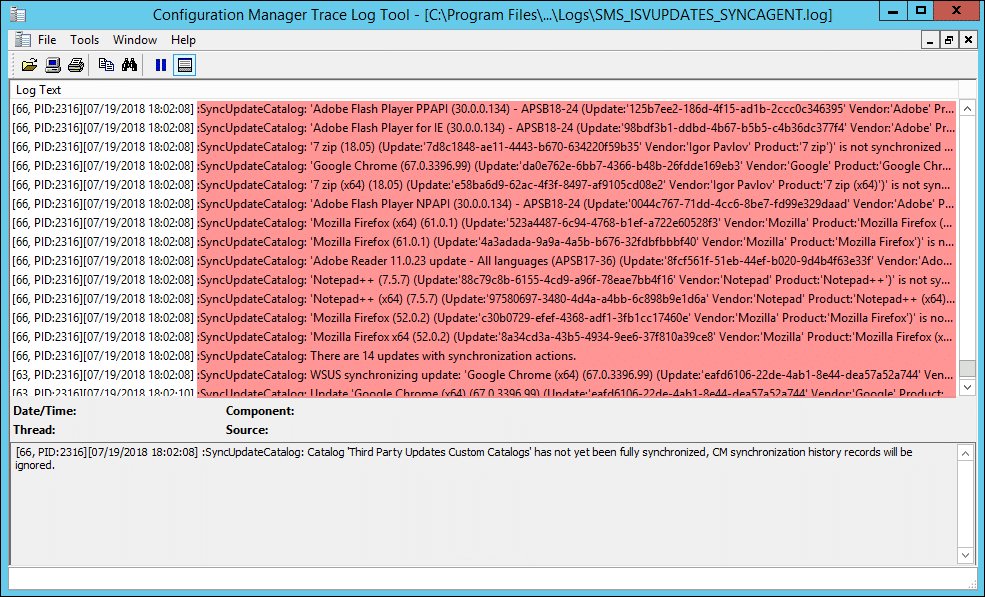
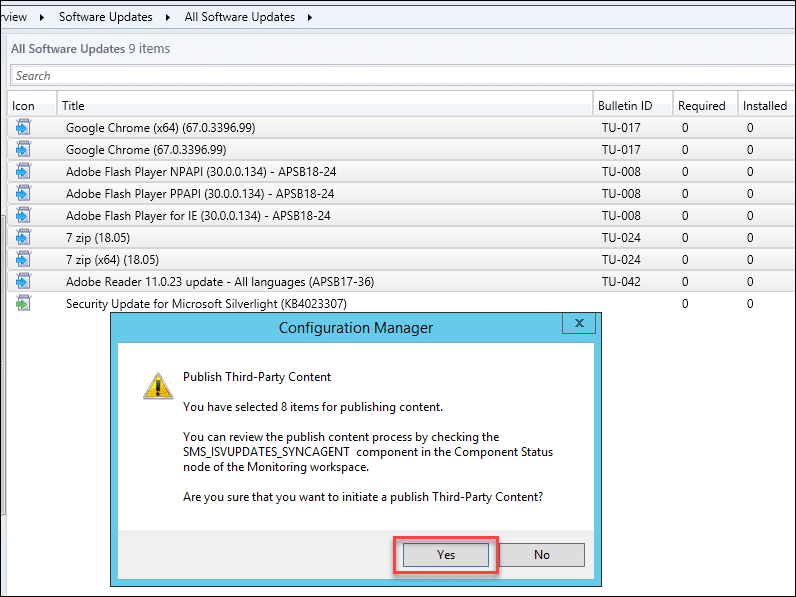
- You can check the status of updates publishing process in SMS_ISVUPDATES_SYNCAGENT.log file under C:\Program Files\Microsoft Configuration Manager\Logs Directory
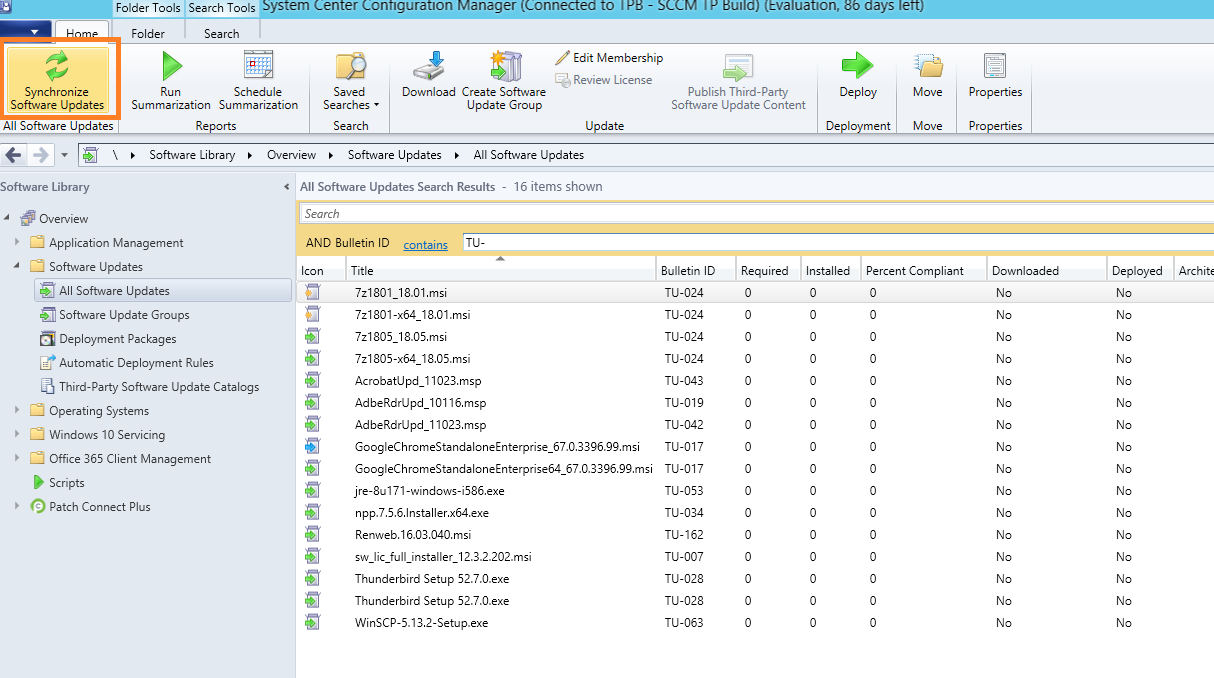
- After successful publishing, you need to initiate SCCM-WSUS sync from SCCM console under All Software Updates tab by selecting Synchronize Software Updates option
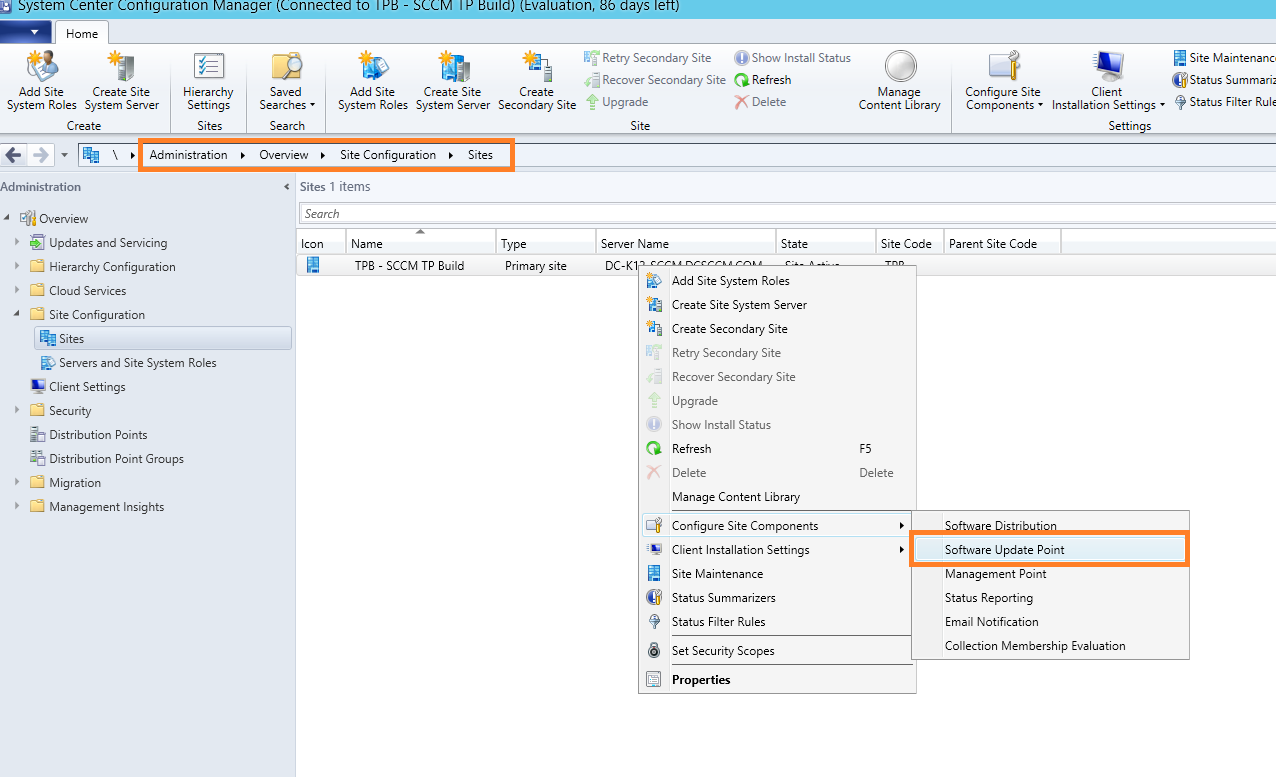
- After successful synchronization, you need to select the products from Software Update Point to see published in updates in SCCM. Navigate to \Administration\Overview\Site Configuration\Sites Right click and select Software Update Point
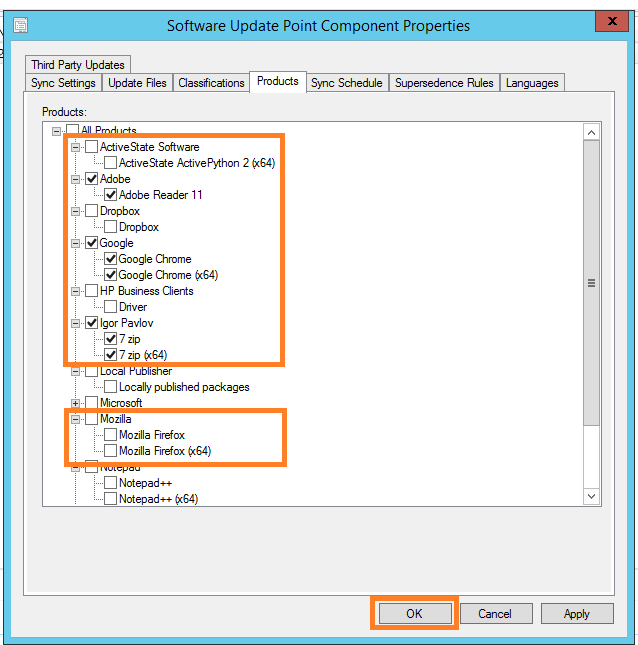
- Under Products tab, the newly published products(applications) are listed. select the required products and again initiate SCCM-WSUS sync from 'All Software Updates' tab
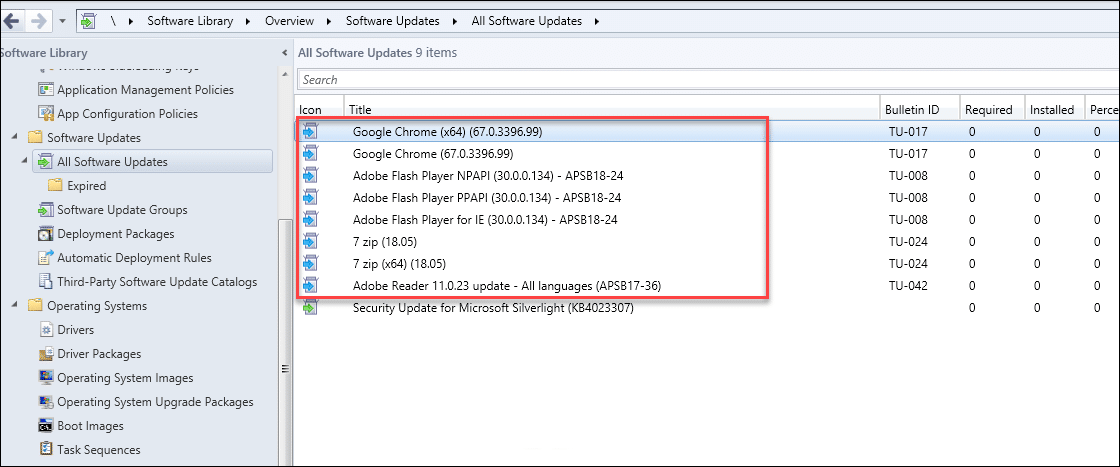
- After the successful synchronization, the Meta-Data of third-party updates are listed under 'All Software Updates'.
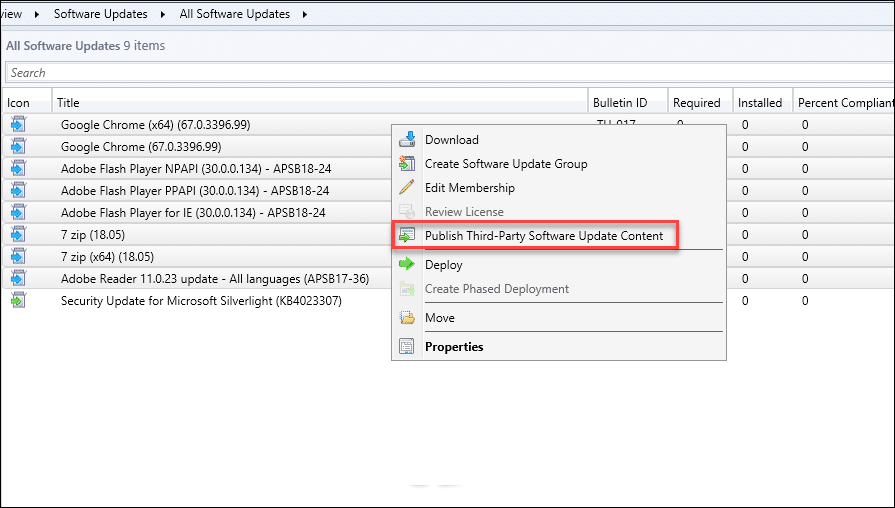
- Select the required application and right click to select Publish Third-Party Software Update Content. This downloads and publishes the full contents of update to SCCM. You can check the status of updates publishing process in SMS_ISVUPDATES_SYNCAGENT.log
- After publishing full content of all updates, Again initiate WSUS-SCCM sync, After the sync, you can deploy the updates to all client machines.

Patch Connect Plus also supports the V3 format of third-party catalogs.
Note:
The publishing of updates for certain third-party applications, (Ex: 7-Zip) may fail since they fall under the category of open-source applications. While publishing patches for similar open-source applications, Patch Connect Plus provides you with a self-signed certificate that you can add to SCCM, so that patches do not get blocked. Download the Patch Connect Plus self-signed certificate. Once this certificate has been downloaded, it has to be imported to the SCCM machine's Certification Authorities Store (local computer account) under Trusted Publishers and Trusted Root Certification Authorities.
Once the certificate has been imported, patches can then be published to SCCM. Additionally, to find the imported certificate, open the SCCM console, navigate to Administration > Security > Certificates. Here you can find the certificate named as Patch Connect Plus SCUP. Also note that this one-time certificate import ensures all updates for open source applications get signed before they are published to SCCM.
If you are looking to learn how to add third party catalogs to Microsoft SCUP, click here.