Description
This document will explain the steps to create signing certificate using Local CA.
Steps
To create signing certificate using Local CA follow the steps given below,
- Creating Signing Certificate template
- Issuing Signing Certificate template
- Requesting Signing Certificate
- Deploying the certificate using GPO
Creating the Signing Certificate template on the certification authority.
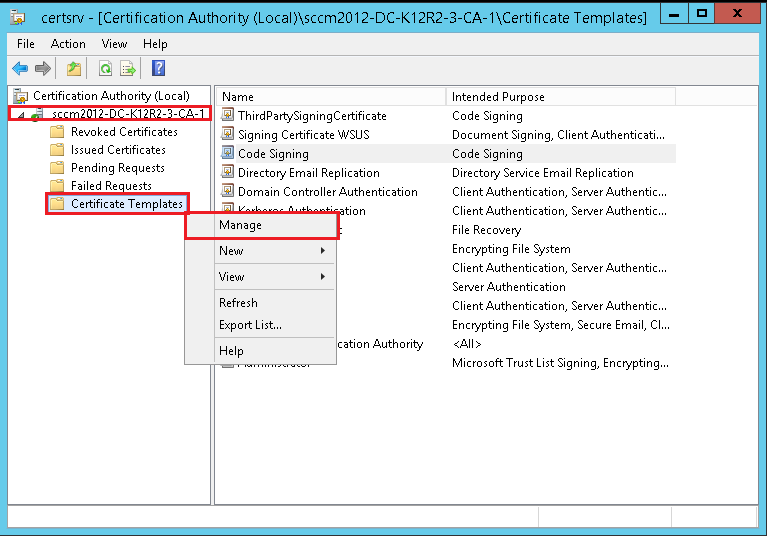
- Open CertificatIon authority on the machine where you have installed the certification authority.
- Expand the name of the certification authority and click Certificate Templates.
Right-click Certificate Templates, and click Manage to load the Certificate Templates management console.
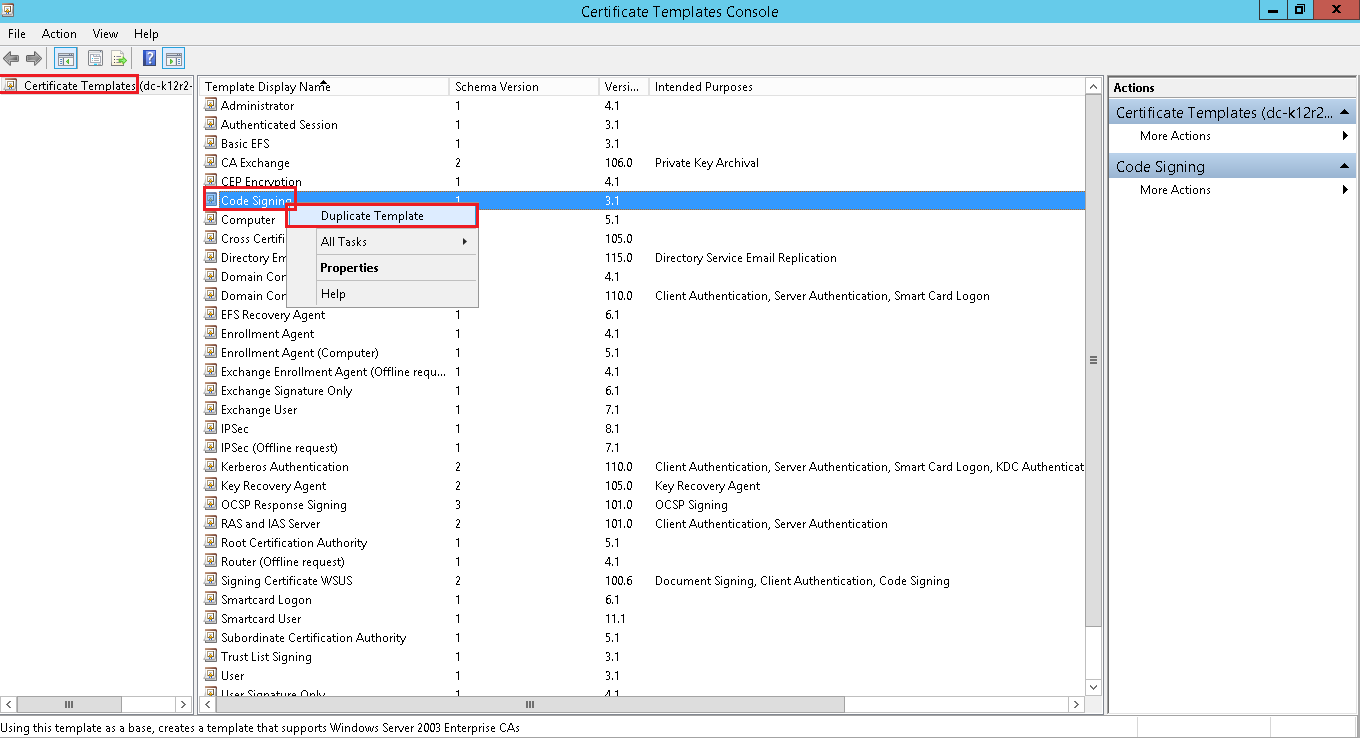
In the results pane, right-click the entry that displays "Code Signing" in the Template Display Name column, and then right click and select Duplicate Template.
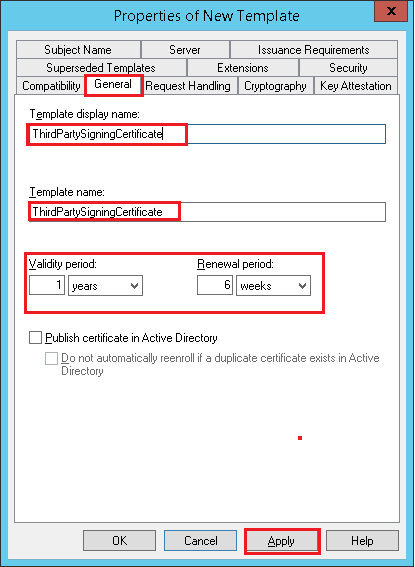
Properties of New template console will open. Select General tab, enter the template name for the site server signing certificate. For eg: ThirdPartySigningCertificate.
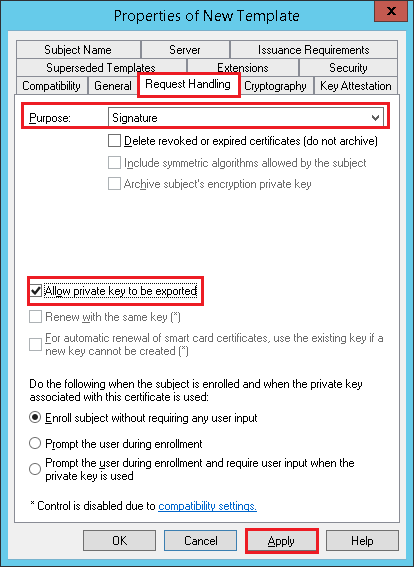
Select Request handling tab and enable Allow private key to be exported.
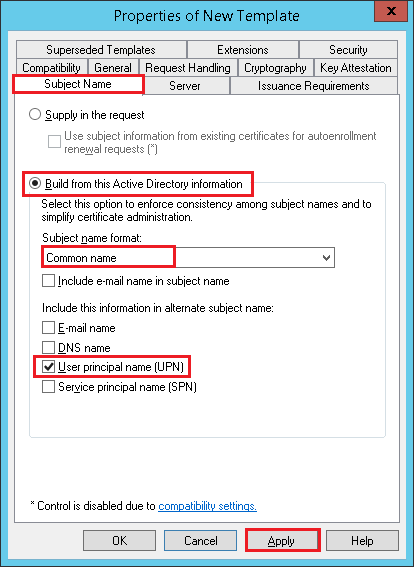
Select Subject name tab and select Build from this Active Directory information and select Common Name as the Subject name format.
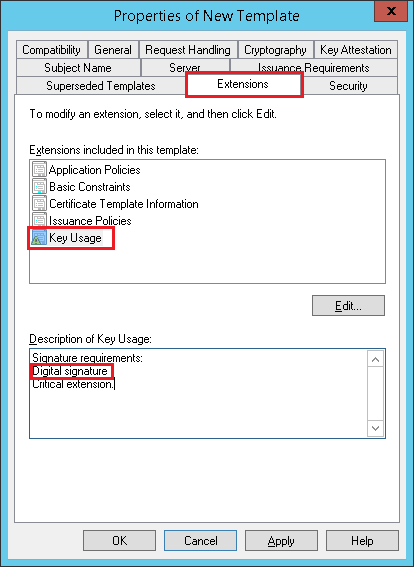
Select Extensions tab and ensure that the key usage has digital signature.
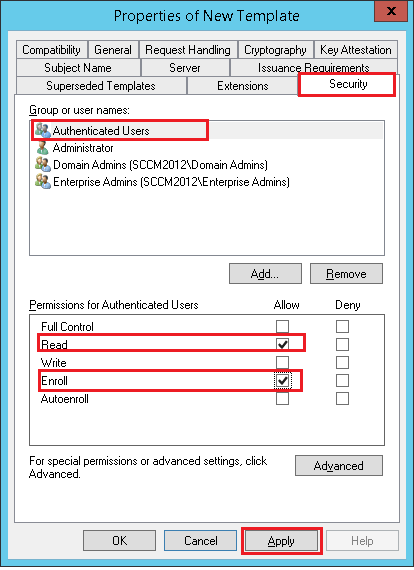
Select Security tab, under Group or users name select Authenticated users and provide Read and Enroll permissions.
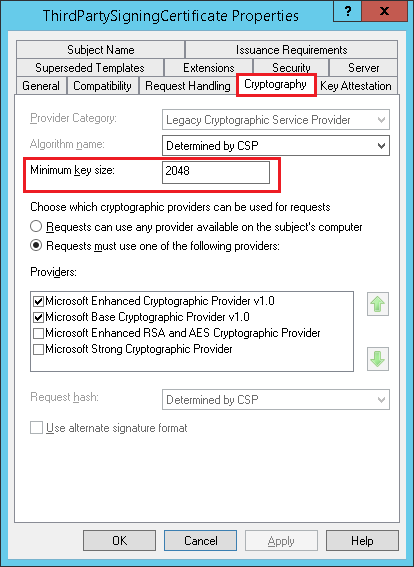
Select Cryptography tab and verify if the minimum key size is 2048.
- Click OK and close the Certificate Templates console.
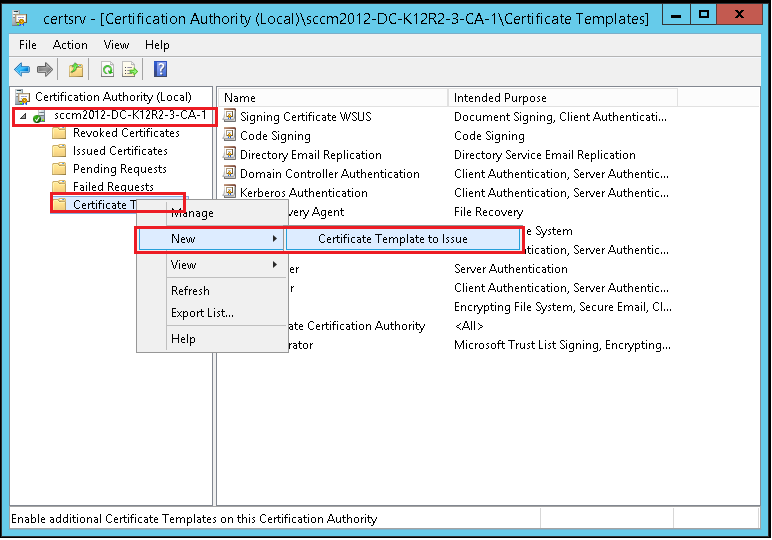
Issuing the Signing Certificate template
In Certification Authority, right-click Certificate Templates, click New, and then click Certificate Template to Issue.
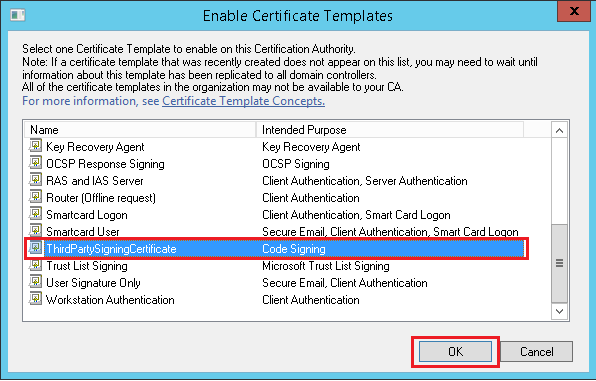
In the Enable Certificate Templates dialog box, select the new template you have just created, ThirdPartySigningCertificate, and then click OK.
Requesting Signing certificate
- On a machine which is under the domain, type mmc.exe in command prompt, and then press Enter.
- An empty management console will open , click File, and then click Add/Remove Snap-in.
- Add or Remove Snap-in dialog box will open, select Certificates from the list of Available snap-ins, and then click Add.
- In the Certificate snap-in dialog box, select My user account, and then click Finish.
- In the Add or Remove Snap-in dialog box, click OK.
- In the console, expand Certificates— Current User, expand Personal and click Certificates
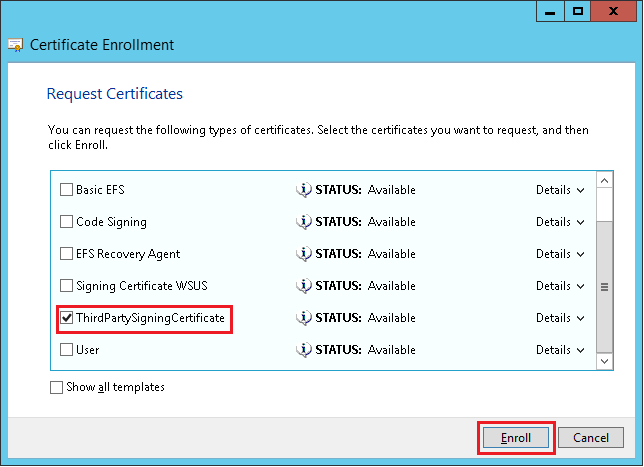
Right click Certificates, then click All Tasks and then click Request New Certificate.

Follow the Certificate Enrollment wizard to select the newly created certificate template, set a friendly name in certificate properties and click Enroll.
- After enroll succeeds, you will find the new certificate under Certificates — Current User -> Personal -> Certificates.
Right click the certificate you just enrolled and click All Tasks -> Export. Follow the export wizard and export the certificate without private key and save the export as SigningCertificate.cer.
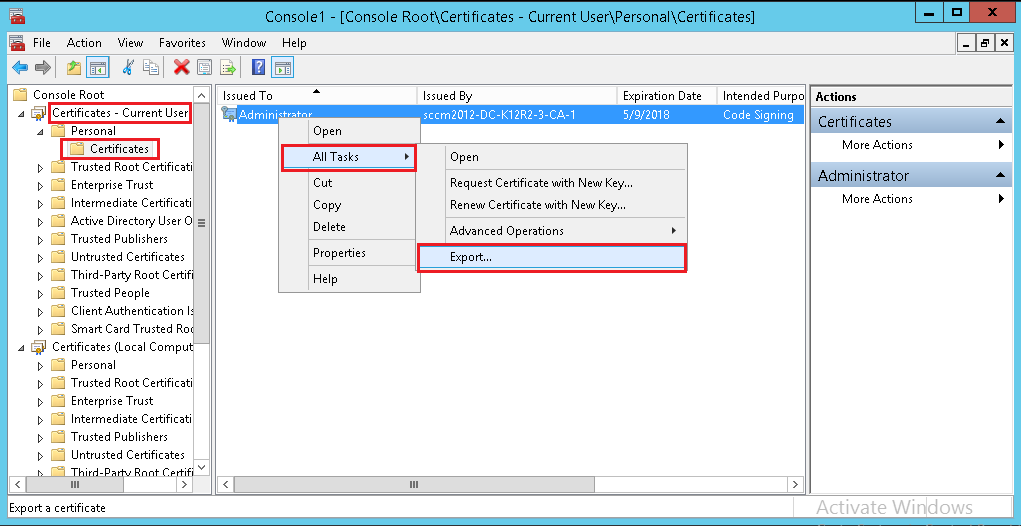
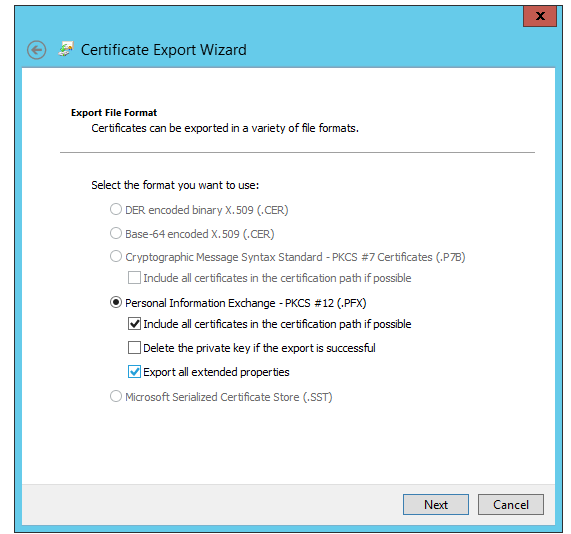
- Export the certificate again, and this time, select "Yes, export the private key" and "Export all extended properties" in the Certificate Export Wizard, and save the export as SigningCertificate.pfx.
Steps to Deploy Signing certificate through GPO.
In case if this problem continues, kindly Contact Support
Keywords: Third-party Patch Management, Create Signing certificate, local CA.