OpManager Standard/ Professional Installation
- Installing OpManager on Windows
- Installing OpManager on Linux
- Installing OpManager on Linux using Console mode/ Silent mode
- Installing OpManager on Linux with MSSQL database
- Installing OpManager with Kingbase DB
- Installing OpManager on AWS
- Installing OpManager with Amazon RDS
- Installing OpManager on Microsoft Azure
- Installing OpManager Enterprise edition
- Prerequisites to Installing OpManager on CIS Hardened server
- Starting OpManager on Linux
Installing OpManager on Windows
Steps to install
Step 1: Download OpManager for Windows.
Step 2: Execute the downloaded "ManageEngine_OpManager_64bit.exe" file to install and follow the instructions in the installation wizard.
Step 3: Click 'Next' to start the installation process. Go through the license agreement and click 'Yes' to proceed to the next step.
Step 4: Choose the directory where you wish to install OpManager in the subsequent steps of the wizard.
Step 5: Specify the port number to run OpManager Web Server (OpManager uses 8060 as the default web server port) and click 'Next'.
Step 6: Register for technical support by providing your contact information such as Name, E-mail ID, etc., and click 'Next'.
Step 7: OpManager is bundled with PostgreSQL by default. However, it also supports MSSQL databases. Choose the desired database option and click 'Next'.
Step 8: Click 'Finish' to complete the installation process.
Installing OpManager on Linux
Steps to install
- Download OpManager for Linux.
- Login as root user.
Assign the executable permission to the downloaded file using the following command:
chmod a+x ManageEngine_OpManager_64bit.bin
- Execute ./ManageEngine_OpManager_64bit.bin with administrator privileges (sudo). This will display the installation wizard.
- Click 'Next' to begin the installation process. Go through the license agreement and proceed to the next step.
- In the subsequent steps of the wizard, select the OpManager Edition, the directory to install OpManager, and the port number to run OpManager Web Server. Proceed to the next step.
- Verify the installation details and click 'Next'.
- Click 'Finish' to complete the installation process.
It is recommended to install OpManager in the opt folder. By default, OpManager is installed in the /opt/ManageEngine/OpManager directory.
Troubleshooting steps:
- In Linux setups, you may occasionally face issues such as the OpManager server failing to start or database connection errors. To resolve this, check the /etc/hosts file and comment out any IPv6-related entries, as these can interfere with proper hostname resolution.
- Verify that DNS resolution is working correctly in Linux setups. If not, manually add an entry in the /etc/hosts file with the server's IP address and hostname to ensure proper connectivity and successful startup of OpManager.
Installing OpManager on Linux using Console mode
You can install OpManager on your Linux system through the console terminal if your server does not have a graphical user interface (GUI) or if you are accessing it remotely or via a cloud-based Linux machine. Unlike a UI-based installation, the command-line installation requires you to execute a series of commands to complete the setup. To install OpManager using console mode, follow the steps provided below:
Steps to install
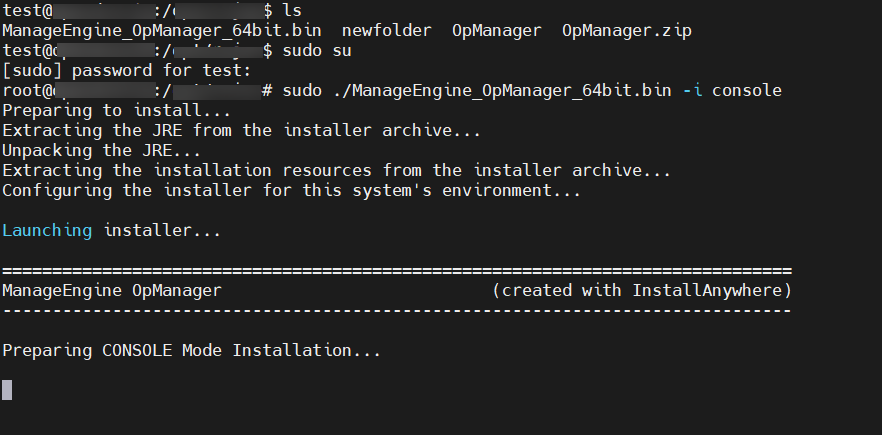
- Download the ManageEngine OpManager (.bin) installation file.
- Once downloaded, open the Command Terminal and navigate to the directory where the installation file is located.
The user should login as root user and be given executable permissions to perform the installation, run the command below:
chmod a+x ManageEngine_OpManager_64bit.binAfter assigning the permissions, you can execute the downloaded OpManager file using the following command:
sudo ./ManageEngine_OpManager_64bit.bin -i console
- Once you press Enter, an introduction to InstallAnywhere Wizard for OpManager will be displayed as the command output in the console to guide you through the installation.
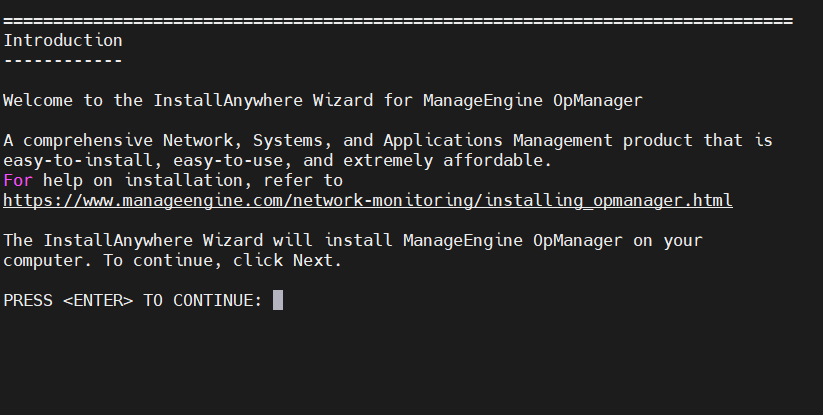
- Read the License Agreement, press Enter to continue and accept the terms of the license.
- You will be requested to register for technical support. Complete the registration based on your preference.
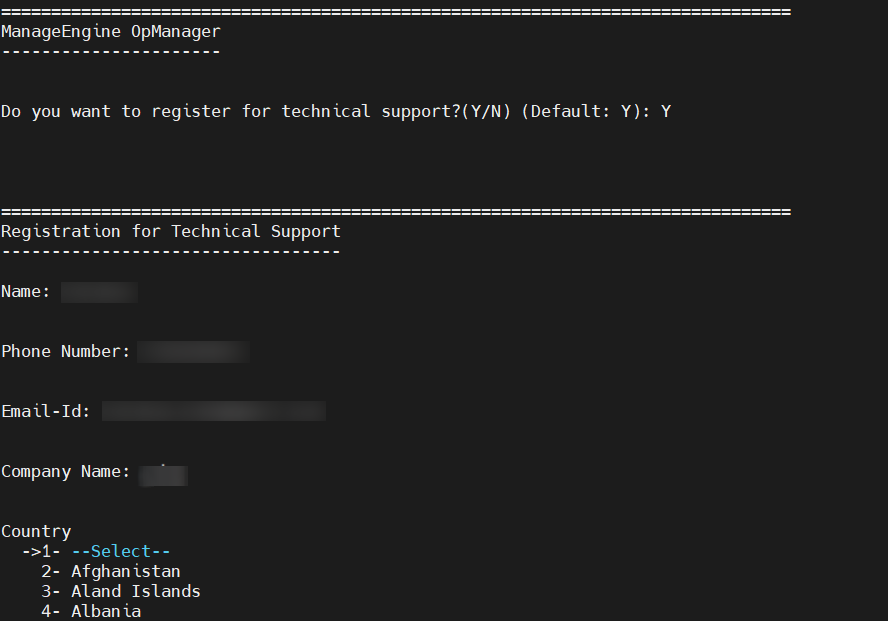
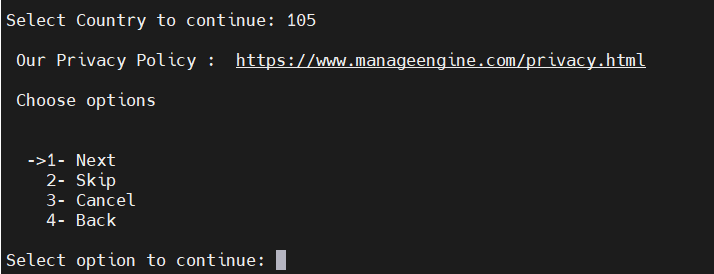
- Select your country from provided list and enter the corresponding numerical value to continue.
- Review ManageEngine’s Privacy Policy, then choose from the available options (Next, Skip, Cancel, or Back) to continue.
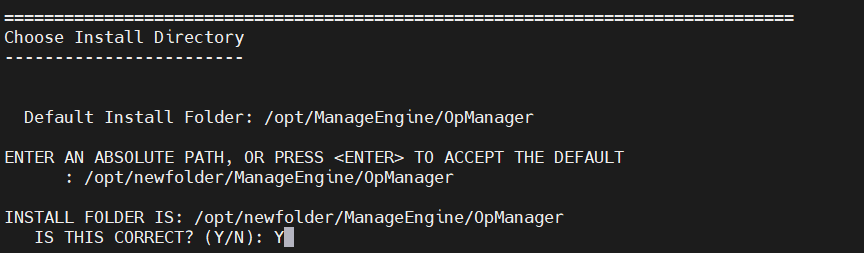
- Specify the Installation Directory. You can either choose the default folder or provide an absolute path for the directory and press Enter to continue.
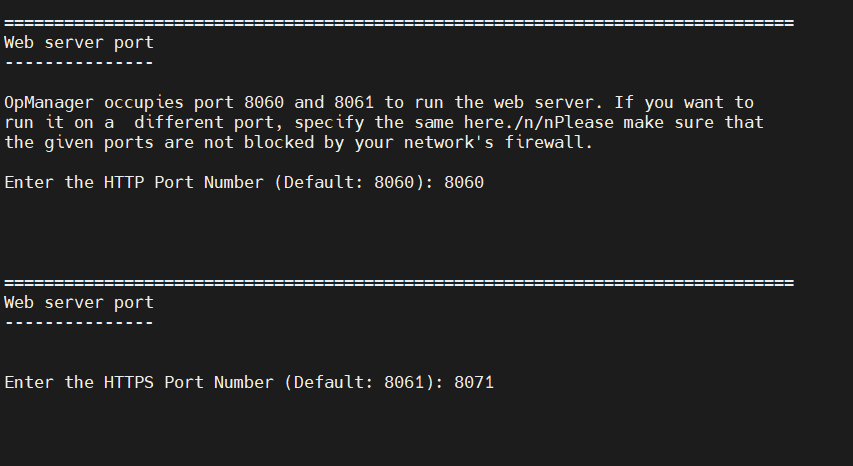
- Enter the Web Server Port to run the web server. By default OpManager occupies the ports 8060 and 8061. If needed you can enter any other available ports. Ensure that ports provided are open and not blocked.
- After entering the port numbers, a Pre-installation Summary will be displayed with product and disk space details.
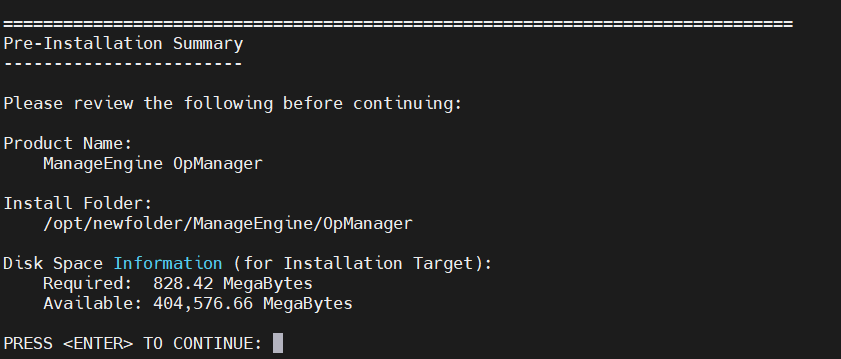
- After reviewing, press Enter to proceed with the installation.
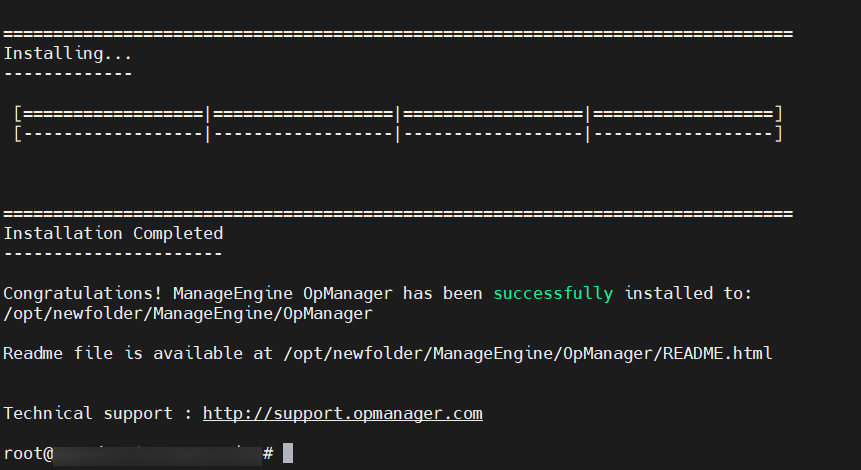
- Wait for the installation to complete successfully.
After installation, navigate to the bin directory in your device using the following command:
cd <OpManager_Home>/binStart Opmanager by running the following command:
sh StartOpManager.sh
After starting the service successfully, you can open the OpManager UI through the configured web server port.
Installing OpManager on Linux with MSSQL database
From version 12.8.330, MSSQL database is supported for Linux setups. As of now MSSQL database cannot be configured directly from the installation wizard for OpManager's Linux installation. Instead, perform a default installation with PgSQL database in Linux environment and then migrate the database to MSSQL.
Note: MSSQL database is not included with the setup for Linux installations.
Steps to migrate to MSSQL DB
After installing, follow the below steps before starting the product, to migrate from PgSQL to MSSQL database in Linux installations.
- Step 1: In terminal, go to <OpManager_Home>/bin directory and execute the DBConfiguration.sh file.
- Step 2: Provide the SQL server details with the DB name.
- Step 3: Leave the Migrate data from existing database option unchecked.

- Step 4: Then, click OK to start migration.
A success message will be displayed in a dialog box after the migration is successful.
Note:
- The DBConfiguration.sh file can be executed either directly from the Linux machine or from X11 enabled environments.
- Executing DBConfiguration.sh from the console mode is currently not supported.
- For BCP utility details, please refer this link.
Installing OpManager with Kingbase DB
From version 12.8.658 onwards, OpManager supports the Kingbase database. Currently, the Kingbase database option is not available in the InstallShield wizard during installation. To use Kingbase, you must install OpManager with the default PostgreSQL (PgSQL) database option and then reconfigure the database to Kingbase using DBConfiguration, as outlined in the steps below.
The DBConfiguration method is applicable for both Windows and Linux. However, on Linux, this method is supported only in X11-enabled environments or when accessed directly from the Linux machine.
- Install OpManager using the PgSQL database option. Do not start OpManager after installation.
- Open the command prompt/terminal and navigate to <OpManager_Home>/bin.
- Execute the DBConfiguration script as shown below:
- Windows: DBConfiguration.bat -showKingbaseDB
- Linux: sh DBConfiguration.sh -showKingbaseDB
- Select Kingbase from the database options, provide the required database details, and click OK.
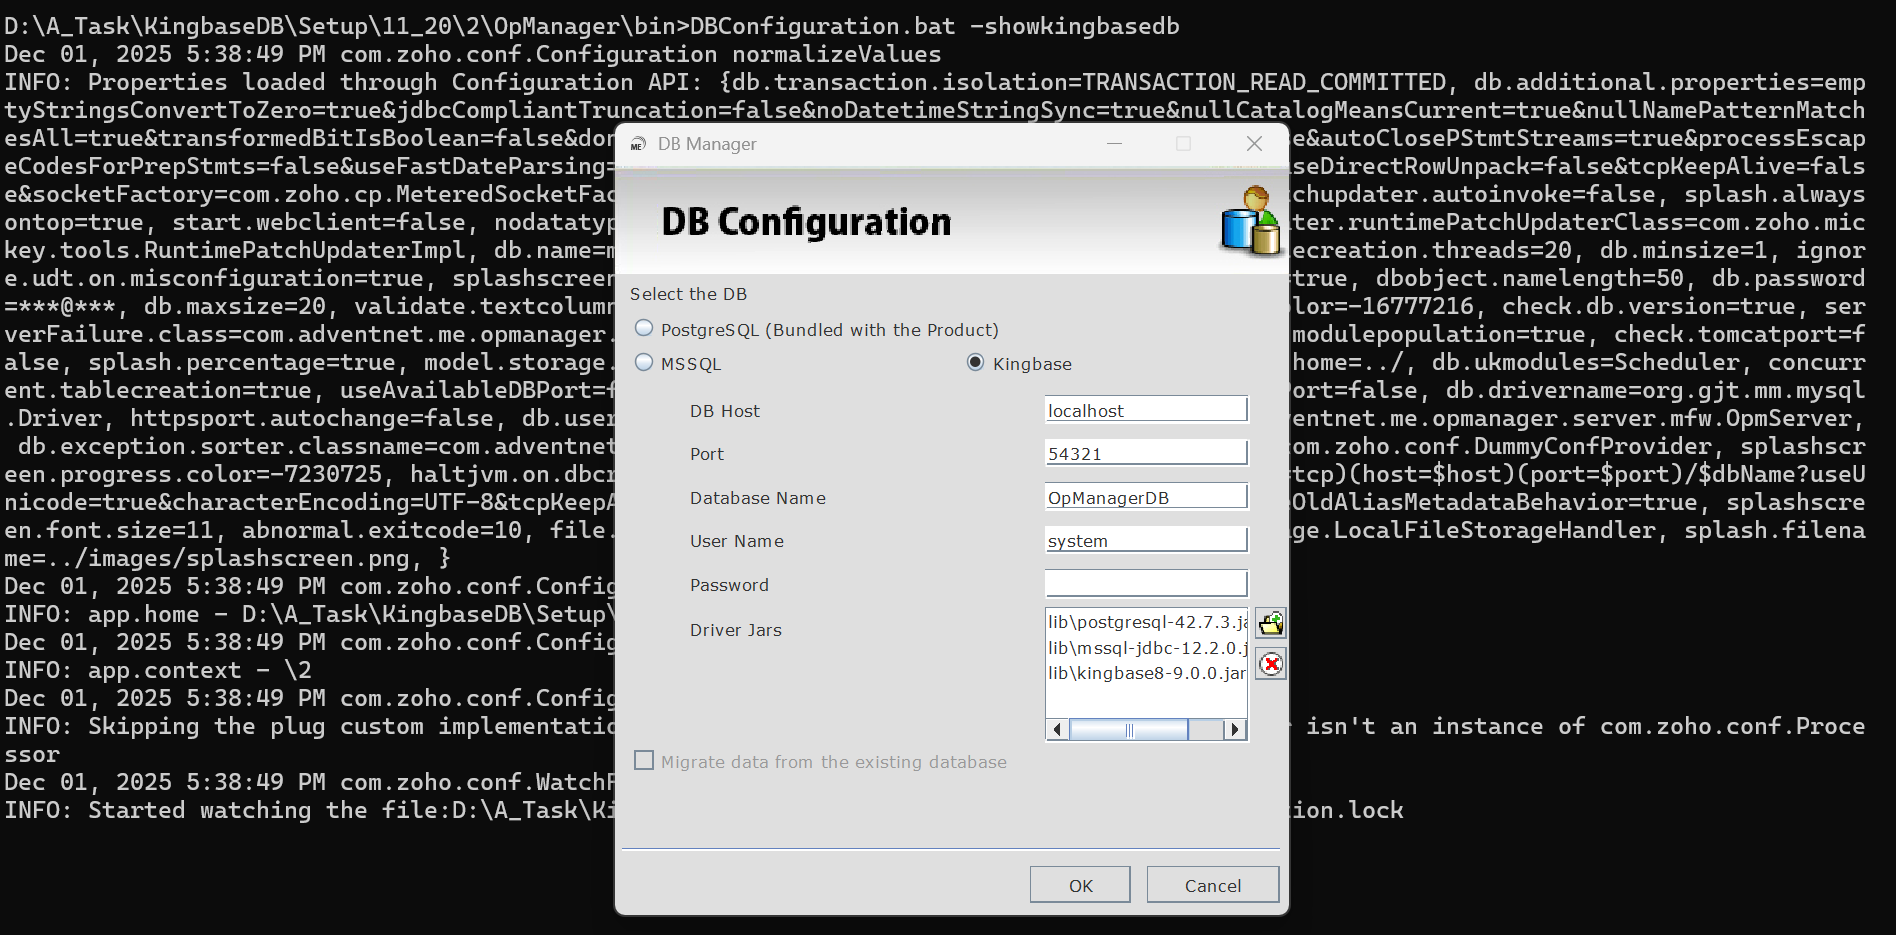
- Configure the Read-Only User (ROUser) by following the steps provided below.
- Start OpManager.
Read only user configuration
Similar to the ro_user configured for remote PgSQL, you must configure a read-only user for the Kingbase database.
- Connect to the Kingbase database used by OpManager.
- Execute the following queries:
- CREATE USER rouser WITH PASSWORD "<ROPASSWORD>"
Replace <ROPASSWORD> with a password of your choice and skip this step if the user already exists.
Example: CREATE USER rouser WITH PASSWORD 'RO_PASSWORD'; - REVOKE ALL ON SCHEMA public FROM rouser, public;
- GRANT CONNECT ON DATABASE "<DatabaseName>" TO rouser, public;
Replace <DatabaseName> with the OpManager database name.
Example: GRANT CONNECT ON DATABASE "Product_Name_DB" TO rouser, public; - GRANT USAGE ON SCHEMA public TO rouser, public;
- GRANT SELECT ON ALL TABLES IN SCHEMA public TO rouser, public;
- ALTER DEFAULT PRIVILEGES FOR ROLE <Superuser> IN SCHEMA public GRANT SELECT ON TABLES TO rouser, public;
Replace <Superuser> with the Superuser of the Kingbase database.
Example: ALTER DEFAULT PRIVILEGES FOR ROLE system IN SCHEMA public GRANT SELECT ON TABLES TO rouser, public; - GRANT USAGE ON SCHEMA public TO rouser;
- GRANT SELECT ON ALL TABLES IN SCHEMA public TO rouser;
- ALTER DEFAULT PRIVILEGES IN SCHEMA public GRANT SELECT ON TABLES TO rouser;
- CREATE USER rouser WITH PASSWORD "<ROPASSWORD>"
- Edit the file <OpManager_Home>/conf/database_params.conf and add the following entry at the end. Use the same password specified in step 2.a.
- ro_password=<ROPASSWORD>
Example: ro_password=RO_PASSWORD
- ro_password=<ROPASSWORD>
Installing OpManager on CIS Hardened server
Before installing the product, please check for the 'execute' permission in the /tmp directory with the 'mount' command. If the command returns the line containing /tmp as 'noexec' as highlighted below, it depicts that we aren't allowed to execute any file under the /tmp directory [even if the /tmp directory has 777 permission(i.e. rwxrwxrw)] due to which our installation might throw errors.
[root@ip-172-31-44-74 /]# mount | grep /tmp
tmpfs on /tmp type tmpfs (rw,nosuid,nodev,noexec,seclabel)
In such a case, we can go ahead with one of the below approaches:
a) Modify the 'noexec' permission in the /tmp directory to 'exec'.
To modify the permission in the /tmp directory, we would have to remount the directory with 'exec' permission with the below command:
mount -o remount,exec /tmp
b) Use another directory as temp directory for installation:
To use another directory as temp directory for the installation, we would have to create a tmp directory under any directory (preferrably /opt since it would have full access) and then mark it as temp before installing the product with the below commands:
mkdir /opt/tmp
export IATEMPDIR=/opt/tmp
Note: When following the first approach, it's advisable to remount the tmp directory with the noexec permission after a successful installation and verification of the product's functionality. Allowing the tmp directory to be executable could pose a security risk, as the directory typically has worldwide access (777 - rwxrwxrw) by default. To revoke this permission, use the following command:
mount -o remount,noexec /tmp
Regarding the second approach, it's important to note that the IATEMPDIR is simply an environmental variable, and any changes made to it will be reverted once the particular terminal session is closed.
After performing the above, please proceed with the installation of OpManager.
Note: The above mentioned steps have been carried out in Red Hat Enterprise Linux 7 OS with hardening level of CIS Benchmark - Level 1 machine.
Starting OpManager on Linux
Steps for starting the setup as a service:
1. Install the product
2. Go to > <OpManager Home>/bin/
3. run the linkAsService.sh file by (sh linkAsService.sh)
4. Then start the product
systemctl start OpManager.service (or) /etc/init.d/OpManager.service
Note:
- Step 4 may vary based on the linux OS type and its version.
- After starting OpManager, enter the "cat nohup.out" command to see start up information.
Post Installation Quick links