A dynamic distribution group is a mail-enabled group in Microsoft Exchange Online whose membership is not maintained manually. Instead of adding and removing people manually, you define a recipient filter with conditions such as department or company. Exchange Online uses these recipient attributes to maintain a calculated group membership list, which is refreshed at least once every 24 hours. This keeps a department or location mailing list accurate on its own as people join, move, and leave.
There are three practical ways to create one: with the New-DynamicDistributionGroup cmdlet in Exchange Online PowerShell, the Exchange admin center (EAC), and ManageEngine ADManager Plus. This guide covers all three, along with how to build and preview recipient filters and how to troubleshoot a group that returns the wrong members.
A regular (static) distribution group has a fixed member list that an administrator maintains. A dynamic distribution group has no stored membership at all; its members are calculated whenever mail is sent to it by evaluating the recipient filter against the current directory. The advantage is that the group never goes stale, so a group defined as everyone in Sales always reaches the current sales staff. The trade-off is that you can't add a separate member who does not match the filter, and membership is only as accurate as the recipient attributes the filter depends on. Because membership is recalculated at send time, there is no manual conversion from a static list to a dynamic one; you create a new dynamic distribution group whose filter matches the intended people.
New-DynamicDistributionGroup creates the group in one command. There are two ways to define membership, and they are mutually exclusive: precanned filters (the same conditions as the EAC) or a custom recipient filter.
The precanned approach uses IncludedRecipients with one or more Conditional attribute parameters. This creates a group of every mailbox user in the Marketing department:
New-DynamicDistributionGroup -Name "Marketing Team" -IncludedRecipients "MailboxUsers" -ConditionalDepartment "Marketing"
For conditions the precanned parameters can't express, such as combining departments with or logic, use RecipientFilter with an OPATH filter string instead. Note that you can't use RecipientFilter together with IncludedRecipients or the Conditional parameters in the same command:
									New-DynamicDistributionGroup -Name "Marketing and Sales" `

									-RecipientFilter "(RecipientTypeDetails -eq 'UserMailbox') -and (Department -eq 'Marketing' -or Department -eq 'Sales')"
A custom RecipientFilter is written in OPATH, the filter syntax Exchange uses. Conditions take the form property -operator 'value', and you combine them with logical operators. The operators you will use most are -eq (equals), -ne (not equal), -like and -notlike (wildcard match), and -and, -or, and -not to combine conditions. Wildcards with -like are supported only as a prefix or suffix, such as Department -like 'Sales*'.
Common filterable properties include Department, Company, StateOrProvince, Office, Title, and RecipientTypeDetails. A more selective filter simply chains more conditions:
									New-DynamicDistributionGroup -Name "US Sales Managers" `

									-RecipientFilter "(RecipientTypeDetails -eq 'UserMailbox') -and (Department -eq 'Sales') -and (Title -like 'Manager*') -and (StateOrProvince -eq 'US')"
When the standard attributes don't capture how you need to segment recipients, Exchange provides 15 custom attributes, CustomAttribute1 through CustomAttribute15 (also called extension attributes), that you can populate with any value and filter on. This is the usual way to build a group for a project, a mailing preference, or any grouping that doesn't map to a directory field. For example, assign a project code to CustomAttribute1 and filter on it:
									New-DynamicDistributionGroup -Name "Project Falcon" `

									-RecipientFilter "(RecipientTypeDetails -eq 'UserMailbox') -and (CustomAttribute1 -eq 'Falcon')"
To change a group's filter after creation, use Set-DynamicDistributionGroup -Identity "<name>" -RecipientFilter "<new filter>". The new filter takes effect the next time mail is sent to the group.
Exchange Online maintains a calculated membership list for each dynamic distribution group. To preview which recipients currently match the group’s filter, retrieve the group and pass its filter to Get-Recipient with -RecipientPreviewFilter:
									$DynamicDistributionGroup = Get-DynamicDistributionGroup -Identity "Marketing and Sales"

									Get-Recipient -RecipientPreviewFilter $DynamicDistributionGroup.RecipientFilter |

									Select-Object Name, PrimarySmtpAddress, Department
The preview helps validate your filter, but its results may differ from the stored membership until the list is refreshed.
The parameters and cmdlets below are used for dynamic distribution group tasks in Exchange Online PowerShell.
| Parameter or cmdlet | Description |
|---|---|
| New-DynamicDistributionGroup | Creates the dynamic distribution group. |
| -Name | The name of the group. |
| -IncludedRecipients | The recipient types to include, such as MailboxUsers or AllRecipients (precanned filter). |
| -ConditionalDepartment | A precanned condition; similar parameters exist for company, state, and custom attributes. |
| -RecipientFilter | A custom OPATH filter string; can't be combined with the precanned parameters. |
| -RecipientContainer | Scopes the group to a specific OU or domain. |
| Get-DynamicDistributionGroup | Retrieves a group and its stored filter, used for previewing membership. |
| Get-Recipient -RecipientPreviewFilter | Lists the recipients a filter currently matches. |
| Set-DynamicDistributionGroup | Modifies an existing group, such as changing its filter. |
You can also create a dynamic distribution group through the EAC without using PowerShell commands.
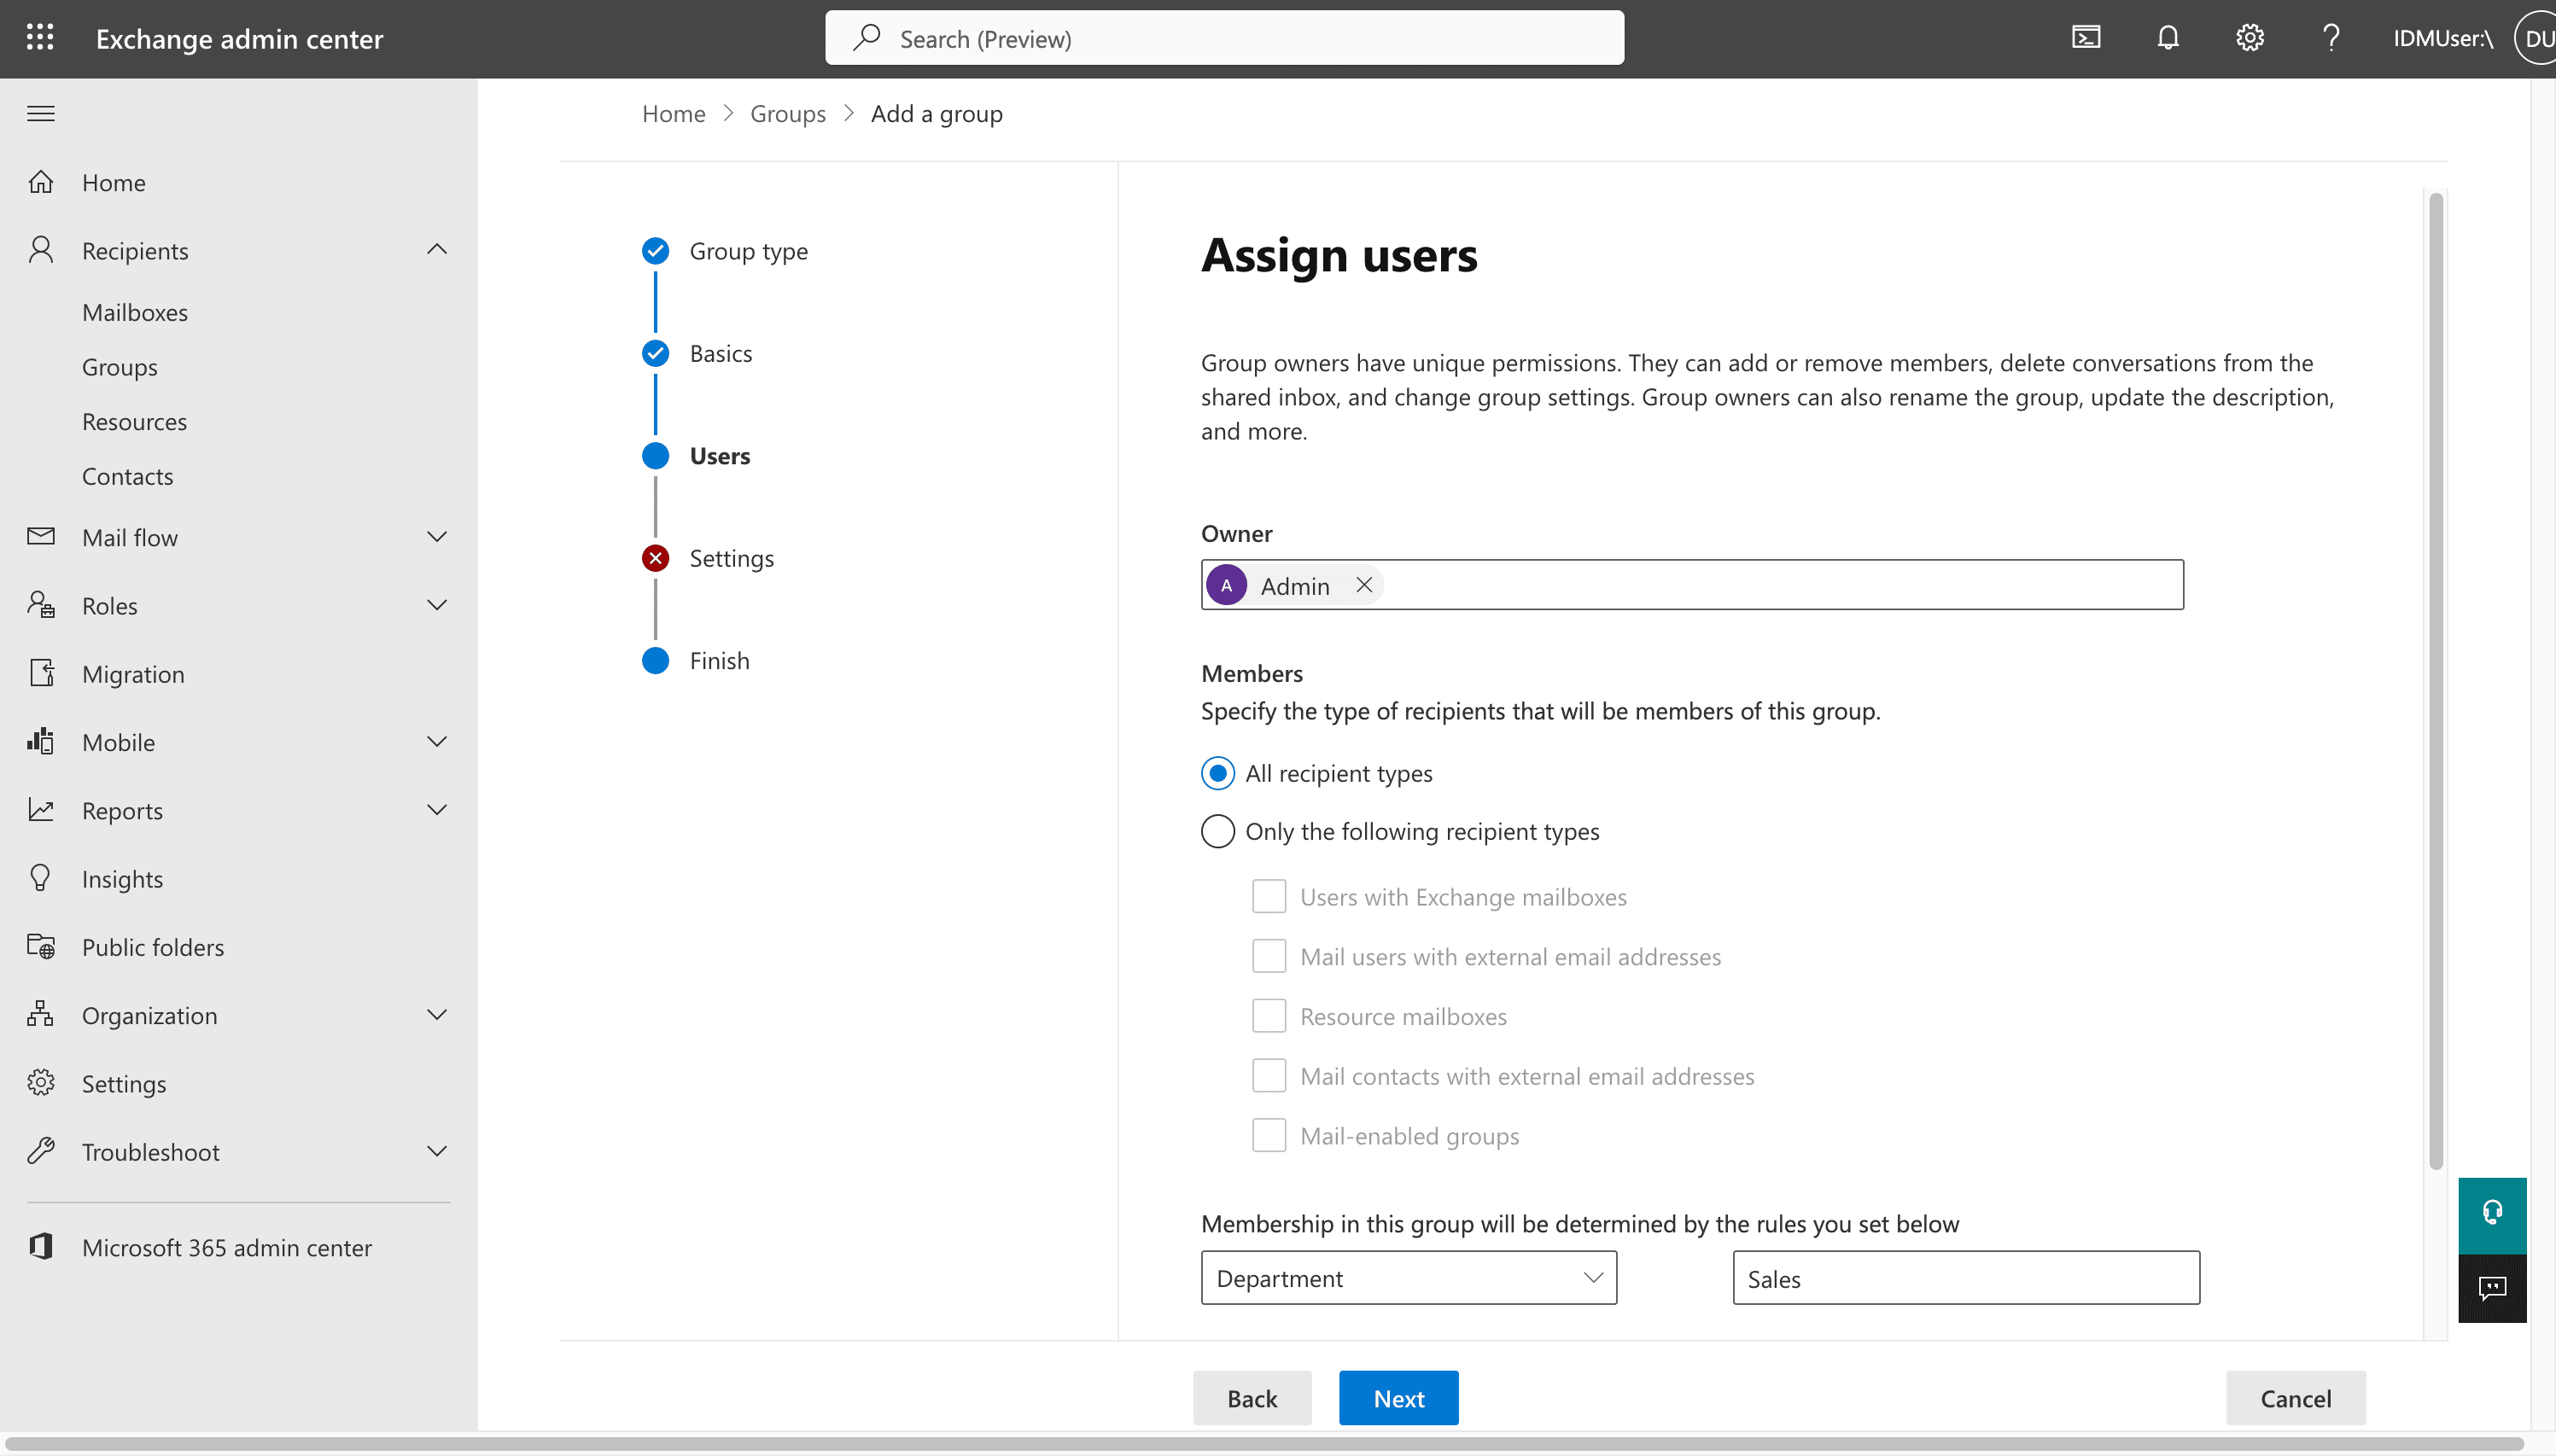
The rules you set in the EAC are what Exchange calls precanned filters: built-in conditions based on common recipient attributes, such as department, company, or state or province. They cover most everyday groups (e.g., all mailboxes in Marketing) without any filter syntax. For conditions the EAC form can't express, you use a custom recipient filter.
Every dynamic distribution group scopes to one or more recipient types through the IncludedRecipients setting, which the EAC exposes as the member-type choice. Its values are AllRecipients, MailboxUsers, MailUsers, MailContacts, MailGroups, and Resources. For a staff mailing list you would use MailboxUsers; AllRecipients includes every mail-enabled object. This setting pairs with the conditional attributes to define who the group contains.
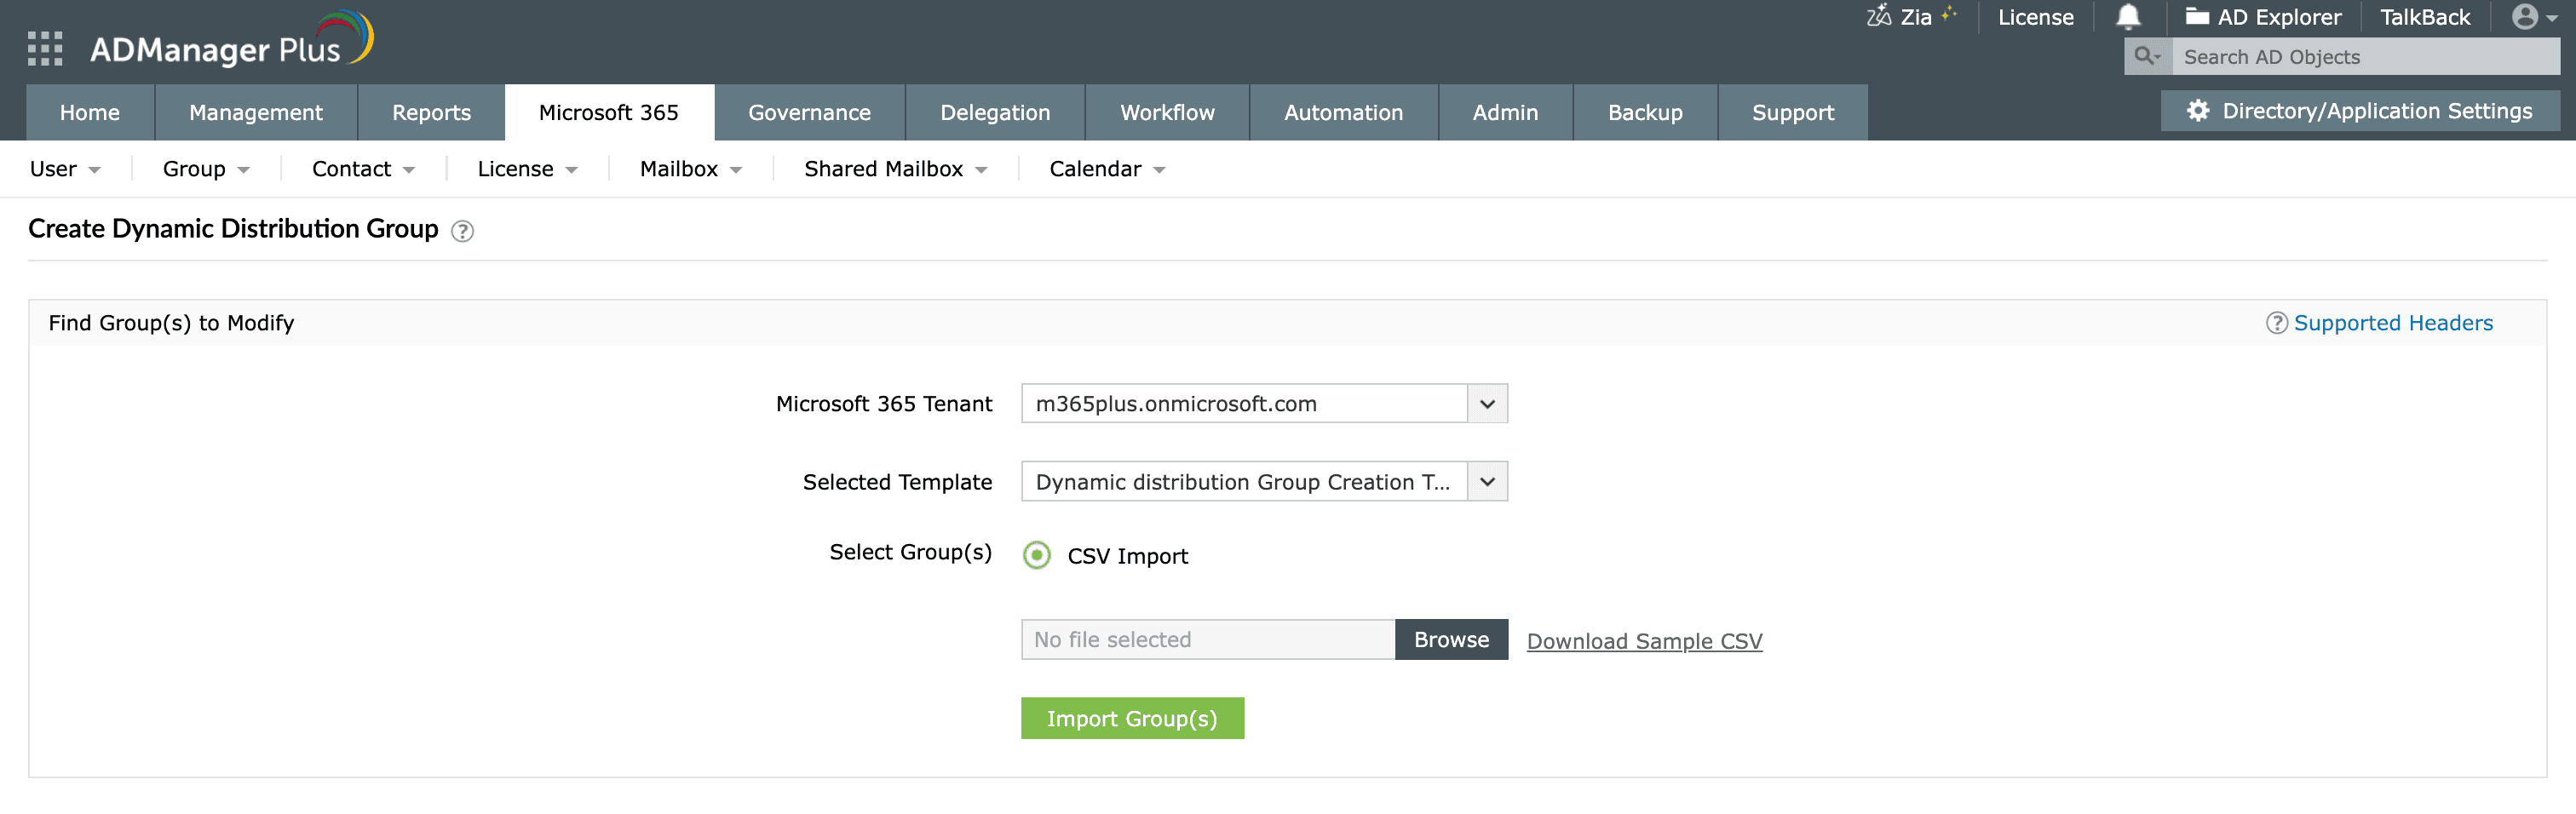
ADManager Plus is a unified AD, Exchange, and Microsoft 365 management and reporting tool that creates dynamic distribution groups through a point-and-click console, including creating many at once from a CSV file, with no filter syntax to write.
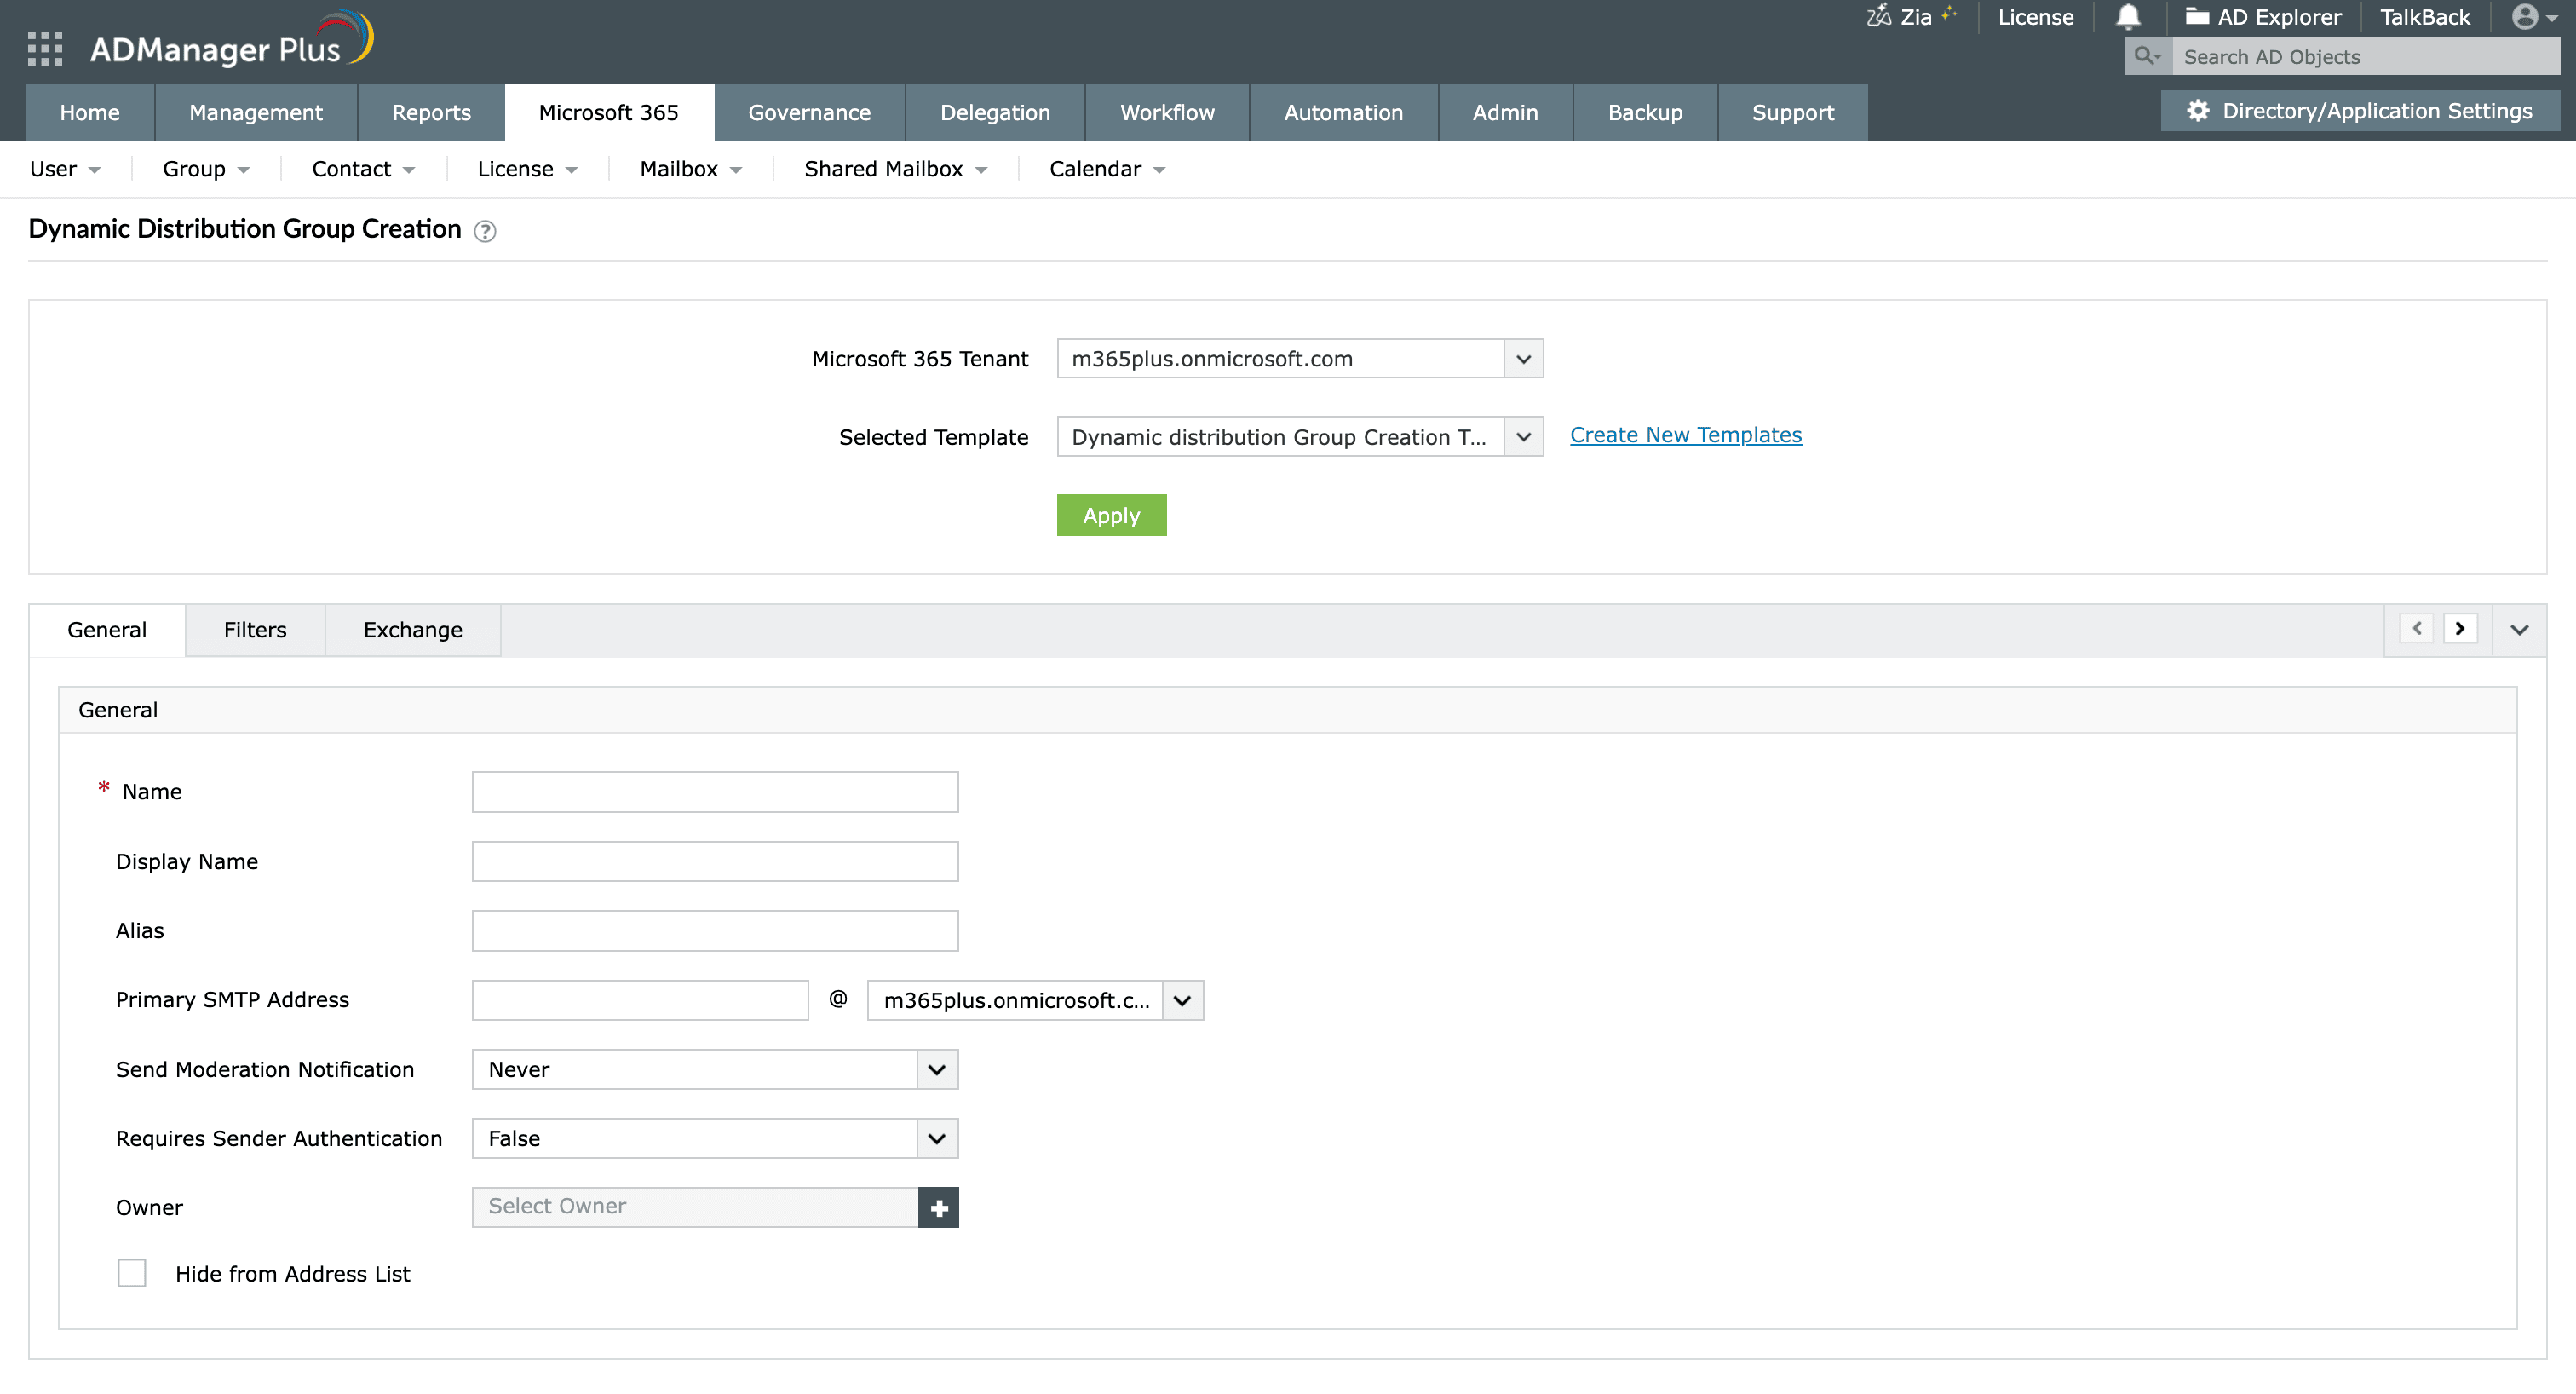
Verify that the group was created by generating the Dynamic Distribution Groups report.
Both native methods create dynamic distribution groups reliably, but each has limitations that show as the environment and the requirements grow:
ADManager Plus replaces scripts and one-off portal work with a single console for AD, Microsoft 365, and Exchange management and reporting:
The New-DynamicDistributionGroup cmdlet is used to create a dynamic distribution group. For example, run the following command in an Exchange Online PowerShell session after connecting with Connect-ExchangeOnline:
New-DynamicDistributionGroup -Name "Marketing" -IncludedRecipients "MailboxUsers" -ConditionalDepartment "Marketing"
Use -RecipientFilter instead of the conditional parameters when you need custom OPATH logic.
To create a static distribution group, use New-DistributionGroup -Name "<name>" in PowerShell, or Add a group > Distribution in the EAC, then add members explicitly. A static group has a fixed member list you maintain, unlike a dynamic group whose members come from a filter.
No, there is no direct conversion, since a static distribution group and a dynamic distribution group are different object types. To move to a dynamic group, create a new dynamic distribution group with a recipient filter that matches the same people, confirm the membership with the preview command, and then decommission the old static list once you are satisfied it matches.
To view the group's calculated membership in Exchange Online, run:
Get-DynamicDistributionGroupMember -Identity "Marketing"
To preview recipients who currently match the group's filter criteria, run:
												$DynamicDistributionGroup = Get-DynamicDistributionGroup -Identity "Marketing"

												Get-Recipient -RecipientPreviewFilter $DynamicDistributionGroup.RecipientFilter
For a script-free approach, ADManager Plus offers the Dynamic Distribution Groups report.

