Discovering Nutanix clusters in OpManager
Nutanix is a vendor of distributed computing and storage virtualization solutions, specialising in an area called 'Hyperconverged Infrastructure'. Basically, the idea is to provide an all-inclusive virtual environment, including the storage component of the VM itself. This is to enable data requests to be handled inside the VM itself instead of being sent to an external storage, and so the latency for data retrieval and access reduces to a negligible level.
OpManager makes use of the Prism API framework to fetch performance metrics from the devices in the Nutanix environment.
Discovering your Nutanix cluster into OpManager
- Enter the IP address or DNS name of the Nutanix cluster.
- From the Nutanix Credential drop-down, select an existing credential profile.
- If the required credential profile is not available, click Add Credential. In the Add Credential (Nutanix) window, provide the following details:
- Click Save to create the credential profile.
- To enable in-depth monitoring of hosts and virtual machines, click Advanced Settings and select the required credential profiles:
- SNMP
- WMI
- CLI
- Click Discover to start discovering the Nutanix cluster.
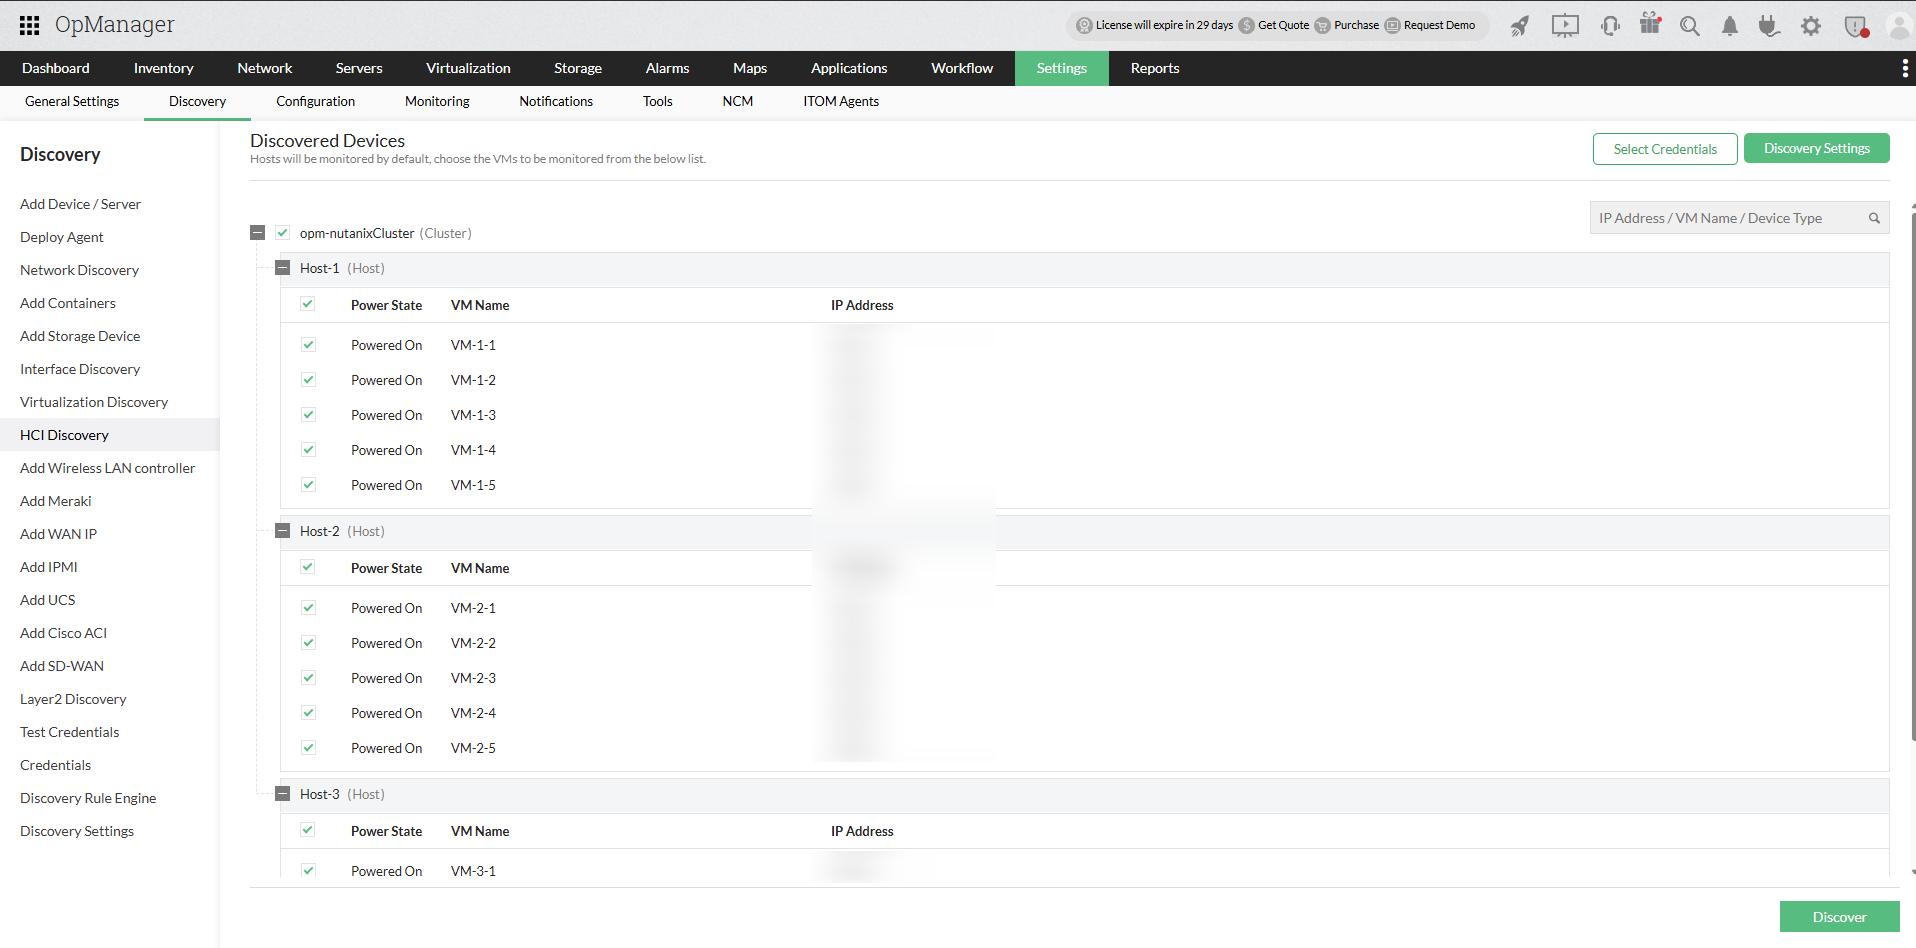
- In the Discovered Devices screen, OpManager lists all hosts and virtual machines under the specified Nutanix cluster.
- Hosts will be discovered by default.
- Select or clear the checkboxes to choose the virtual machines that need to be monitored.
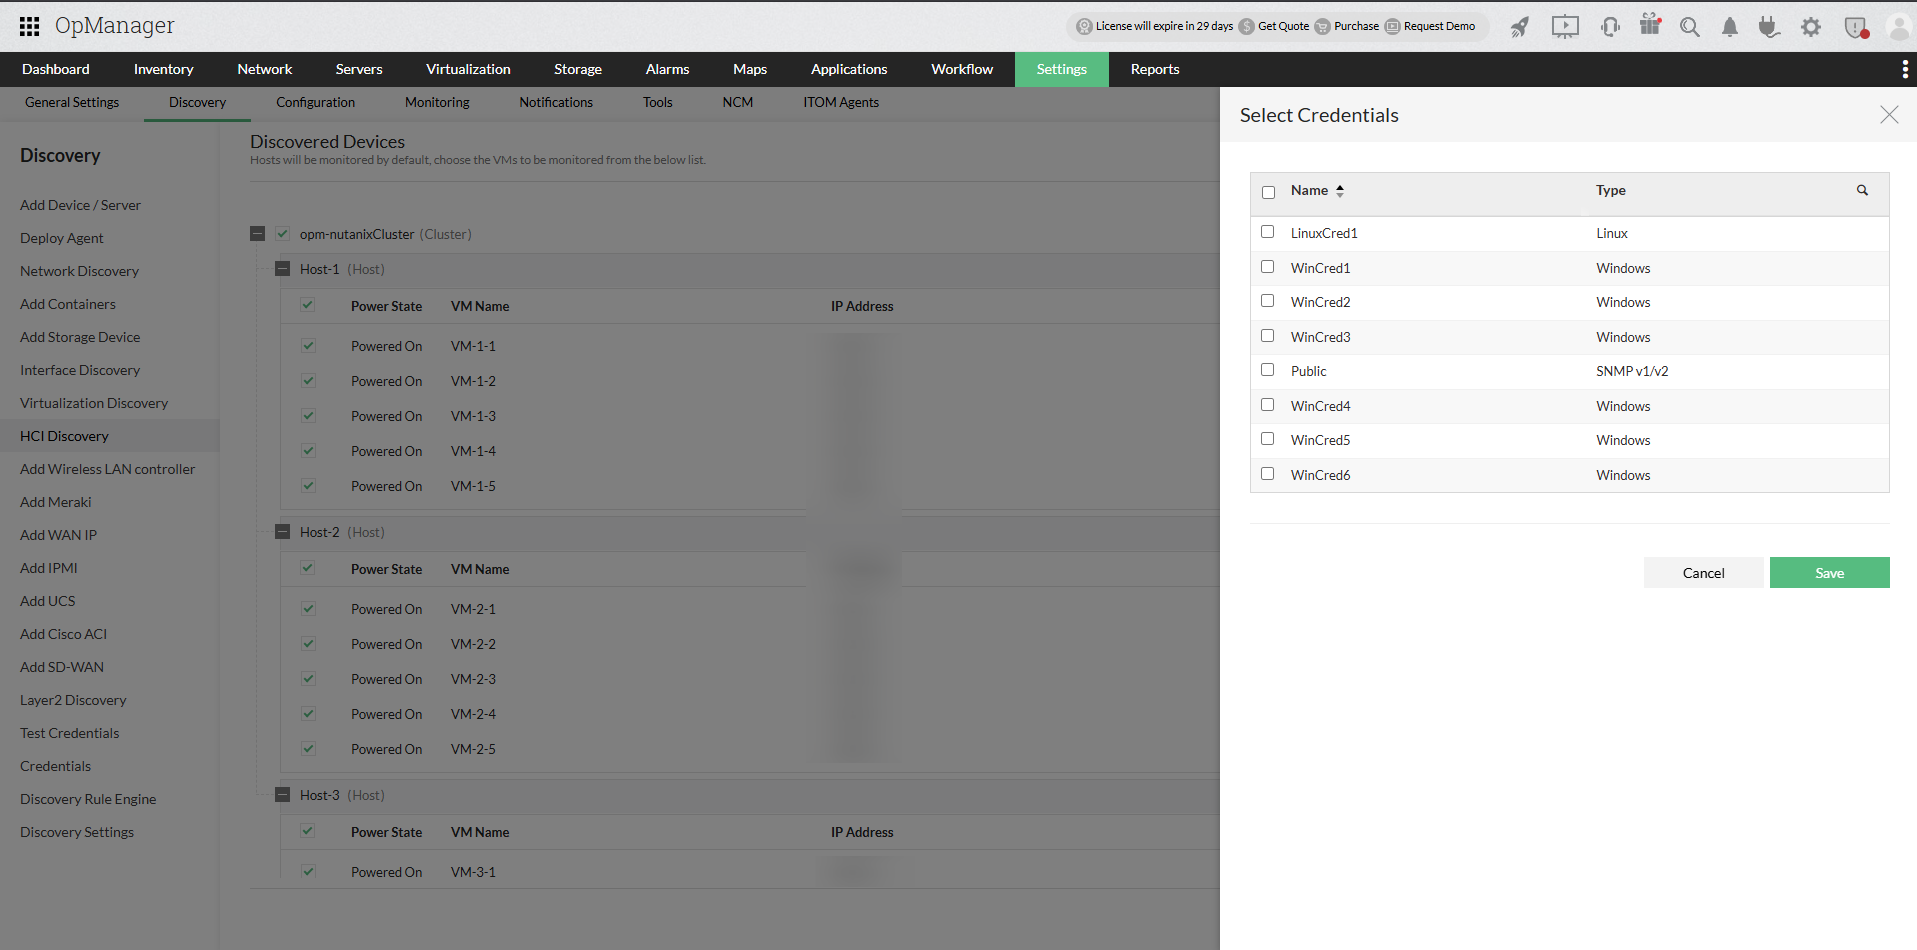
- For OS-level monitoring of the selected hosts and virtual machines, click Select Credentials and choose one or more SNMP, WMI, or CLI credential profiles.
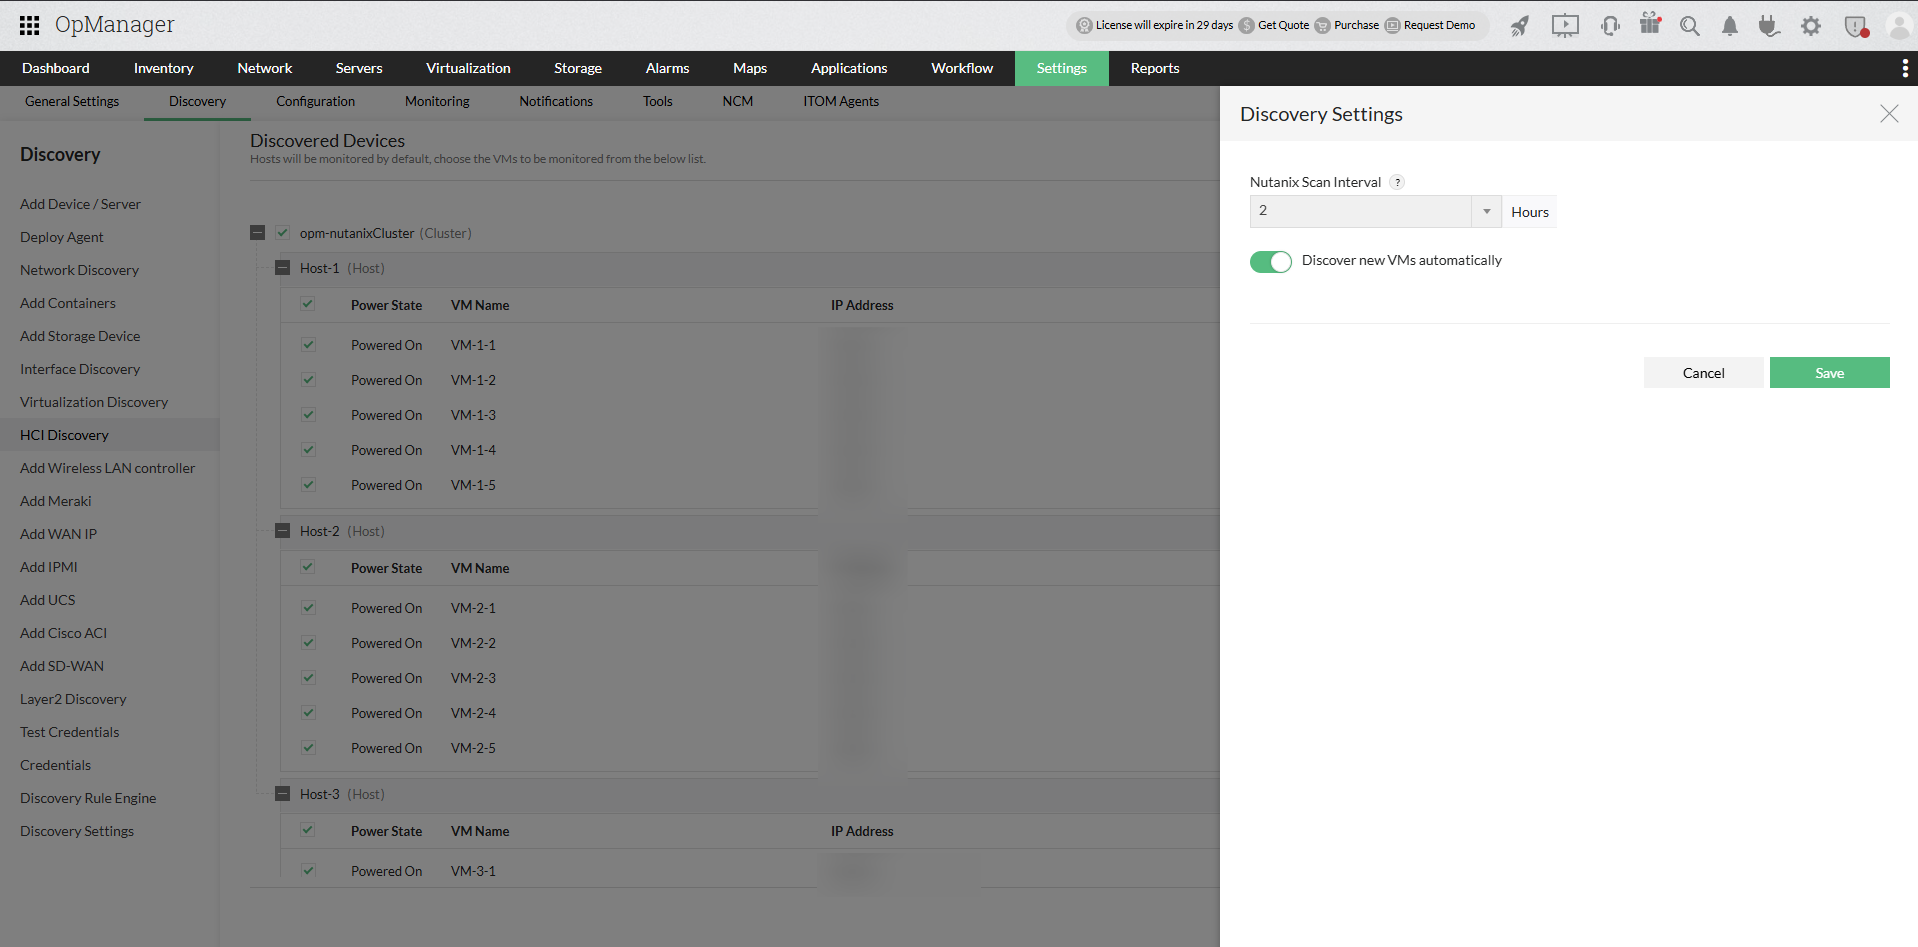
- Click Discovery Settings on the Discovered Devices screen. In the Discovery Settings panel, configure the Nutanix Scan Interval and choose whether to enable or disable automatic discovery of new VMs.
- Click Save to apply the settings.
- Click Discover to proceed. OpManager initiates discovery and adds the cluster, hosts, and selected virtual machines using the configured credentials.
| Field | Description |
|---|---|
| Profile Name | Name of the credential profile |
| Description | Brief description of the credential profile |
| User Name | User name of the Prism Element |
| Password | Password of the Prism Element |
| Protocol | Select HTTP or HTTPS |
| Time Out | Connection timeout value (default: 20 seconds) |
| Port Number | Port used by the Prism Element (default: 9440) |
Once discovery is completed, navigate to Virtualization → Nutanix to view the discovered Nutanix clusters, hosts, and virtual machines.
Frequently asked questions:
- How to discover devices and interfaces in OpManager?
- How to add a new credential?
- Can I add a non-admin user account for WMI?
- Can I add devices using SSH?
- Why are devices discovered as 'Unknown'?
- What are devices supported in OpManager?
- Why are interfaces not discovered for my device?
- How can I associate device templates to a newly discovered device?
- How to associate monitors to the discovered device?
- What is a discovery filter?
- How do I configure a new discovery rule?
- How to manage or unmanage a device?
- How to configure device dependencies?
- How can find the missing VMs and hosts?
- How can I discover a VLAN?.
- How does availability monitoring work in OpManager?
- What are the basic system requirements to install and use OpManager?
- How can I troubleshoot issues with device discovery?
- How can I troubleshoot issues with VCenter/ESX discovery?