User management plays an important role in protecting your network resource monitoring solution from improper usage and in enhancing security. Your IT team might have different users carrying out different tasks with the network resource monitoring solution. Giving all these users complete control over the solution causes security and compliance issues. Each of them only needs access to the necessary modules that allow them to perform their tasks effectively. By restricting access to users based on the tasks they are assigned, you can avoid unauthorized data access, updates, deletions, or modifications.
OpUtils helps you do this with its customized approach to defining who can access your OpUtils console and how. With the role-based access control capability, you can easily set up user profiles for your IT team and define their access levels. With this, users can access only the modules, subnets, and switch ports they are authorized to access. This helps you maintain security without compromising on the level of access users need to carry out their tasks.
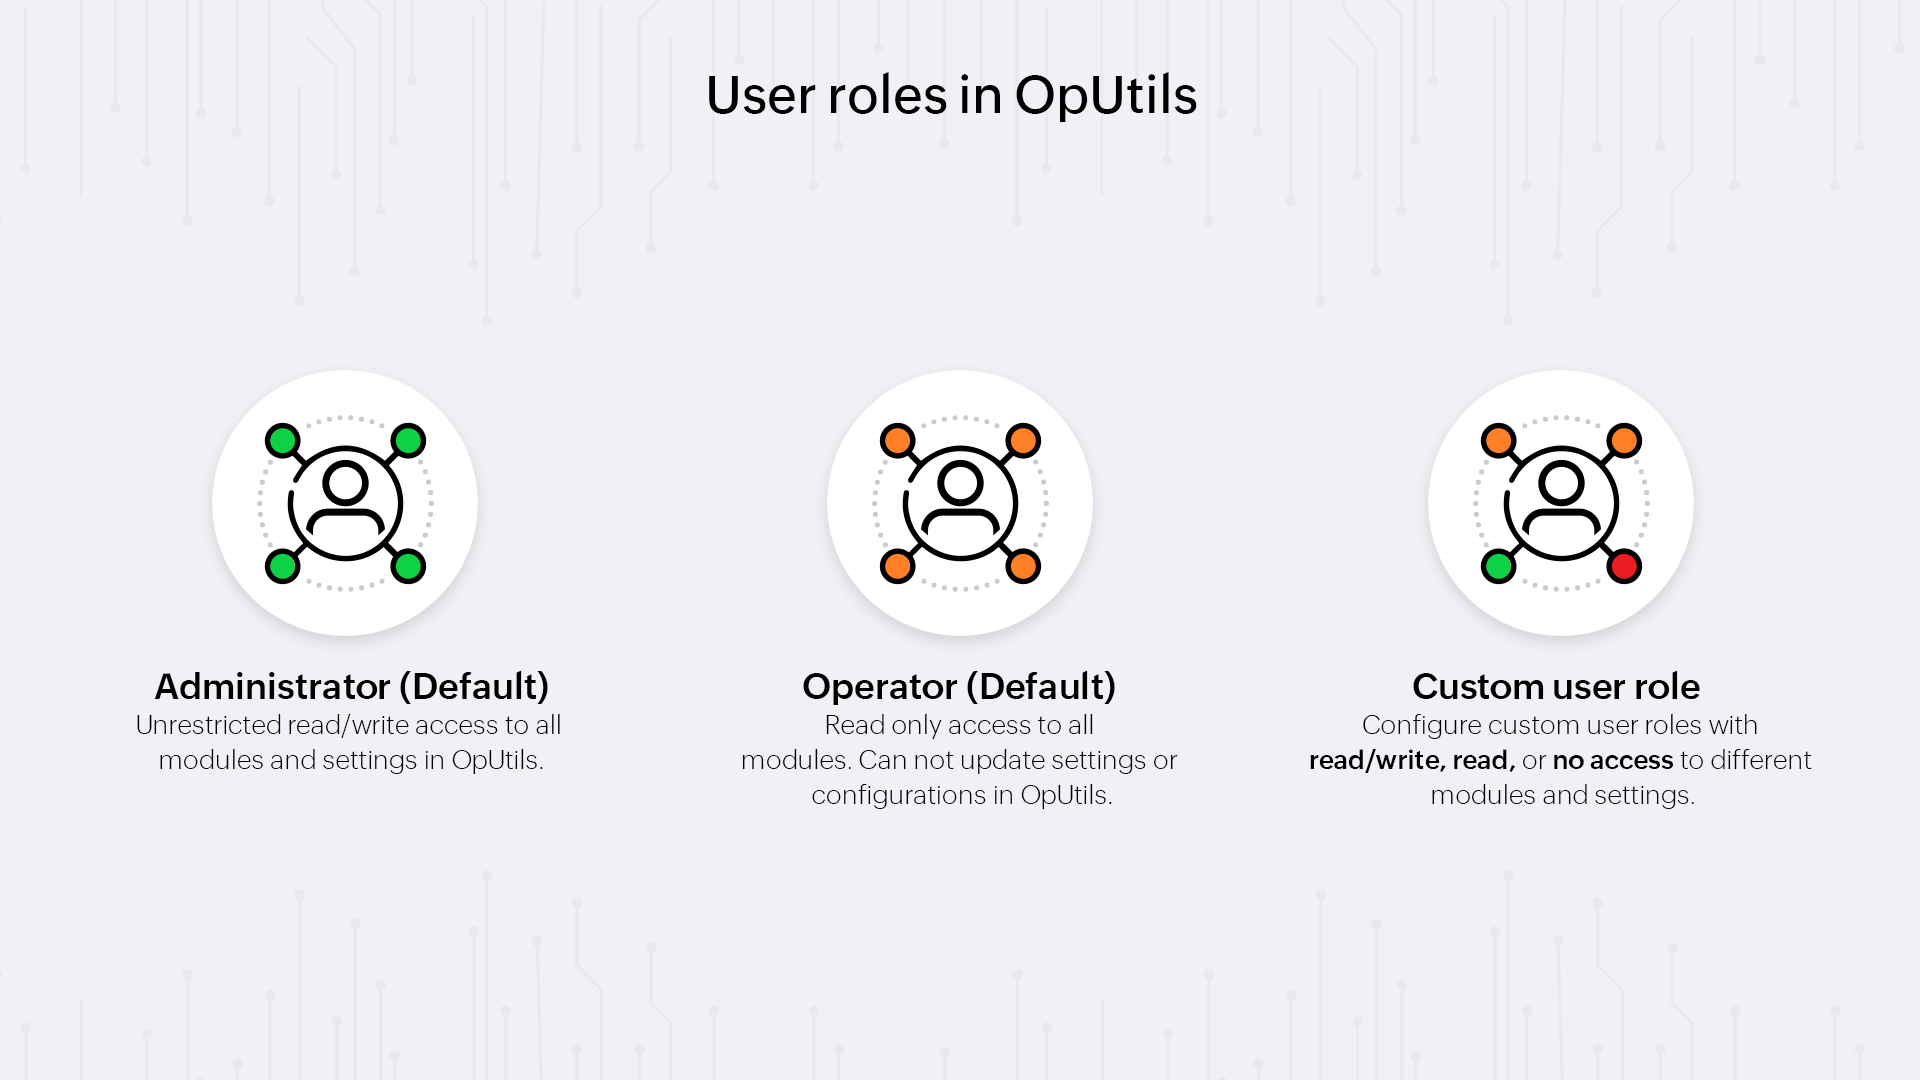
By default, OpUtils offers two user Roles–Administrator and Operator. These Roles are predefined and cannot be modified.
Administrator – This role can be assigned to users who require unrestricted read/write access to OpUtils. They can freely access all the modules and monitored resources such as IP subnets and switch ports without any restrictions to what they can access. They can add, modify, or delete any devices in all the tools and can set up specific configuration parameters like configuring email alerts. They can also set up and delegate different user Roles to different users.
Operator – Users with the Operator role will only have read access to the OpUtils modules and tools. With this restricted access they can view and monitor all modules and tools in OpUtils but cannot add or delete any devices or initiate scanning or other configurations.

Let's say your IT team has different users carrying out different tasks such as a user who manages your IP address space, a user to monitor the switch port mapping, and a group of users who just need to utilize the Networking Tools module. In this case, default Roles might not be what you're looking for, as giving administrator access to users who only need to use the IP Address Manager module will also give them access to the Switch Port Mapper module. You need to configure user Roles that provide enough access to carry out the tasks and no more to avoid misuse of the tool.
In these cases, you can set up custom user Roles for different user groups with OpUtils. Using OpUtils's User Management capability, user Roles can be configured to grant Read/Write, Read, and No Access individually to different modules. This helps you define different access privileges for different users accessing your OpUtils console.
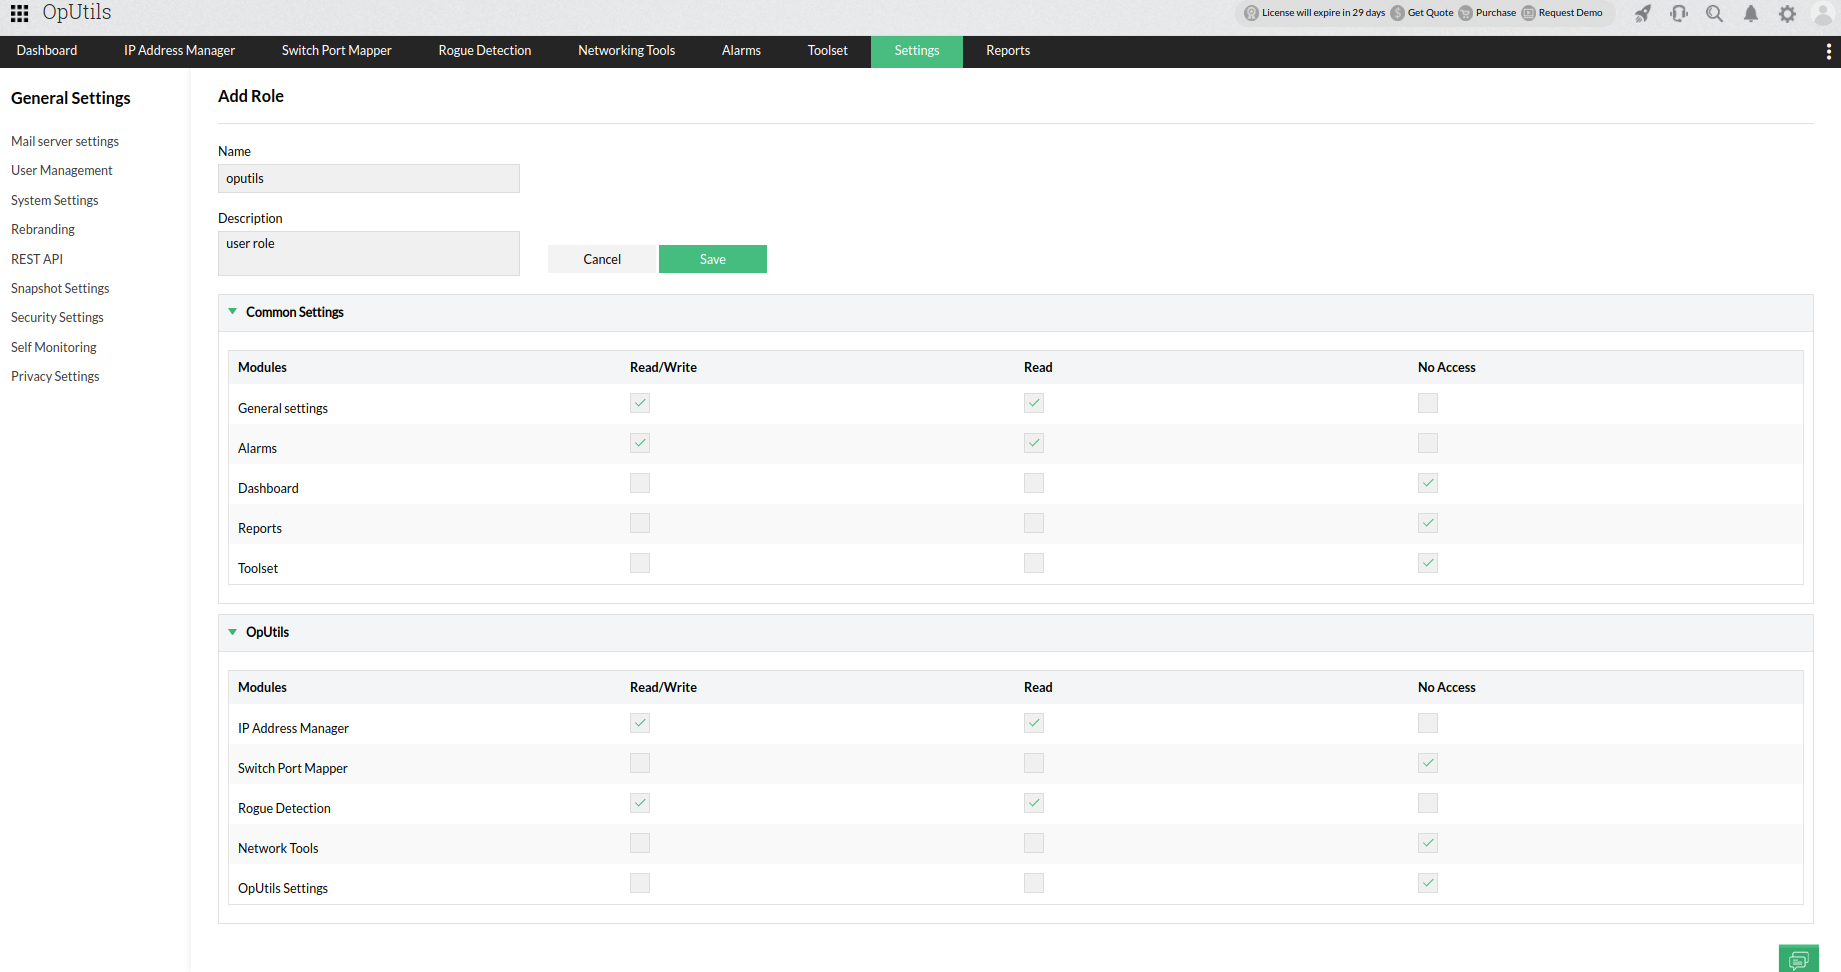
For instance, for the group of users who need to only use the IP Address Manager module, you can configure access to only the required modules as shown below:
| Module | Read/Write | Read | No Access |
|---|---|---|---|
| General Settings | Yes | ||
| Alarms | Yes | ||
| Dashboards | Yes | ||
| Reports | Yes | ||
| Toolset | Yes | ||
| IP Address Manager | Yes | ||
| Switch Port Mapper | Yes | ||
| Rogue Detection | Yes | ||
| Networking Tools | Yes | ||
| OpUtils Settings | Yes |
Now, all the users with this custom user role can only access, modify, or update information pertaining to the IP Address Manager module. This helps you easily designate the right level of access to the right users.
Learn more about User Management and access restrictions for default Roles.
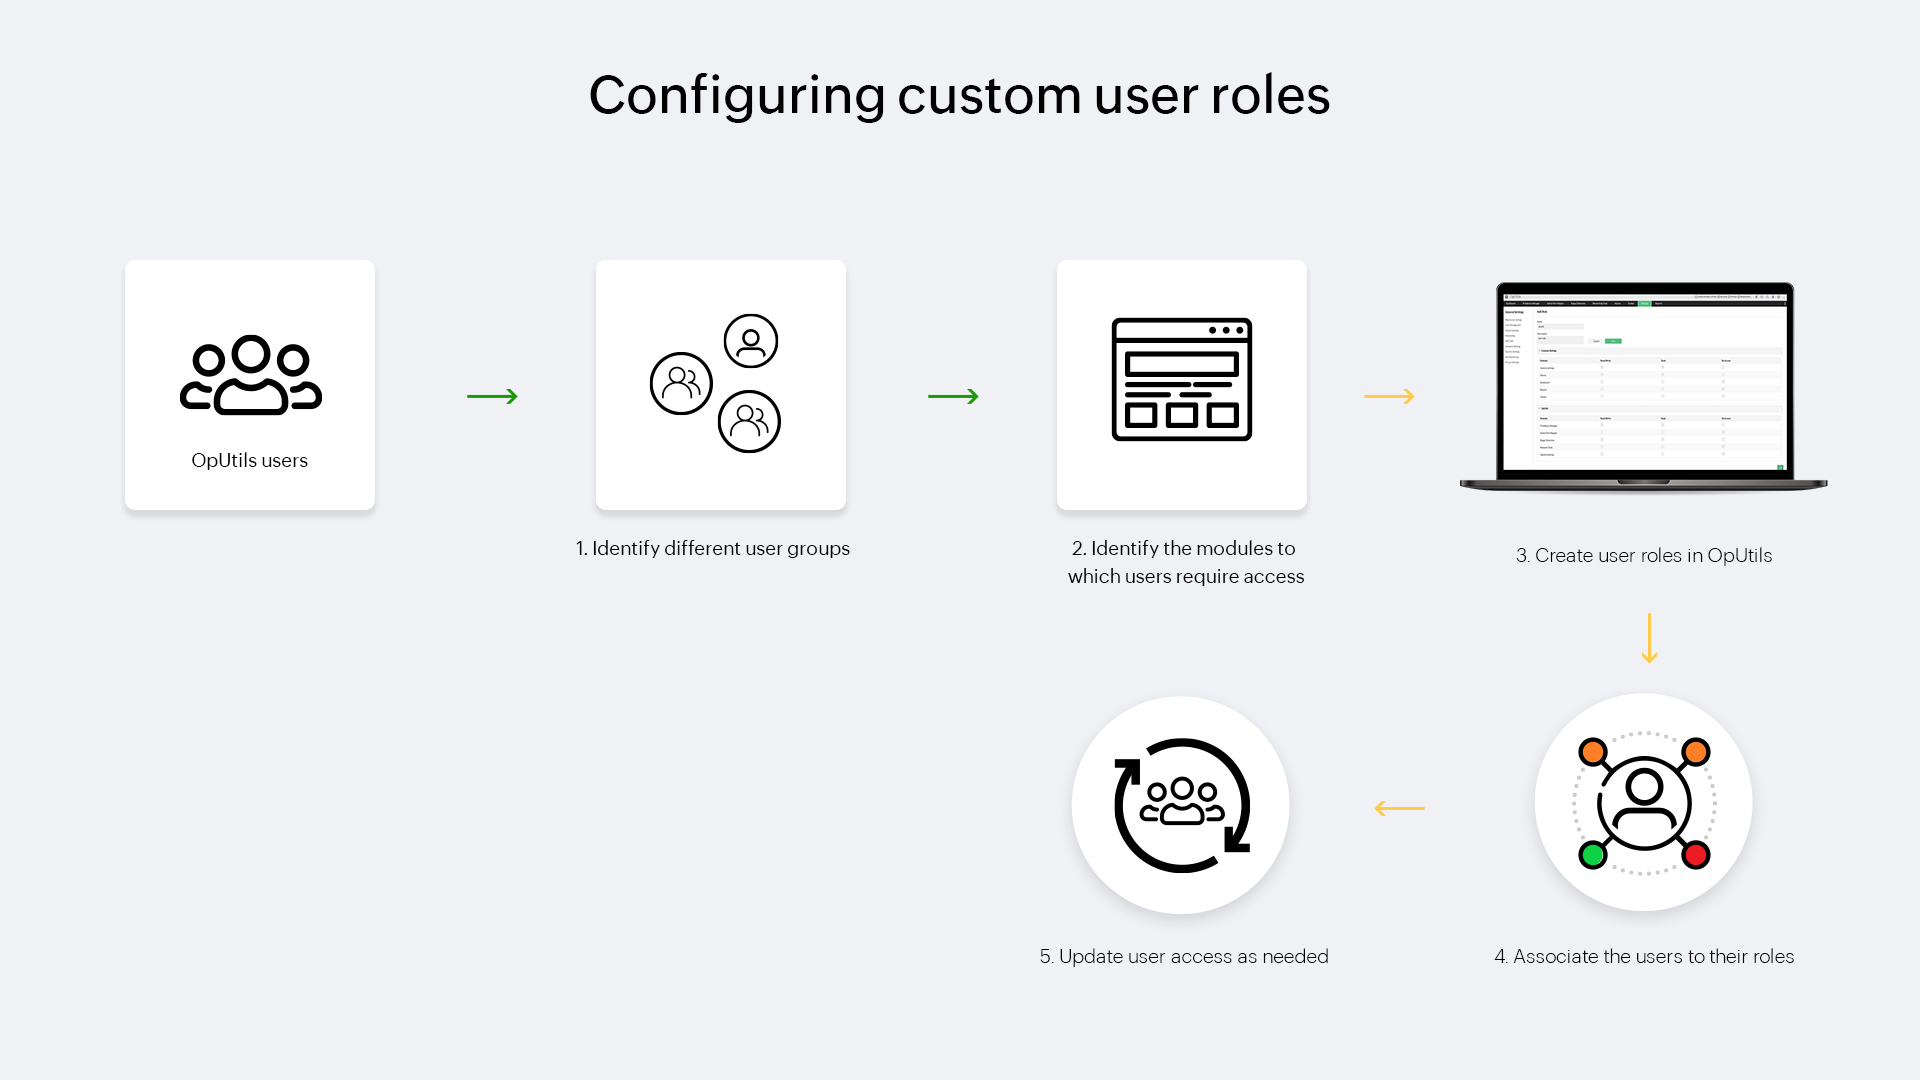
To utilize this capability effectively, we suggest following the steps below.

Users in your IT team might require Read or Read/Write information in OpUtils. Segregate your users based on their required access levels. You can group users with similar access requirements into different user groups.
For the different users or user groups, identify the modules they require access to and the level of access such as Read/Write, Read, or No Access.
In your OpUtils console, go to Settings > Basic Settings > User Management, and click User. With the Add Roles option, configure different user Roles for the different users or user groups identified, and set the required permissions for individual OpUtils modules.

Now, go to Settings > Basic Settings > User Management, and click User. Under Configure User Details, add the appropriate custom user role to the user.
Users' tasks in your organization might change from time to time. An IP Address Manager user might use network tools to carry out certain tasks. To support this, you can grant the required access to users by creating new user roles and associating them to the users that need them, updating their existing user role.
Learn more about how to create and associate user Roles.
New to OpUtils? Learn more about OpUtils or download a free, 30-day trial for a hands-on experience with role-based access control. You can also schedule a free, personalized demo with our experts who can answer all your product questions.