How to configure single sign-on (SSO) for ServiceNow
ManageEngine ADSelfService Plus supports AD-based SSO for ServiceNow and other SAML-enabled applications. After enabling ServiceNow SSO in ADSelfService Plus, users only need to log in to their Windows machines with their AD domain credentials to run it. Once logged in, users can securely access ServiceNow in one click without having to enter their usernames and passwords again.
Benefits of enterprise SSO
Ease of access
Users don't have to enter their passwords repeatedly and will be automatically signed in to both on-premises and cloud applications.
Reduce password reset tickets
Minimize the workload for IT administrators by enabling users to log in to all applications using a single set of credentials.
Easy to deploy and administer
SSO can be rolled out for either all or specified users based on their domain, OU, or group membership.
ADSelfService Plus' ServiceNow SSO capabilities
ADSelfService Plus supports both Identity Provider and Service Provider-initiated SSO for ServiceNow.
Identity provider-initiated SSO for ServiceNow: Users need to log in to the ADSelfService Plus' end-user portal, and then click on the ServiceNow icon on the Applications dashboard to access ServiceNow.
Service provider-initiated SSO for ServiceNow: Users can access their ServiceNow domain via an URL or a bookmark. They will automatically be redirected to the ADSelfService Plus portal for login. Once the users are signed in, they'll be automatically redirected and logged in to the ServiceNow portal.
Step-by-step guide for ServiceNow SSO configuration
Before you begin
Download and install ADSelfService Plus if you haven’t already.
Configuring your Active Directory domain in ADSelfService Plus
With ADSelfService Plus, you can use the existing AD domain credentials of users for authentication during single sign-on. First you need to configure the AD domains in ADSelfService Plus to enable SSO for ServiceNow.
ADSelfService Plus will try to automatically add all the domains that it can discover in your network. If your domains are automatically added, skip to Step 9; otherwise, follow Steps 1-8 to add them manually.
- Launch the ADSelfService Plus web console and log in using admin credentials.
- Click the Domain Settings link available on the top-right corner of the application.
- Click the Add New Domain link.
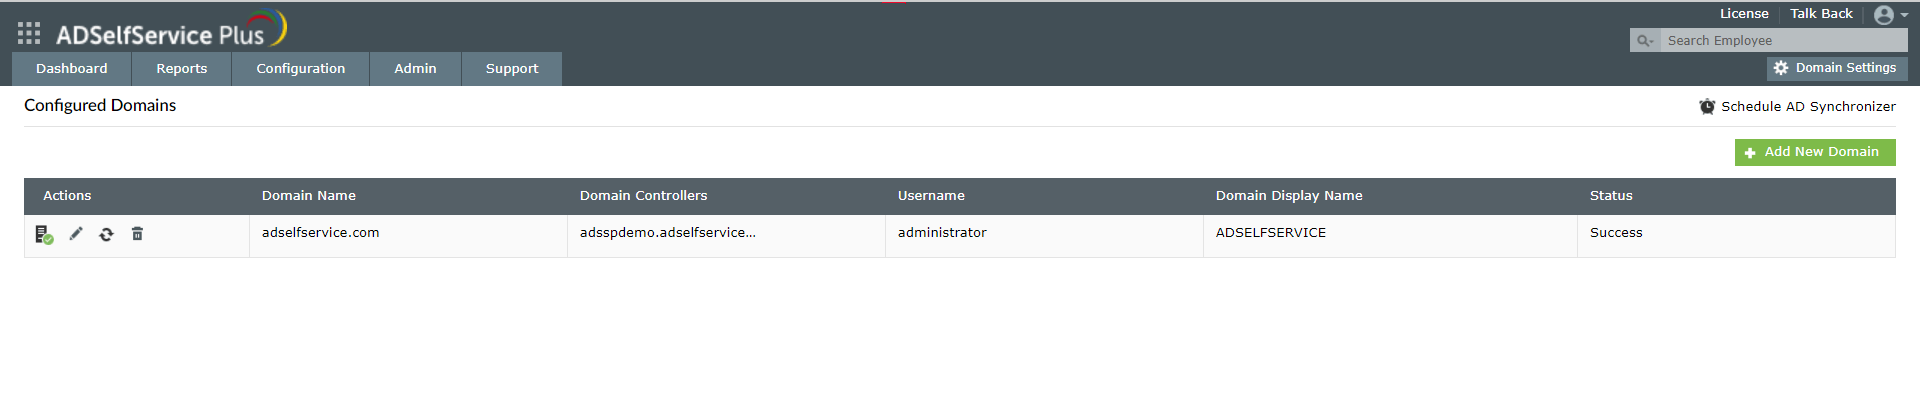
- In the Add New Domain window, enter the name of the domain you want to add in the Domain Name field.
- In the Add Domain Controllers field, click Discover. ADSelfService Plus will try to automatically discover the domain controllers associated with the domain.
- If the domains are not auto-discovered, then enter the domain controller name in the field provided, and click Add.
- You can leave the authentication fields empty if you're not going to use the end user self-service features of ADSelfService Plus.
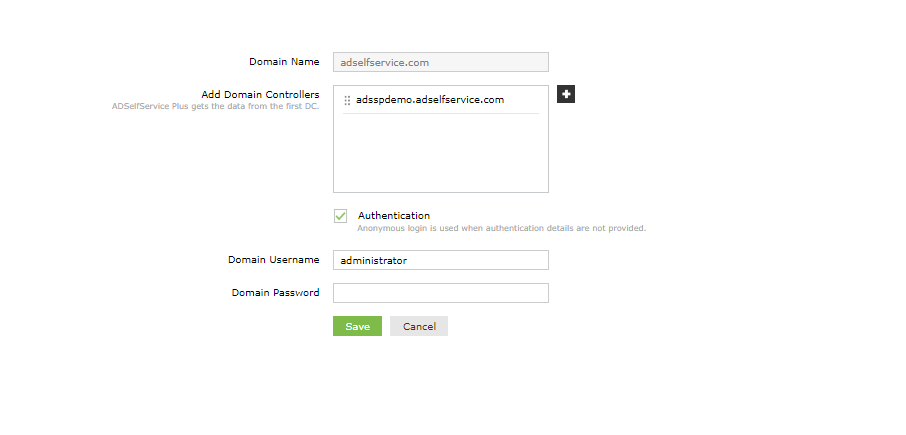
- Back in the Add New Domain window, click Save to complete adding the Active Directory domain in ADSelfService Plus.
Getting the SAML details from ADSelfService Plus
- Go to Configuration →Password Sync/Single Sign On → Add Applications, and select ServiceNow from the applications displayed.
- Click IdP Details in the top-right corner of the screen.

- In the pop-up that appears, click Download IdP Metadata file and save the XML file. Open the file in a text editor and copy its content.
ServiceNow SAML configuration
- Log in to ServiceNow with administrator credentials.
- Click the Start Building icon.
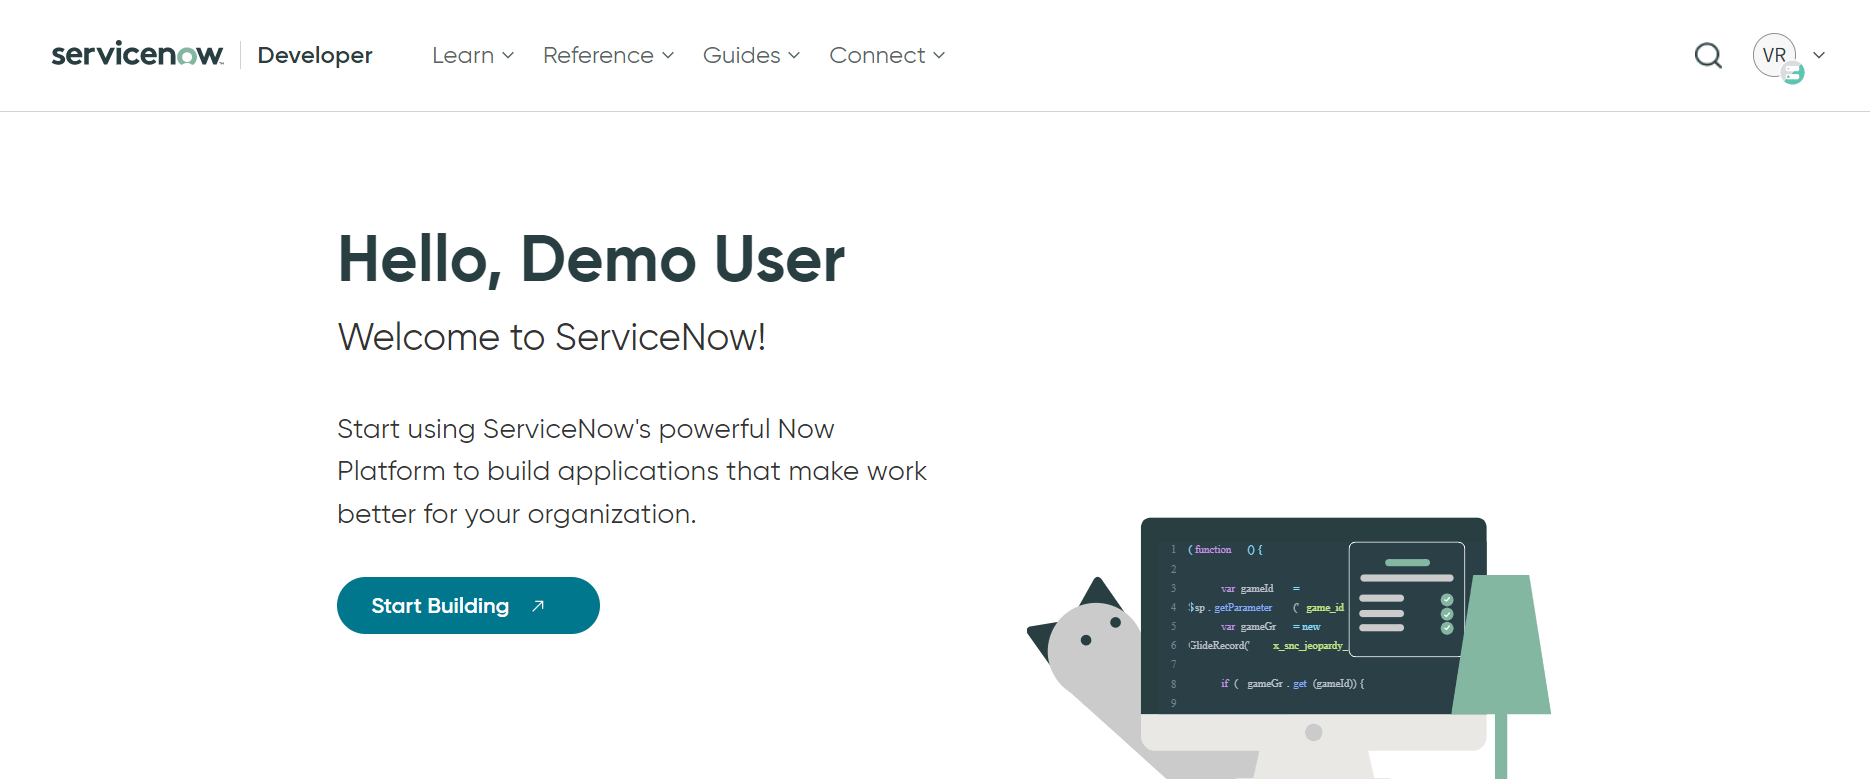
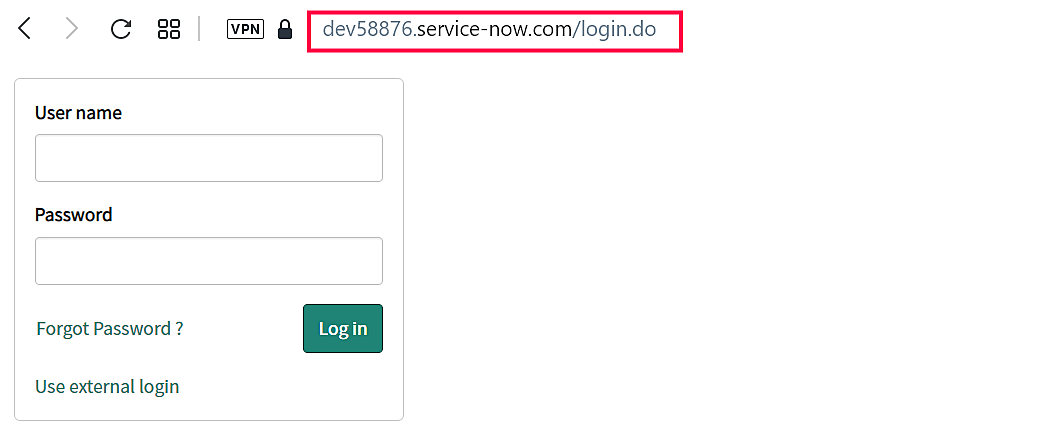
- Copy the instance URL and login to your ServiceNow instance.
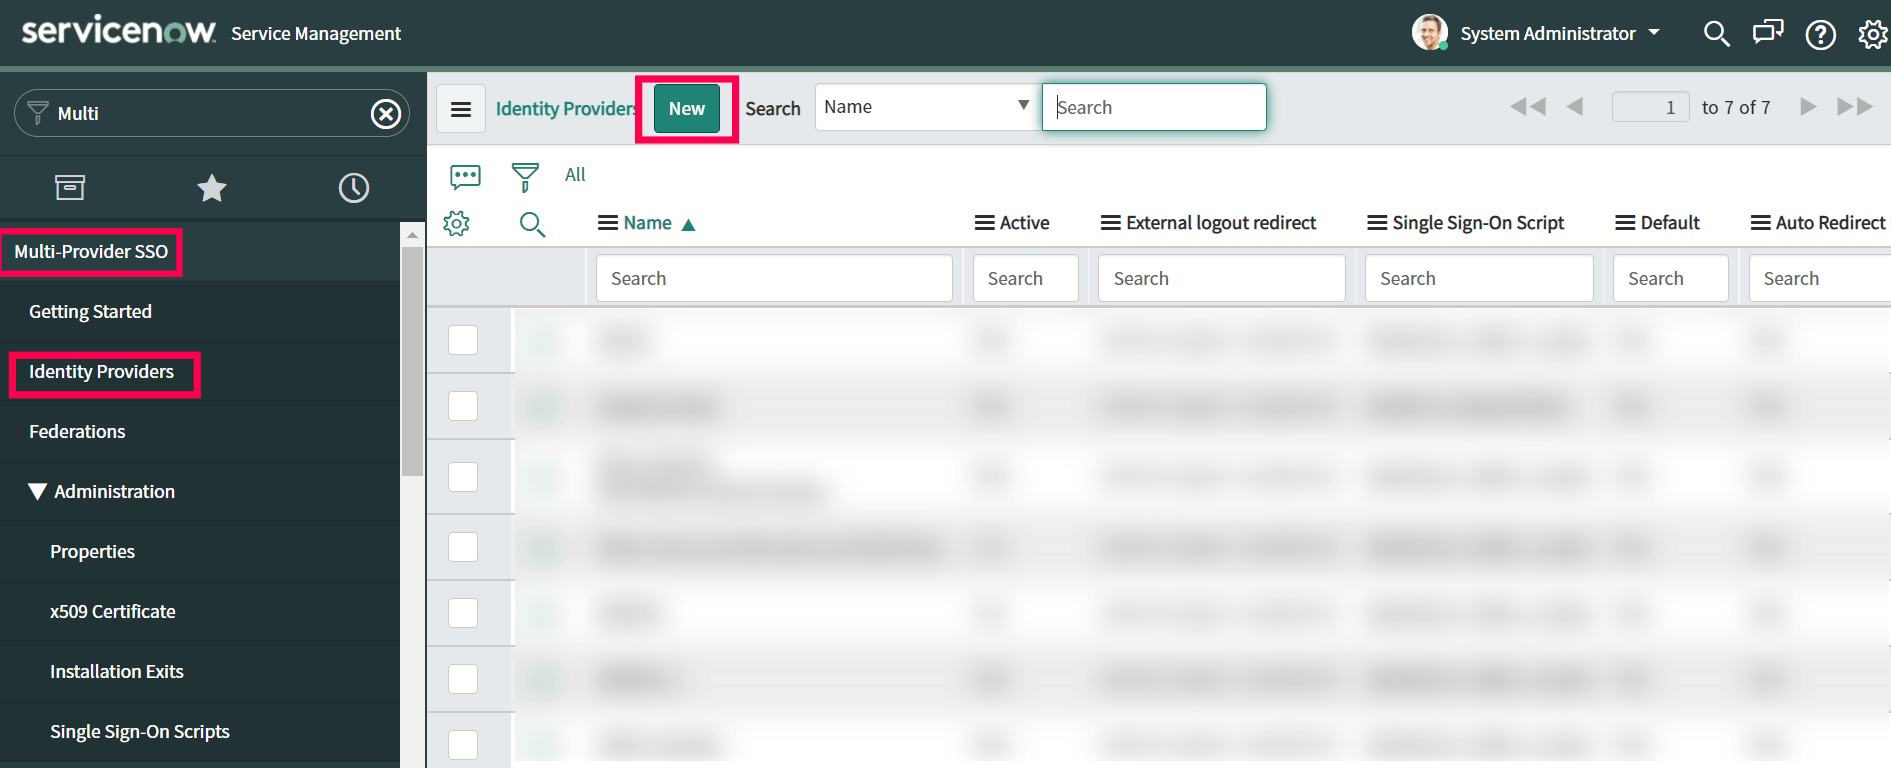
- In the left pane, navigate to Multi-Provider SSO → Identity Providers and then click New.
Note: If Multi-Provider SSO plugin is not activated in your instance, please follow
these steps.
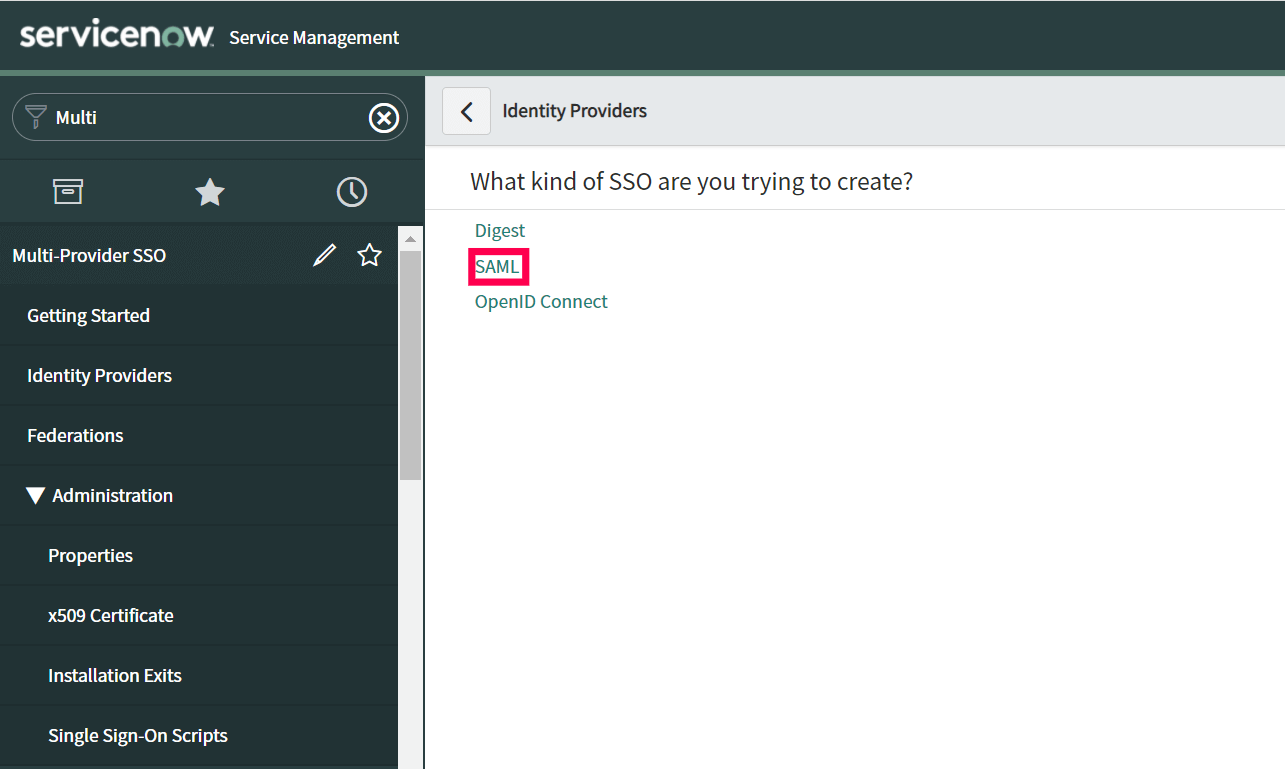
- In the What kind of SSO are you trying to create? section, select SAML.
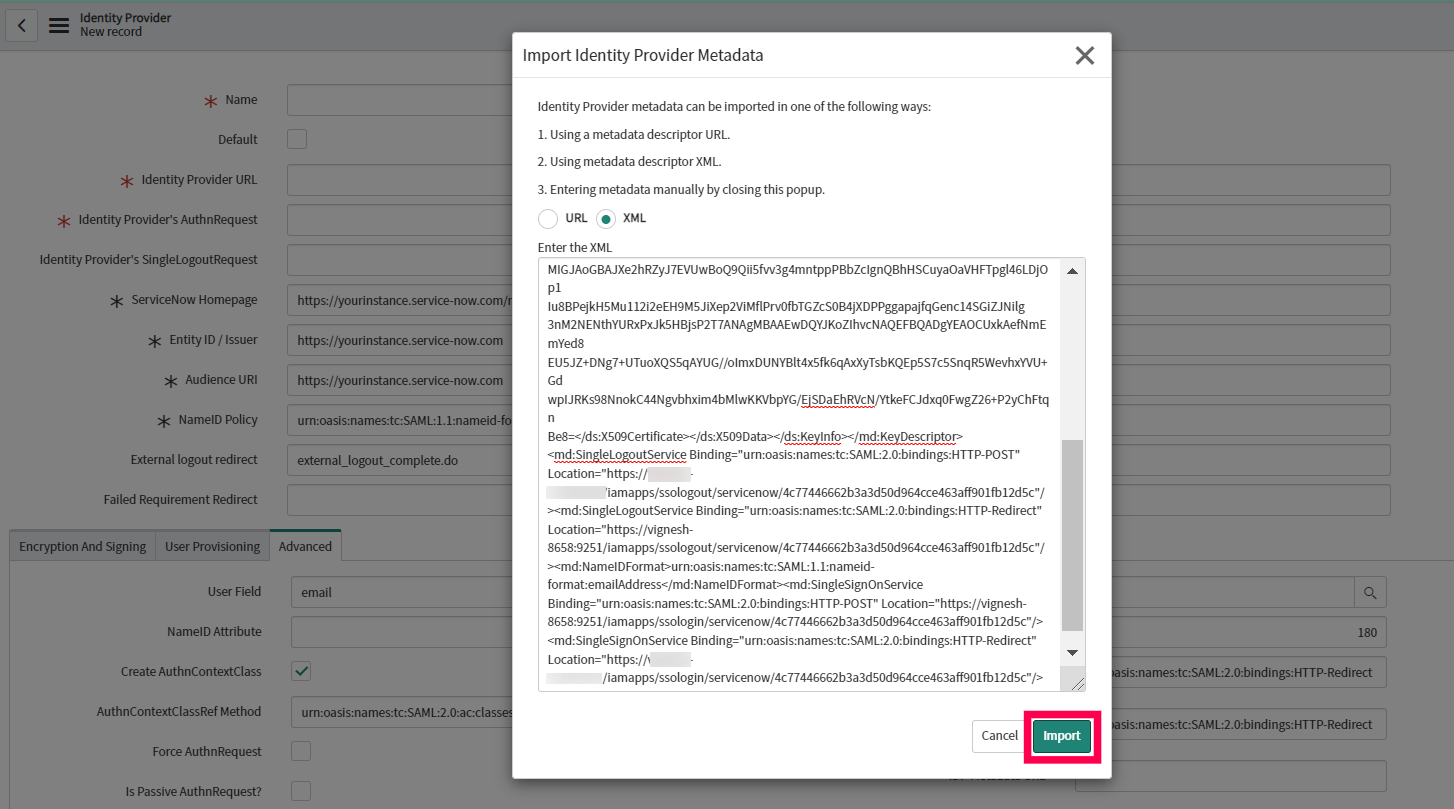
- In the Import Identity Provider Metadata pop up that appears, select XML and paste the XML file content you had copied in Step 11.

- Click Import.
- All the required fields will be auto-filled. Scroll down and click the Advanced tab. Make sure in the User Field, that the value “email” is entered.
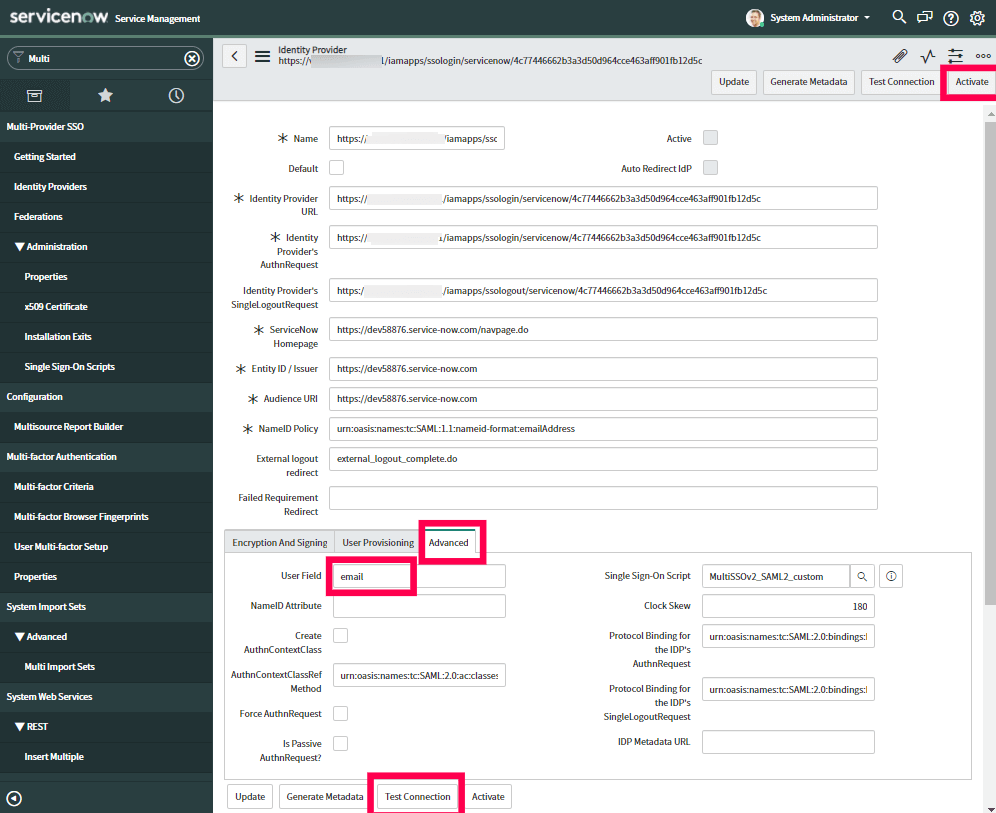
- Click Test Connection. You will be asked to log into ADSelfService Plus.
- Once the connection is successful, click Activate.
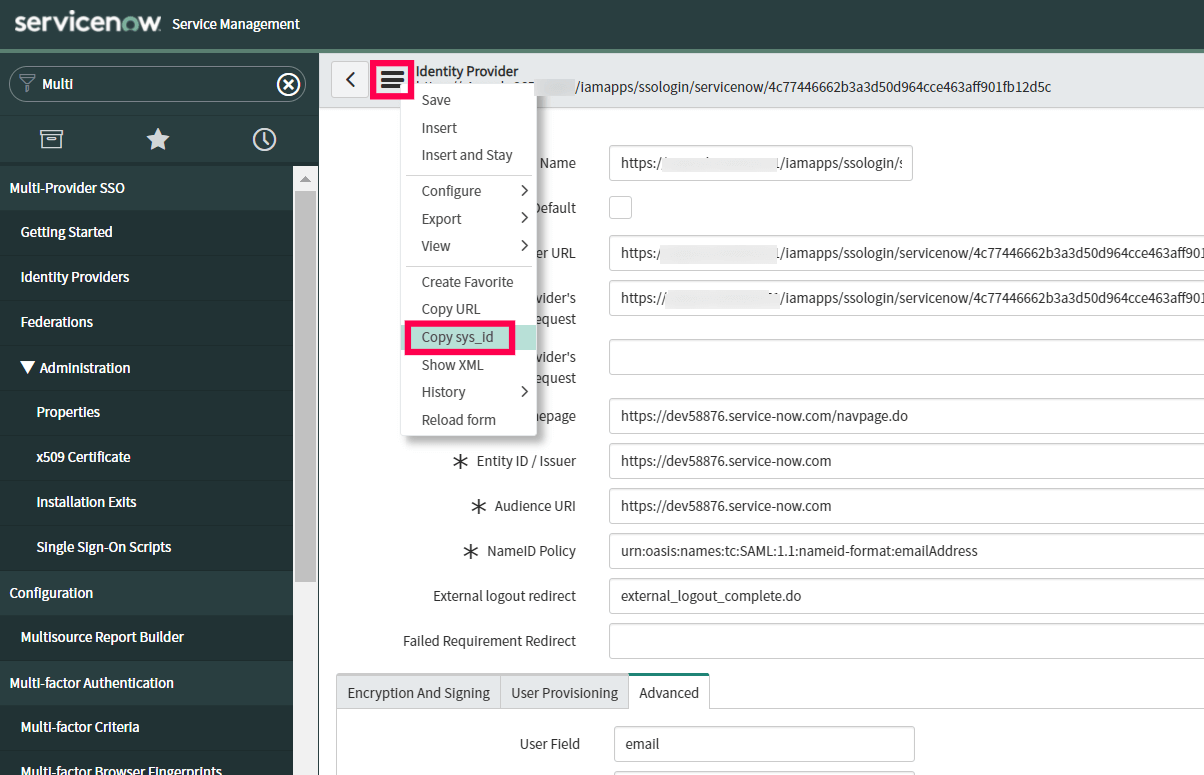
- Now click on the Additional Actions icon from the identity provider title menu, select Copy sys_id. Paste the value in a note and keep it safe.
- In the left pane, navigate to Multi-Provider SSO → Administration → Properties.
- Make sure that Enable multiple provider SSO in enabled.
- In the field for user identification, change "user_name" to email as the value.
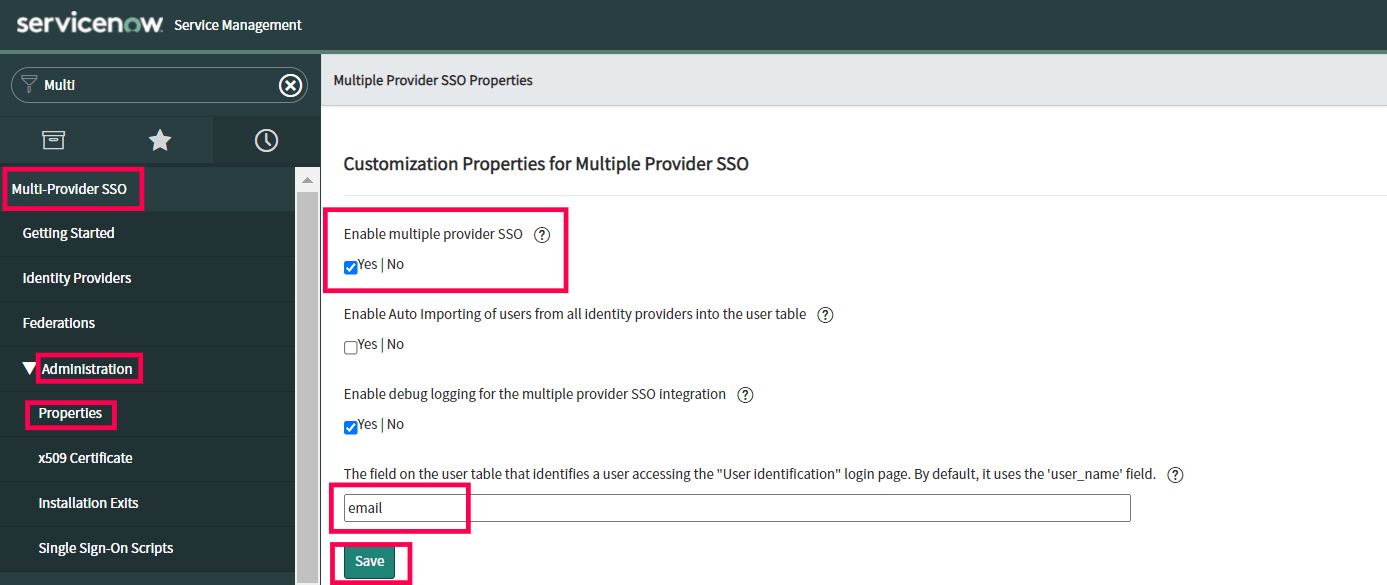
- Click Save.
- In the left pane, navigate to User Administration → Users.
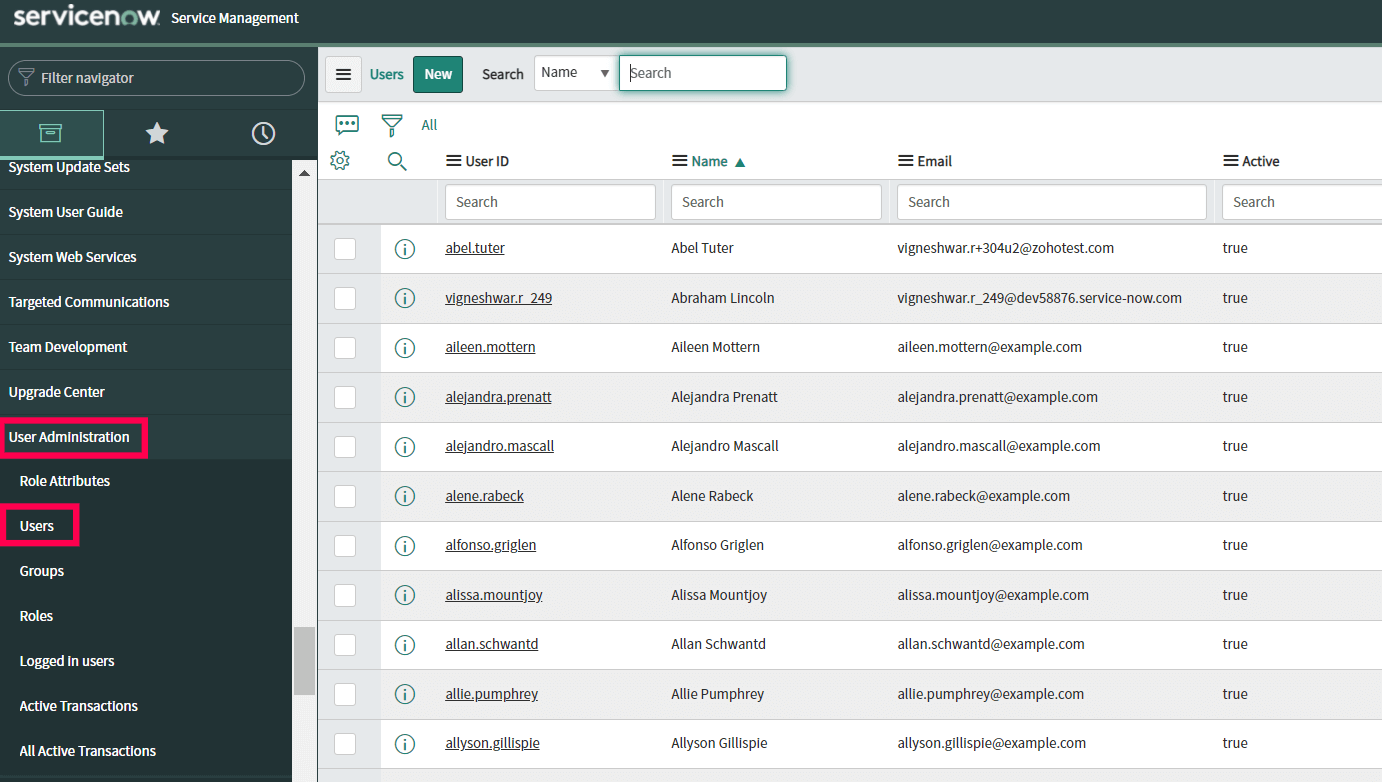
- Select a user for whom you want to enable SSO and click his/her username.
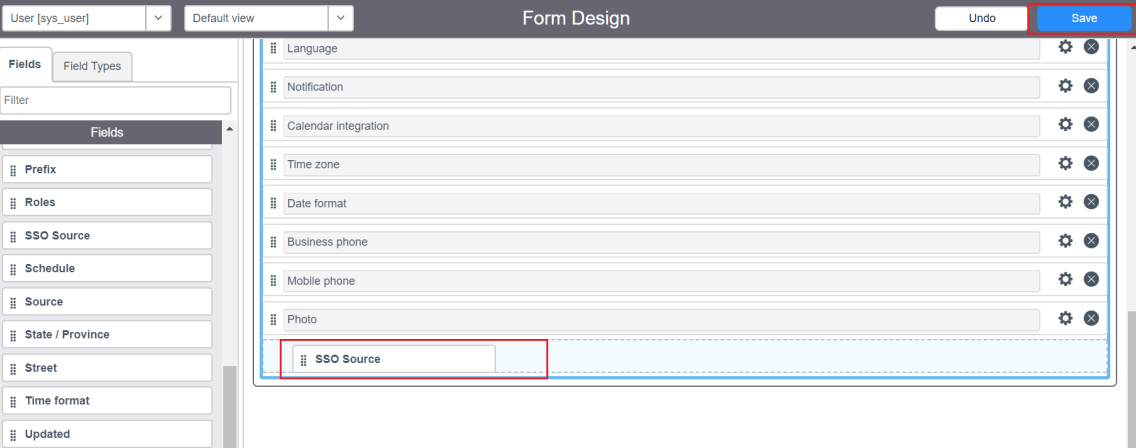
- Now click the Additional Actions icon and select Configure → Form Design.
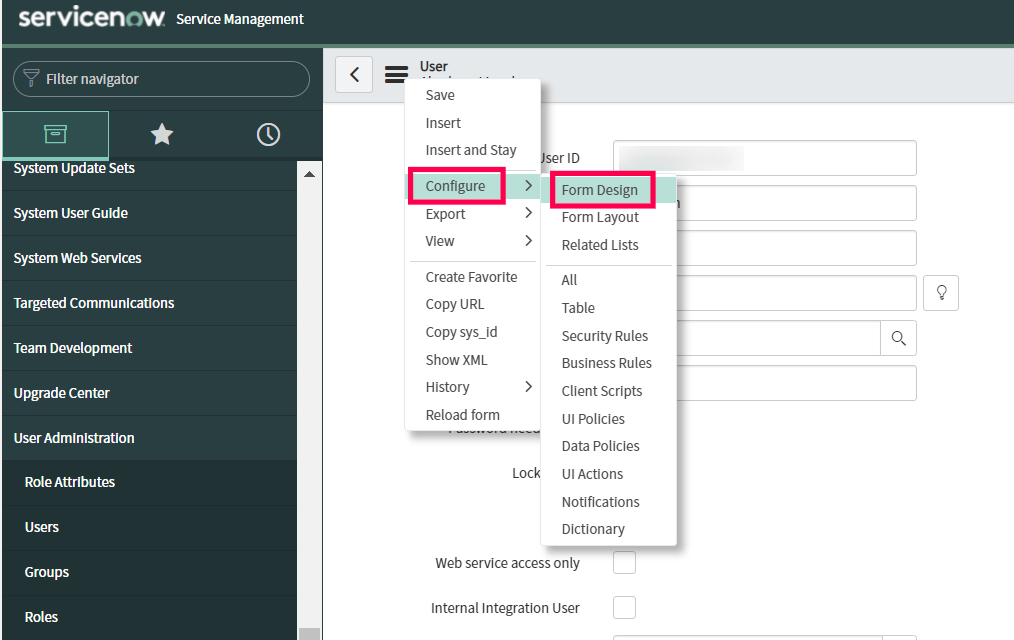
- Drag and drop the SSO source field from the left pane into the user’s form and click Save.
- In the SSO source field, paste the sys_id you had copied in step 22. Append “sso:” before the sys_id value. For example, if the sys_id copied is "23dc968f0a0a3c1900534f399927740e", after appending sso the new value to be updated in SSO source field will be "sso:23dc968f0a0a3c1900534f399927740e".
- Click Update.
- Repeat steps 28-33 for other users to whom you want to enable SSO.
Adding your ServiceNow domain in ADSelfService Plus and enabling single sign-on.
- Now switch back to ADSelfService Plus.
- Go to the ServiceNow SSO configuration page.
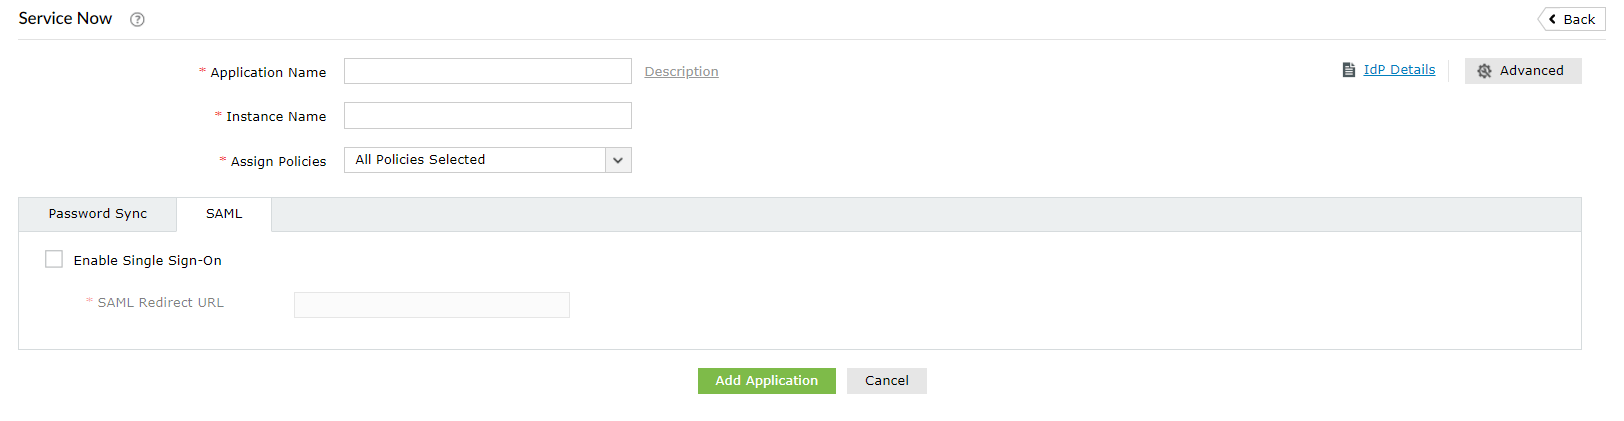
- In the SAML Redirect URL field, enter the instance URL from step 14.
- In the Instance Name field, enter the domain name for which you enabled SSO. For example, if you use johndoe@thinktodaytech.com to log in to ServiceNow, then thinktodaytech.com is the domain name.
- In the Application Name field, provide an appropriate display name.
- In the Assign Policies field, click the drop-down box and select the policies for which you wish to enable SSO. The policies you select will determine which SSO features users will have enabled.
- Click Add Application.
Your users can now log into their ServiceNow accounts automatically using single sign-on.
Need some help? Get help from our support team, and set up SSO for ServiceNow in minutes.
Contact us.
How SSO helps with regulatory compliance.
Highlights
Free Active Directory users from attending lengthy help desk calls by allowing them to self-service their password resets/ account unlock tasks. Hassle-free password change for Active Directory users with ADSelfService Plus ‘Change Password’ console.
Get seamless one-click access to 100+ cloud applications. With enterprise single sign-on, users can access all their cloud applications with their Active Directory credentials. Thanks to ADSelfService Plus!
Intimate Active Directory users of their impending password/account expiry by mailing them these password/account expiry notifications.
Synchronize Windows Active Directory user password/account changes across multiple systems, automatically, including Office 365, G Suite, IBM iSeries and more.
Ensure strong user passwords that resist various hacking threats with ADSelfService Plus by enforcing Active Directory users to adhere to compliant passwords via displaying password complexity requirements.
Portal that lets Active Directory users update their latest information and a quick search facility to scout for information about peers by using search keys, like contact number, of the personality being searched.