How to set AD account expiration date
Setting an expiration date for Active Directory (AD) accounts ensures that users are automatically disabled after a specific period, which is beneficial for managing temporary staff, contractors, or interns. This is controlled by the accountExpires attribute in AD, which stores the expiration date and time for each user account. Specifying this attribute helps improve security by preventing unused or outdated accounts from remaining active in your organization. ADManager Plus, an AD user management tool, offers three ways to set expiration dates for AD users:
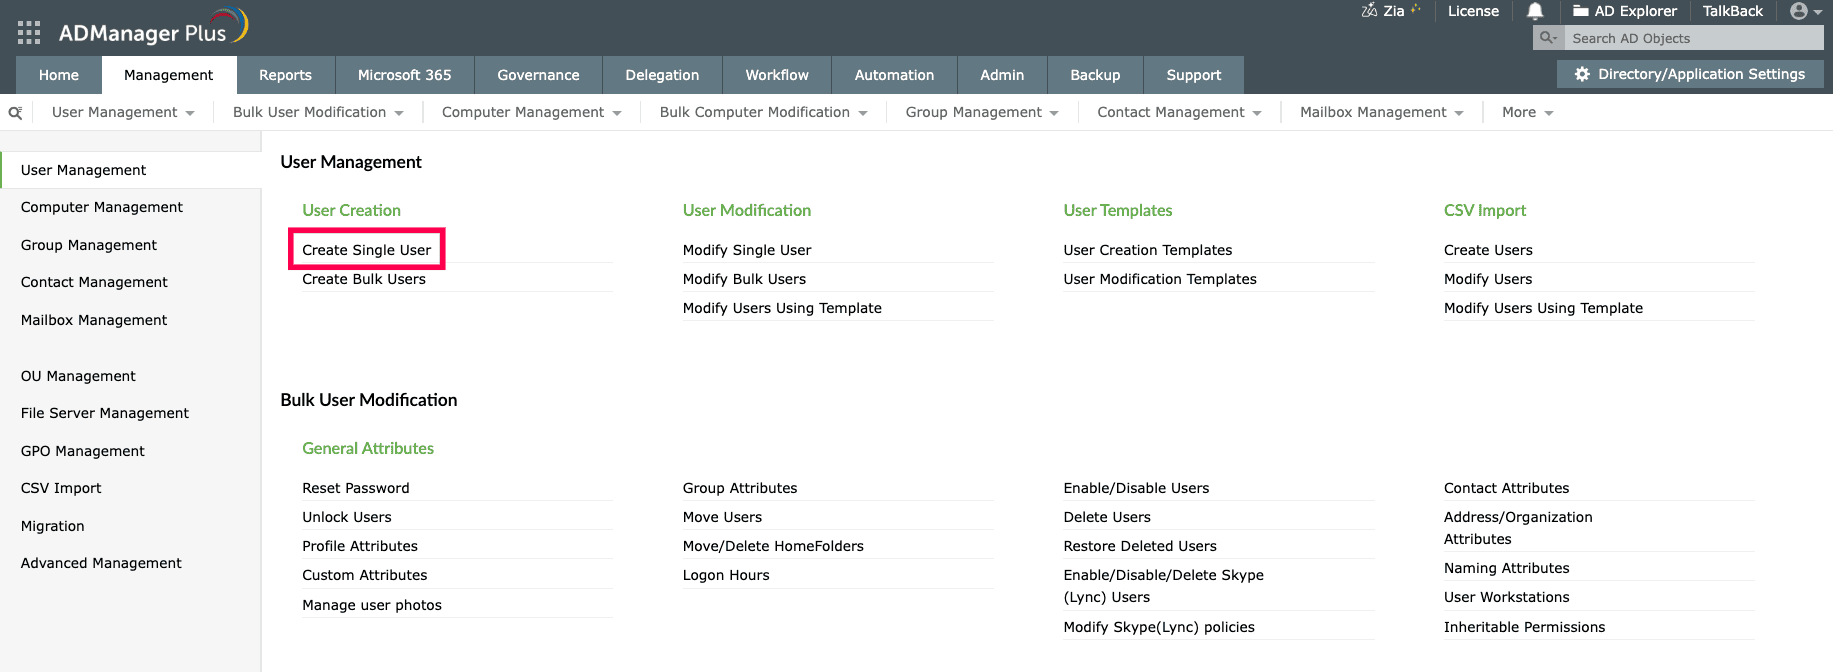
Method 1: Set expiration date while creating a single user
Using ADManager Plus' GUI-based interface, easily setup an expiration date and time for an AD user.
- Navigate to Management > User Management > User Creation > Create Single User.
- Select the Domain and Template for user creation. To create a common template for account expiration, follow these steps.
- Go to the Account tab. Under Account Properties, select End of and configure the date and time when you want the account to expire in the Account Expires section.
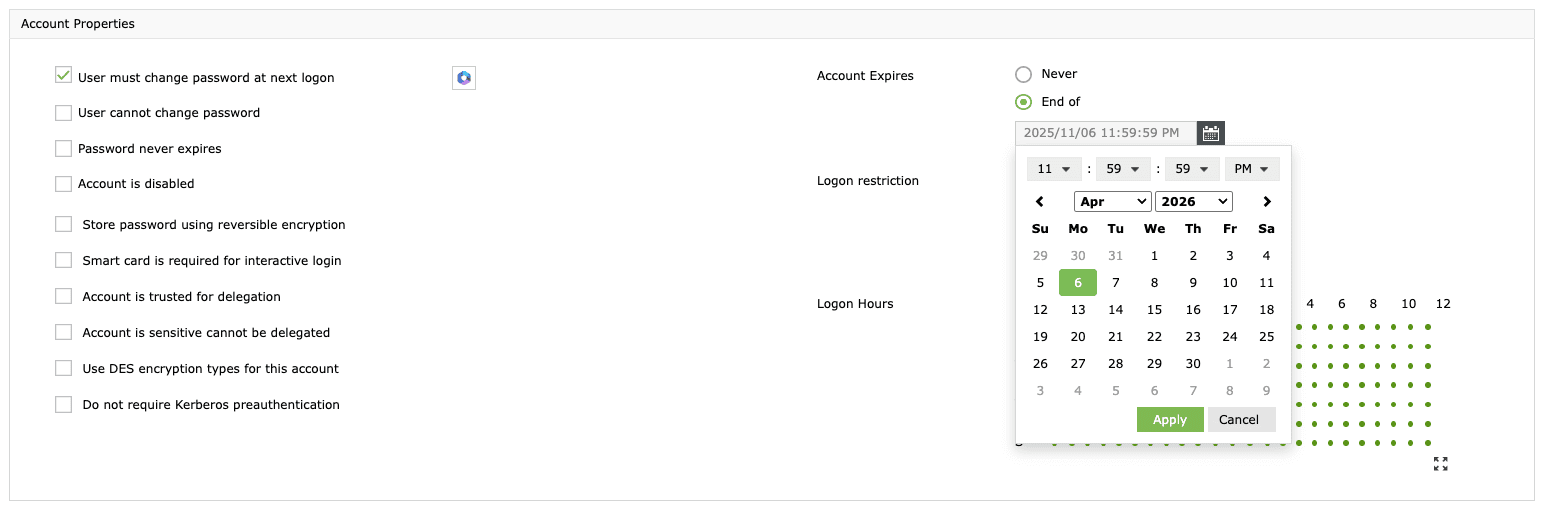
- Fill in values for all required attributes in the other tabs and click Create.
Creating a template for account expiration
With user creation templates, you can set a common expiration time for a set of new user accounts.
- Navigate to Management > User Management > User Templates > User Creation Templates and click + Create New Template.
- Enter a Template Name and select the Domain.
- Go to the Account tab. Under Account Properties, select End of and configure the date and time at which you want the account to expire in the Account Expires section.
- Click Save Template. Use this template in the future while creating new accounts.
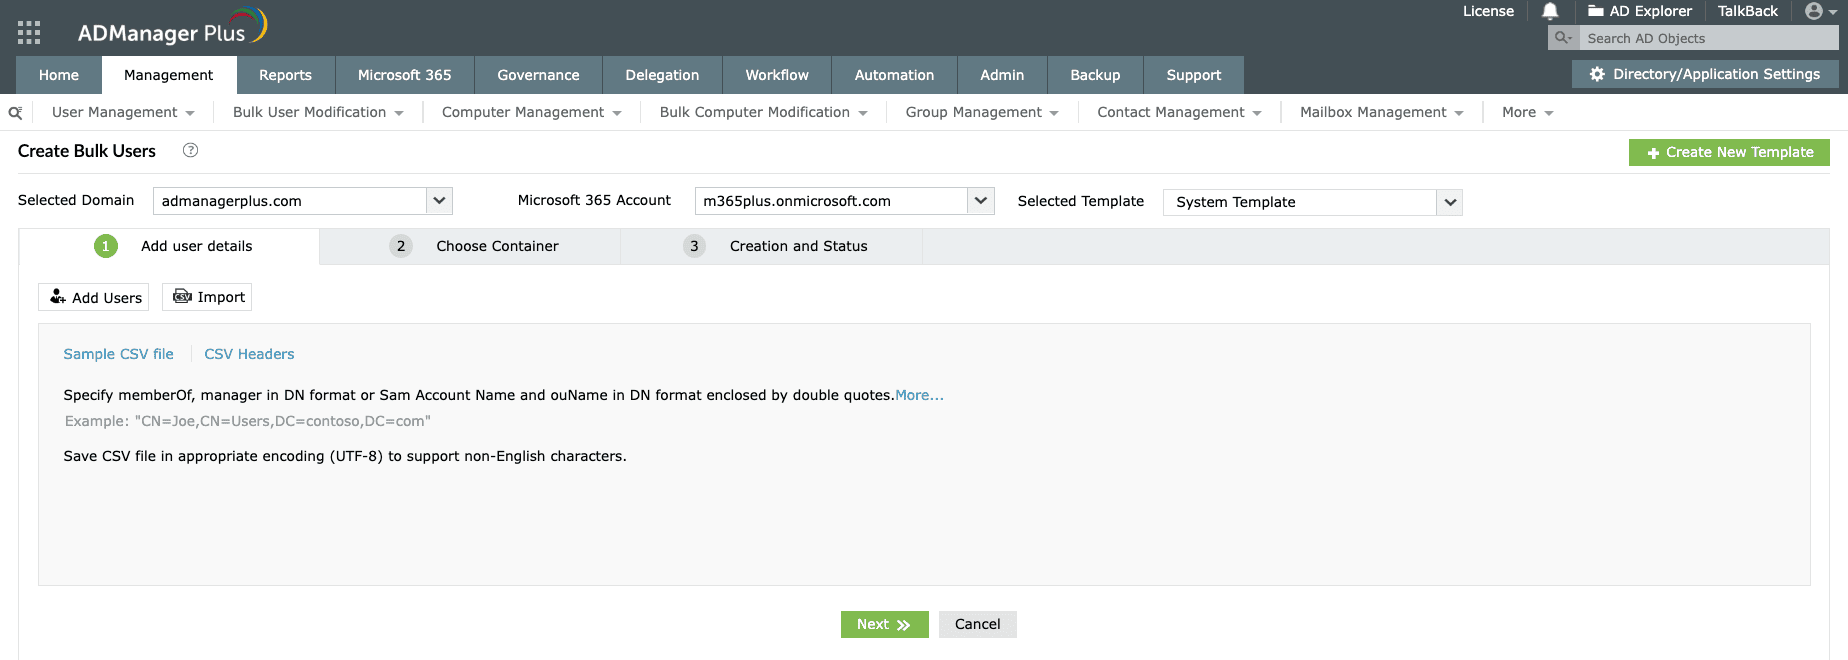
Method 2: Set expiration date while creating multiple users
By importing a CSV file, you can specify the accoutExpires attribute in AD to set the expiration date for multiple users in bulk.
- Navigate to Management > User Management > CSV Import > Create Users.
- Click the Import button to import a CSV file containing a user list with the accountExpires attribute mentioned and values in MM-dd-yyyy format.
- Click Next and select the Organizational Unit (OU) where the user accounts need to be added, then click Create.
Method 3: Configure expiration date for existing users
Similarly, you can also modify expiration dates for existing user accounts through any of the following steps:
- To modify expiration date for a single user, navigate to Management > User Management > Modify Single User.
- To create a template, navigate to Management > User Management > User Templates > User Modification Templates.
- To modify using a CSV file, navigate to Management > User Management > CSV Import > Modify Users.
FAQs
1. What is the AD accountExpires attribute?
The accountExpires attribute in AD is a property of a user object that specifies the date and time when the account is set to expire. When an AD account expires, the user will no longer be able to log in to the domain. The value is stored as a large 64-bit integer, representing the number of 100-nanosecond intervals since 12:00 AM, January 1, 1601 (UTC). For example, an accountExpires value corresponding to 2025-12-31 23:59:59 means the user's account will automatically expire at that date and time.
2. How to set AD account expiration date for a user to 30 days?
To set an AD account to expire after 30 days, log in to ADManager Plus and follow these steps:
- Navigate to Management > User Management > User Modification > Modify Single User.
- Select your preferred user and go to the Account tab.
- Under Account Properties, in the Account Expires section, choose End of and set the expiration date to 30 days from today.
- Click Update User.
Select a language to translate the contents of this web page: