Request attributes
Request attributes in OpManager Nexus APM Insight enable you to extract specific contextual data from your application's HTTP requests, method parameters, or custom parameters based on user-defined conditions. The extracted values are stored as request attributes, enabling deeper performance analysis, request tracking, and filtering using meaningful business or application-specific information.
For example, if every incoming request contains a customer ID, tenant ID, order ID, region, or user role in the request headers, parameters, or payload, you can extract these values as request attributes.
Benefits of request attributes
Request attributes help you:
- Extract important business or application data from requests.
- Apply supported numerical and string operations to the extracted values before they are stored.
- Track requests using meaningful identifiers such as customer ID, tenant ID, order ID, payment ID, or region for faster troubleshooting and business transaction analysis.
- Filter and analyze requests based on extracted attribute values.
- Simplify troubleshooting by correlating requests with business-specific information.
- Gain deeper visibility into application behavior without modifying monitoring workflows.
How request attributes work
When request attributes are configured:
- Incoming requests are evaluated against the configured conditions.
- If a request matches the specified conditions, the configured value is extracted.
- The extracted value is processed based on the configured numerical or string operations (if any) and then stored as a request attribute.
- The attribute becomes available for request tracking, filtering, and analysis.
Only requests that satisfy the configured conditions will have the request attribute extracted and stored.
Create a request attribute
Follow the below steps to create a request attribute:
- Log in to your OpManager Nexus account.
- Navigate to Admin > APM > Request Attributes.
- Click the Plus icon
 (Add request attribute button).
- Enter the following details:
Add Request Attribute screen
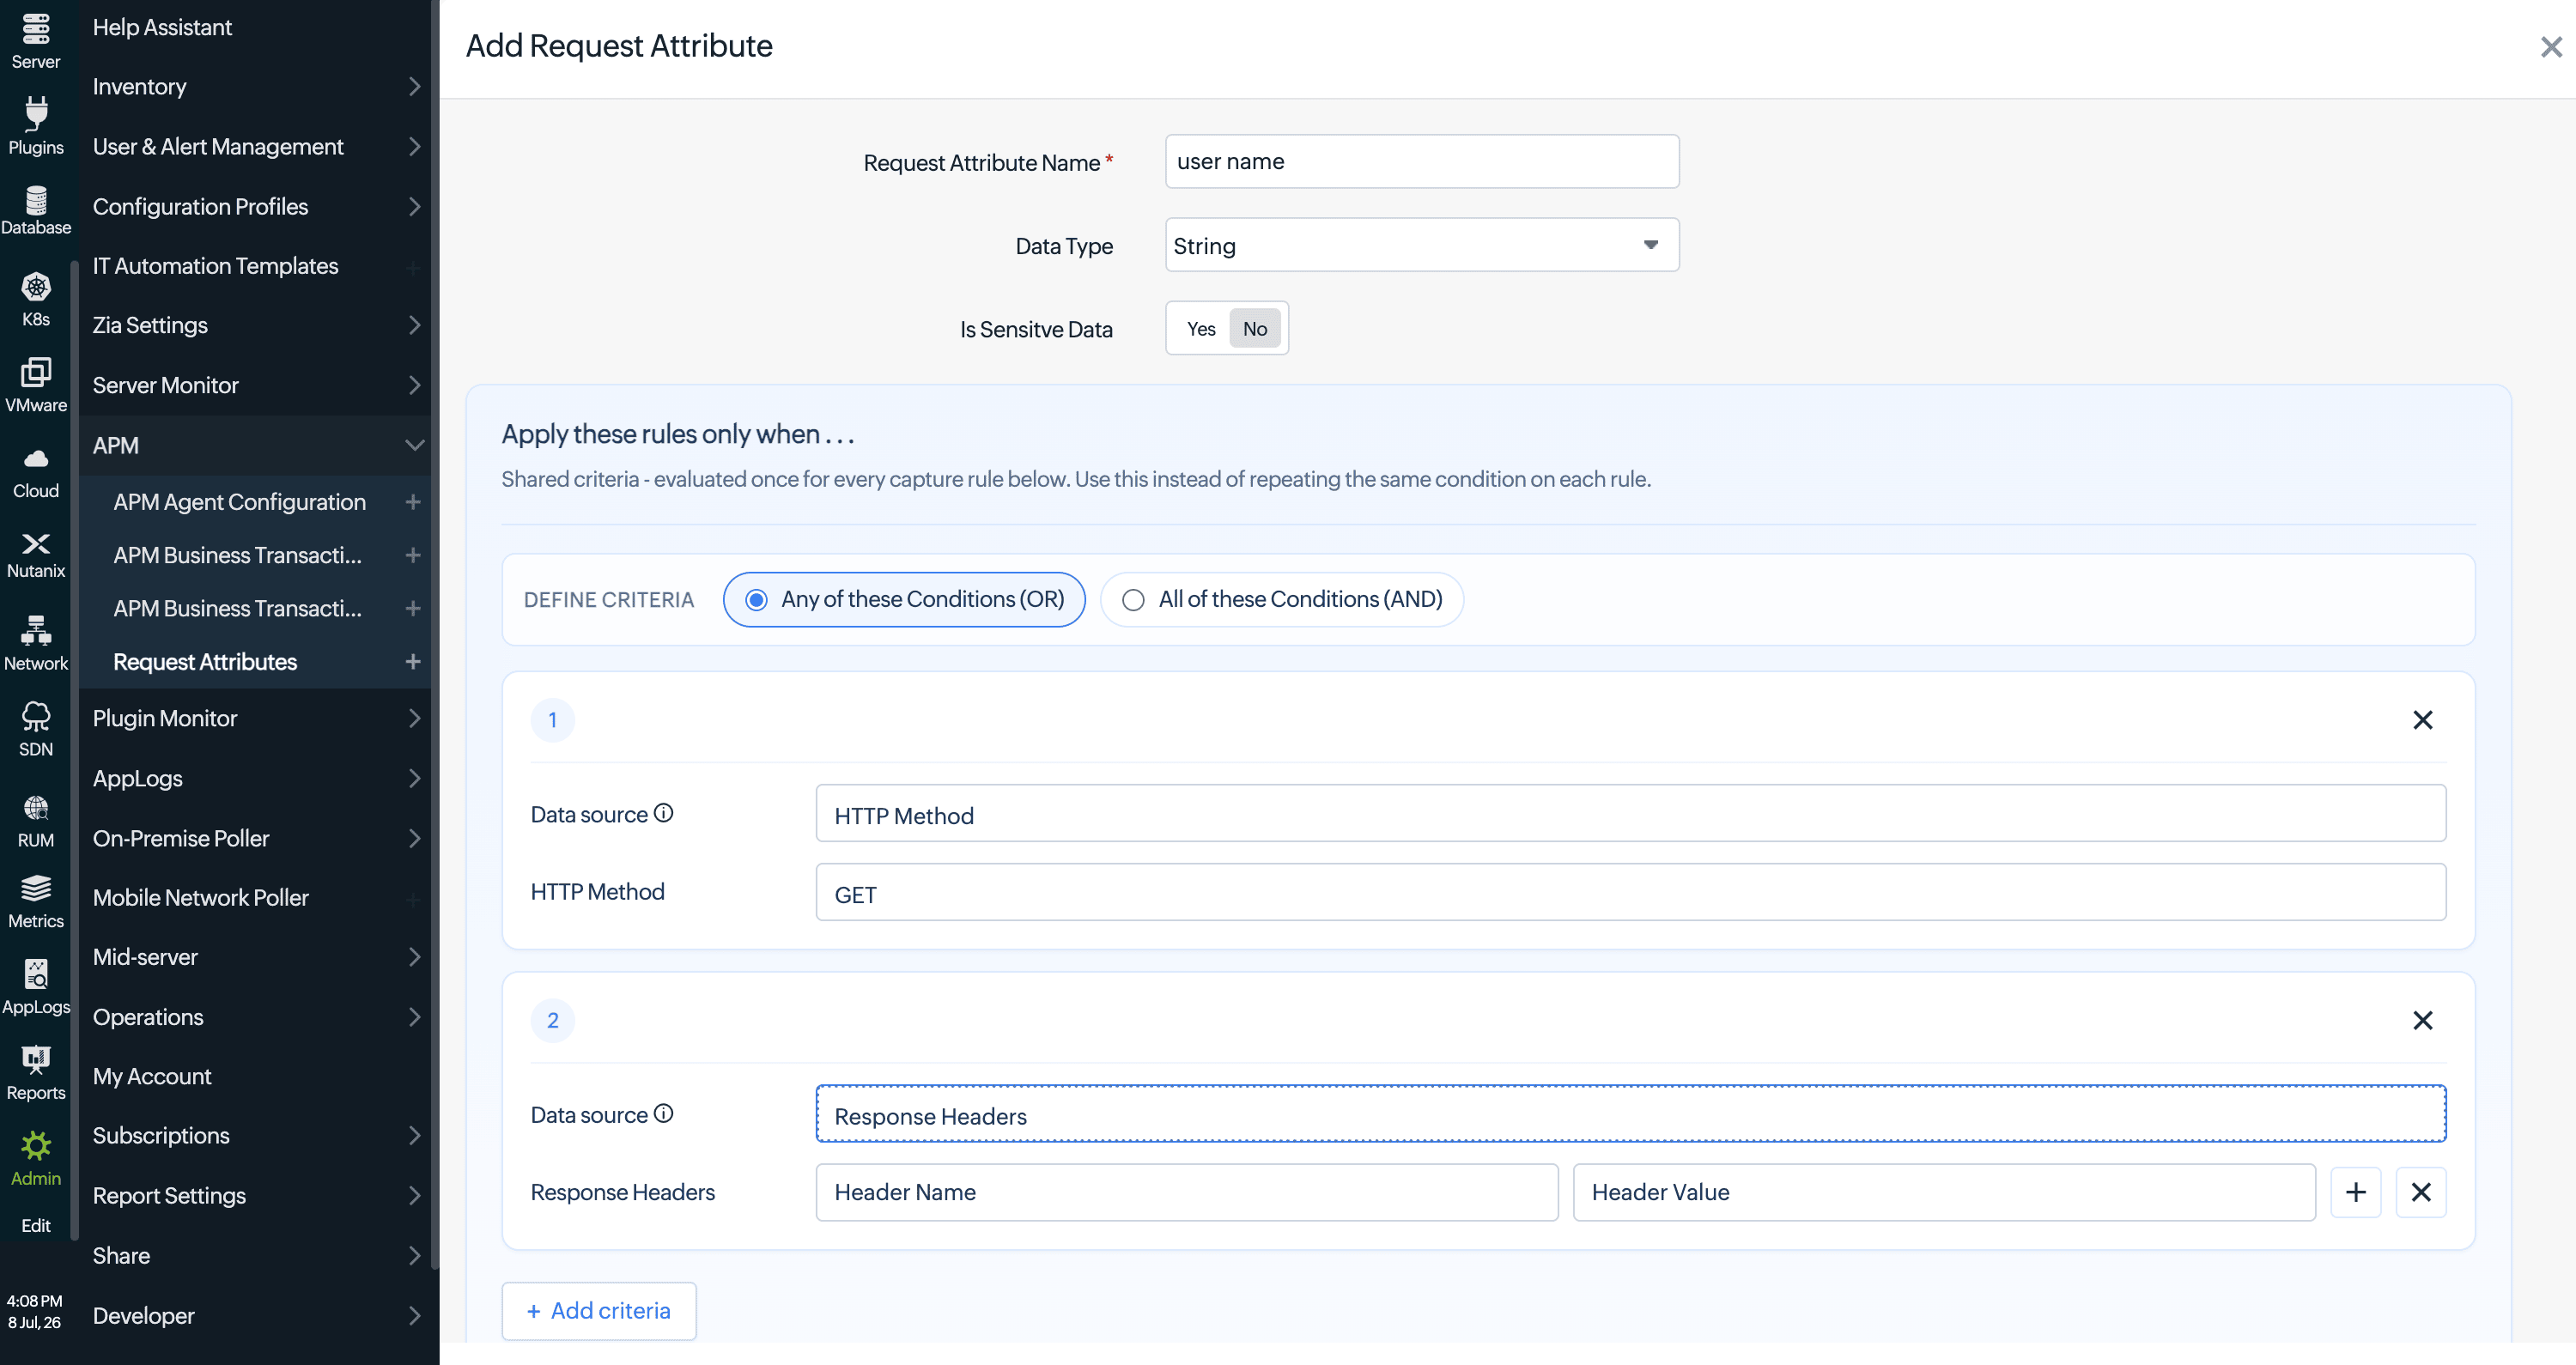
- Request Attribute Name: Provide a unique name for the request attribute.
- Data Type: Select the data type of the extracted value.
- Is Sensitive Data: Specify whether the extracted attribute contains sensitive information.
- Yes: The attribute is treated as sensitive, and its value is masked or handled securely wherever applicable.
Note
It is visible only to users with Administrator privileges. Non-admin users cannot view the attribute or know that it exists.
- No: The attribute is stored and displayed normally.
- Yes: The attribute is treated as sensitive, and its value is masked or handled securely wherever applicable.
- Apply these rules only when
Define the conditions that determine when the request attribute should be extracted. These shared criteria are evaluated once before the capture rules are processed.- Click Add Criteria and select one of the following options:
- Any of these Conditions (OR): The request attribute is extracted if any one of the specified conditions is satisfied.
- All of these Conditions (AND): The request attribute is extracted only when all specified conditions are satisfied.
NoteClick Add Criteria again to configure one or more conditions.
- For each criterion, specify:
- Data Source: Select the request property to evaluate, such as HTTP Method, Request Headers, Response Headers, HTTP Status Code, or Request Path.
- Condition Value: Enter the value that the selected data source should match. For example, if the data source is HTTP Method, you can specify POST.
- Click Add Criteria and select one of the following options:
- Data Source: After defining the criteria, the user needs to configure data sources, which determine what data to extract from the matching requests. Click the Add Data Source button to create a new data source. This opens the Add Data Source dialog.
Add Data Source screen
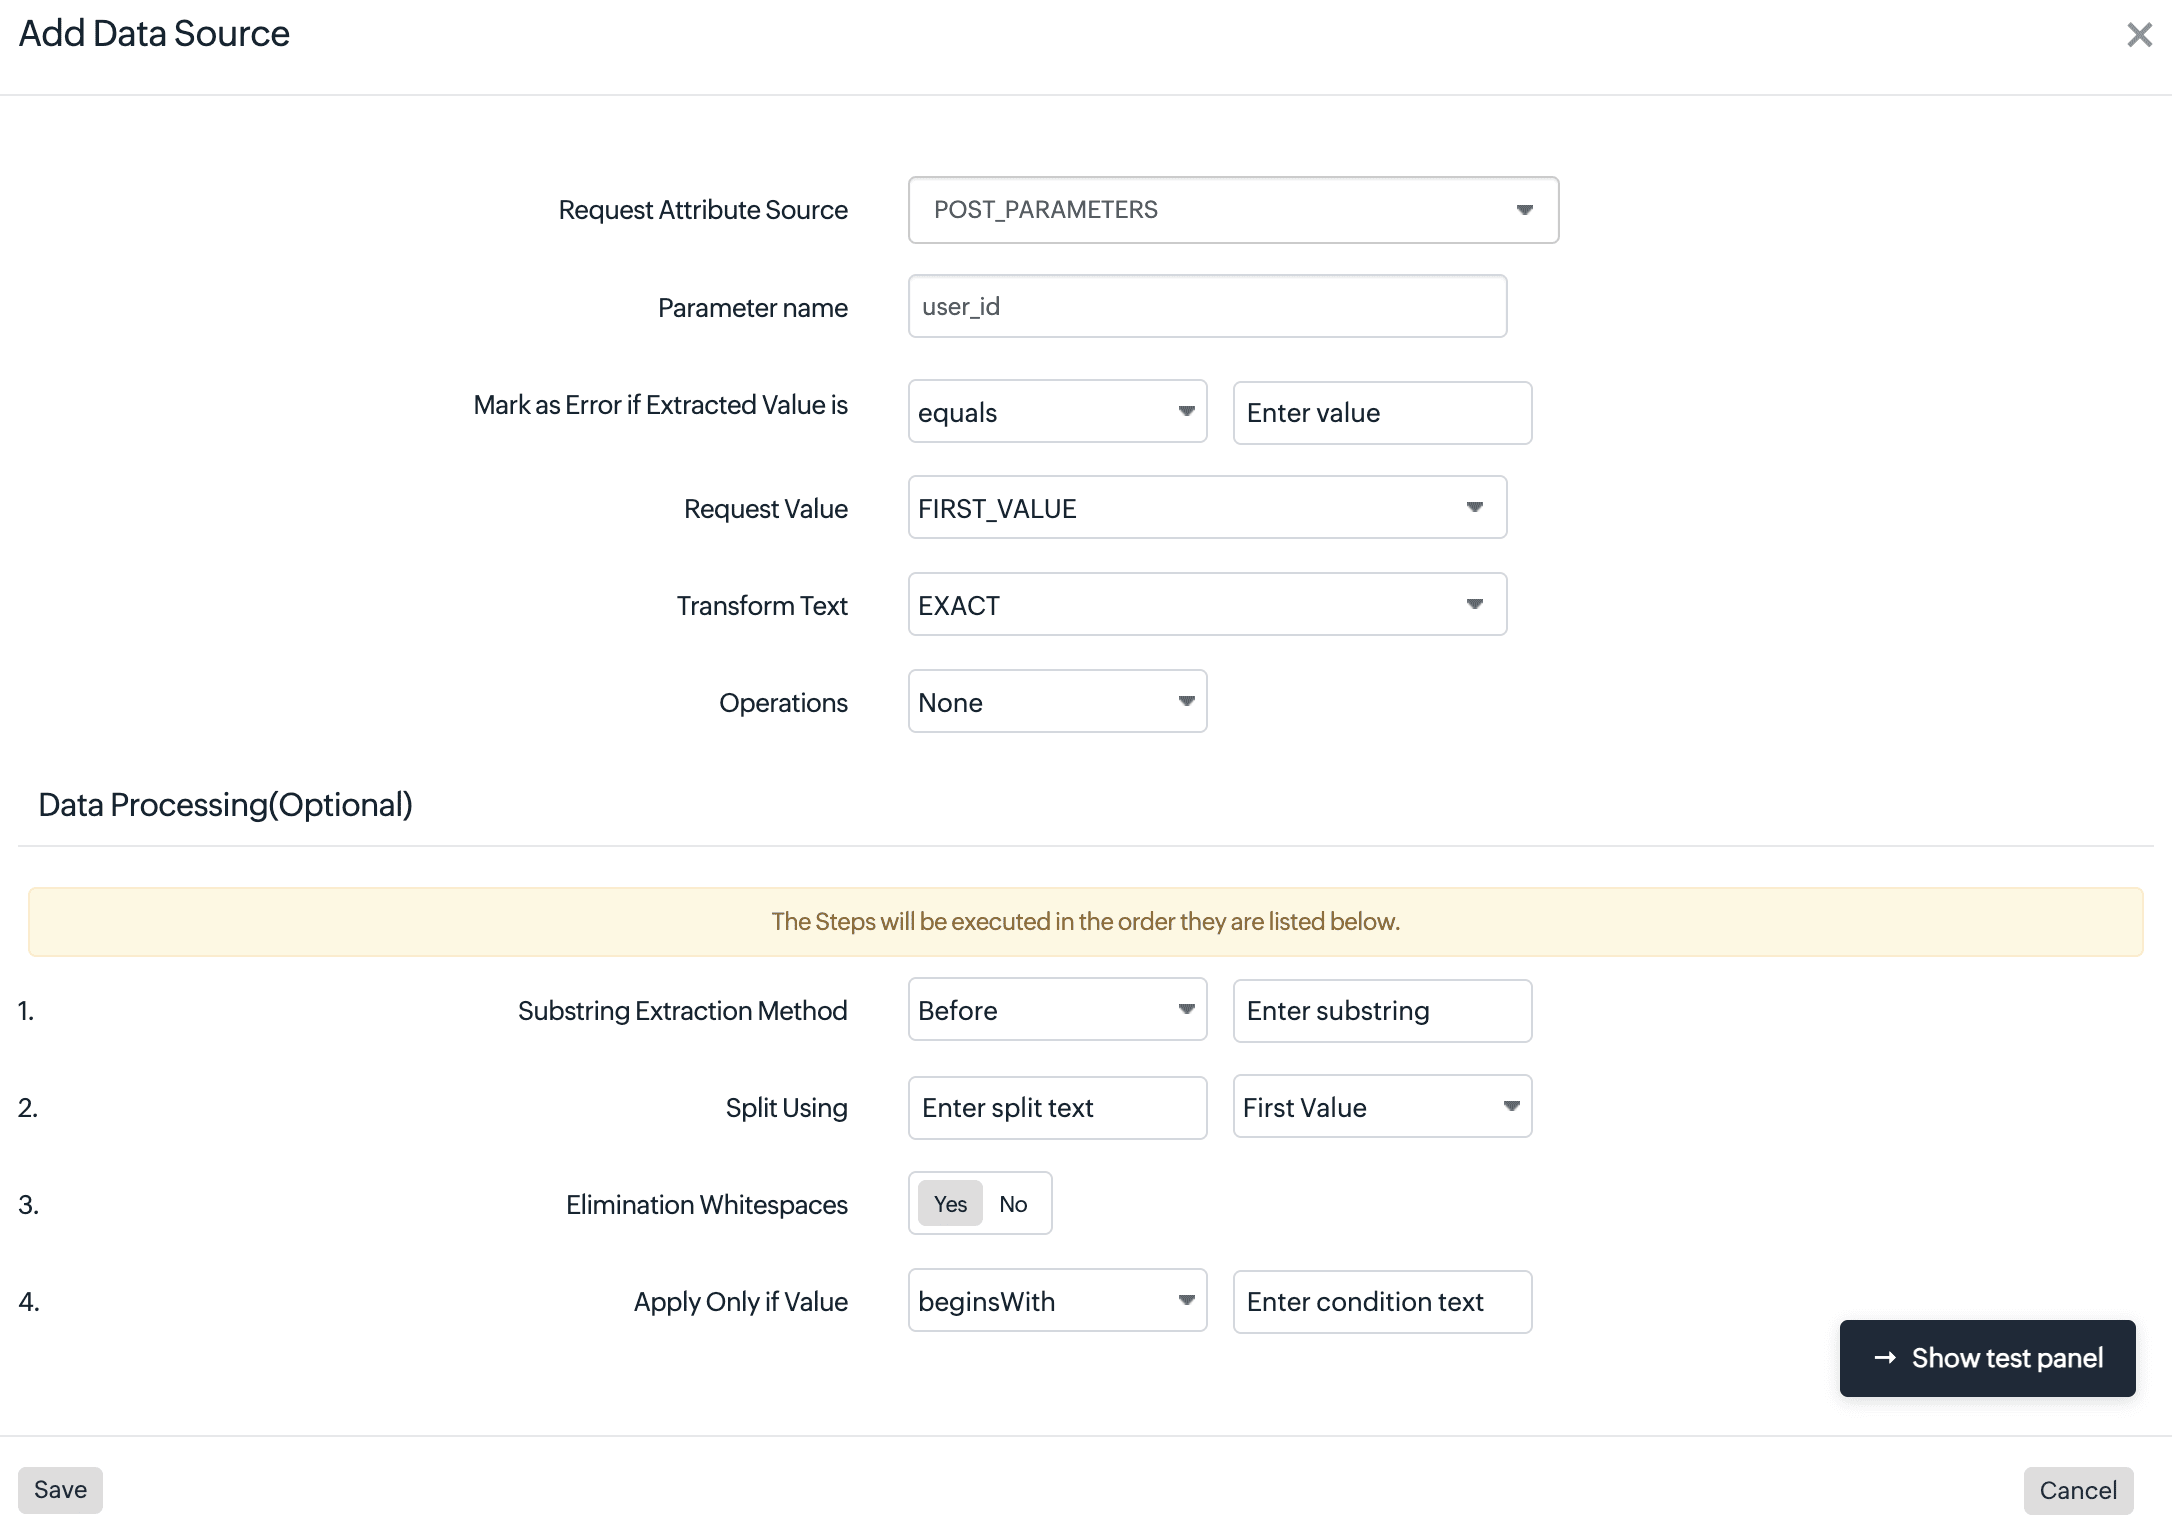
Provide the following details:
- Request Attribute Source: Select the source from which the attribute value will be extracted, such as HTTP requests, method parameters, and custom parameters.
- Parameter Name: Specify the name of the parameter or request field whose value should be extracted.
- Mark as Error if Extracted Value is: Define a condition to mark the request as an error when the extracted value matches the specified criteria.
- Request Value: Select which occurrence of the extracted value to capture when multiple values are available.
- Transform Text: Choose how the extracted value should be transformed before it is stored, such as preserving the original value or applying a supported text transformation.
- Operations: Configure the operation to perform on the extracted value, including the data type, operation type, and value.
Data Processing (Optional)
Optionally configure one or more processing steps to modify the extracted value before it is stored.
Available processing options include:
- Substring Extraction Method: Extract a portion of the value before or after a specified substring.
- Split Using: Split the extracted value using a delimiter and capture the required segment.
- Elimination Whitespaces: Remove leading and trailing whitespace from the extracted value.
- Apply Only if Value: Apply the processing rule only when the extracted value satisfies the specified condition.
Data processing steps are executed sequentially in the order in which they are configured. Rearrange the steps if required to achieve the desired output.
- Click Save to create the request attribute.
Test the data source
The Test panel enables you to validate the data source configuration before saving the request attribute. You can send a sample request and preview the extracted value to verify that the configured extraction and data processing rules work as expected.
To test a data source:
- In the Add Data Source dialog, click Show test panel.
- Select the HTTP request method (for example, GET or POST).
- Enter the request URL.
- Provide the sample request details as required:
- Headers: Add the required request headers.
- Request Body: Enter the sample request payload in JSON format.
- Response Body: Enter the sample response payload, if applicable.
- Review the Extracted value section to verify the value captured for the configured request attribute.
- If the extracted value is not as expected, modify the data source or data processing settings and test again.
- Once the extracted value is correct, close the test panel and click Save.
- The Test panel is intended only for validating your extraction rules. It does not save or apply the request attribute configuration until you click Save in the Add Data Source dialog.
View request attributes
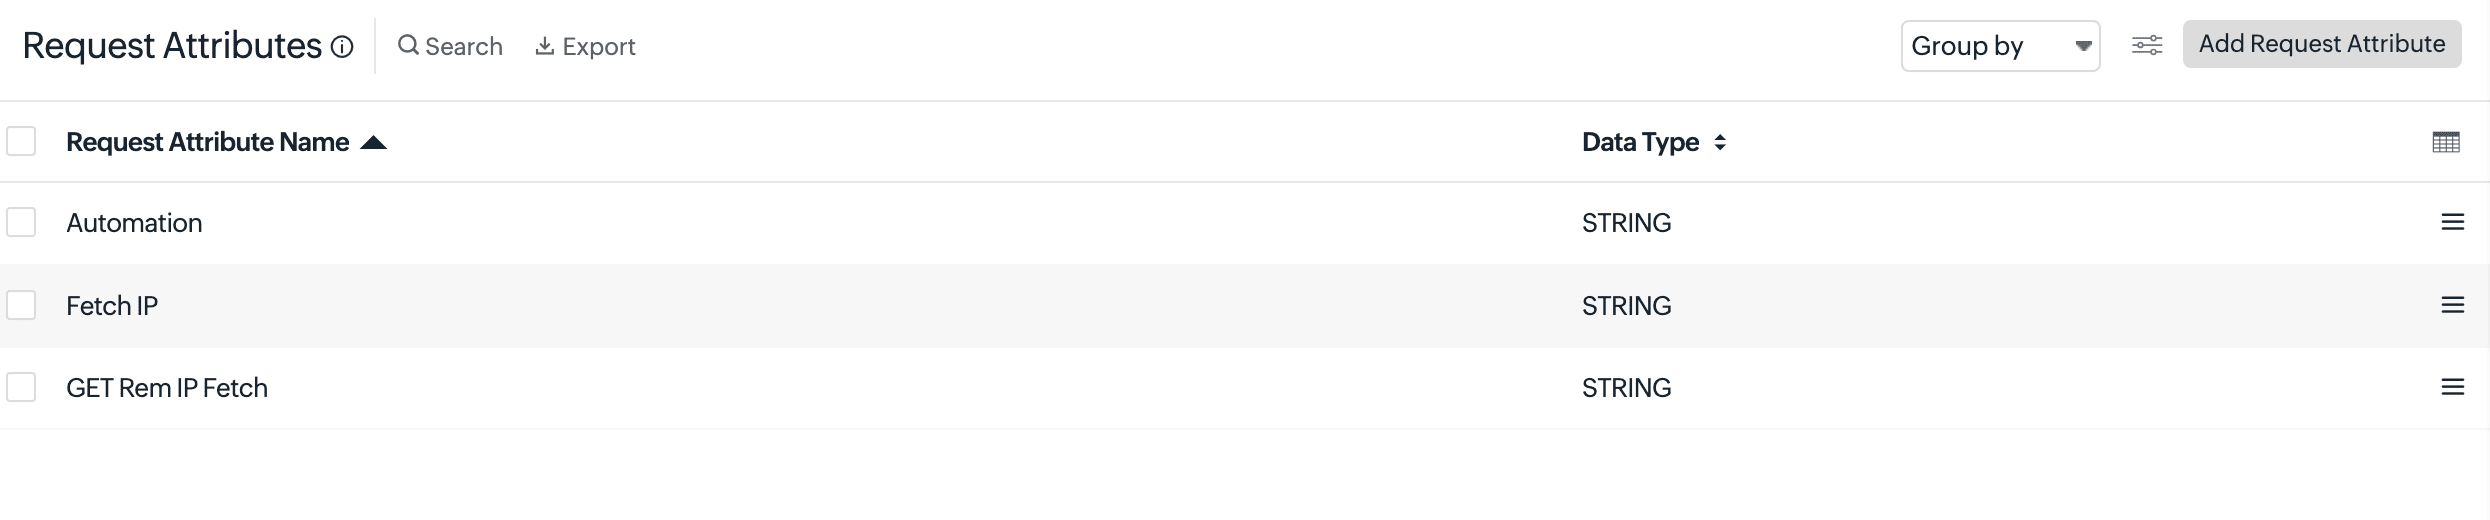
The request attribute is created as a monitor and is listed on the Admin > APM > Request Attributes page, where you can view and manage all configured request attributes.
How to edit a request attribute
You can open an existing request attribute from the Request Attributes page and edit it at any time.
- Log in to your OpManager Nexus account.
- Navigate to Admin > APM > Request Attributes.
- Click the required request attribute.
- Modify the required fields, such as:
- Request Attribute Name
- Is Sensitive Data
- Define Criteria
- Data Sources
- You cannot modify the Data Type of a request attribute after it is created.
- To modify an existing data source, click the Edit (pencil) icon
 next to the required data source. You can update all the fields including Data Processing settings.
- Click Save to apply the updated configuration.
Updated conditions are applied only to new incoming requests. Previously captured request attributes remain unchanged.
View request attributes in traces
After creating a request attribute, you can view its extracted values in the Traces tab and use them to filter trace data.
To display a request attribute as a column
- Navigate to APM > APM Insight > Applications.
- Click your application name and go to the Traces tab.
- Click the Filter columns icon
 in the upper-right corner of the traces table.
- Select the required request attribute from the list.
- The selected request attribute is added as a new column in the traces table, displaying the extracted values for each trace.
To filter traces using a request attribute
- In the Traces tab, click Add Filters.
- Select the required request attribute.
- Specify the filter value.
- Apply the filter to view only the traces that match the selected request attribute value.
Request attributes become available for selection as columns and filters only after they are configured and data has been collected for matching requests.
Delete a request attribute
Request attributes can be deleted individually.
Steps to delete a request attribute
- Navigate to Admin > APM > Request Attributes.
- Click the Hamburger icon
 of the required request attribute.
- Select Delete.
- Confirm the deletion.
When a request attribute is deleted:
- New requests will no longer have the attribute extracted.
- Existing historical request data remains available according to the configured data retention policy.