Migrating to Mobile Device Manager Plus cloud using the UEM migration tool
Table of Contents
- Introduction
- Platforms You Can Migrate From
- Prerequisites for Migration
- Migration Checklist
- What Gets Migrated and What Doesn’t
- Migrating from MDM On-Premises to MDM Plus Cloud
- Module Customisation
- Migrate the Data
- Migrating Devices to Mobile Device Manager Plus
- Collecting and Sending Logs (Troubleshooting)
- Post-Migration Checklist
1. Introduction
Managing devices across different platforms sometimes requires switching MDM solutions or changing hosting preferences. Reasons for migration may include better workflows, platform-specific features, or improved support.
Migrating devices can be complex, especially when organizations have a large fleet with corporate apps, security policies, and critical data. This guide helps IT admins migrate various components efficiently while minimizing disruptions.
2. Platforms You Can Migrate From
We enable you to:
- Migrate from Mobile Device Manager Plus On-Premises to Mobile Device Manager Plus Cloud
- Migrate from Mobile Device Manager Plus Cloud to Mobile Device Manager Plus On-Premises
- Migrate from Endpoint Central’s MDM On-Premises to Mobile Device Manager Plus On-Premises
- Migrate from Endpoint Central’s MDM On-Premises to Mobile Device Manager Plus Cloud
- Migrate from Endpoint Central’s MDM Cloud to Mobile Device Manager Plus On-Premises
- Migrate from Endpoint Central’s MDM Cloud to Mobile Device Manager Plus Cloud
- Migrate from Mobile Device Manager Plus On-Premises to Endpoint Central’s MDMP On-Premises
- Migrate from Mobile Device Manager Plus On-Premises to Endpoint Central’s MDMP Cloud
- Migrate from Mobile Device Manager Plus Cloud to Endpoint Central’s MDMP On-Premise
- Migrate from Mobile Device Manager Plus Cloud to Endpoint Central’s MDMP Cloud
3. Prerequisites for Migration
Before proceeding with migration, ensure that your setup meets these requirements:
A. Hosting-Based Pre-Requisites (Destination server - On-Premises)
- The Migration Tool and On-Premises server must be installed on different machines.
- The server must be updated to the latest build.
- APNS must be configured on the destination server (APNS ensures management of Apple devices)
- NAT must be configured on the destination server and the migration tool.
B. Connectivity-Based Pre-Requisites
During migration, devices must be reachable with the current MDM server, UEM Migration Tool, and the new MDM server.
The following configurations must be done within the UEM Migration Tool before initiating the migration:
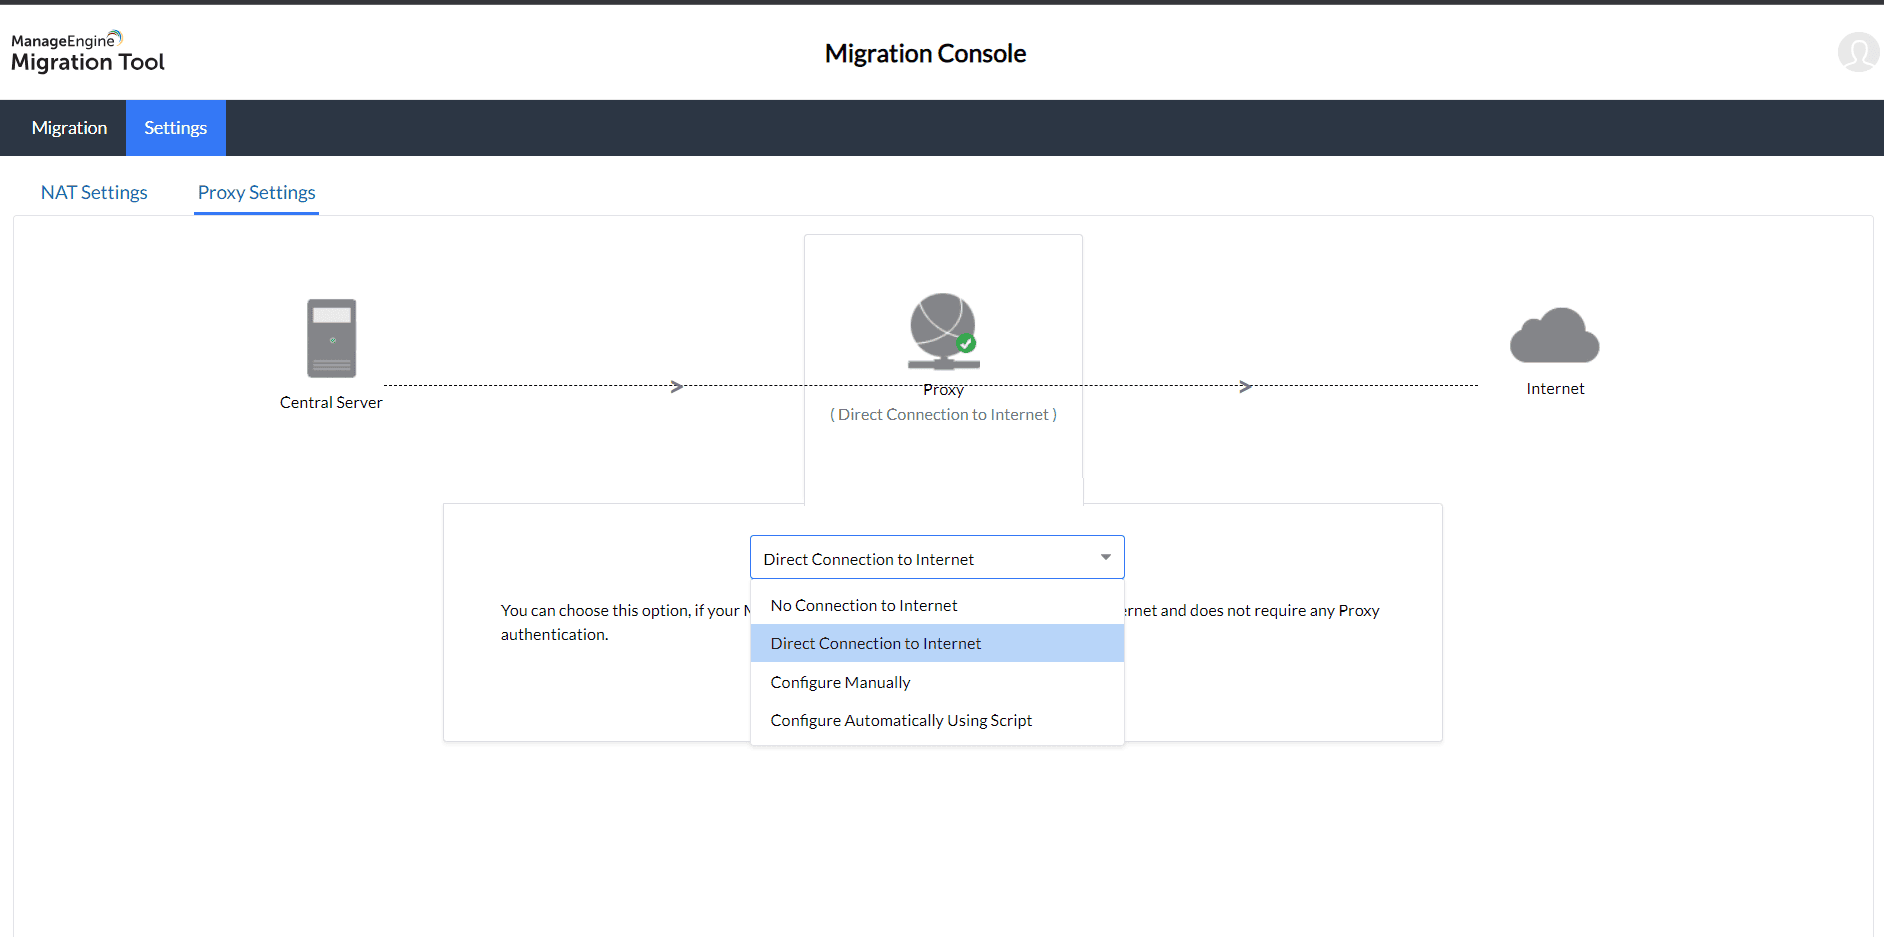
- To set up proxy settings, click Settings → Proxy → Choose the Connection type from the drop-down → Save.
NAT Configuration for Apple Devices
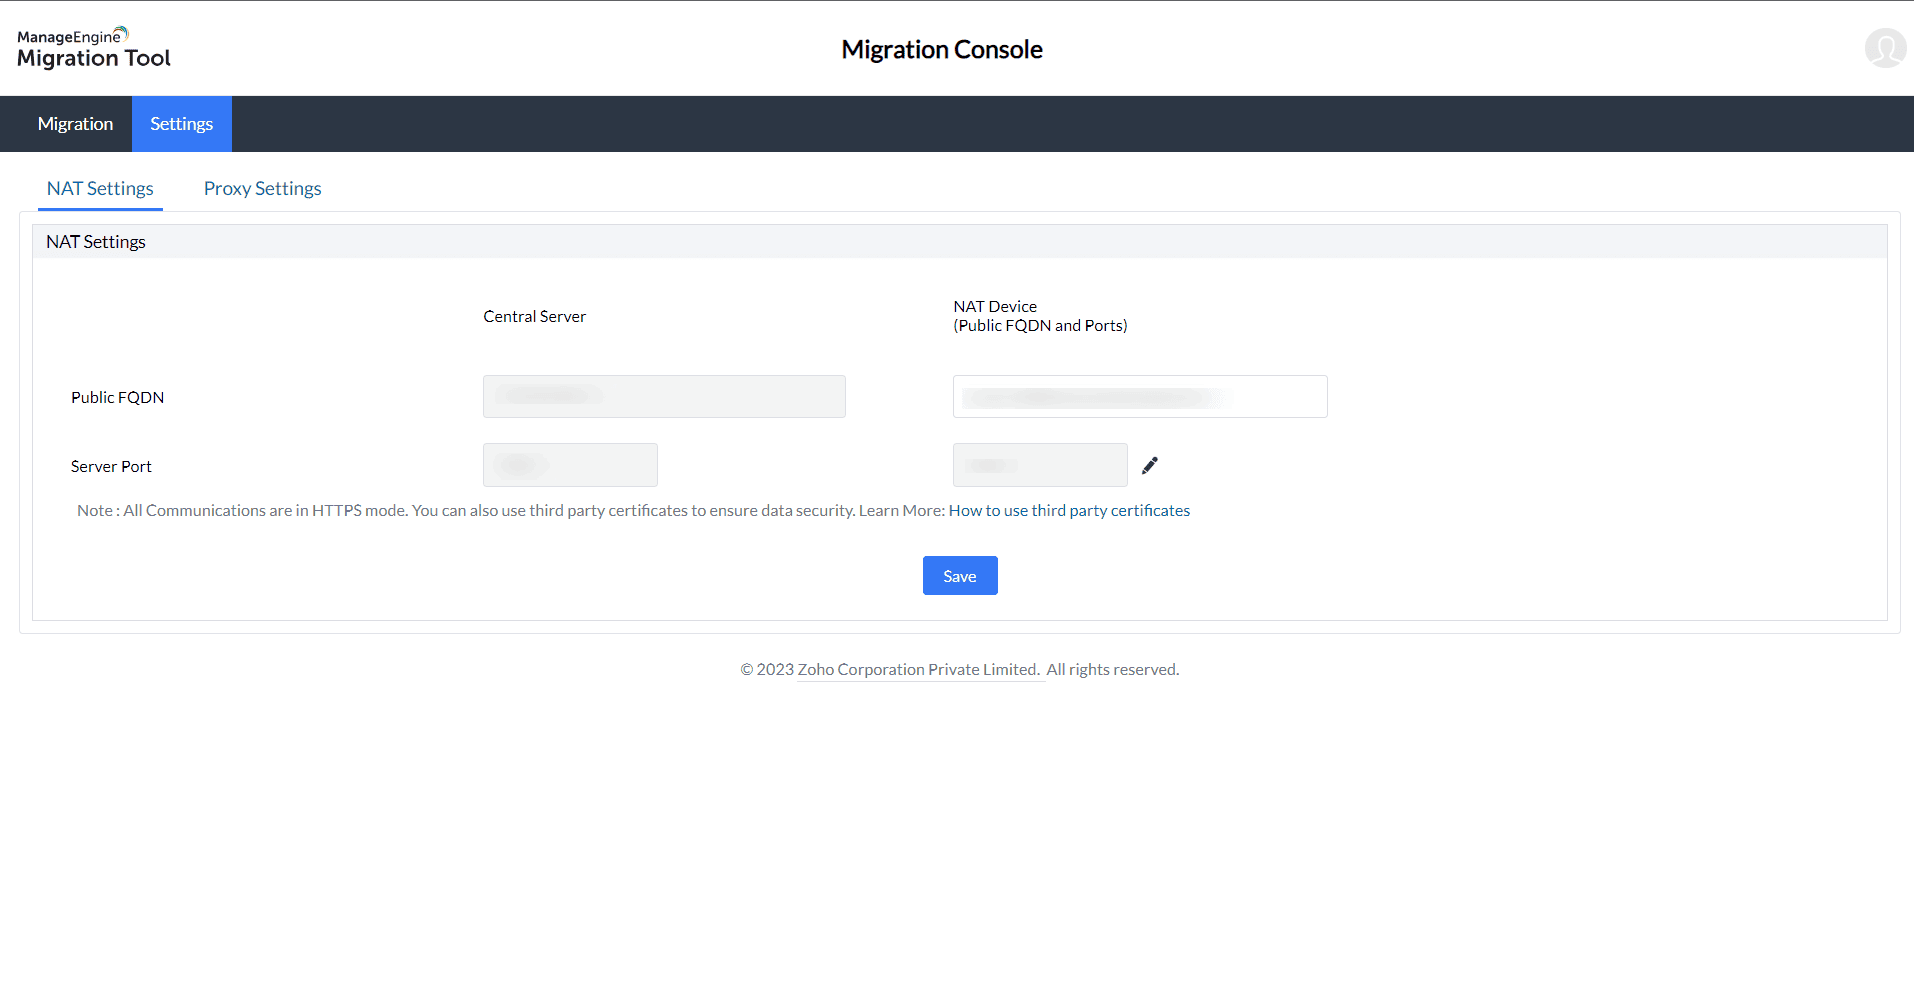
- For Apple devices, configure NAT settings by clicking on Settings → NAT and then adding the required IP address or FQDN. Once the IP address or FQDN has been added, click Save.
4. Migration Checklist
Before starting the migration, follow this checklist to ensure a smooth transition:
- Assess the current MDM setup and document key configurations.
- Plan a specific timeline for the migration process.
- Communicate migration plans to employees.
- Initiate migration using Migration tool.
- Test migration with a few devices before full-scale deployment.
- Verify device functionality under the new MDM setup.
5. What Gets Migrated and What Doesn’t
What will be migrated:
- Groups
- Users
- Devices (along with their records and configurations)
- Apps
- Profiles
- User-to-Group associations
- App-to-Group associations
- Profile-to-Group associations
- Enrollment tokens
What will not be migrated:
- Audit logs
- OS update policies
- Location history and device-specific logs
- User role assignments (must be reconfigured in the new server)
6. Migrating from MDM On-Premises to MDM Plus Cloud
There are multiple supported migration paths across products and deployment types. This section shows an example of migrating from MDM On-Premises to MDM Plus Cloud.
- Download the Migration Tool and install it on your server.
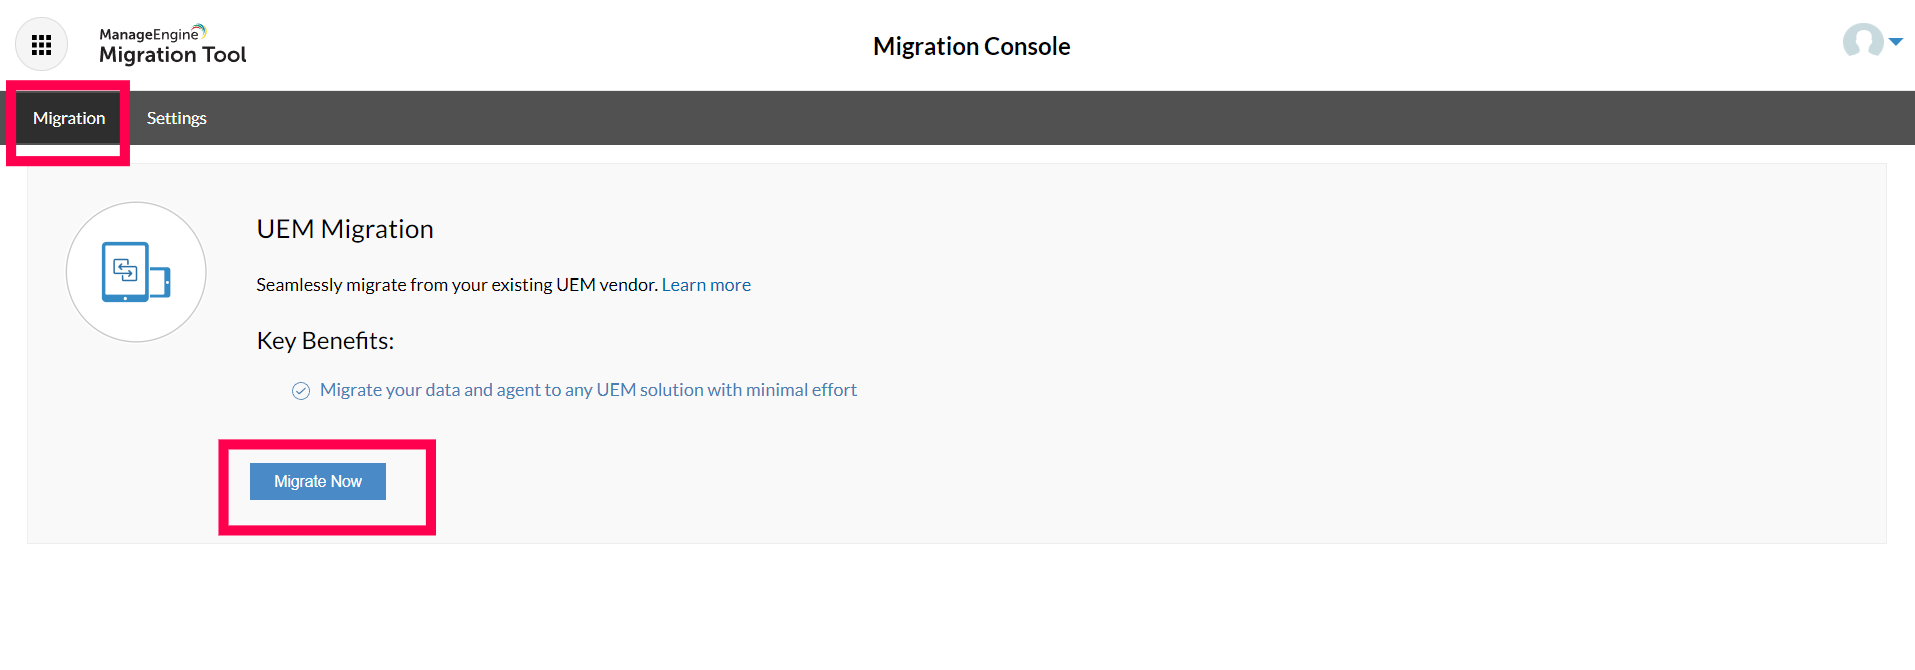
- Open the Migration Tool → Go to the Migration Tab.
- Ensure all pre-requisites are configured, then click "Migrate Now".
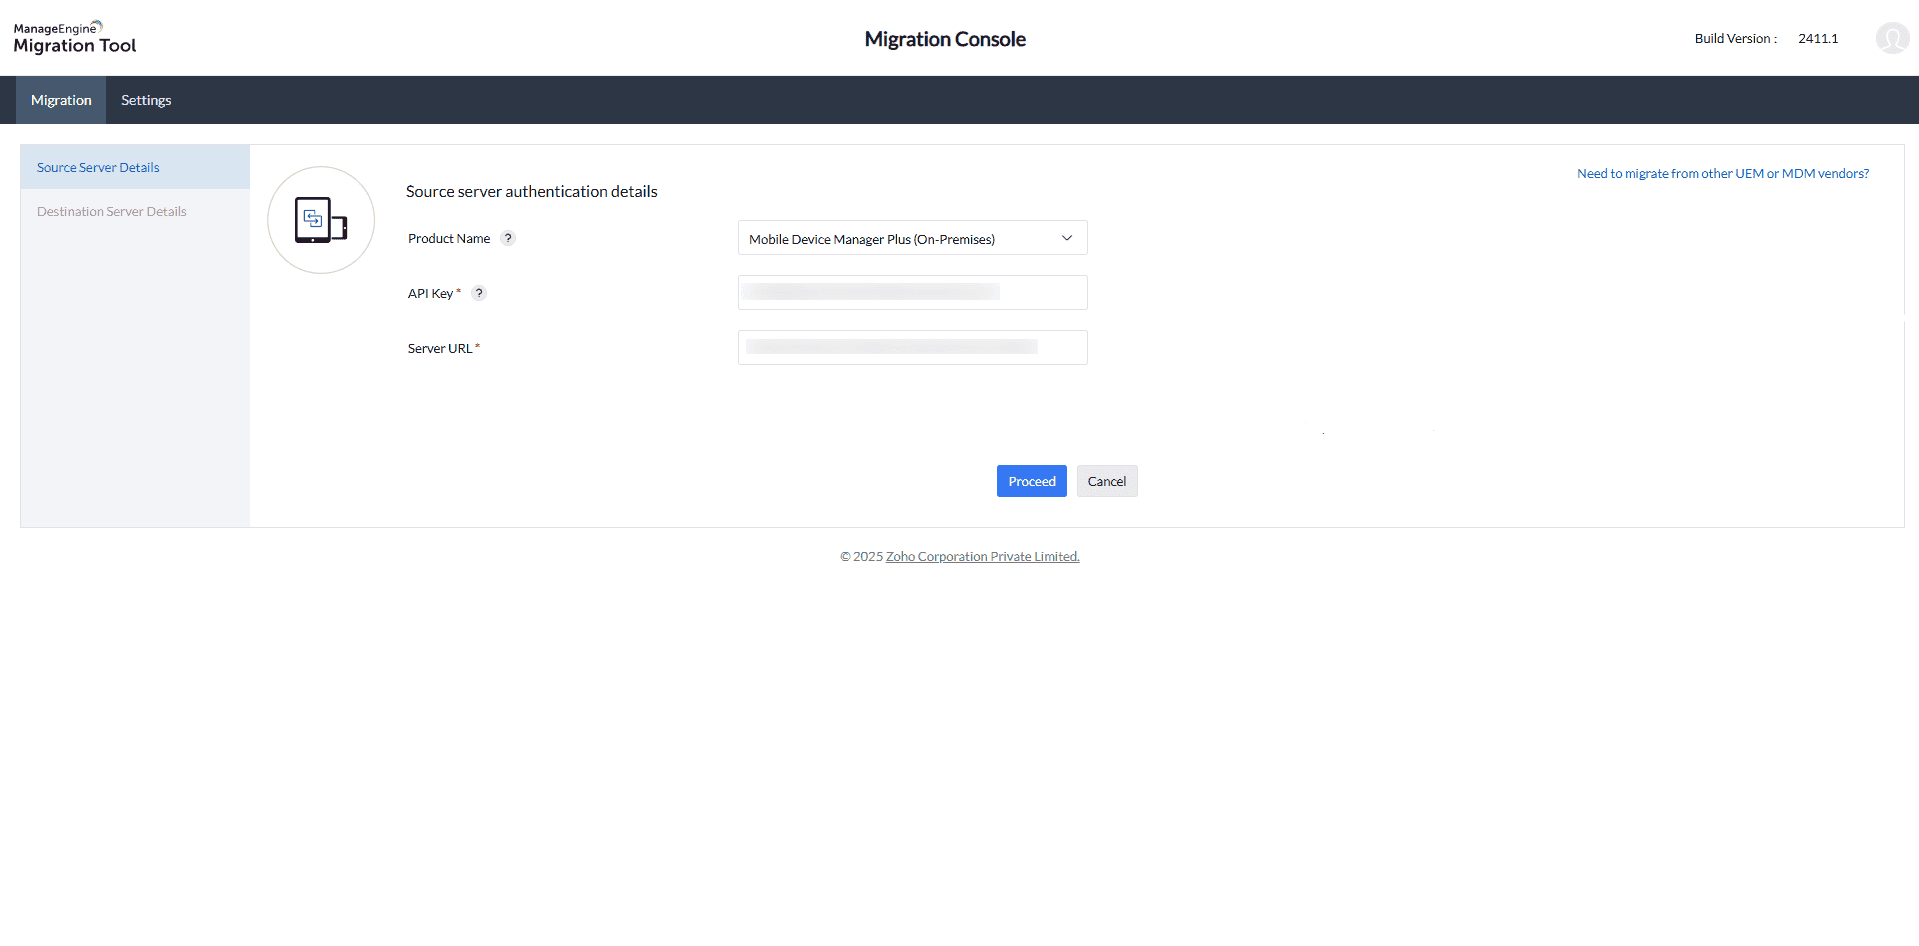
- Now you’ll be on the source server page. Select Mobile Device Management On-Premises as the product name. Enter the authentication details for the source server.
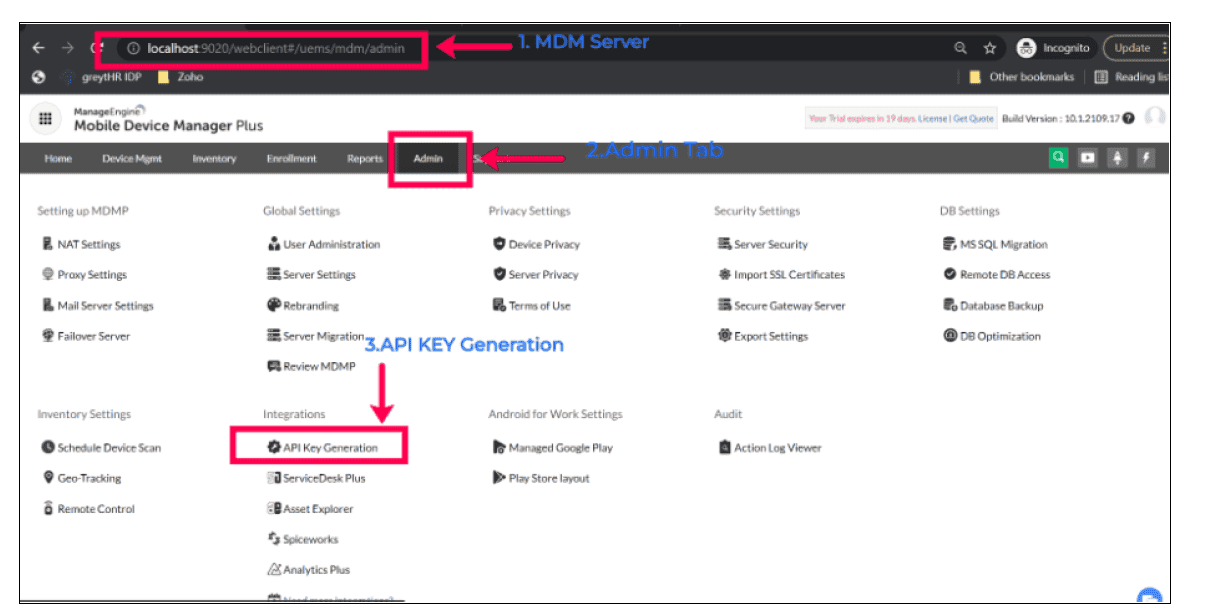
How to obtain the API Key:
You can obtain the API key in one of the following ways:
- Generate a new API Key from the Mobile Device Manager Plus console
- Use an existing API Key from the Mobile Device Manager Plus console
- Use an existing API Key from the Endpoint Central console
MDMP On-Premises:
Go to Admin → API Settings → Generate Key
- For Endpoint Central On-Premises API key generation steps, refer here
- After entering the API Key and Server URL, click Proceed.
https://, followed by the Fully Qualified Domain Name (FQDN) and the respective port. Example: https://mdm.exampledomain.com:9383- You will now be redirected to the destination server page.
Destination Server Authentication
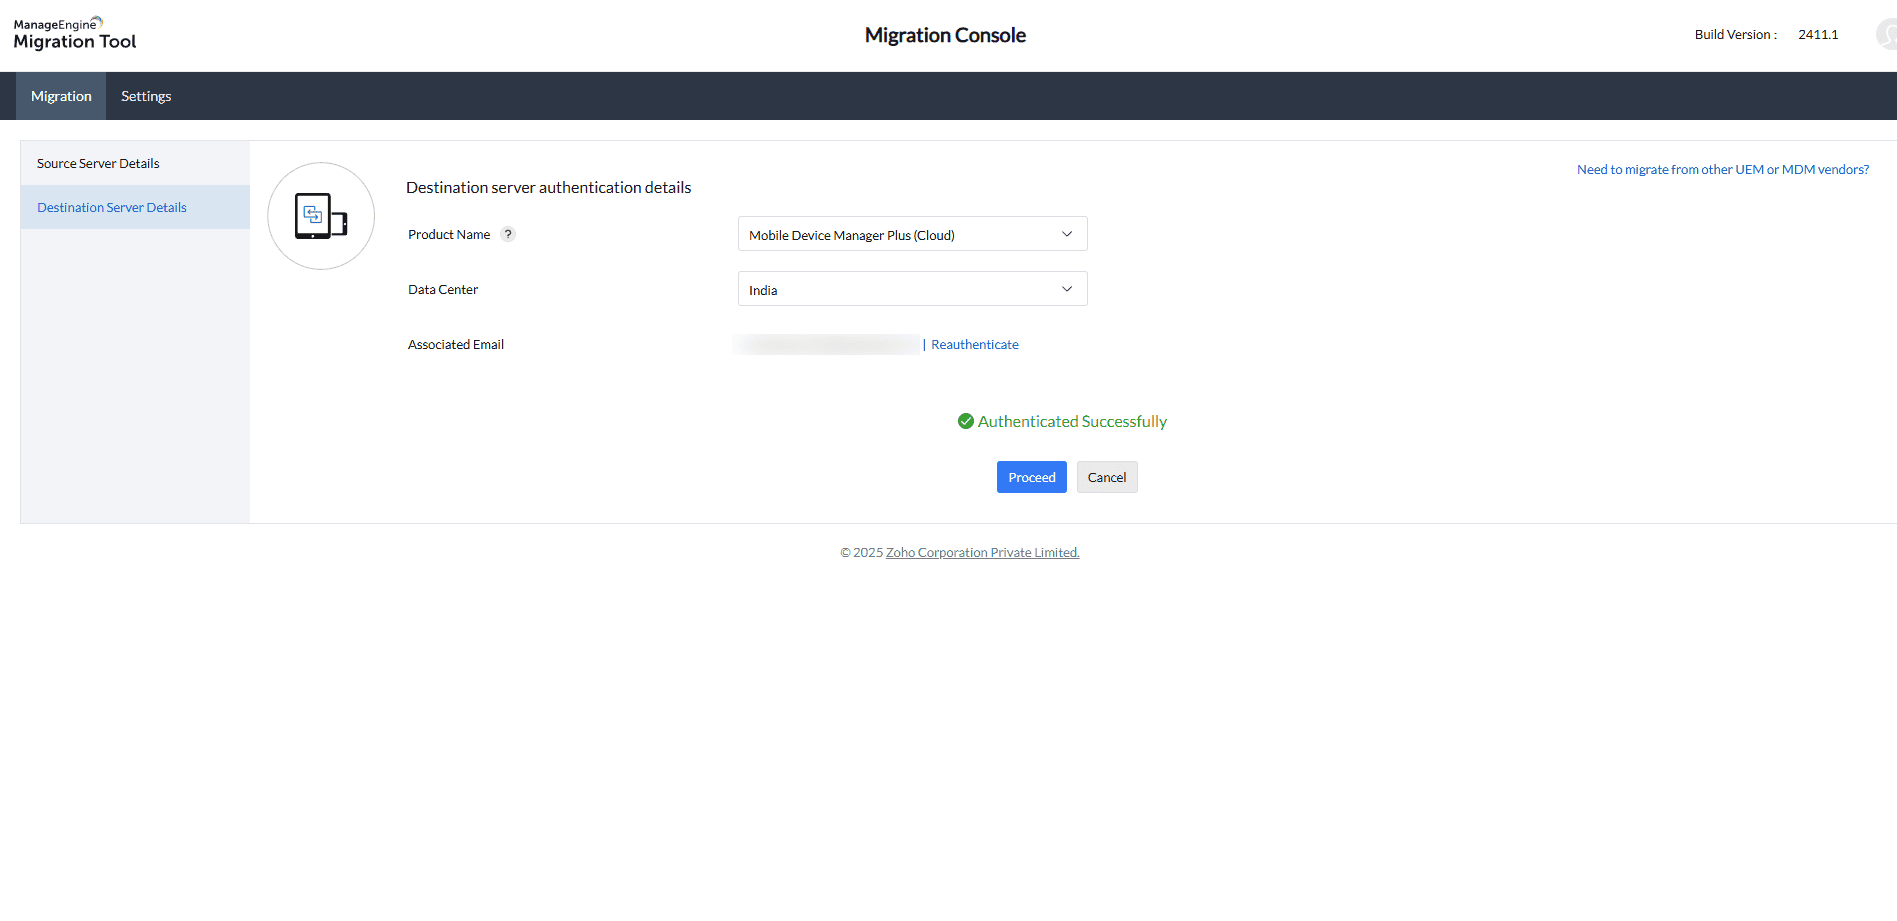
On the destination server page, choose the product name, select the data centre, and click Authenticate.
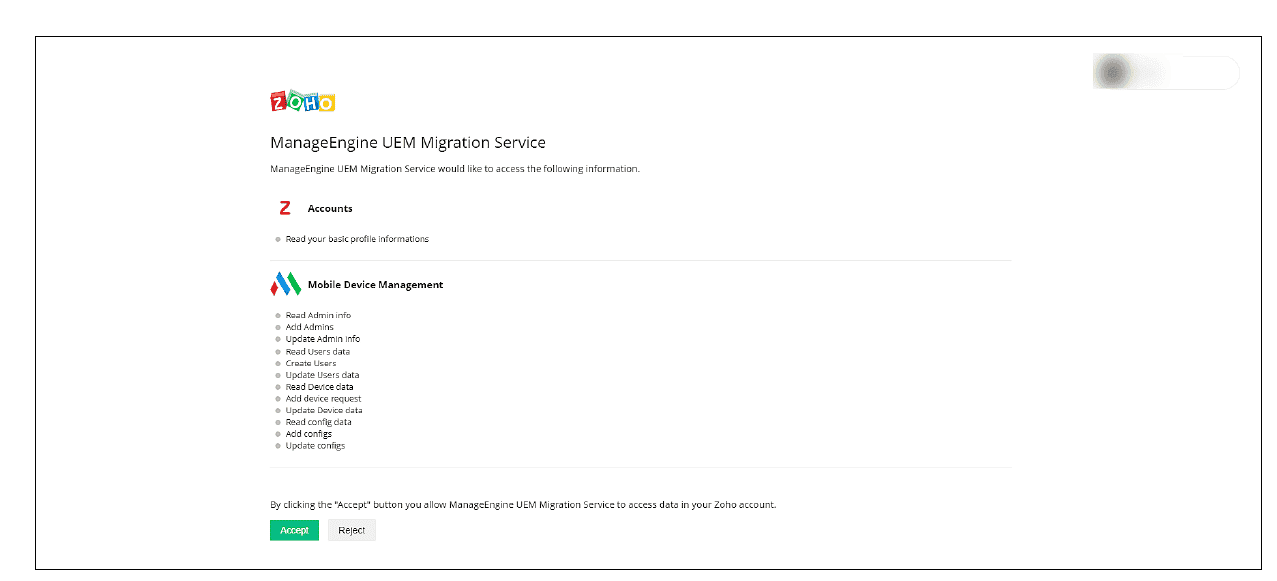
Cloud Authentication steps (MDMP Cloud or Endpoint Central Cloud)
- Authenticate using your Zoho account (Super Admin) credentials.
- Accept the terms to proceed.
- Once authentication is successful, click Proceed to continue.
7. Module Customisation
After completing authentication, proceed to the next step to customize the modules for migration. Choose the data modules to migrate.
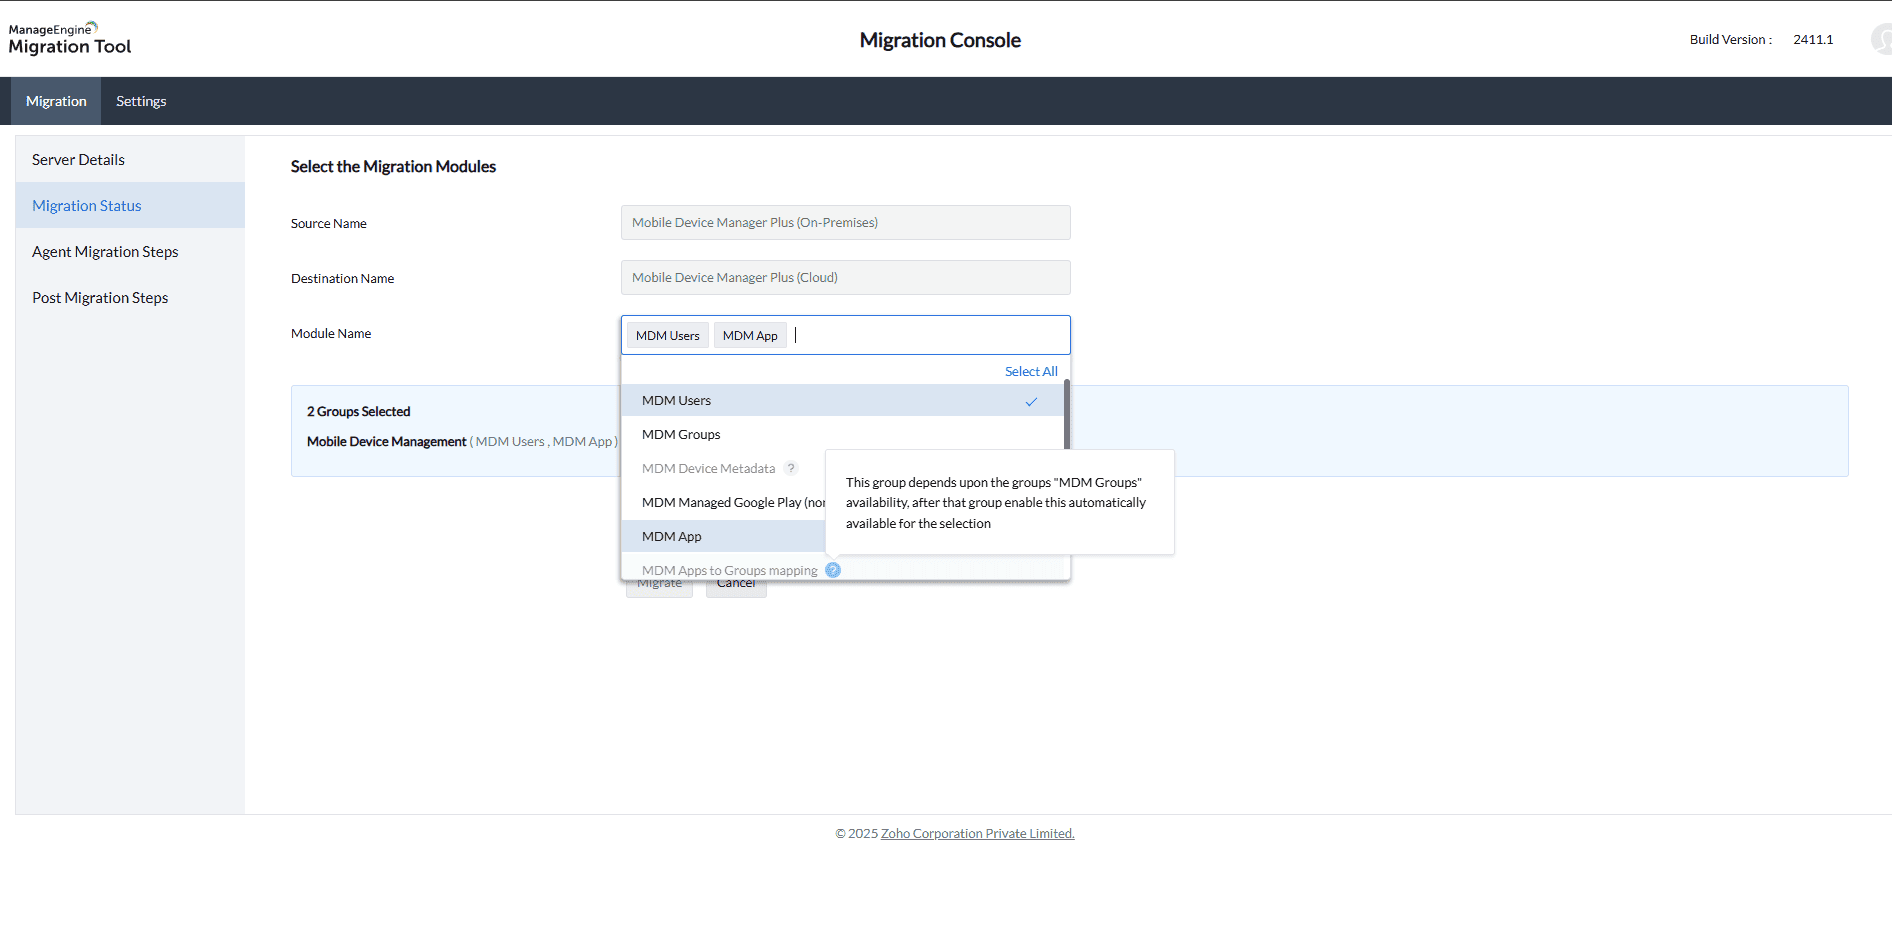
Each module represents a category such as:
- Users
- Groups
- Devices
- Apps
- Profiles
- Enrollment Tokens
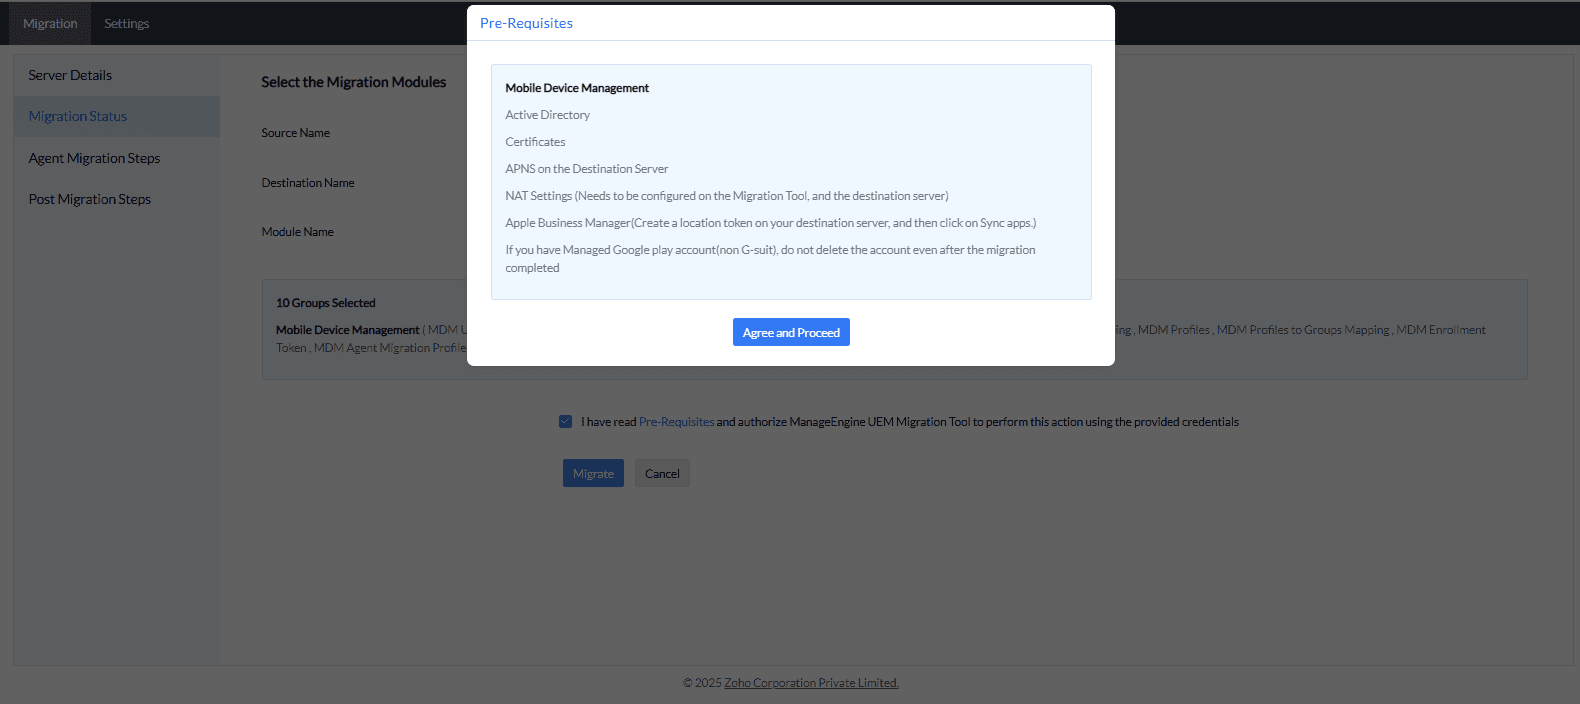
Select the required modules, keeping in mind any dependencies. A module represents a broad category like Groups, Devices, or Apps. For example, the Groups module depends on the Users module. If the Users module is not selected, Groups cannot be migrated.
Select the checkbox to view the list of prerequisites in a pop-up.
Ensure all prerequisites are completed before proceeding with the migration.
Click Agree and Proceed to continue.
8. Migrate the Data
Now that you’ve selected the necessary modules, the next step is to initiate the actual data migration.
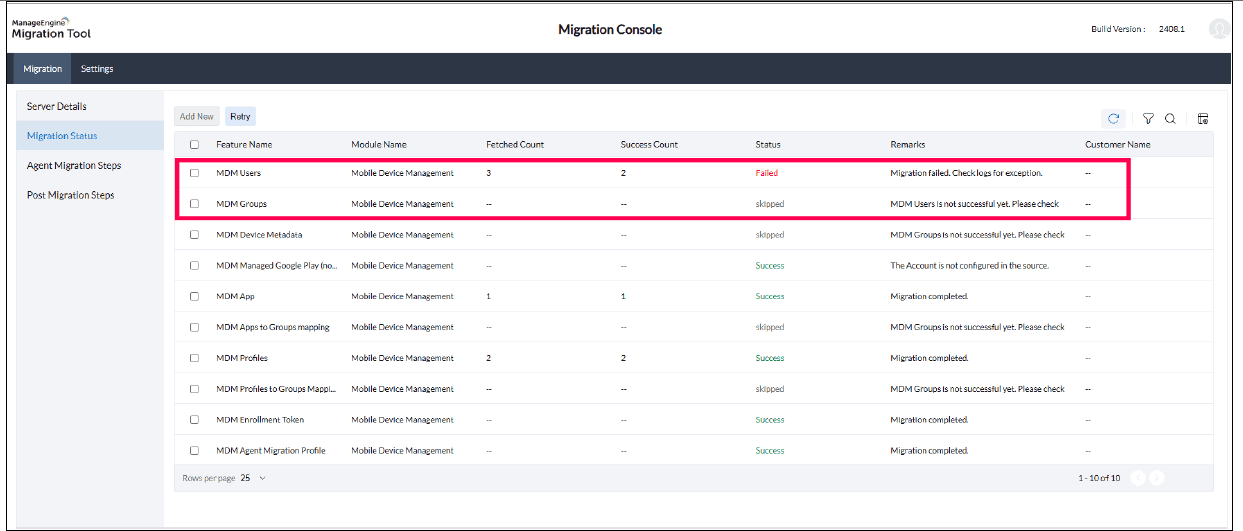
- Click Migrate Now to begin the data migration.
- Monitor the status in the Migration Status page.
9. Migrating Devices to Mobile Device Manager Plus
Once all the modules have been successfully migrated, follow the steps mentioned to migrate your agents to the cloud server.
Steps to Migrate iOS Devices
To migrate iOS devices, an iOS Migration Profile is used to ensure proper enrollment and management.
Follow these steps:
On the source server, locate the "iOS Migration Profile" under Device Mgmt → Profiles in the Source Server console.
- Distribute this profile to test devices.
- Once installed, a web shortcut labeled “MDM Migration” appears.
- User taps "Begin" — the old MDM profile is removed, and a new profile is downloaded.
- The end user must manually install the new profile by navigating to: Settings → General → VPN & Device Management
- The device passcode will be required during installation to complete the setup.
- Verify the migration status in Enrollment → Devices.
- Once tested, distribute the profile to all iOS devices.
B. Migrating Android Devices

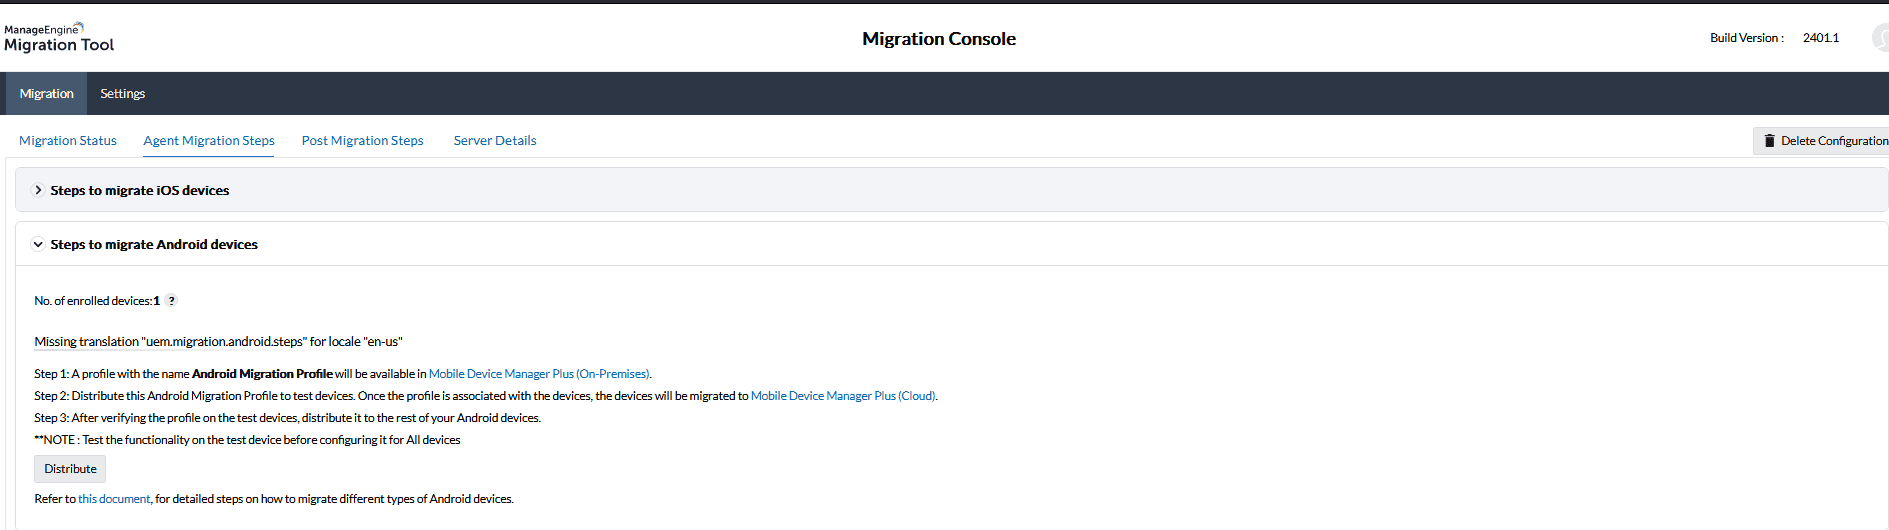
For Android devices, the process is similar using the Android Migration Profile:
- On the source server, find the "Android Migration Profile" under Device Mgmt → Profiles in the Source Server console.
- Distribute the profile to test devices.
- Once installed, devices will automatically migrate.
- Once tested, distribute the profile to all Android devices.
10. Collecting and Sending Logs (Troubleshooting)
If issues arise during migration, collect logs and send them to support:
- Navigate to the unzipped tool folder:
- ManageEngine → DesktopCentral_Server
- Go to the logs folder:
- Path:
<tool installed location>/ManageEngine/UEMMigrationTool/logs - Default installation path:
C:\Program Files\ManageEngine\UEMMigrationTool\logs
- Path:
- Important: Stop the UEM Migration Tool service before collecting the logs.
This prevents collecting only.lckfiles. - Zip the logs folder and attach it to your support ticket.
11. Post-Migration Checklist
After a successful migration, ensure:
- Managed Google Play is configured for Android app deployment.
- Apple devices in Apple Business Manager (ABM) are reassigned to the new MDM server.
- All key integrations (Active Directory, certificates, app stores) are configured.
Key Integrations to Verify:
- Active Directory → Sync users & groups
- Certificates → Secure communication
- App Deployment Configurations:
- Apple Business Manager (iOS/iPadOS)
- Managed Google Play (Android)