Direct Inward Dialing: +1 408 916 9393
As your organization grows, it's likely to deploy multiple IT applications to meet various IT needs. These applications often operate in silos, each catering to specific requirements. Over time, this setup can complicate IT management tasks for your administrators.
To simplify AD management, ManageEngine now provides integration of its identity and governance and administration solution, ADManager Plus, with other popular IT applications using REST, SOAP, and Graph APIs. In addition to these built-in integrations, ADManager Plus also exposes its REST APIs, allowing admins to execute AD management tasks from any external or in-house system.
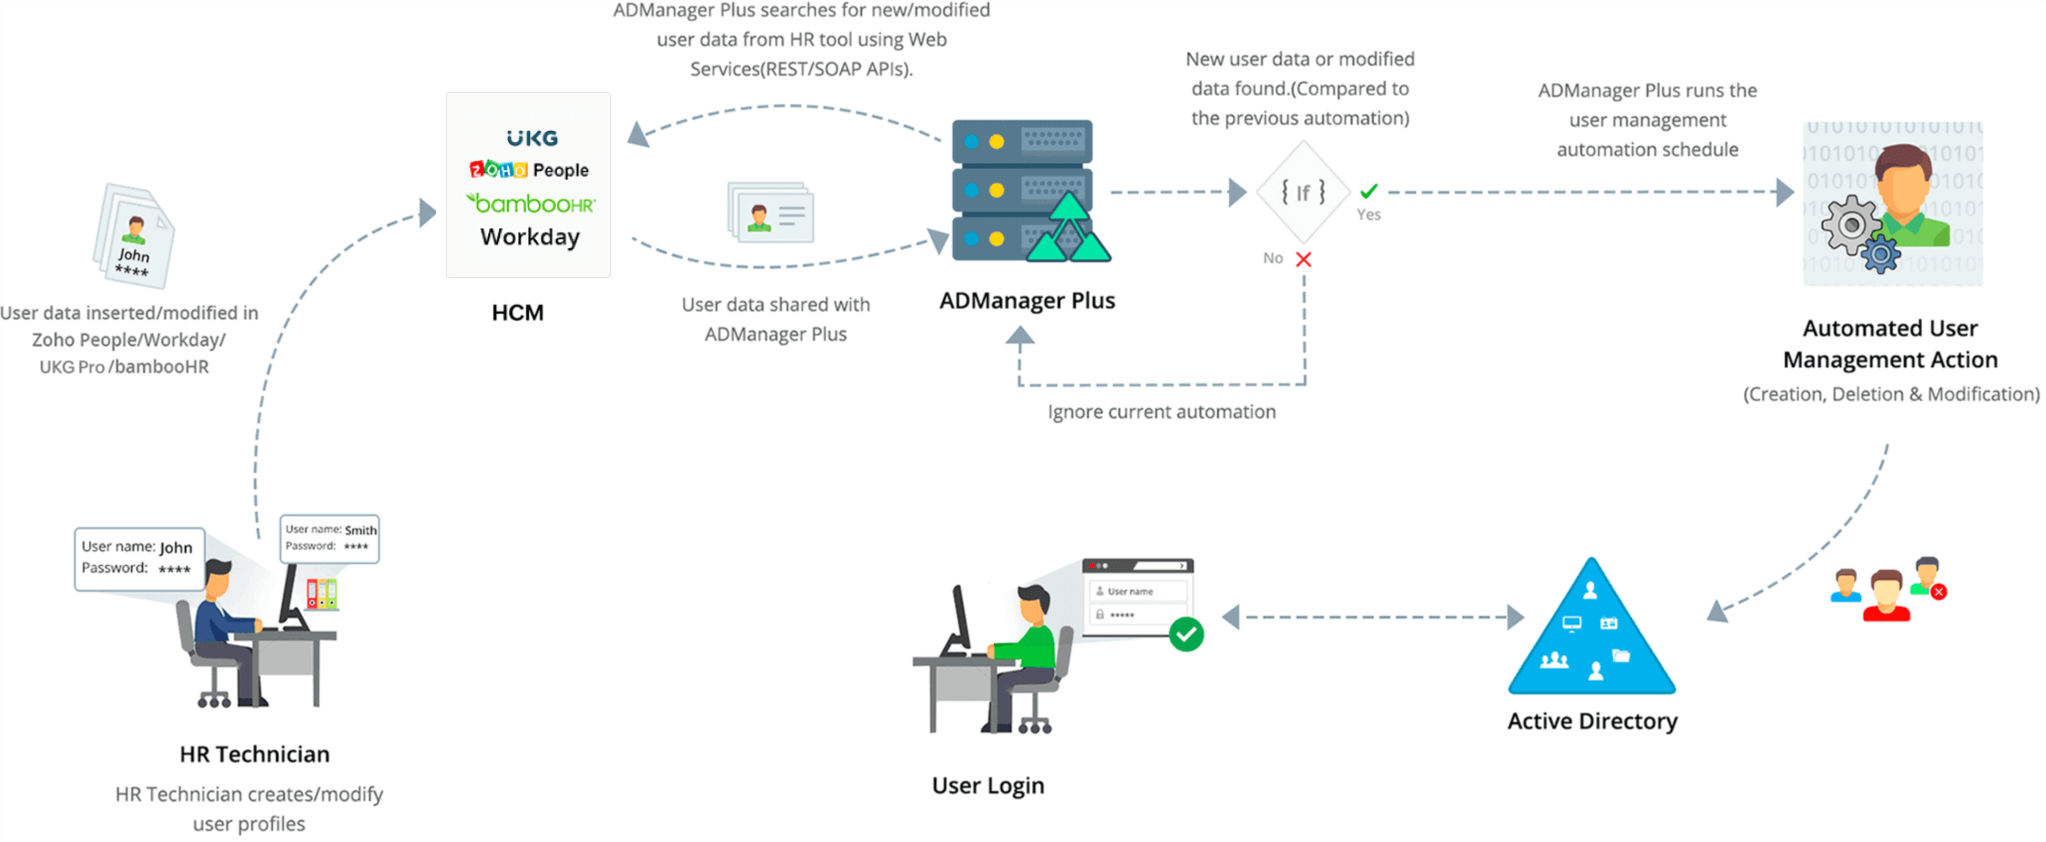
Organizations rely on human capital management (HCM) tools to manage employee details. Integration with popular HCM tools, such as Zoho People, UKG Pro, BambooHR, and Workday makes AD account management easy for administrators and HR managers alike, with complete hands-free user provisioning, management, and deprovisioning.
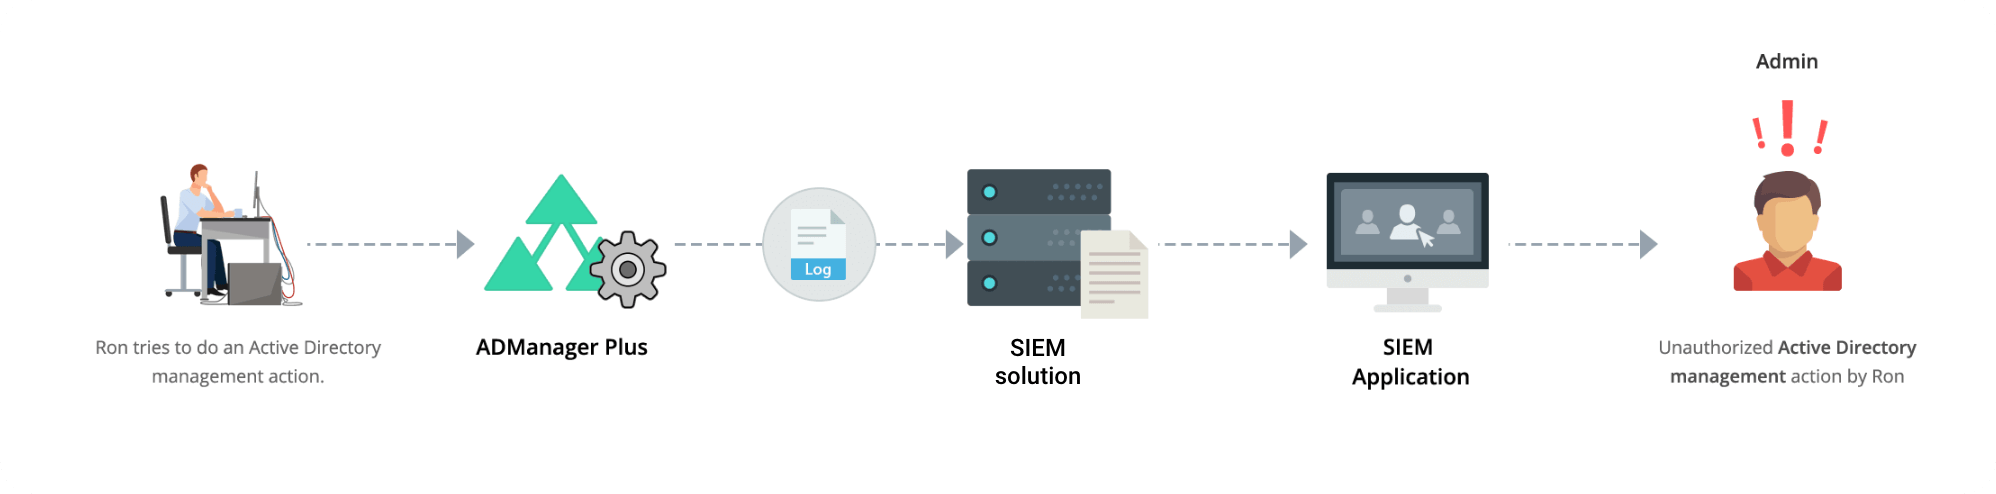
Security information and event management (SIEM) solutions make it easy to generate an audit trail of all AD actions, as well as create reports for meeting key industry standards. SIEM software uses log data to identify and prevent potential attacks, and analyze security breaches. ADManager Plus integrates with SIEM applications to automatically send all logs of AD, Microsoft 365, and Google Workspace management operations performed in ADManager Plus to a SIEM tool.
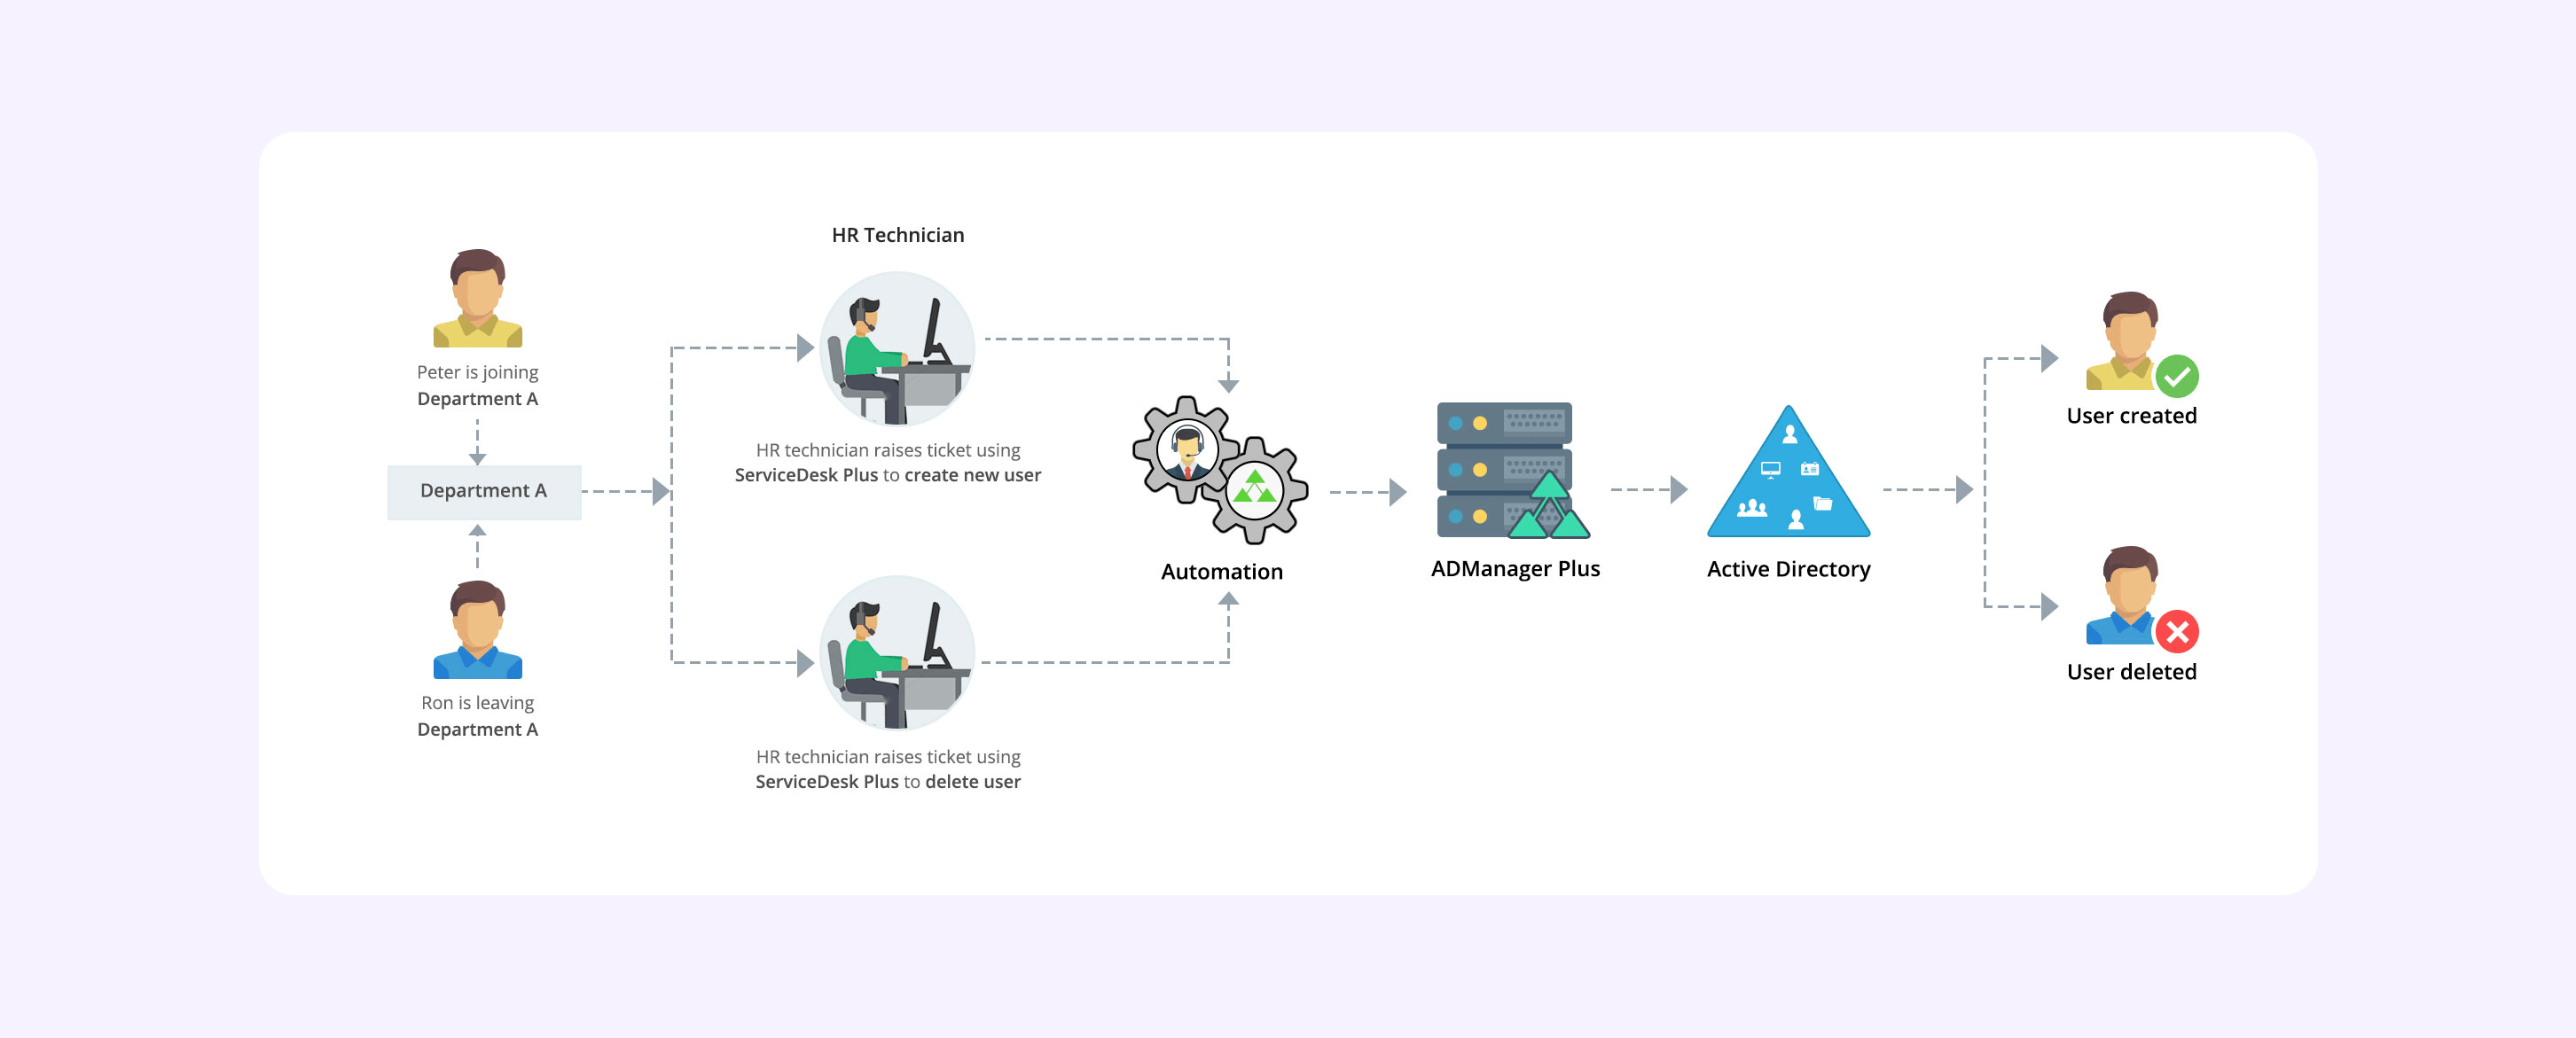
ADManager Plus integration with help desk tools assists AD administrators and technicians with carrying out AD management actions without using multiple tools. ADManager Plus currently integrates with ServiceDesk Plus, Zendesk, ServiceNow, and more.
Most HR applications store employee records in databases that only HR can access. That means IT admins have to rely on HR every time they need to provision, manage, or deprovision accounts in Active Directory. Waiting for CSV files from HR managers can delay the entire user account management process or even introduce data entry errors.
ADManager Plus' integration with databases makes AD account management easy for IT administrators and HR managers alike, with complete hands-free user provisioning, management, and deprovisioning.

A REST API offers a simple, convenient way to integrate applications irrespective of syntax or platform, providing a great deal of flexibility. Using ADManager Plus APIs, administrators can perform the following AD management operations from their in-house application or a third-party application not yet integrated with ADManager Plus:

Based on your organization's preferences, you can use ADManager Plus from:
By integrating their applications, organizations can:
When different departments work together to complete routine tasks, like onboarding a new employee, sharing information takes up time and resources. By connecting the applications used by different departments, integration enables teams to automate routine tasks, saving time and effort while cutting costs. For instance, organizations can streamline HR processes by integrating their HR application with an AD management tool that can automate some key HR processes, including user account creation, generating employee-related reports, etc.
Organizations can improve their security information and event management (SIEM) through real-time monitoring of AD logs. Integrating a log-generating application with their monitoring solution can help organizations detect security issues in real time.
Quicker resolution of user issues improves user experience as well as decreases idle time thus sustaining productivity.