Description
This document explains the steps to publish patches from Microsoft SCUP to update server(WSUS).
Steps
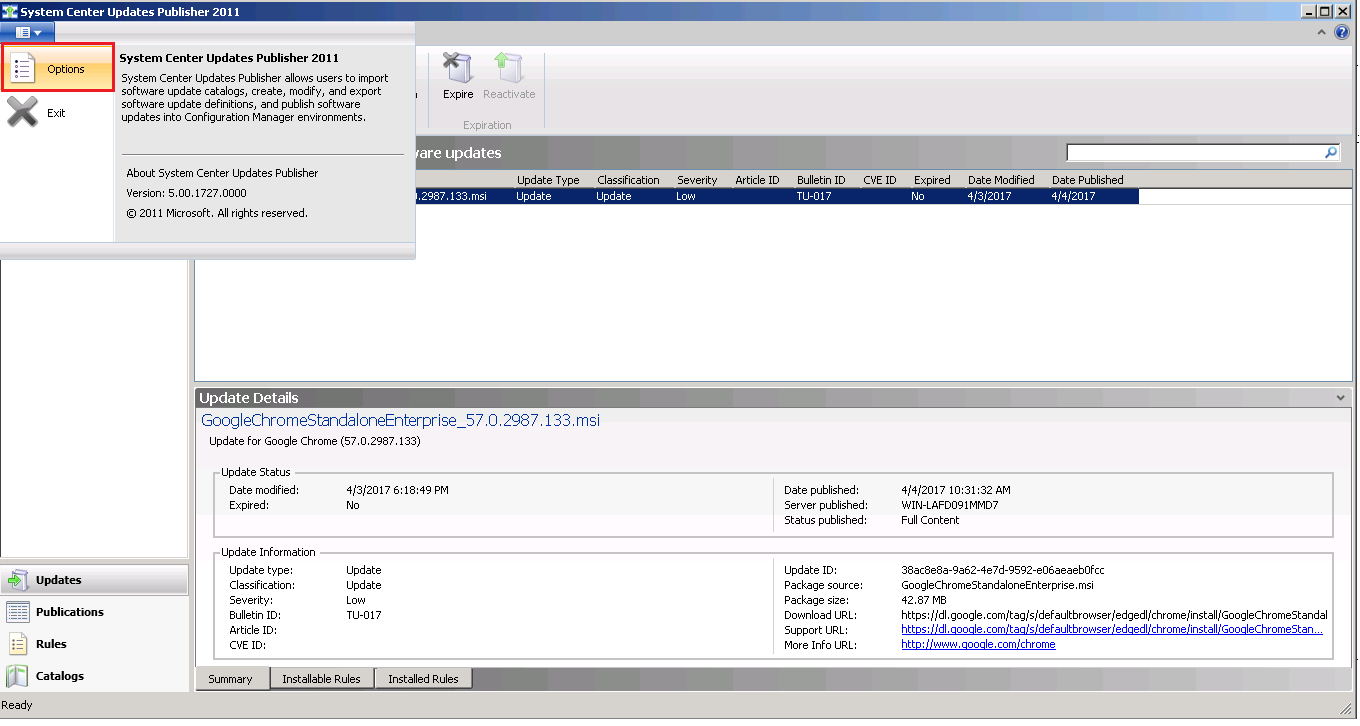
Open SCUP and select Options.
Enabling SCUP to publish updates
- Select Update Server, enable the option "Enable publishing to an update server".
If SCUP is installed on the same machine where WSUS is installed select "Connect to local update server" else select "Connect to a remote update server" and specify the ConfigMgr server details.
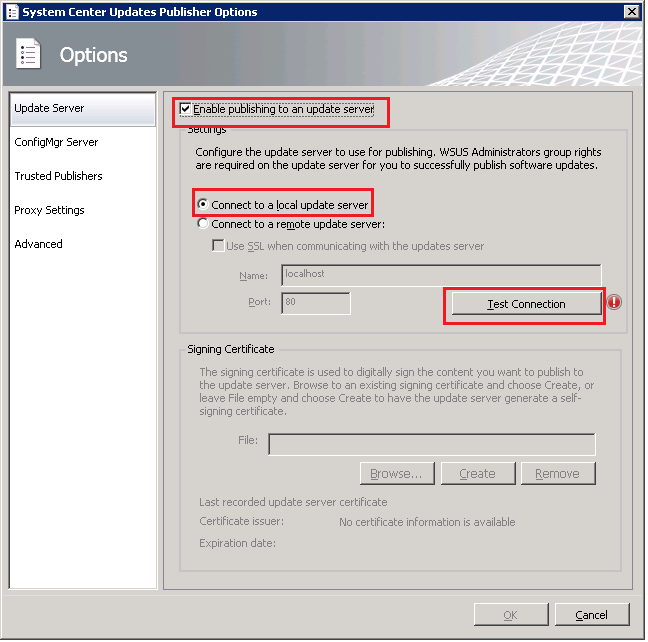
- Click on test connection and click OK.
After successfully establishing connection, you can either create a Self-Signed certificate or import an already existing certificate to sign third-party patches.
Note: If you are using an existing certificate ensure that the certificate intended purpose has "Coding Signing"
Integrating SCUP with ConfigMgr
Select ConfigMgr server enable the option "Enable Configuration Manager Integration"
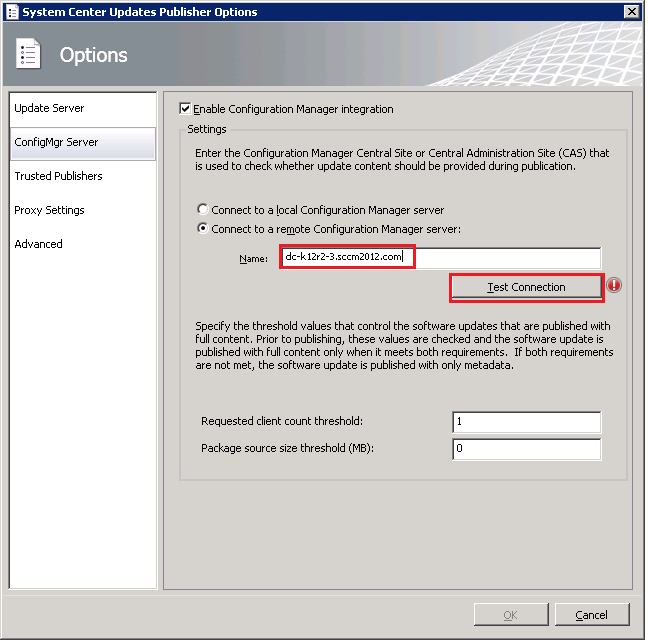
- If ConfigMgr is installed on the same machine where SCUP is installed select "Connect to local configuration manager server" else select "Connect to a remote configuration manager server" and specify the ConfigMgr server details.
- Click on test connection and click OK.
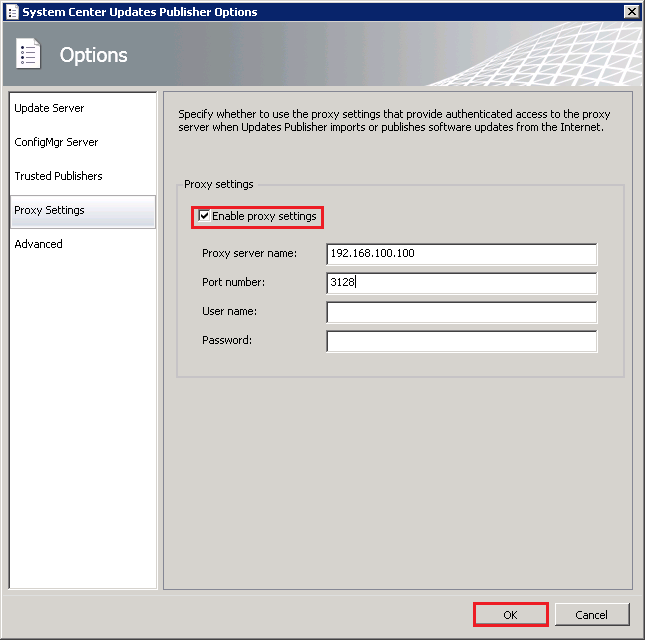
Configure proxy to download the binaries from the vendor sites.
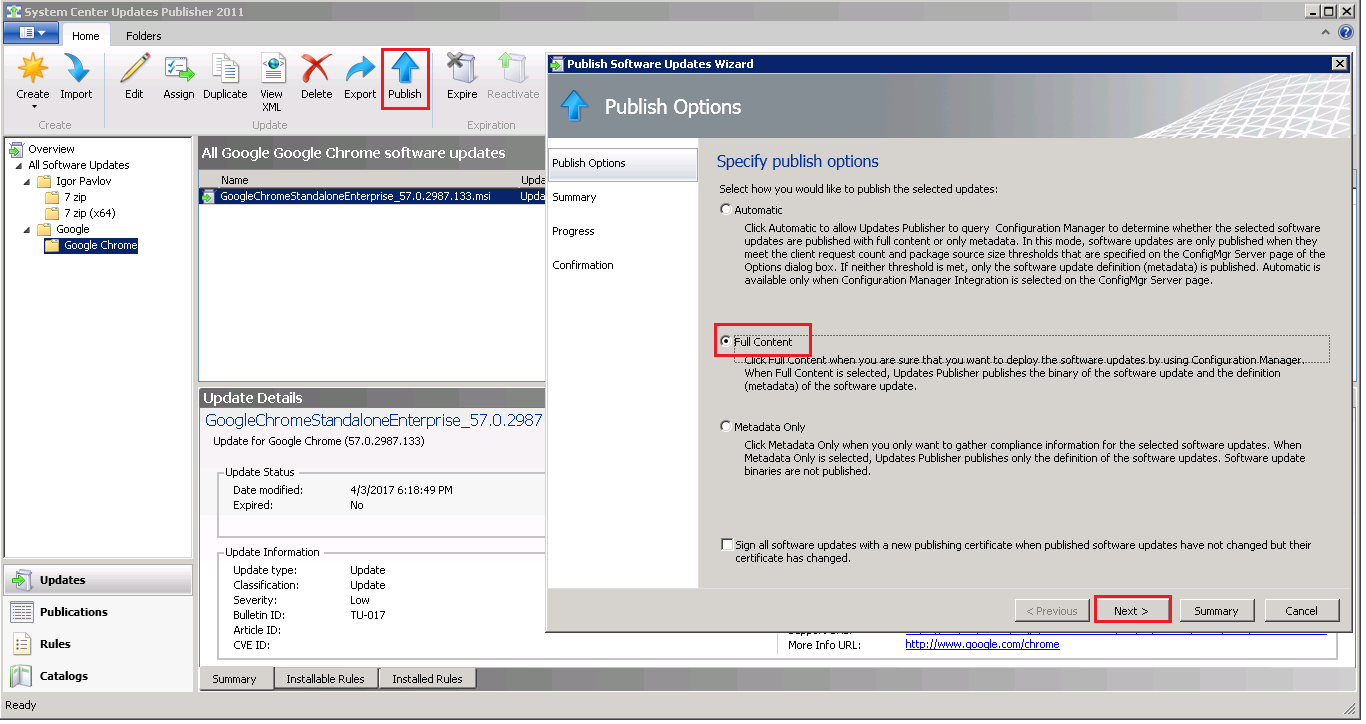
Publishing the updates to Update Server
Open SCUP, under overview select the required updates and click Publish. "Publish Software Update Wizard" will open. Select Full content and click Next.
After successful publish, you can view the published patches in the overview.
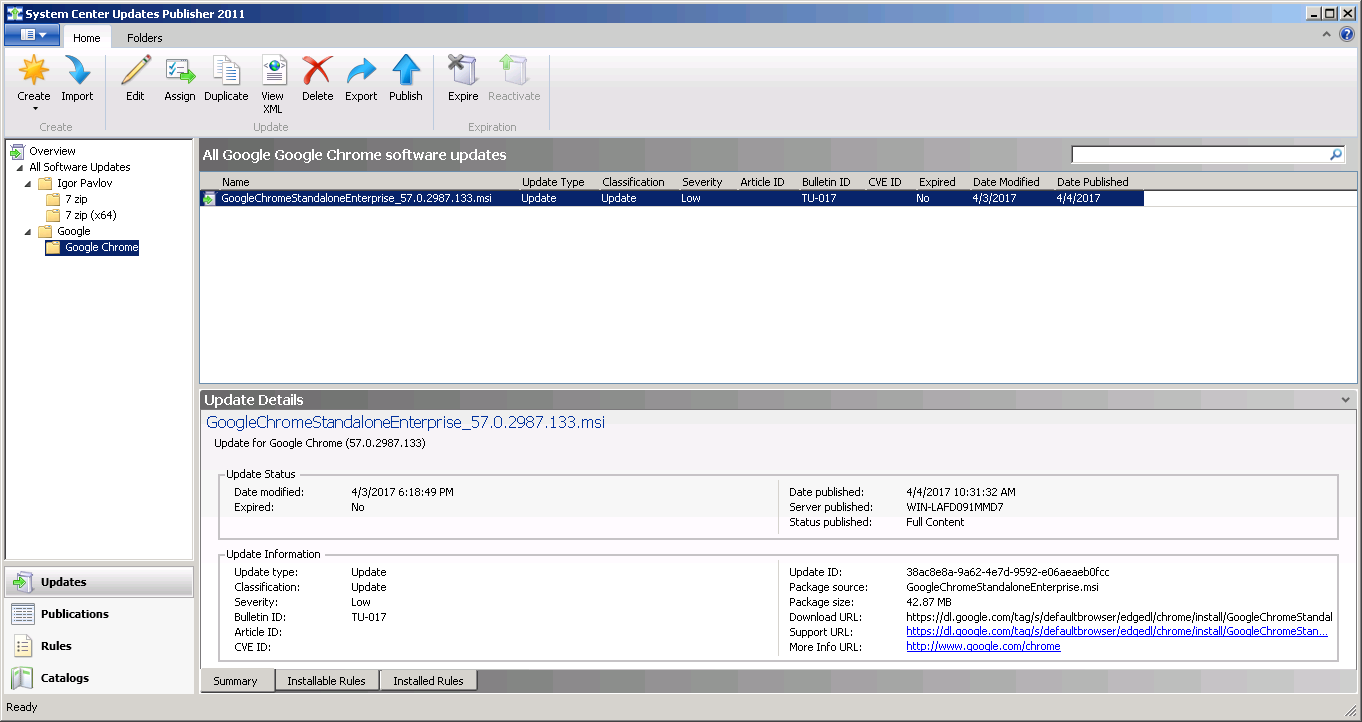
You have now successfully published the patches to update server.
Steps to view published patches in SCCM console
Steps to Deploy the published patches using SCCM
Steps to import third party catalogs into SCUP
Keywords: Third-party Patch Management, Publish Patches to WSUS, Microsoft SCUP