
| If your build number is | Update to build number |
| 6500 to 6524 |
Download and update to 6525 |
| 6400 to 6410 |
Download and update to 6500 |
| 6300 to 6310 |
Download and update to 6400 |
| 6200 to 6221 |
Download and update to 6300 |
| 6100 to 6123 |
Download and update to 6200 |
| 6000 to 6013 |
Download and update to 6100 |
| 5800 to 5817 |
Download and update to 6000 |
| 5700 to 5710 |
Download and update to 5800 |
| 5600 to 5607 |
Download and update to 5700 |
| 5500 to 5521 |
Download and update to 5600 |
| 5400 |
Download and update to 5500 |
| 5300 to 5330 |
Download and update to 5400 |
| 5200 to 5208 |
Download and update to 5300 |
| 5100 to 5116 |
Download and update to 5200 |
| 5000 to 5041 |
Download and update to 5100 |
Based on the build you are using, the update path to the latest build may vary. So, first identify your current build number. How do I find my build number?
Requirements for running the initPgsql.bat file:
You might encounter the following messages during installation:
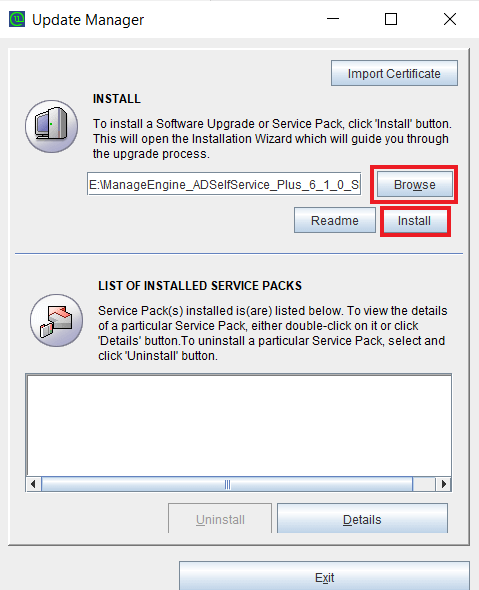
Reason: The server is running a significantly older version of ADSelfService Plus. Your installation will need updates installed during a few subsequent (major) versions of the product before it will be ready for the latest version.
Fix: Download and install every major version of ADSelfService Plus until the latest one.
Steps:
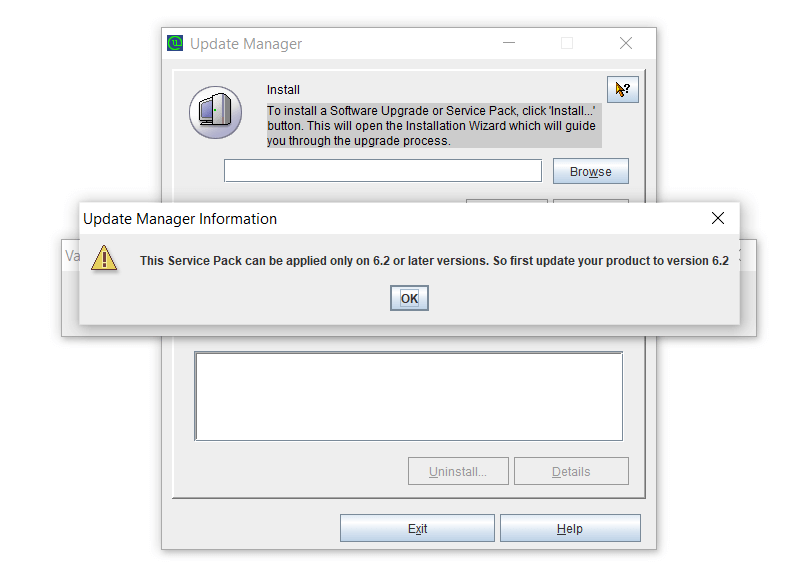
So, for instance, if you are running version 6013, update to version 6100, then to version 6200, and then finally to version 6207 (the latest build). You can find these patches on the ManageEngine site.

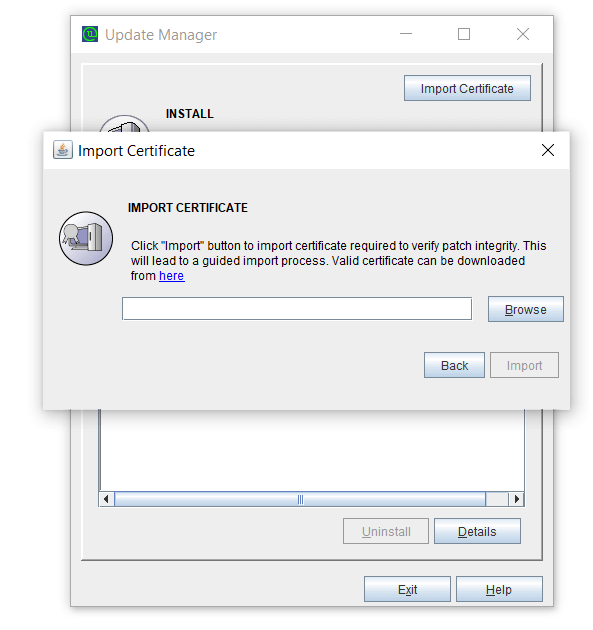
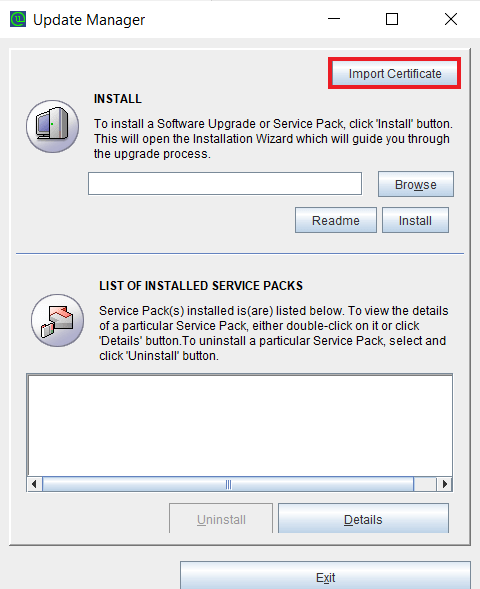
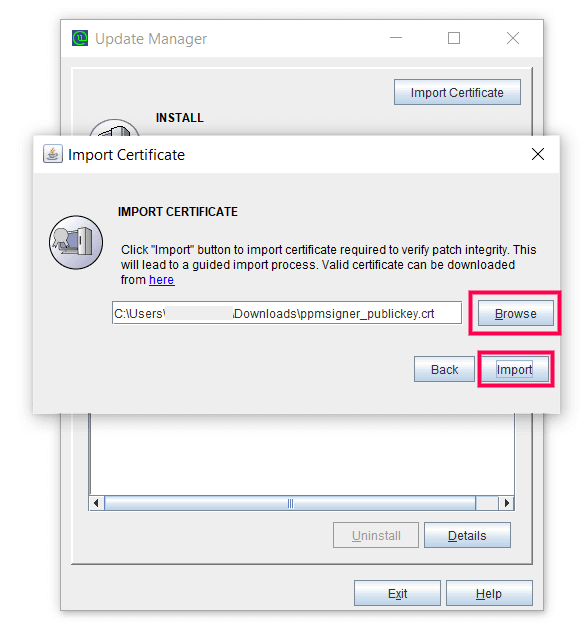
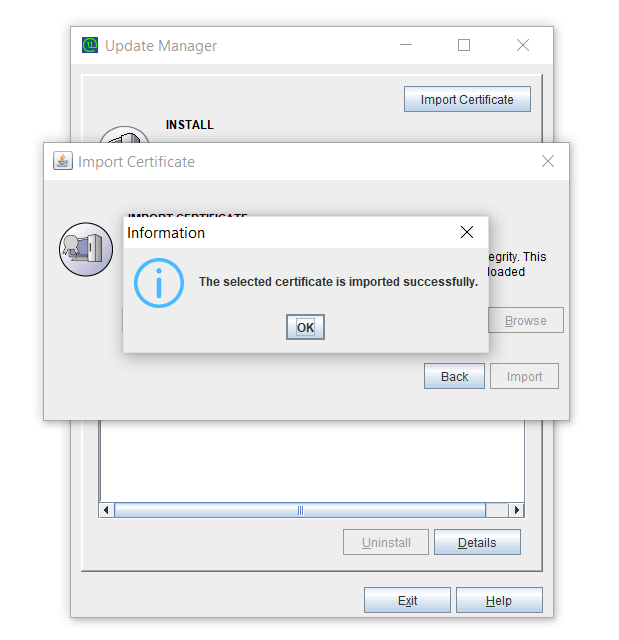
Reason: The server is running an older version of ADSelfService Plus (before version 6201) and cannot connect to the ManageEngine site (blocked port, firewall restrictions, no internet connection, etc). The Update Manager automatically imports the certificate when it is able to connect to the ManageEngine site. However, when it cannot do so, you will need to import the certificate manually.
Fix: Import the certificate manually.
Steps:
You can contact ADSelfService Plus Support at any time for assistance in updating ADSelfService Plus to the latest version.
