Removable storage media is convenient to use but comes with the risks of malware infection and data theft. To thwart these risks, use DataSecurity Plus to disable unauthorized devices and ensure that only authorized USB flash drives can be used by employees. Learn more about the USB port access control capability and other data leak prevention capabilities of DataSecurity Plus.
Steps to disable USB devices
- Download and install DataSecurity Plus.
- Select Endpoint DLP from the application drop-down.
- Go to Configuration > External Device Control under Prevention Policies.
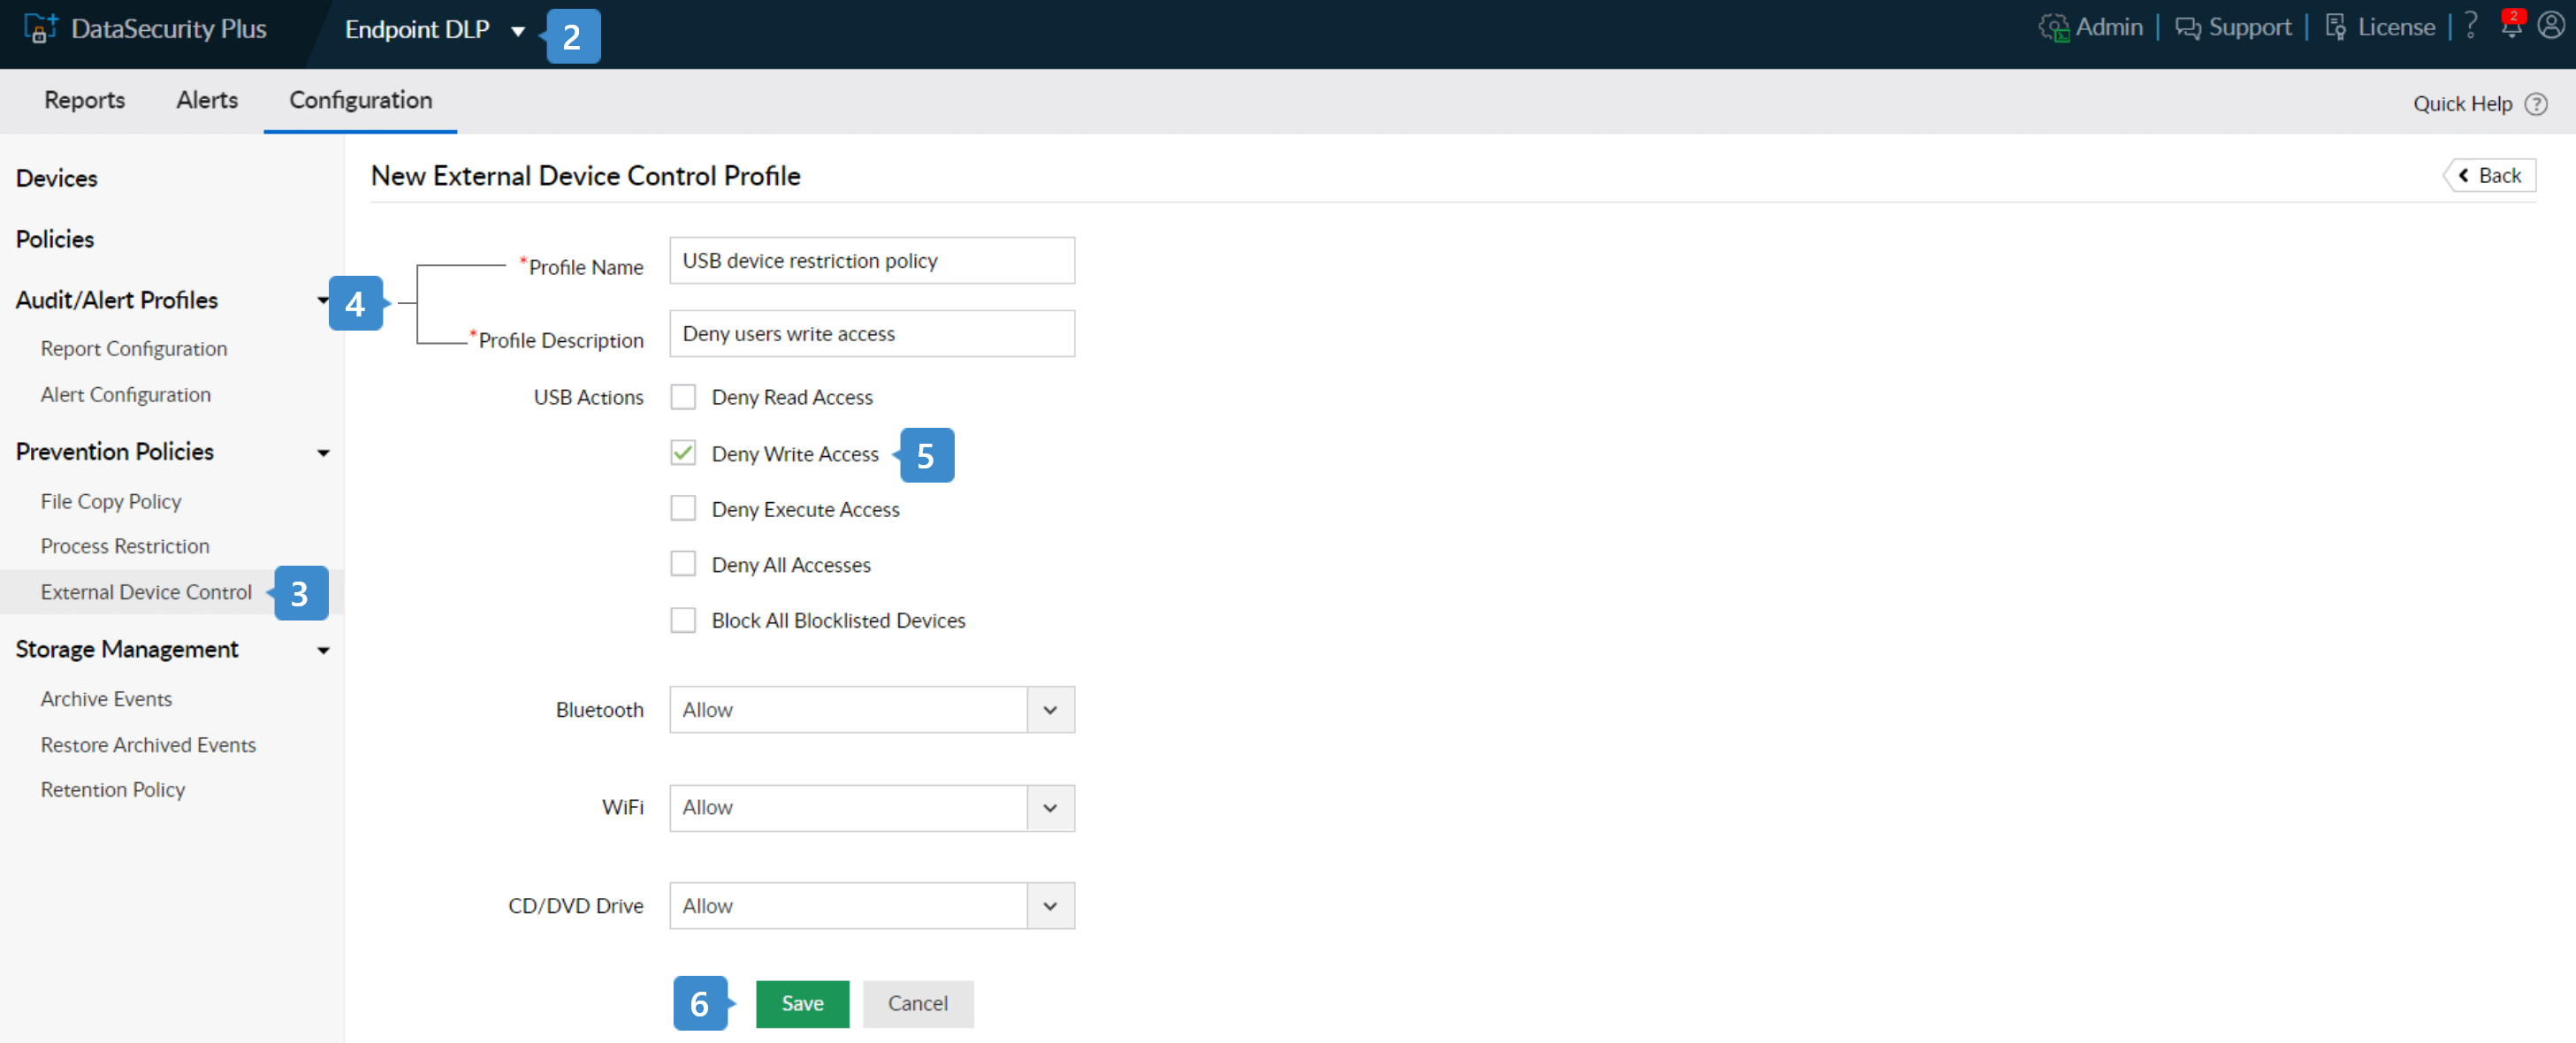
- Click Add New Profile. Enter the Profile Name and Profile Description.
- From the USB Actions options, choose one or more of the deny access options or choose Deny All Accesses to prevent any actions made in USB drives.
- Click Save to create the policy.
Note: The Block All Blocklisted Devices option restricts unwanted USB devices from being detected by endpoints. Follow
these steps to add the device instance path of the USB devices to enable this option.
Steps to apply the USB device restriction policy to endpoints
Ensure you're in the Endpoint DLP module.
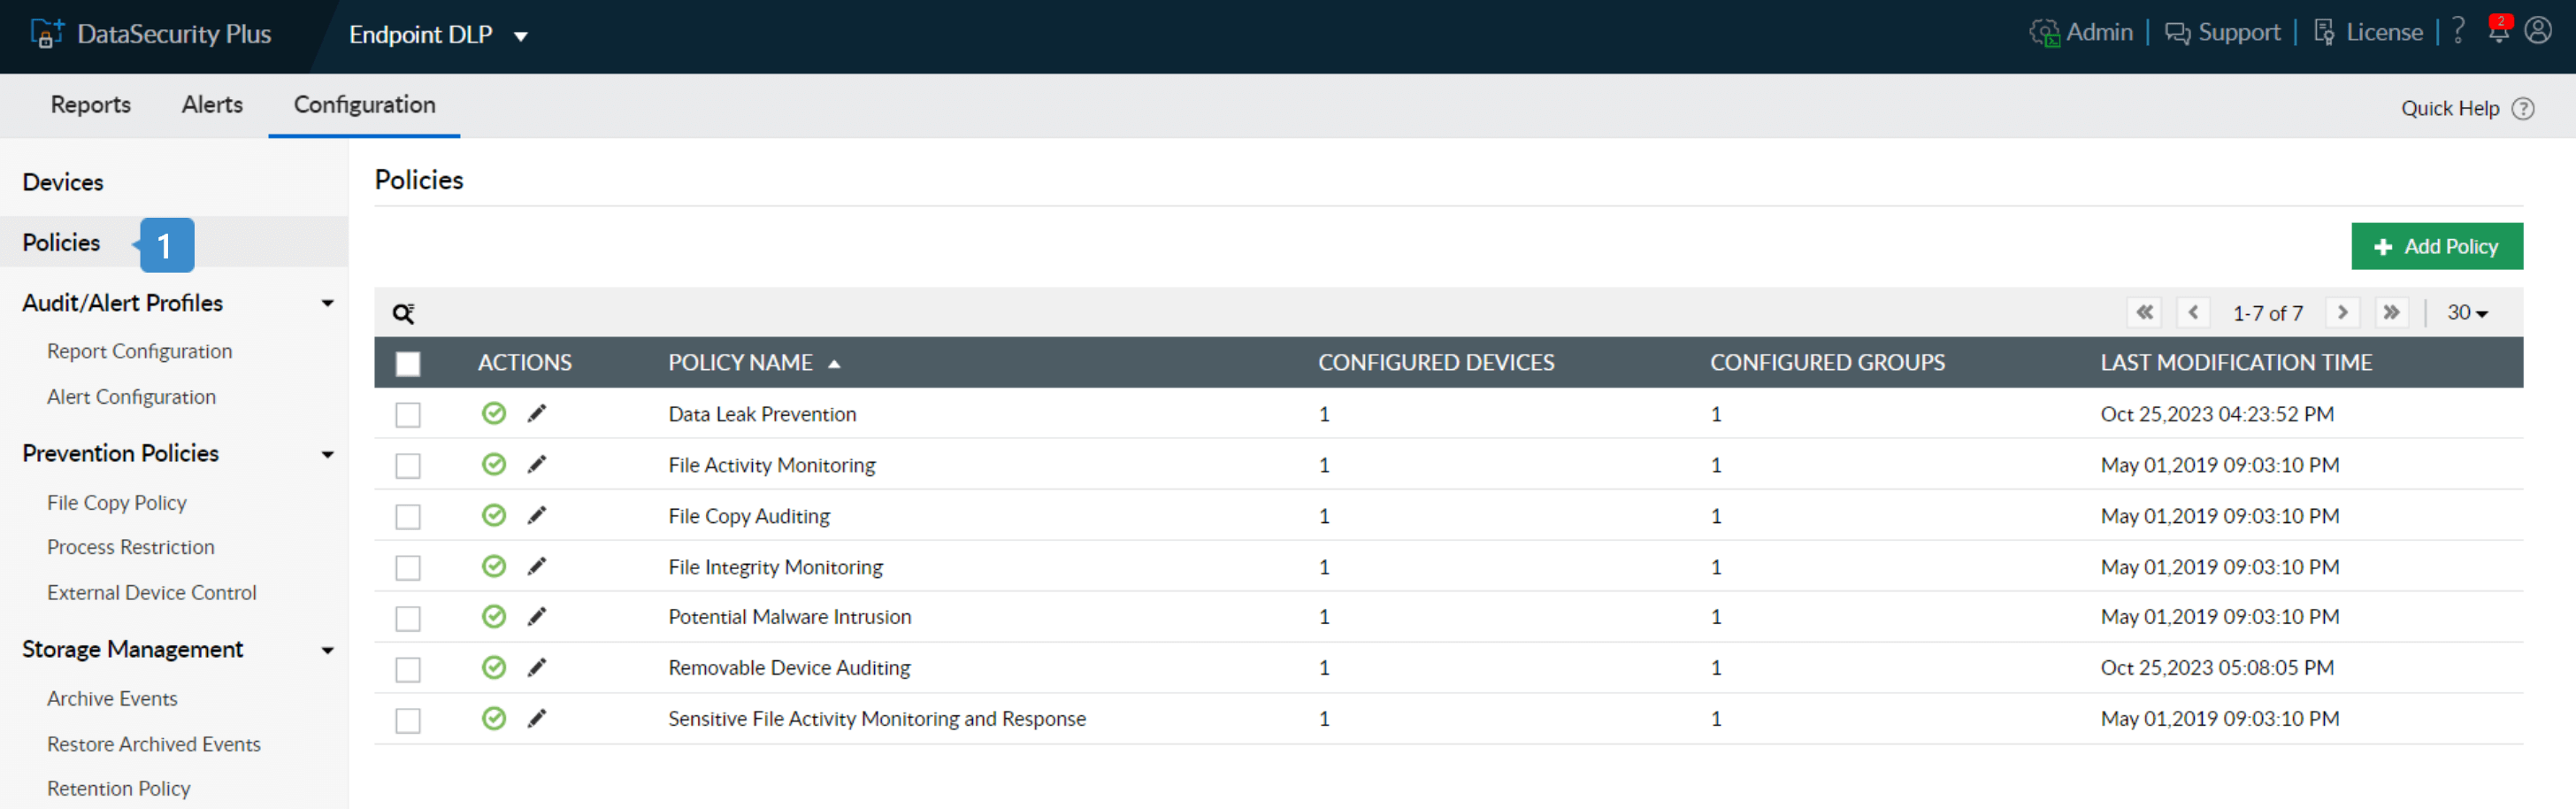
- Go to Configuration > Policies.
- To map the USB device restriction policy created in the above steps, create a new policy or choose an existing policy. View the steps on creating a new policy.
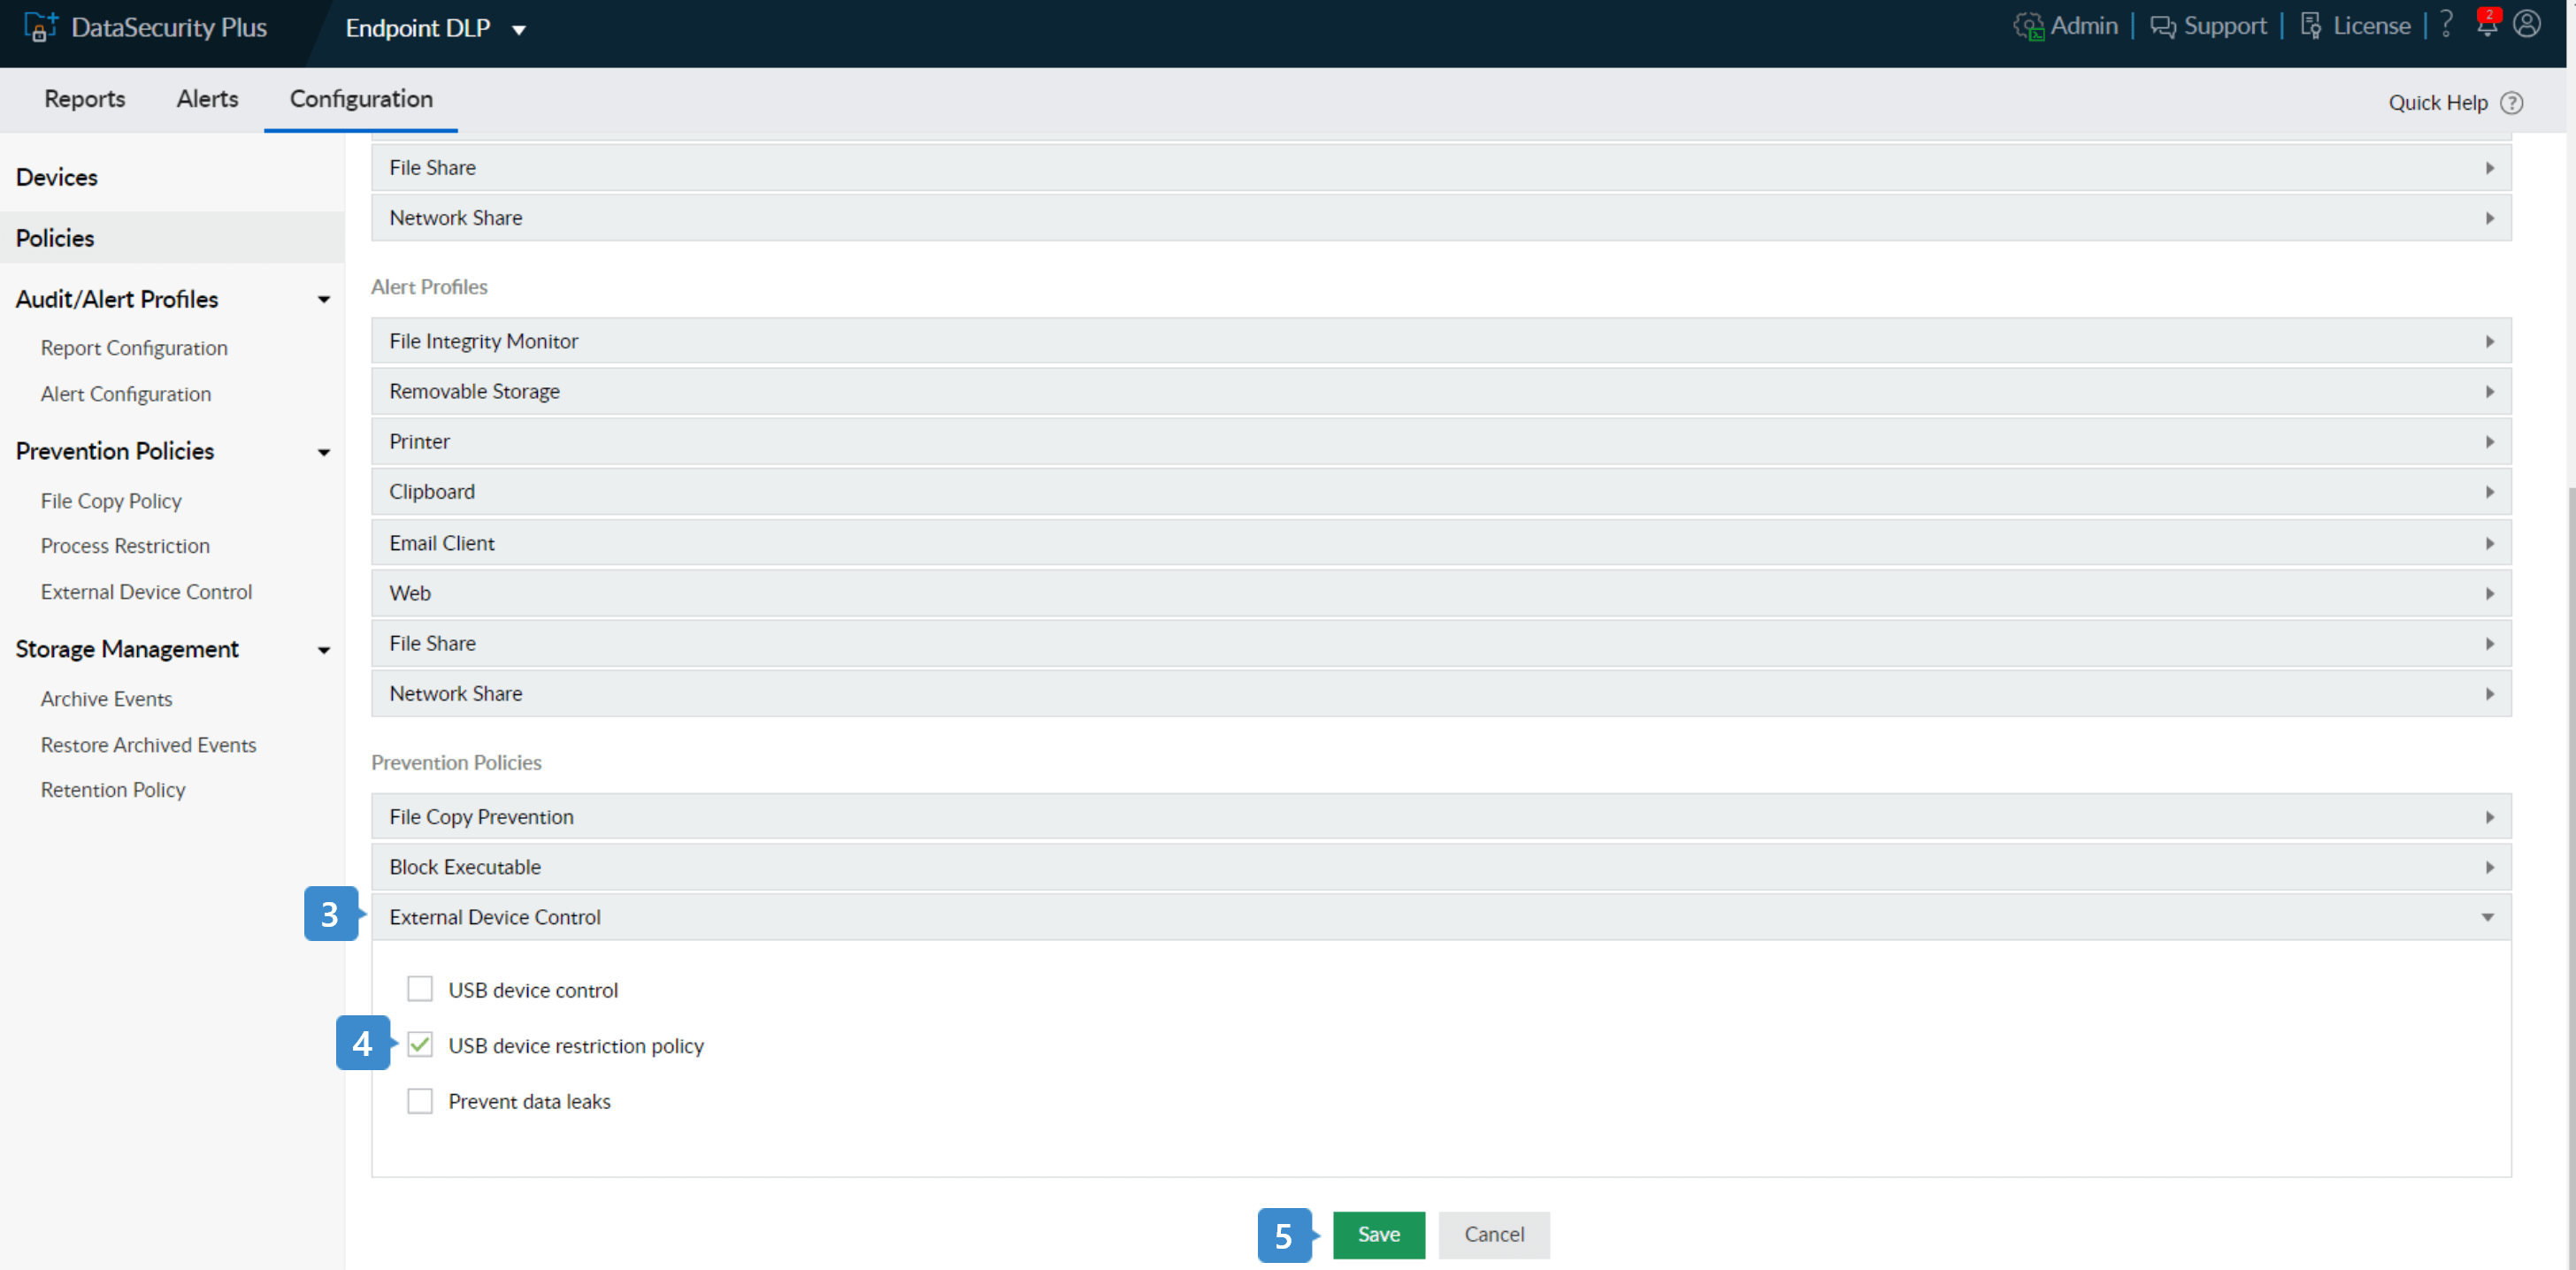
- Scroll down to Prevention Policies and click on the External Device Control policy.
- Check the USB device restriction policy.
- Click Save to map the policy to endpoints.
Note: Ensure that the endpoints for which you want to implement this policy have the right device-policy mapping. Go to Configuration > Devices. In the Configured Devices or Configured Groups page, click the edit icon. Check the policy that includes the USB device restriction policy and click Update Endpoint or Update Group.
The USB device restriction policy will now be applied to the endpoints or groups.
Steps to disable USB ports through Group Policy
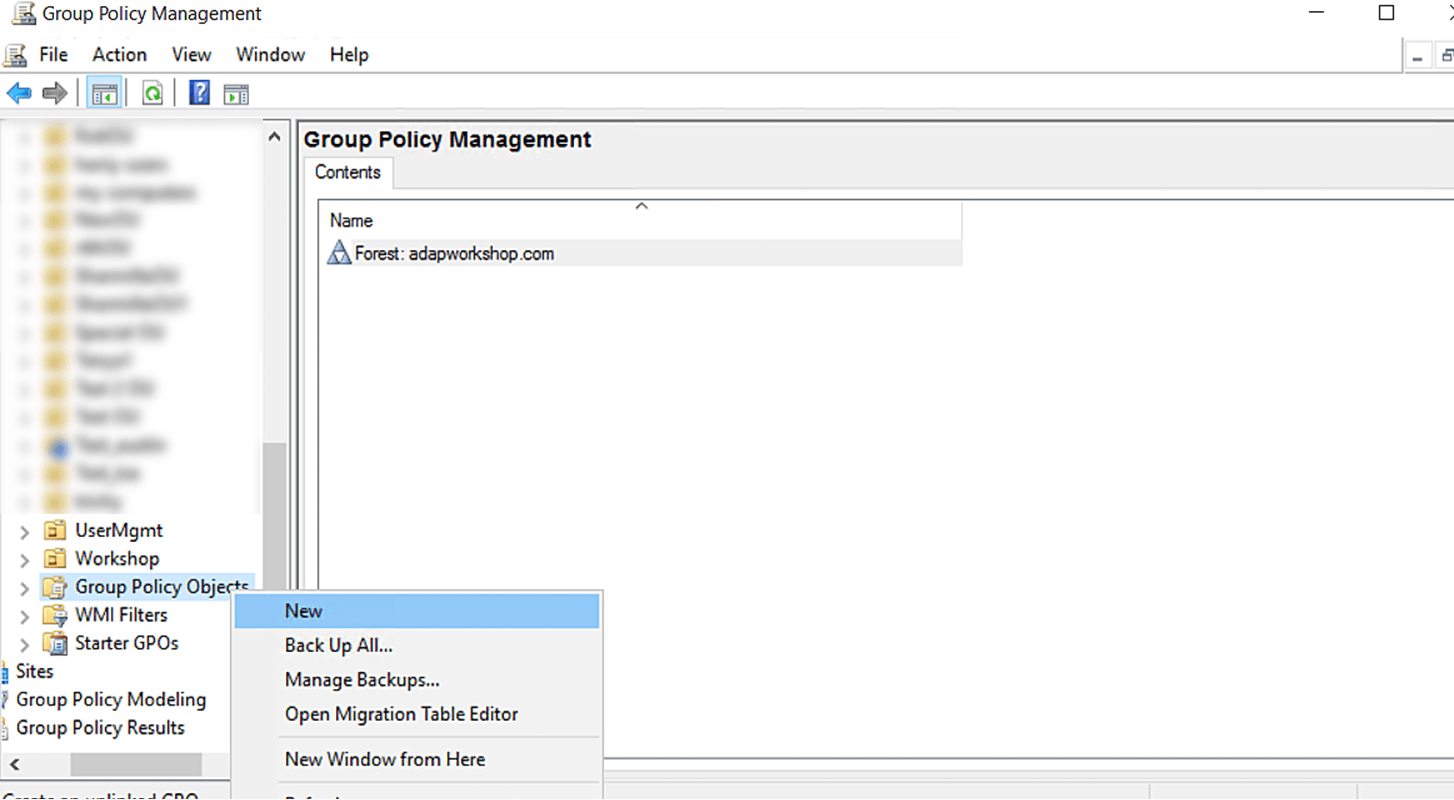
- In the desired domain controller, launch the Group Policy Management tool.
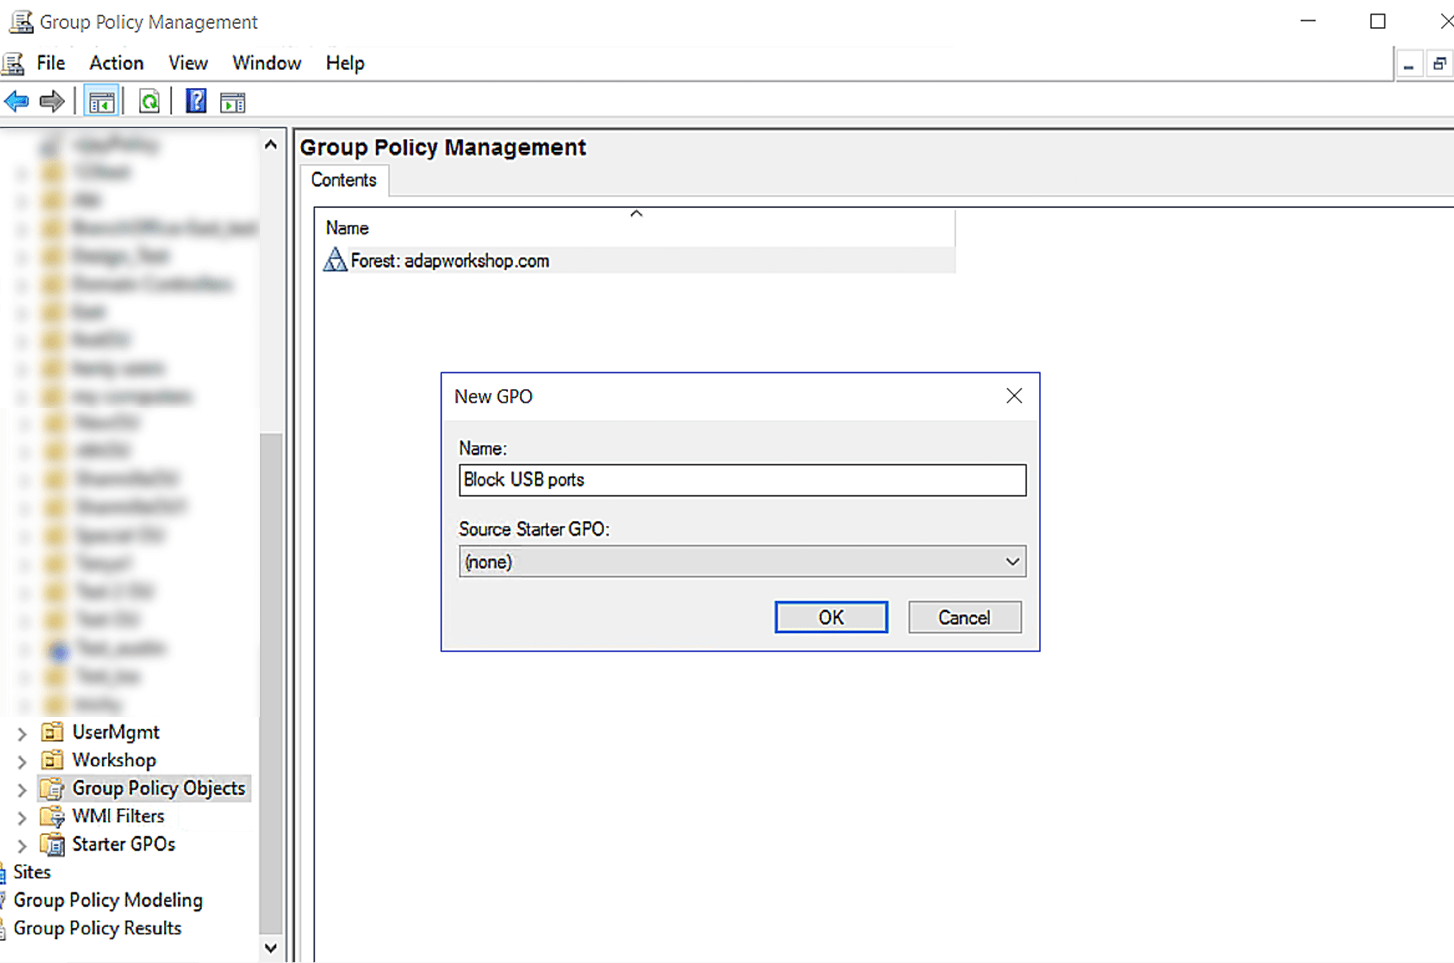
- Right-click Group Policy Objects.Click New.
- In the New GPO dialog box, provide a Name— for instance, Block USB ports. Click OK.
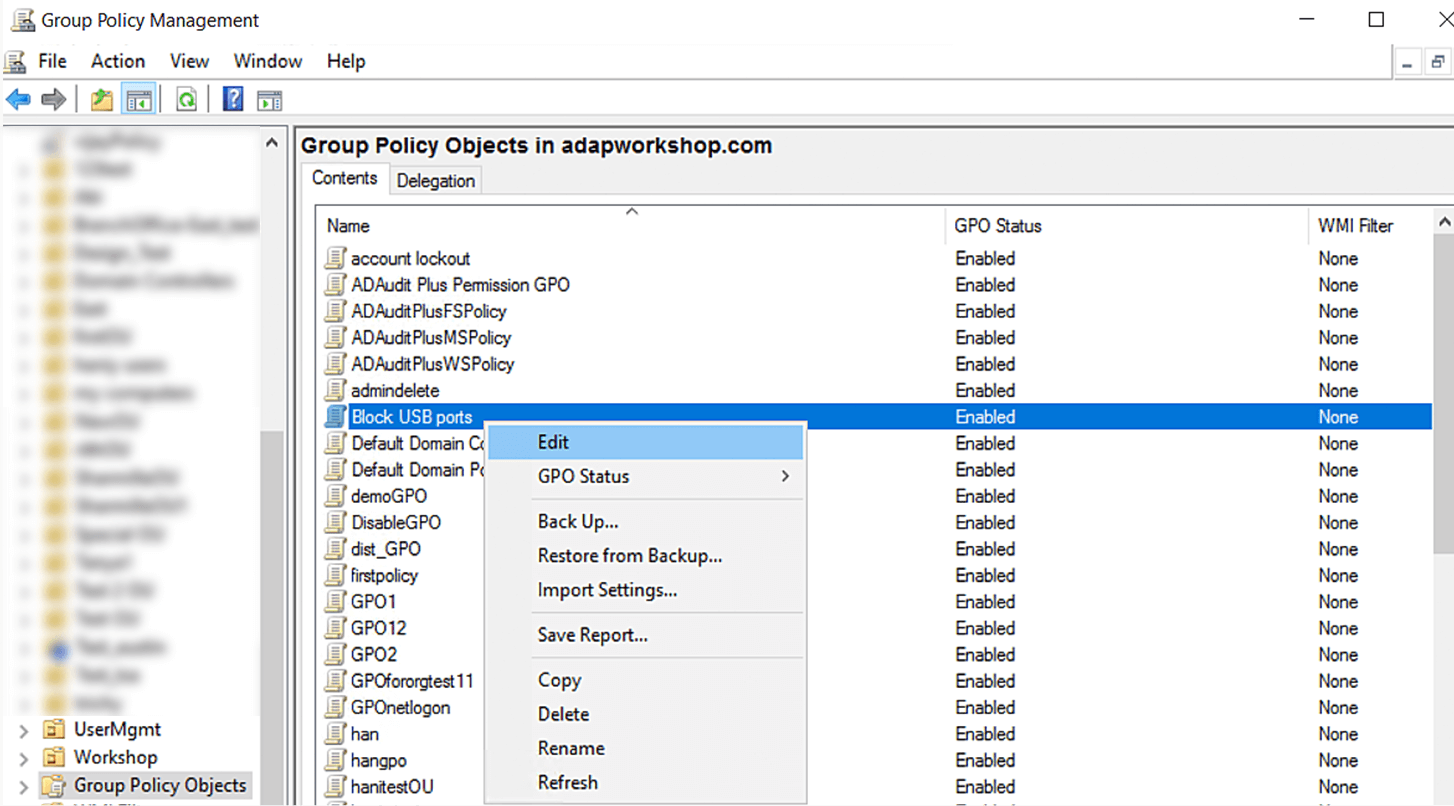
- In Group Policy Objects, right-click Block USB ports. Click Edit.
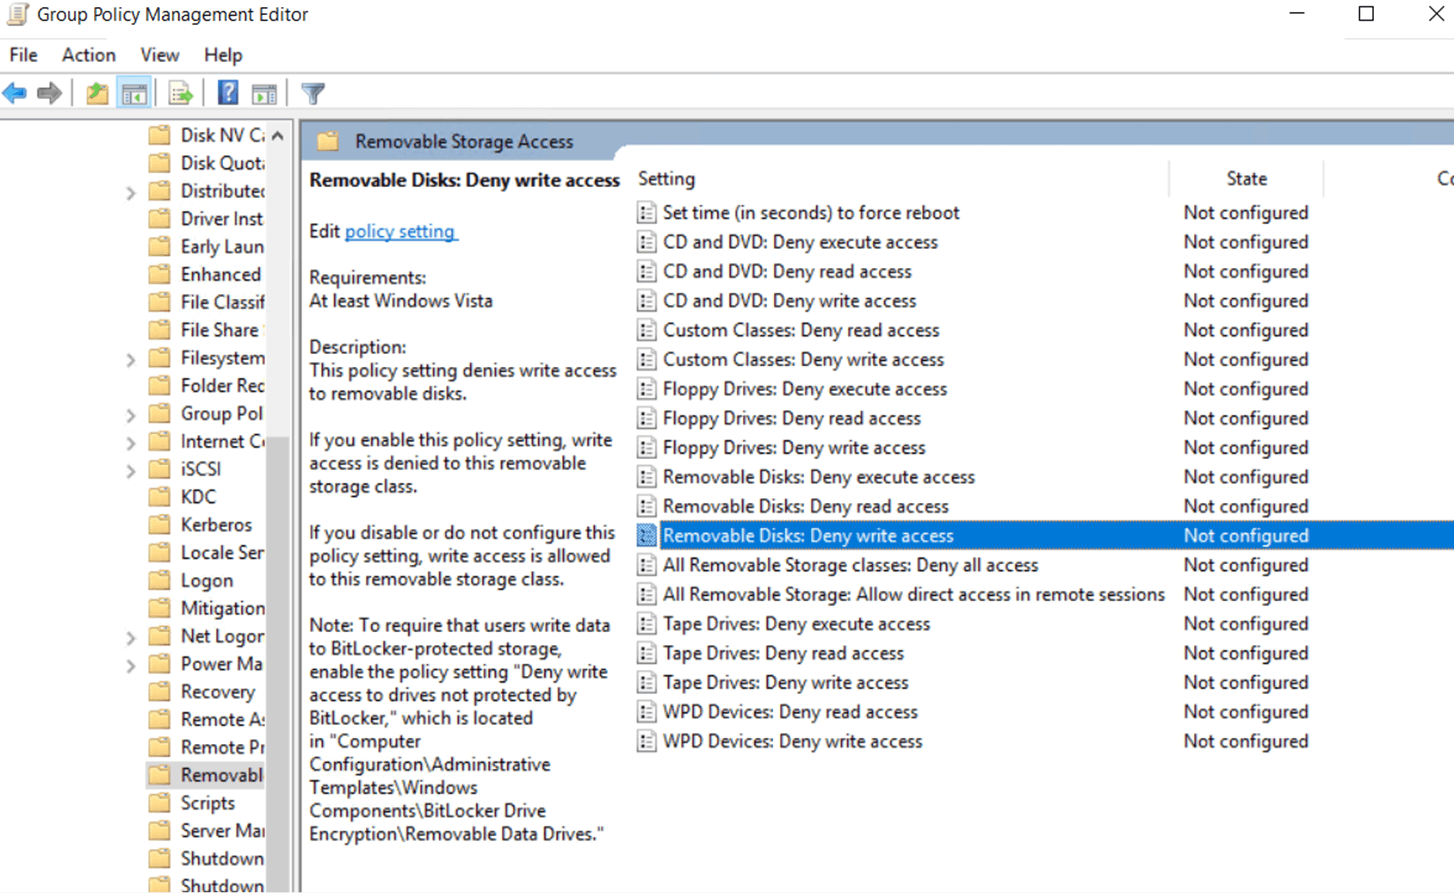
- In the Group Policy Management Editor, navigate to Computer Configuration > Policies >Administrative Templates > System > Removable Storage Access.
- Right-click the preferred setting— for example, All Removable Storage classes: Deny write access. Click Edit.
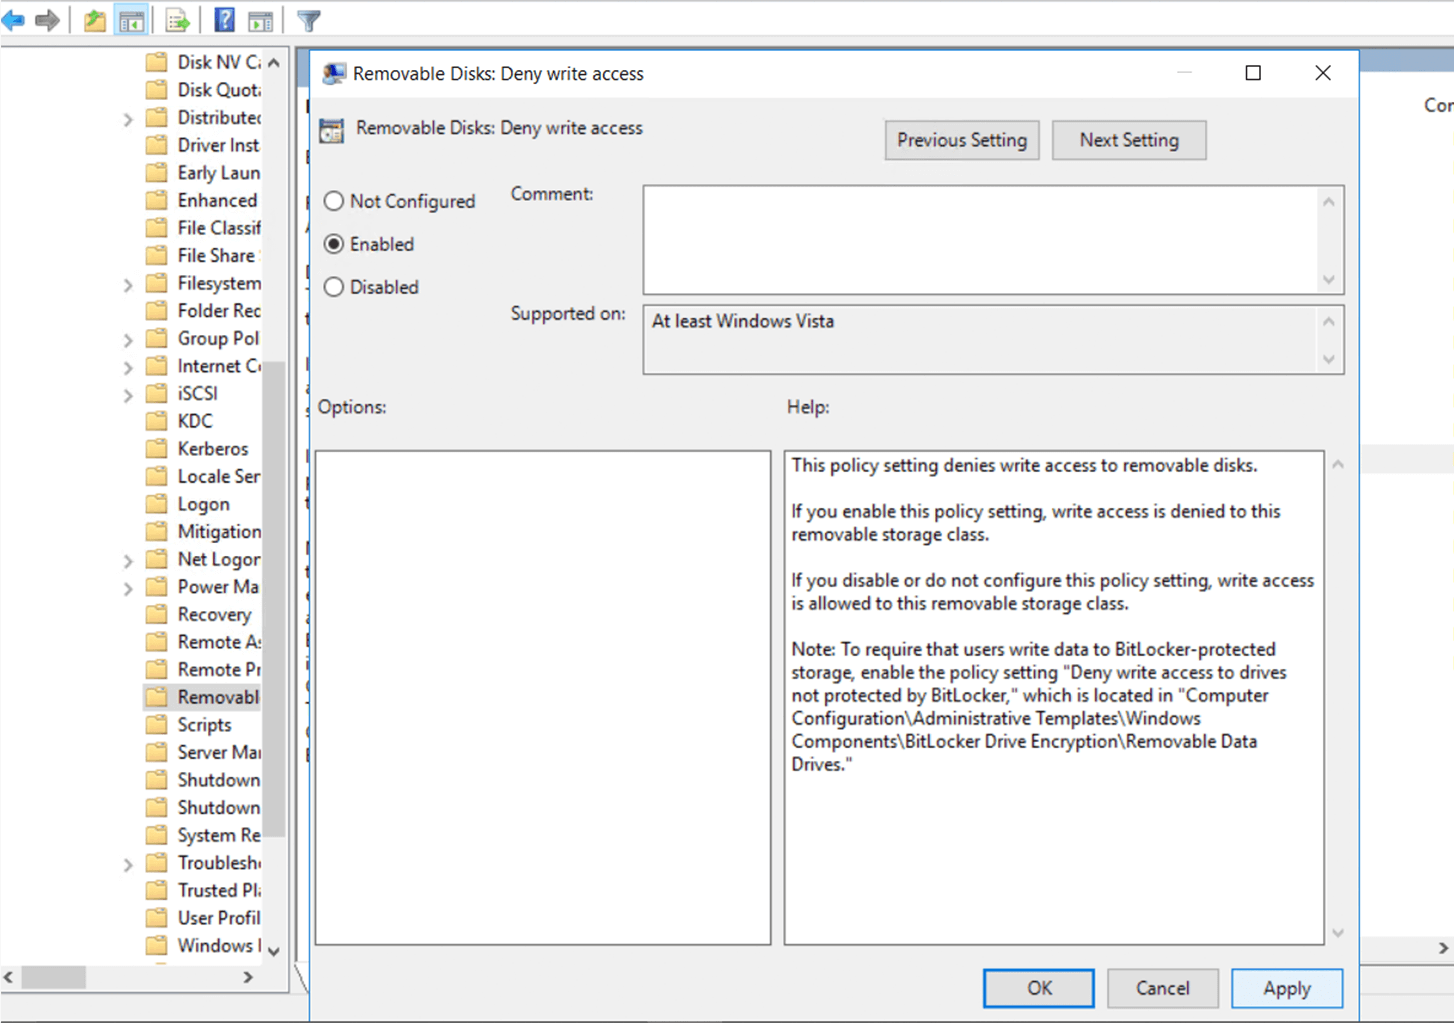
- Click Enabled. Click Apply and then OK.
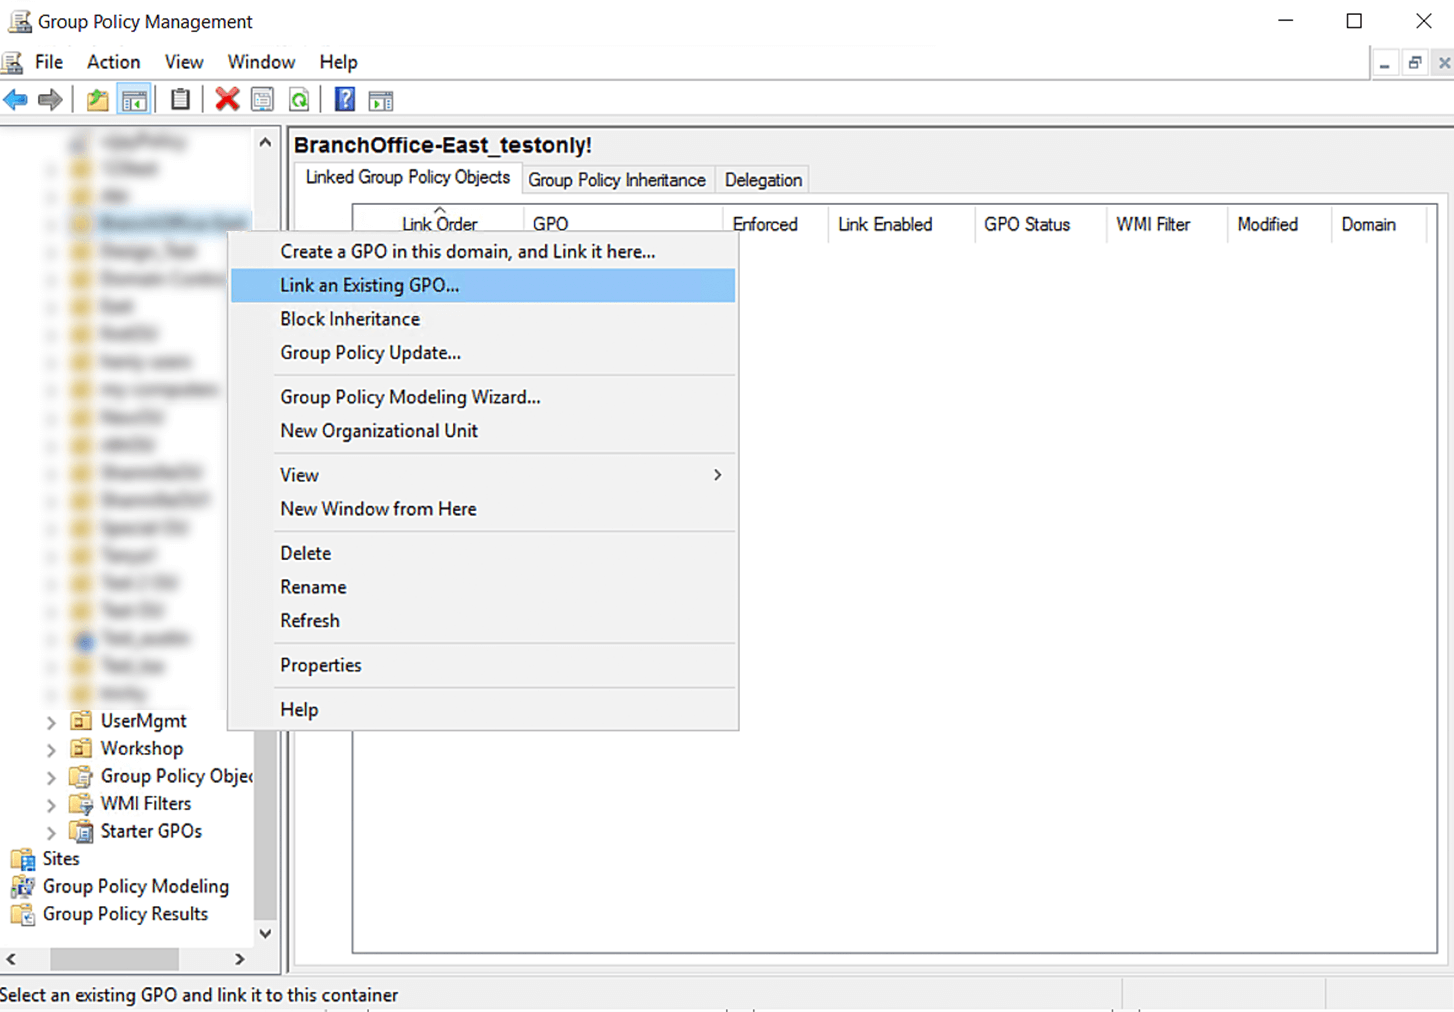
- Go back to the Group Policy Management console to link the GPO to an OU. Right-click the OU you wish to link the GPO with. Select Link an Existing GPO.
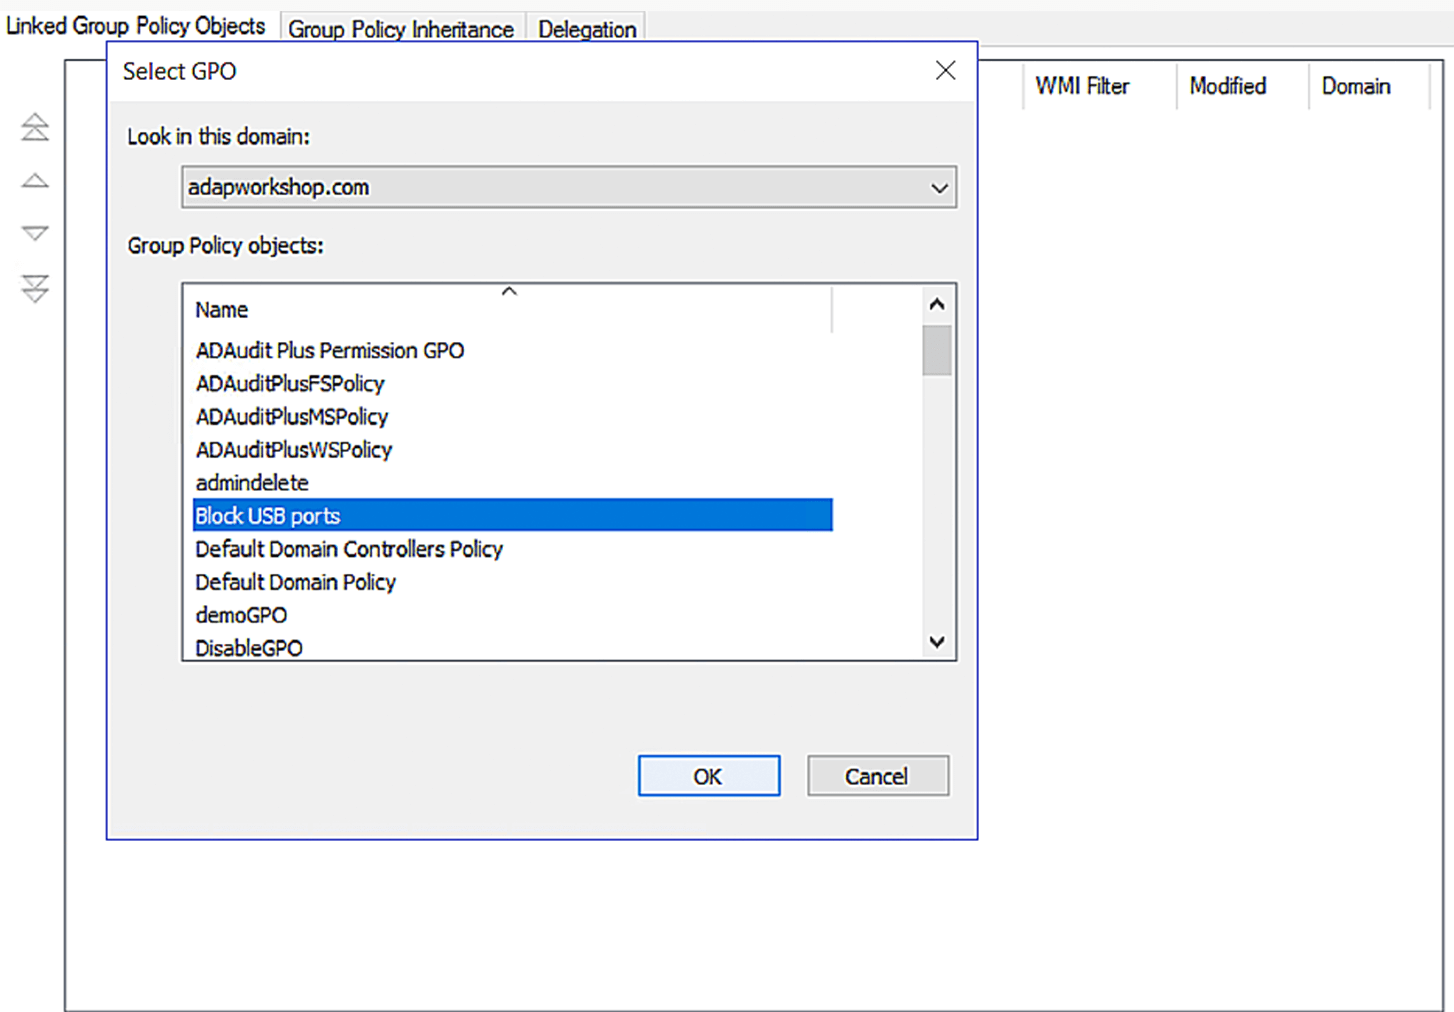
- Select Block USB ports from the Group Policy objects list. Click OK.
Group Policies need to be enforced across endpoints to be implemented effectively. You can update Group Policies remotely from the Group Policy Management console. To update a Group Policy, right-click the desired OU > Group Policy Update.
Note: Ensure that Windows Firewall supports the ability to refresh Group Policies remotely.
Alternatively, you can also perform a gpupdate /force command across desired endpoints to enforce the Group Policy.
Blocking USB actions through Windows Server Group Policy Management is time-consuming and complex. This is due to the multiple checkpoints involved in ensuring Group Policies are applied and that there are no other contradicting Group Policies.
With a data leak prevention (DLP) solution, you can easily enable or disable USB ports and choose to control how users access USB devices. This offers better flexibility to employees and simplifies management for admins.