Steps to configure DataSecurity Plus to track file permission changes
- Download and install DataSecurity Plus.
- Open the DataSecurity Plus console.
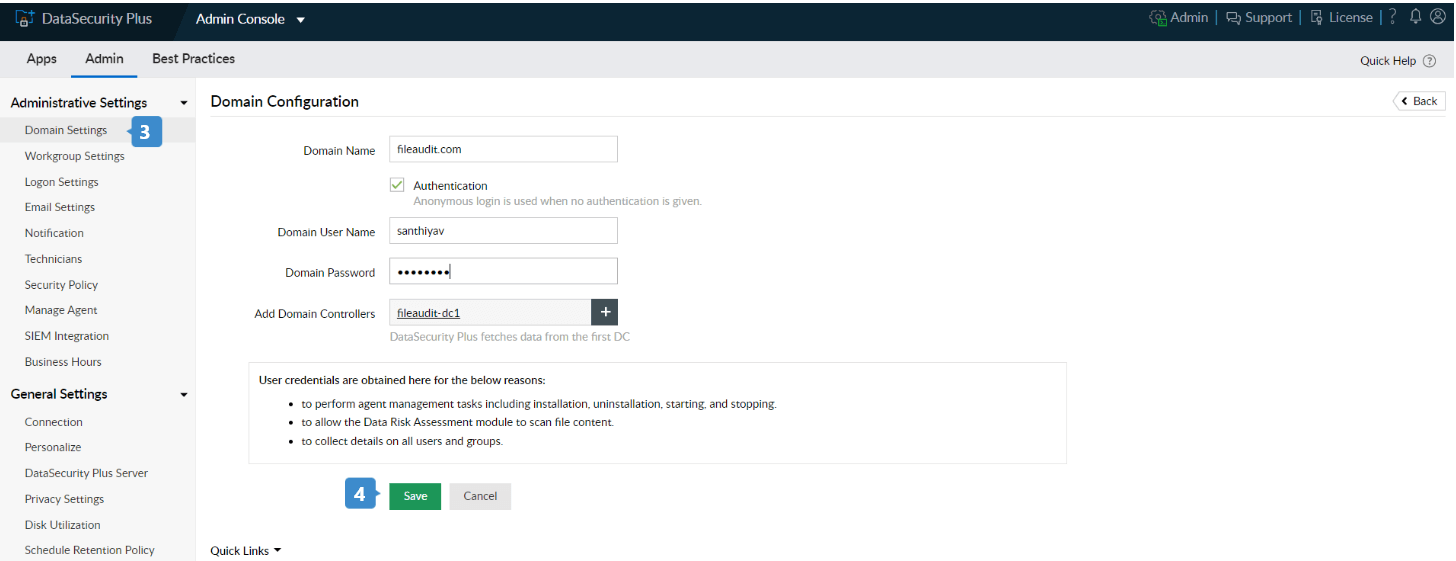
- Navigate to Admin Console > Admin > Administrative Settings >Domain Settings, and click + Add Domain in the top-right corner to add a new domain.
- Provide the Domain Name along with its username and password. Add the required domain controllers and click Save.
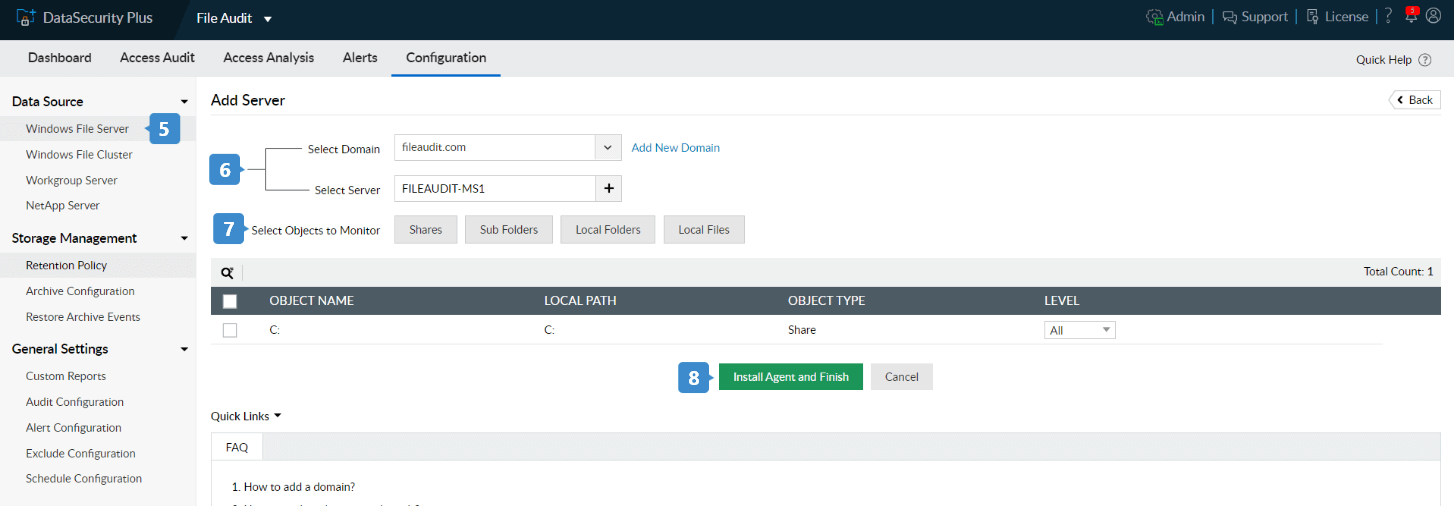
- To add file servers, navigate to File Audit → Configuration, and click the + Add Server button located in the top-right corner.
- Select your domain and add the servers you want to audit.
- Choose the files and folders to be audited from Select Objects to Monitor.
- Click Install Agent and Finish. The agent is now installed on the selected servers.
Steps to view who changed file permissions
- Go to the File Audit tab.
- Navigate to Access Audit > Audit Reports > Security Permission Changes.
- Select the Server Name and Periods to display the report.
- Click Filter in the top-right corner of the report window, and enter the file name you want to monitor. Click Apply. (For this example, we'll name the file Employee_Data.)
You can also create custom reports to see permission changes for a particular user, file, and more.
Steps to send instant alerts when file permission is changed
- Go to the File Audit tab.
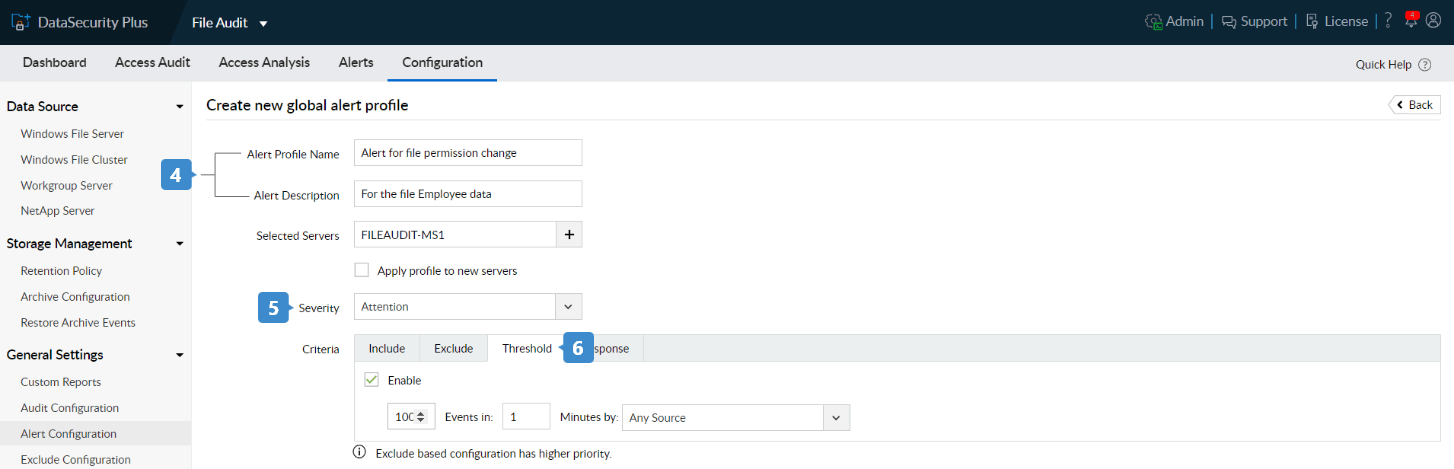
- Navigate to Configuration → General Settings → Alert Configuration.
- Click the + Add Global Alert or +Add Server Alert button located in the top-right corner based on your objective.
- Provide a suitable name and description for the alert.
- Choose a Severity from the drop-down menu.
- You can define a Threshold Limit to send alerts based on the number of permission change events that can occur within a specific time.
Note: If Threshold Limit is not mentioned, then an alert email is sent for every monitored event that occurs in the file.
- Within Criteria > Response, click the Enable email notification check box to receive email alerts.
- Provide the required email address, Priority, Subject, and Message. To add arguments to the subject or message, click Add and choose the argument from the drop-down menu.
- Click Save.
- You can include or exclude trusted entities in the Criteria menu.
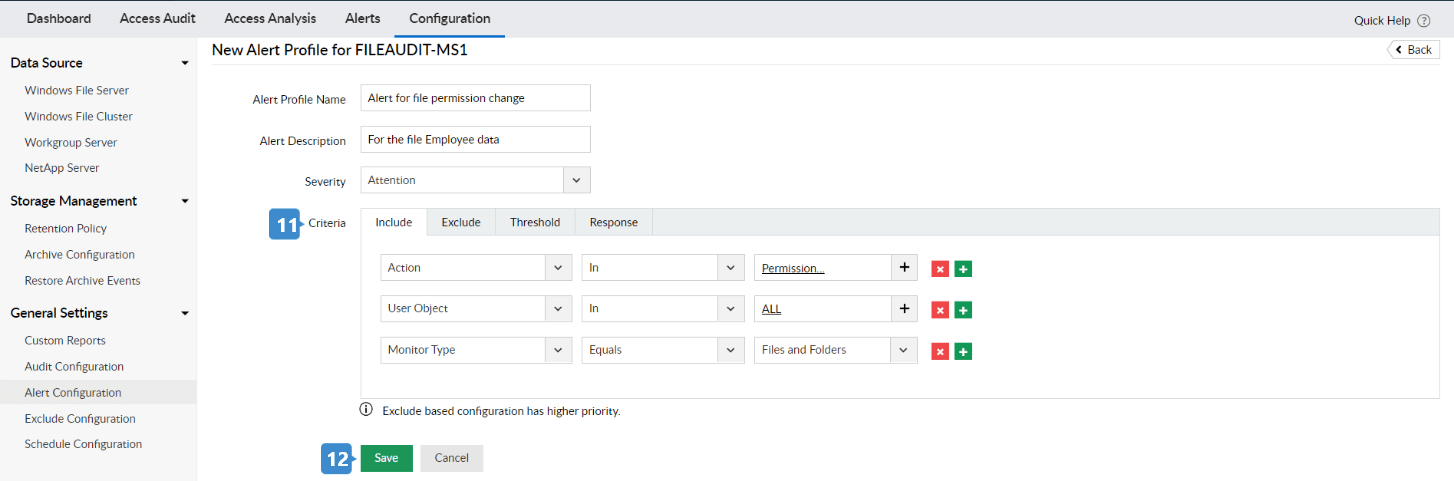
Example: To monitor who changed the permissions of a file, enter the following details under Include:
- User Object: All
- Action: Permission Change
- Monitor Type: Files and Folders
- Click Save.
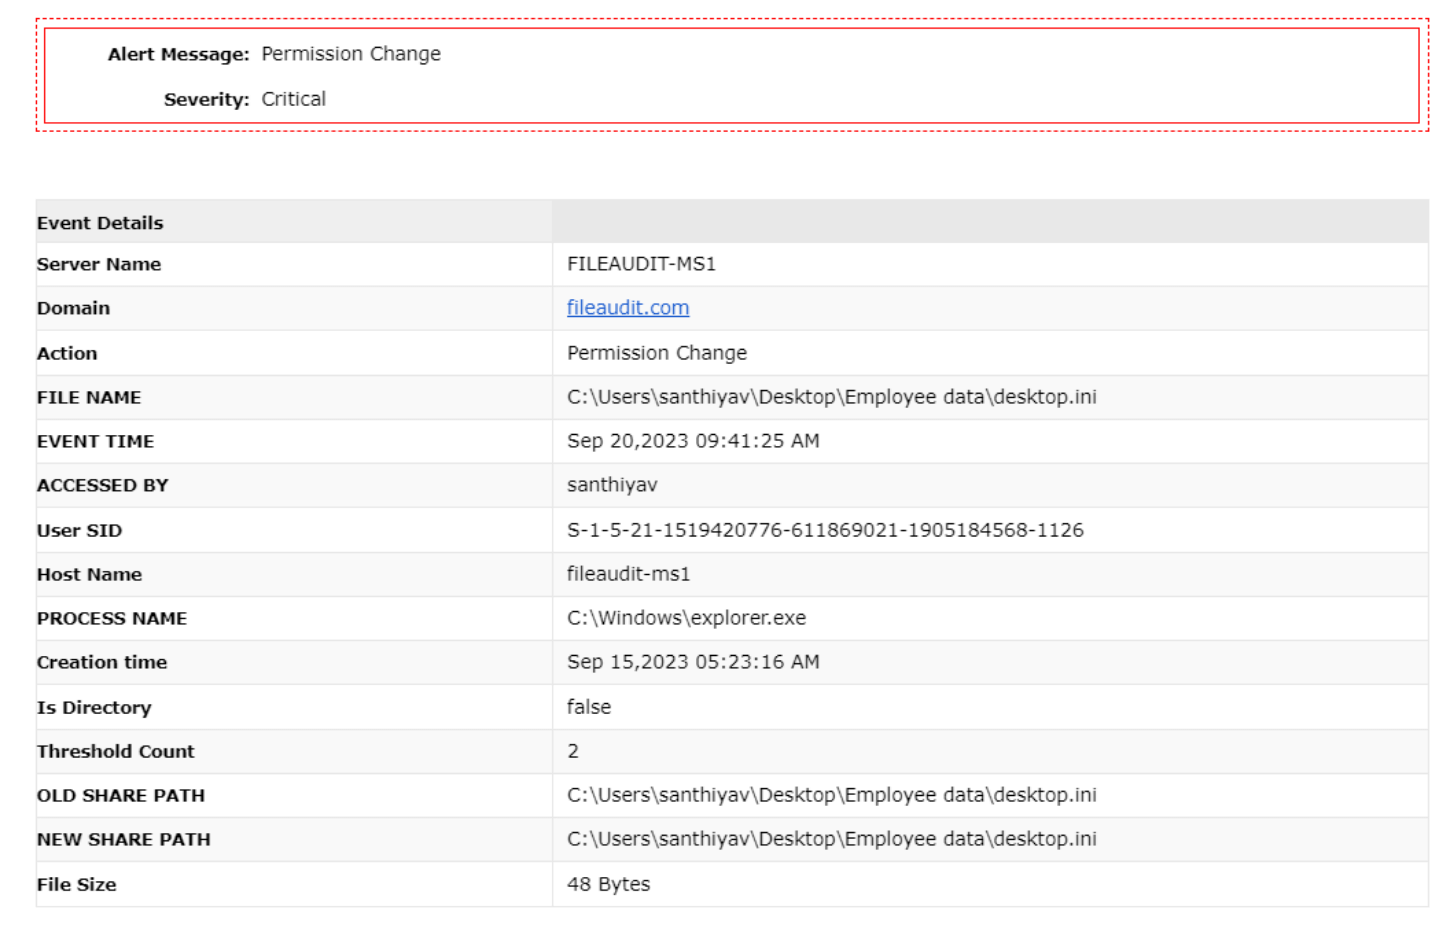
An Alert Profile has been created to send an email whenever a user changes the permissions of the 'Employee Data' file.
The email alert is sent as shown below:
Steps to set an audit policy
- Launch the Group Policy Management console through either of these methods:
- Navigate to Server Manager → Tools → Group Policy Management Console,
or
- Press Win+R and in the Run dialog box that appears, type gpmc.msc and click OK.
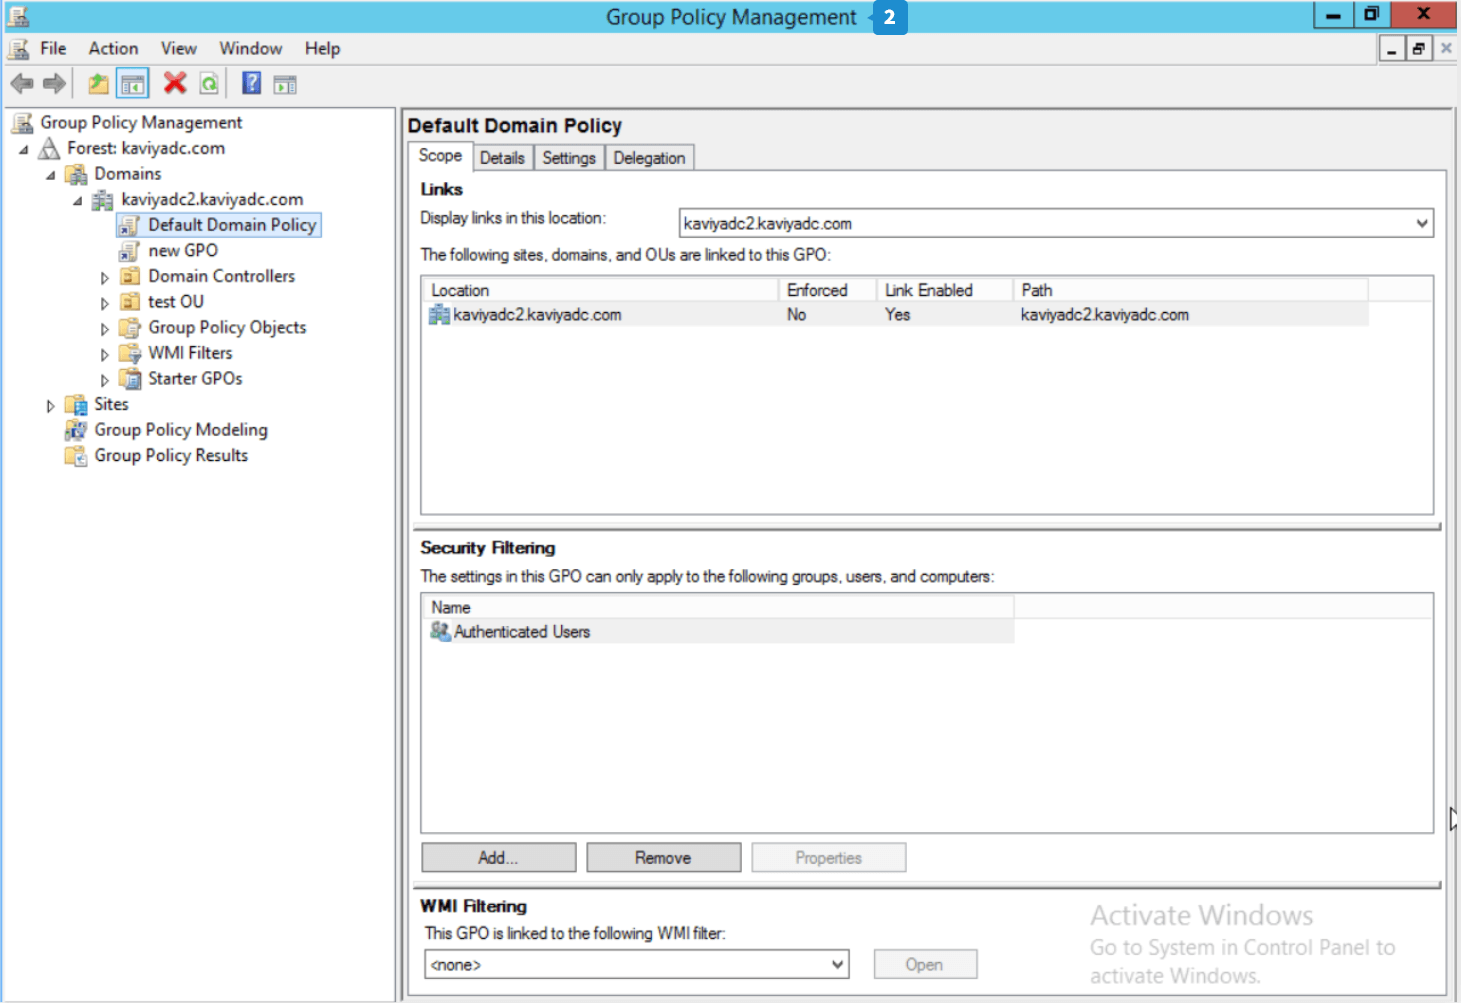
- The Group Policy Management Console window opens. A new Group Policy Object (GPO) can be created, or an existing one can be modified.
- If you want to add the Group Policy to an existing GPO, go to step 6.
- To create a new GPO, right-click the domain, site, or OU where you want to apply the policy, and click Create a new GPO in this domain and Link it here.
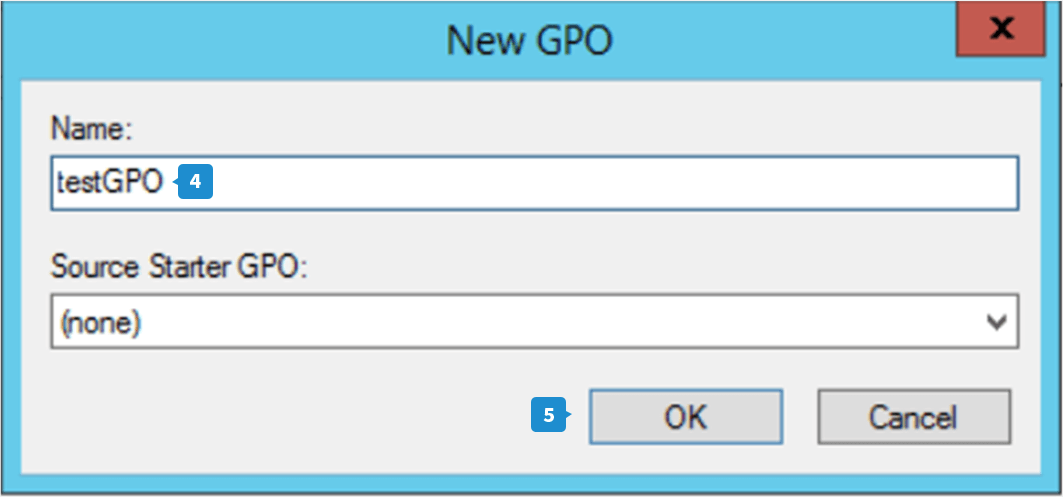
- Enter a name for the GPO in the New GPO dialog box, and click OK.
- Now right-click on that GPO and choose Edit.
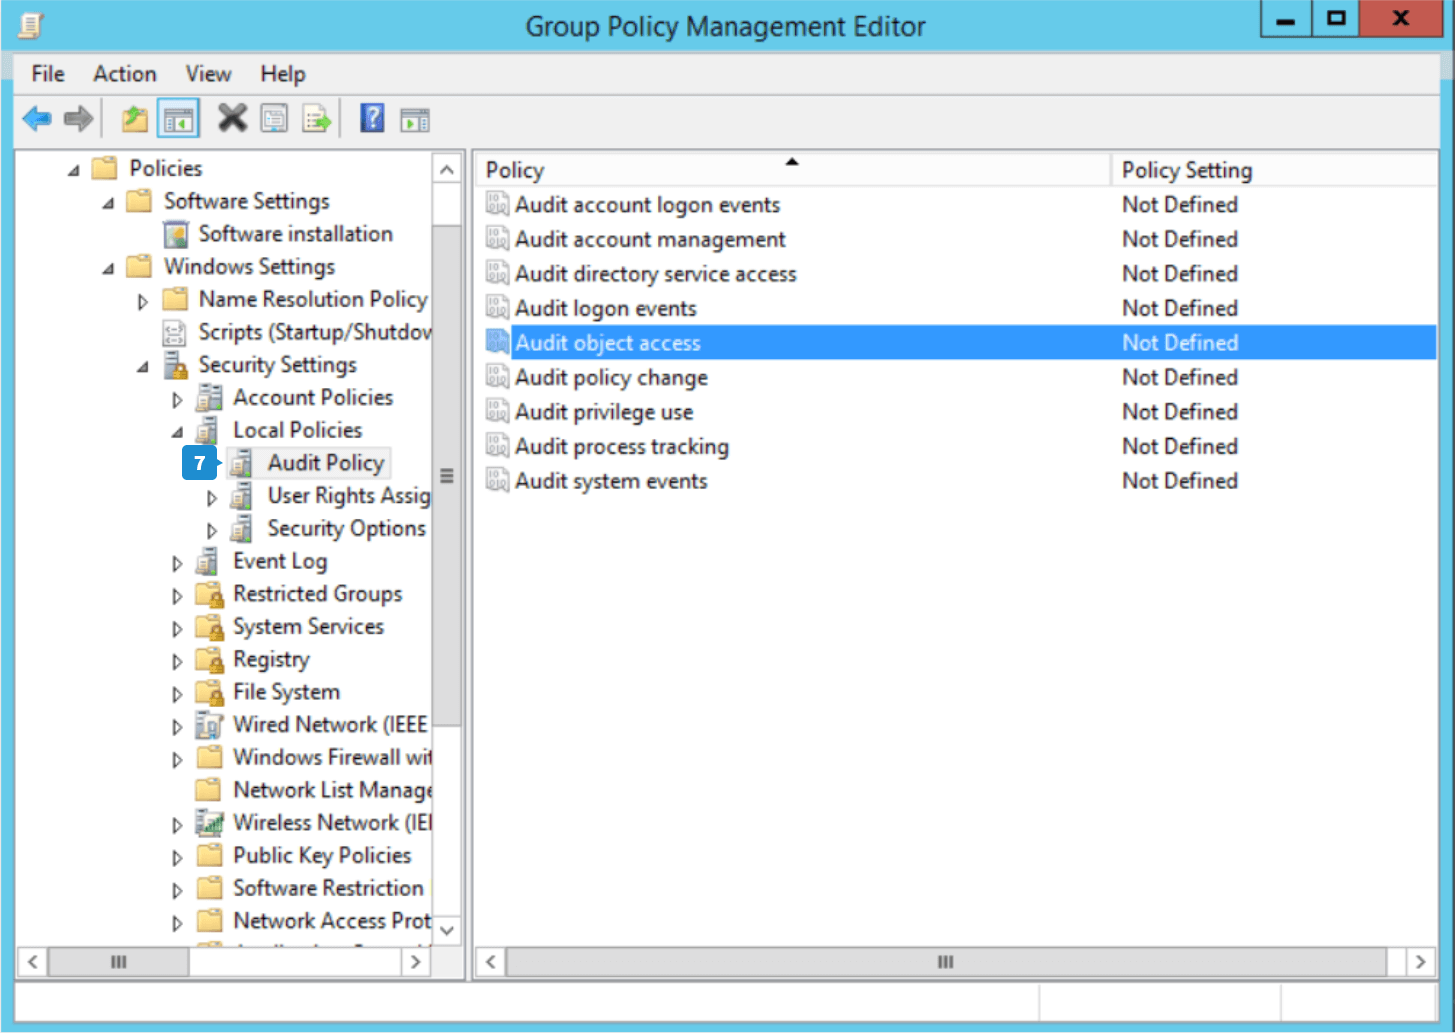
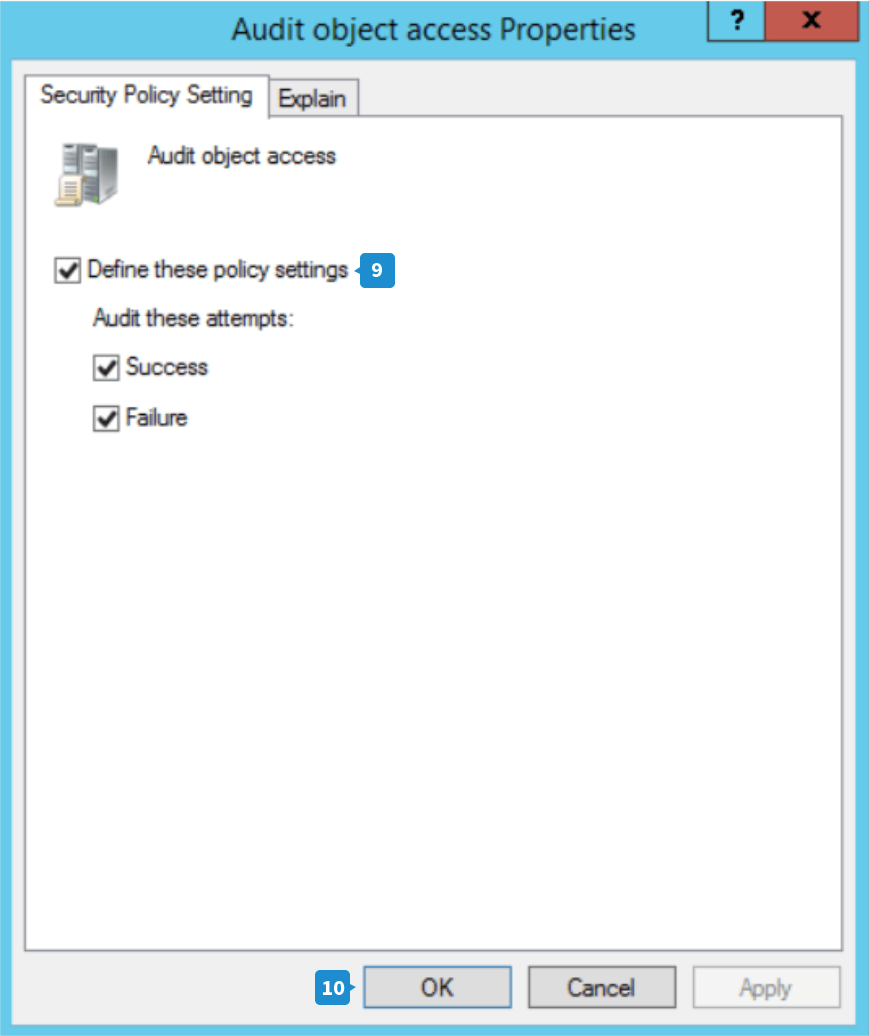
- In the Group Policy Management Editor, navigate to Computer Configuration → Policies → Windows Settings → Security Settings → Local Policies → Audit Policy.
- From the list of audit policies, double-click Audit object access to open its Properties.
- Select the Define these policy settings check box, then choose both Success and Failure to audit all the changes made on the object.
- Click Apply and then OK to close the window.
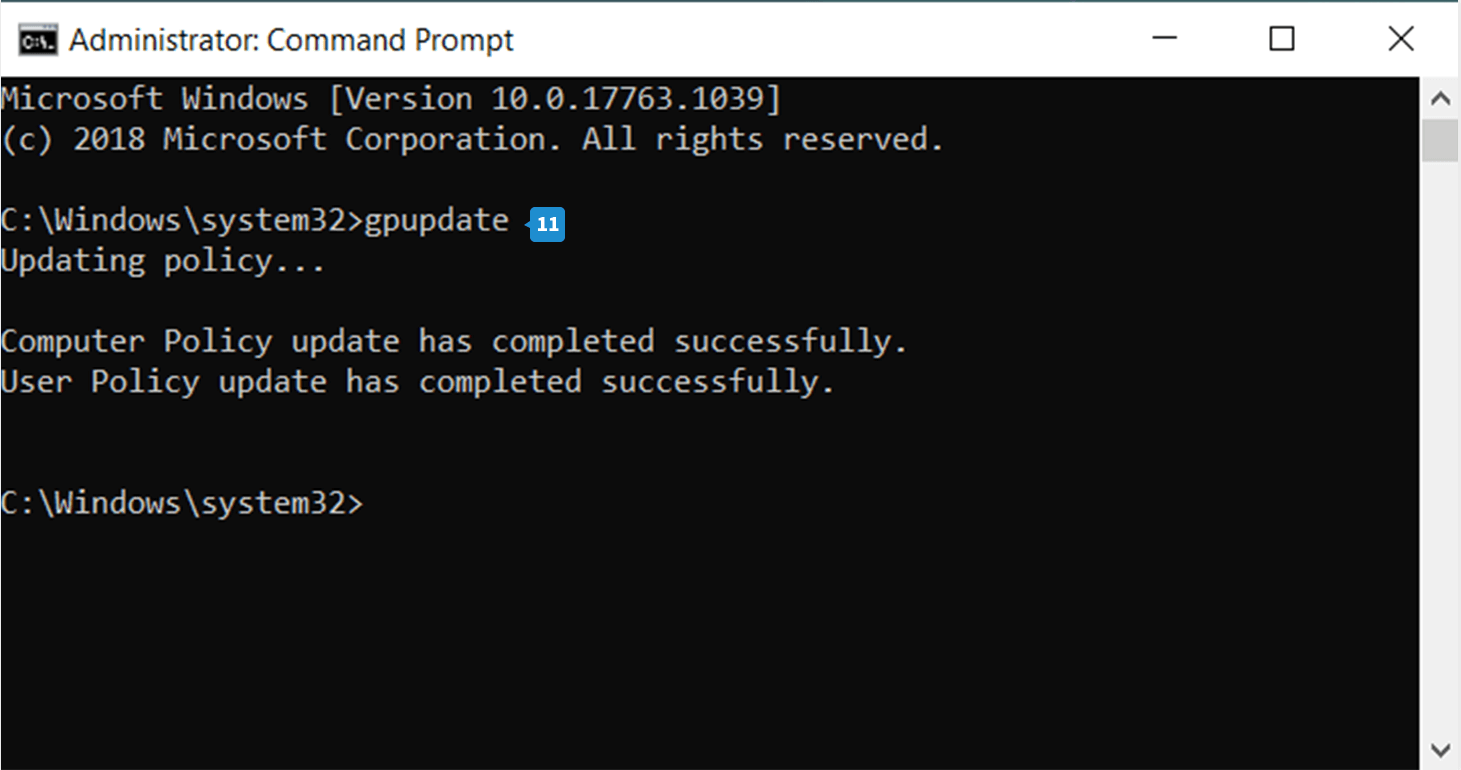
- The GPO will be automatically updated. To update it manually, open the Command Prompt, type gpupdate, and press Enter. Now the GPO is updated.
Steps to set the auditing properties for the required file
- Right-click the file you want to audit and choose Properties.
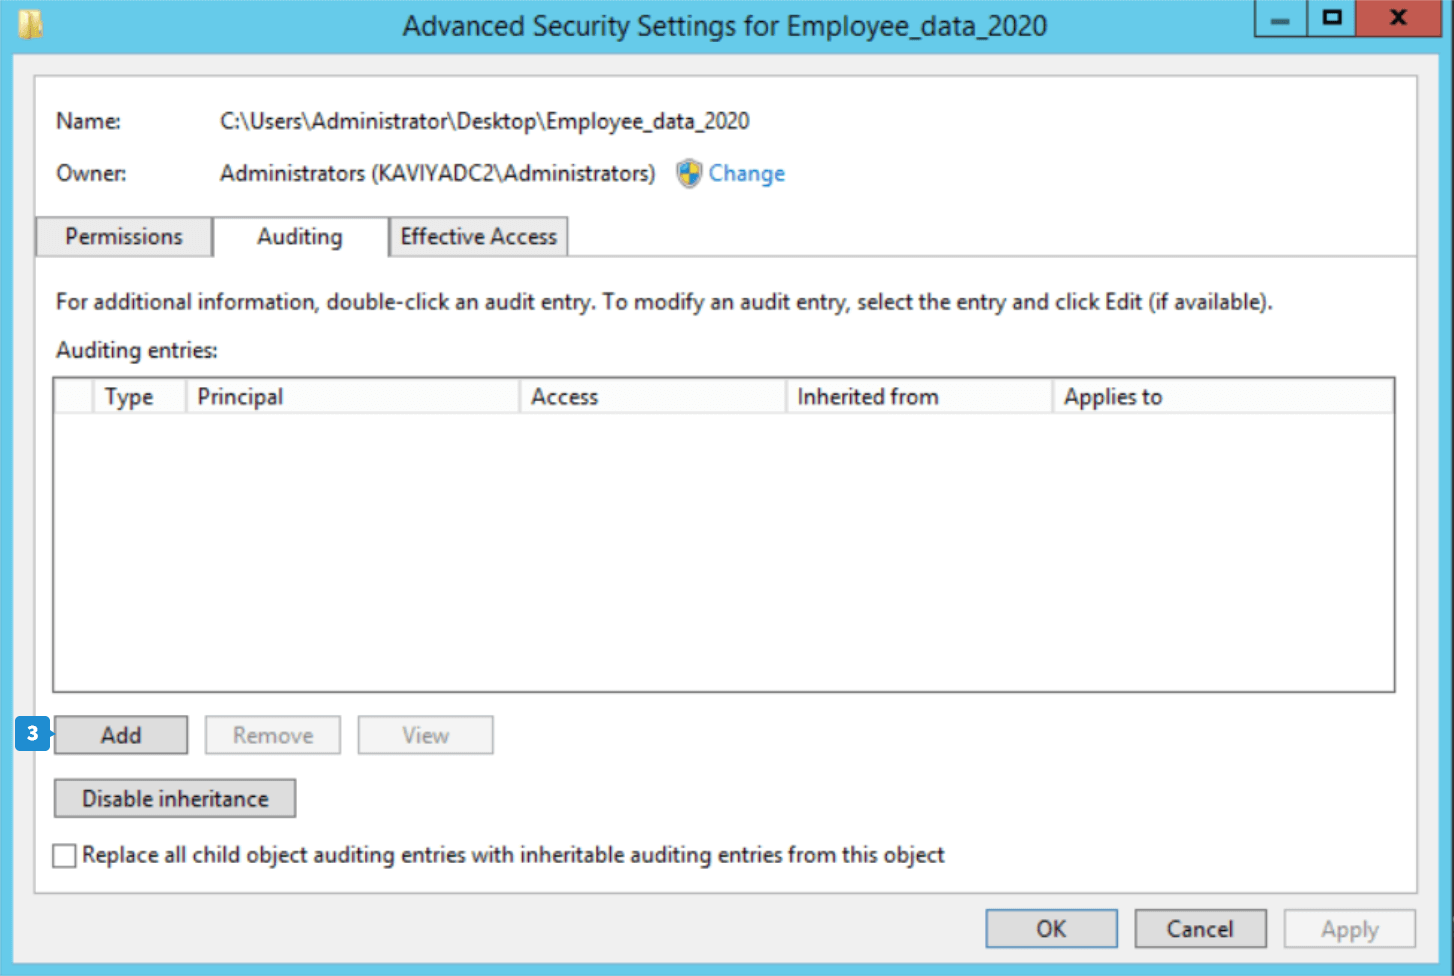
- Go to the Security tab and click Advanced to open the Advanced Security Settings window.
- Go to the Auditing tab and click Add to create a new audit entry. The Auditing Entry window appears.
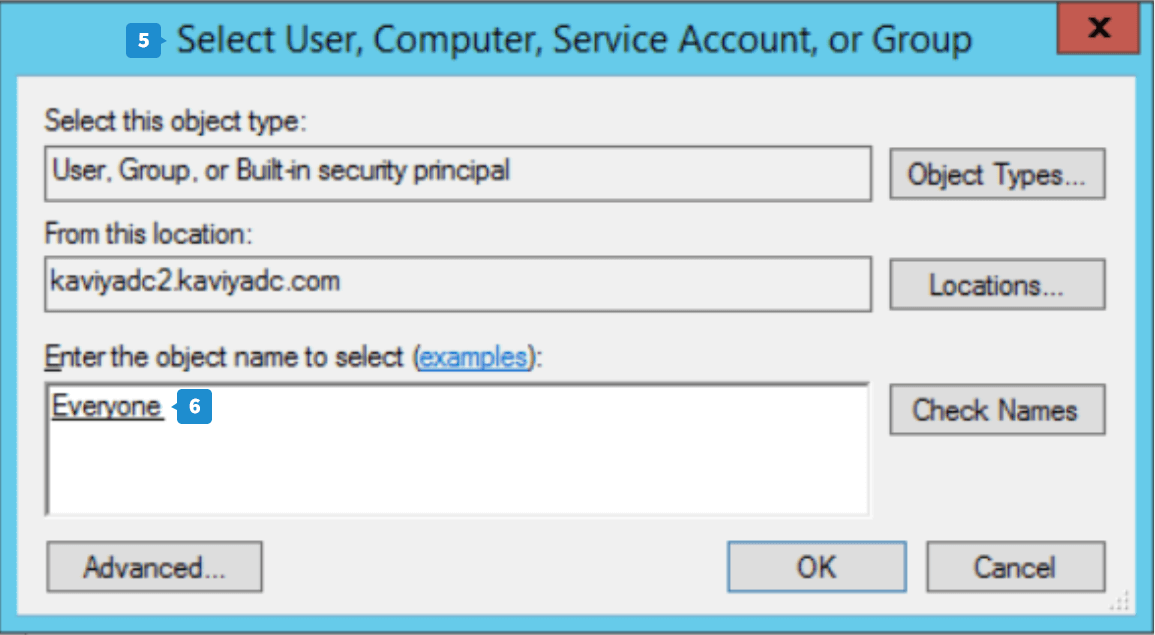
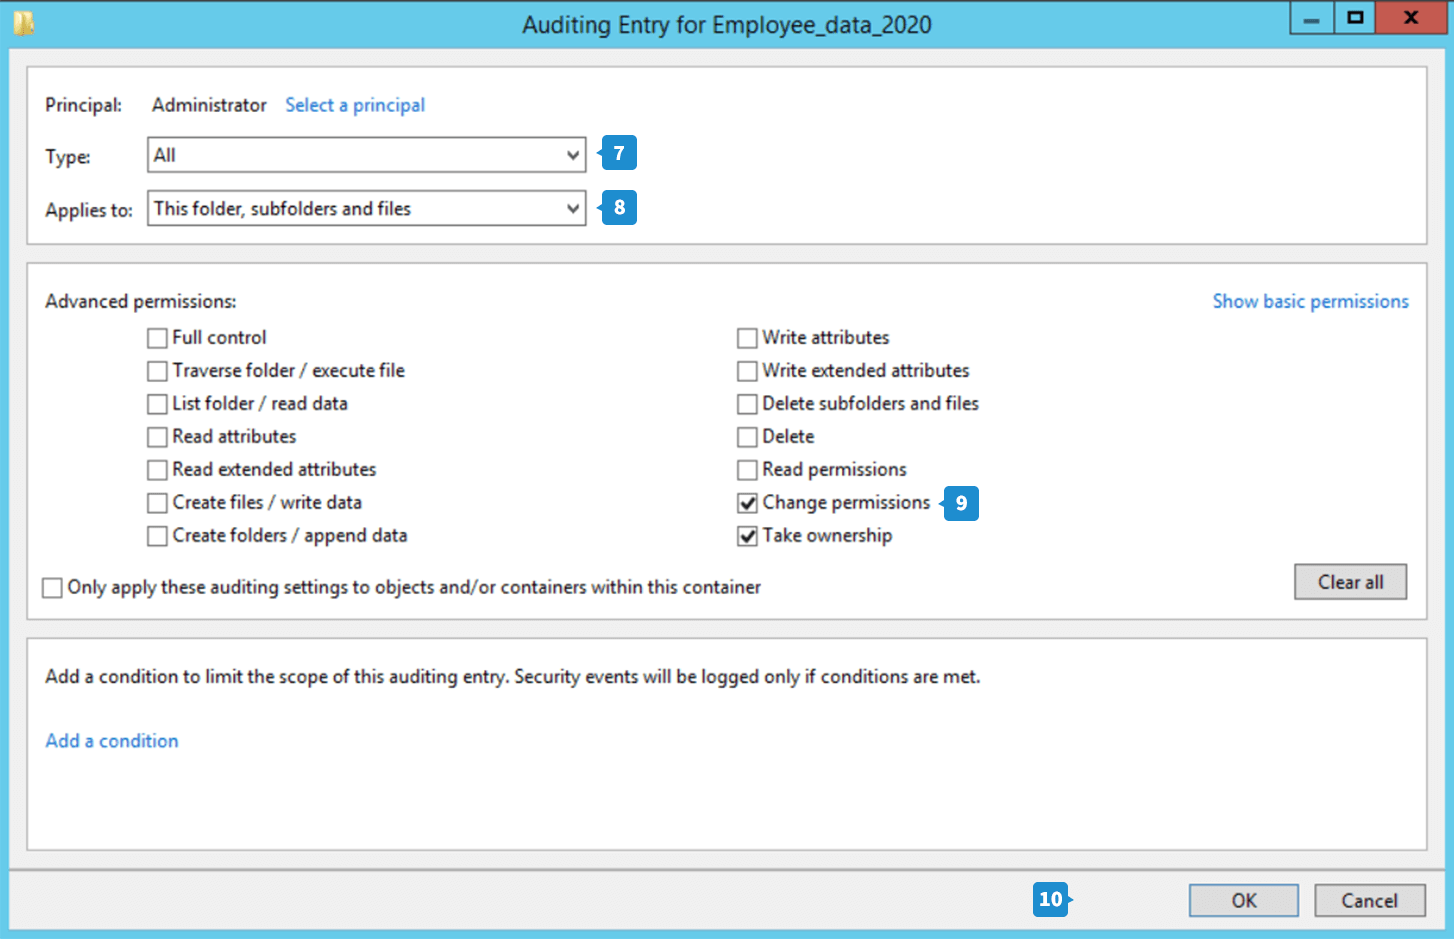
- Click Select a Principal, and the Select User, Computer, Service Account, or Group dialog box will appear.
- Provide Everyone as the object name and click Check Names.
- Click OK to close the dialog box.
- Choose the type of action you want to audit from the drop-down. If you want to audit all successful and failed events, choose All.
- This folder, sub folder and files is selected by default in the Applies To field.
- Under the Permissions section, go to Advanced permissions. Select Change permissions and Take ownership. Click OK.
- The new entry is now added. Click Apply and OK to close the window.
- Click OK in the Properties window.
Steps to view who has changed file permission using Event Viewer
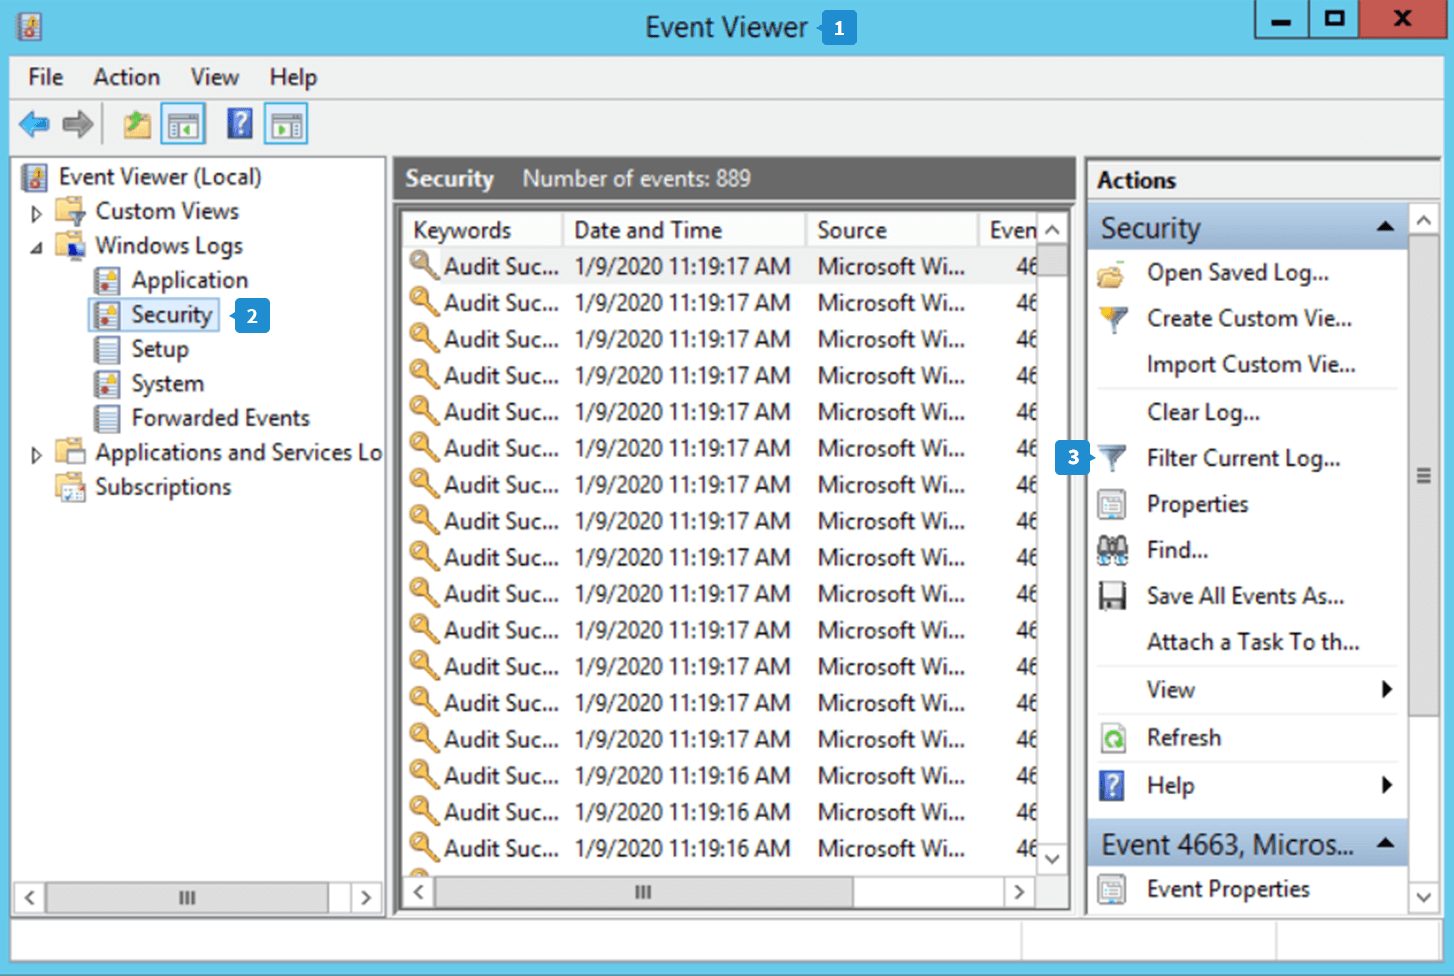
- Open the Event Viewer.
- Navigate to Windows logs → Security.
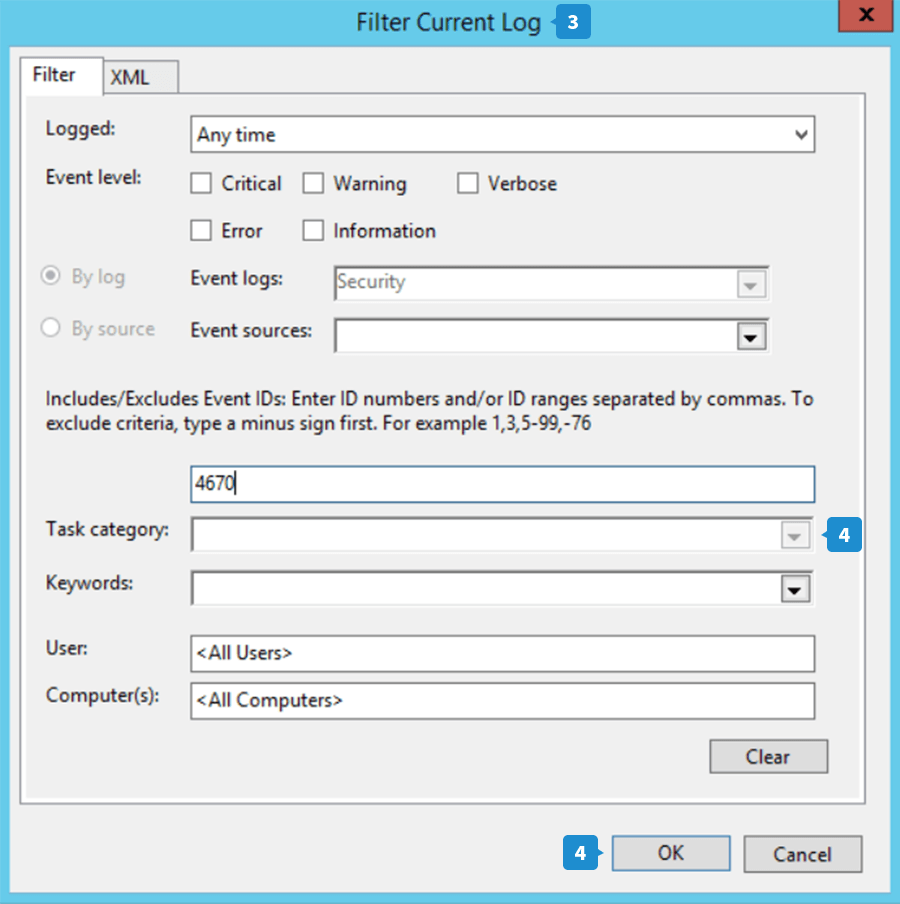
- Click the Filter Current Log option in the right pane to bring up the Filter Current Log window.
- Under the Task category option, enter the event ID for which you want to view logs. When a file's permission is changed, the event ID 4670 is logged. Enter this event ID and click OK.
- The file permission change log is now displayed.
- To search for a particular file, click Find... in the right pane.
- Provide the file name and click Find Next.
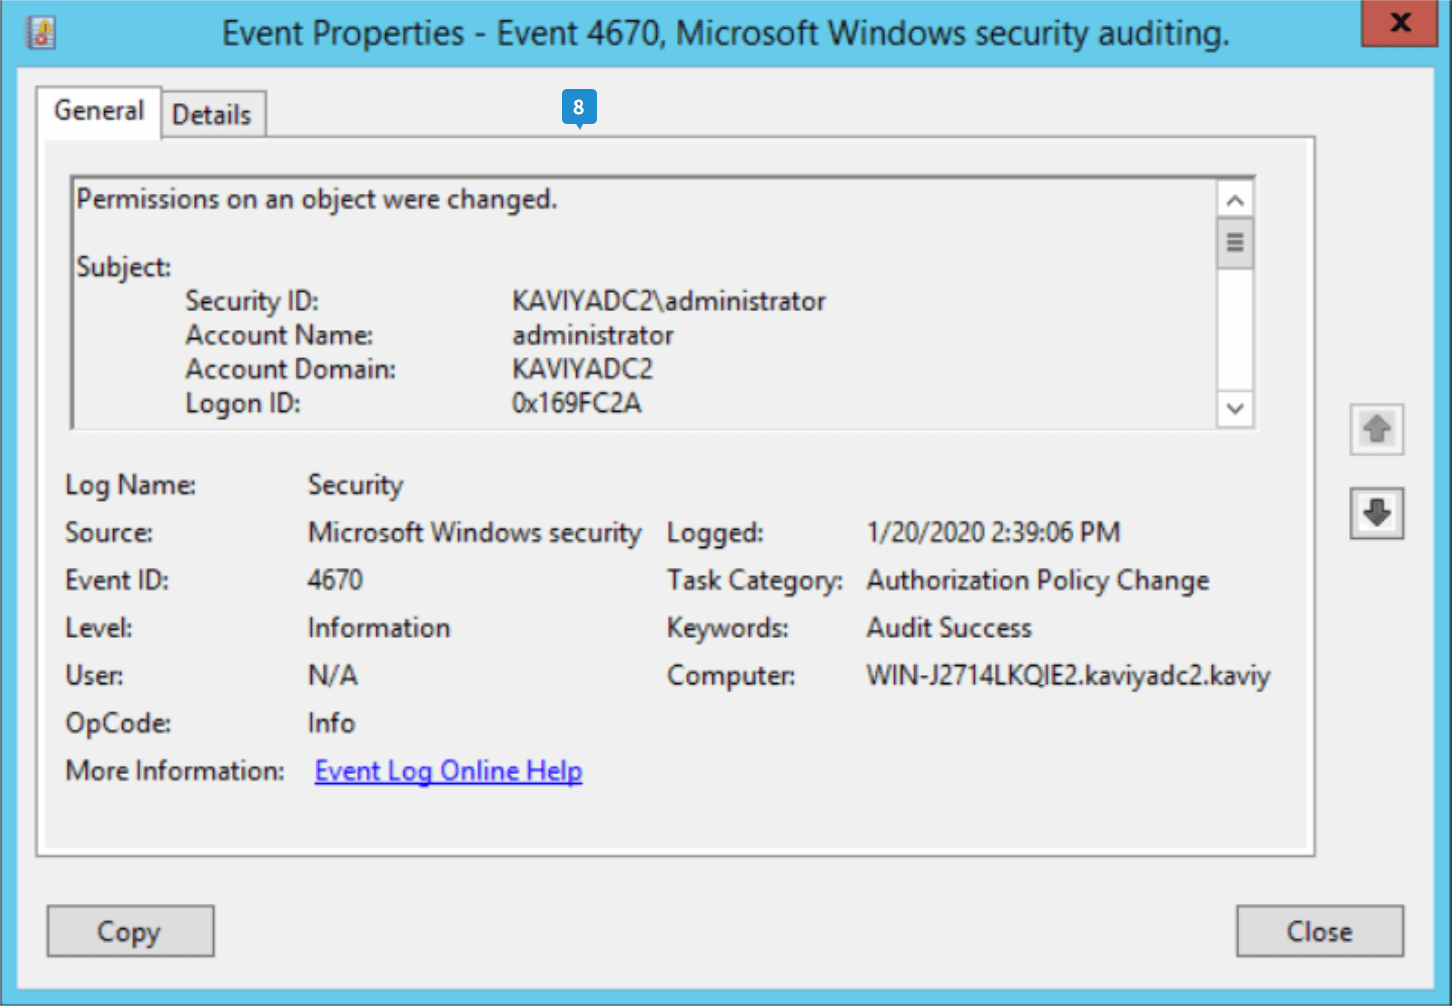
- Double-click the highlighted log to view the details.
You can now view who changed the permissions of a file using native auditing.
Why is native auditing not preferred?
- The amount of logs increases rapidly, so they must be archived or cleared frequently.
- It doesn't offer centralized file auditing capabilities across multiple file server environments.
- The logs contain excessive noise, making it time-consuming to obtain important data from them.
- It doesn't offer built-in report generating capabilities to meet compliance requirements.
While native auditing records all events, it doesn't offer much help when it comes to retrieving the required information or proving adherence to compliance standards.
DataSecurity Plus overcomes these limitations and provides a comprehensive file auditing solution that can be configured and installed within minutes.