It's imperative to continuously monitor files copied to USB drives to detect and prevent unwarranted data transfers, which can result in data loss or misuse. Follow the steps below to configure DataSecurity Plus' device control functionality to closely audit and track down any files copied to USB drives.
Steps to track file activities on USB drives:
- Download and install DataSecurity Plus.
- Open the DataSecurity Plus console.
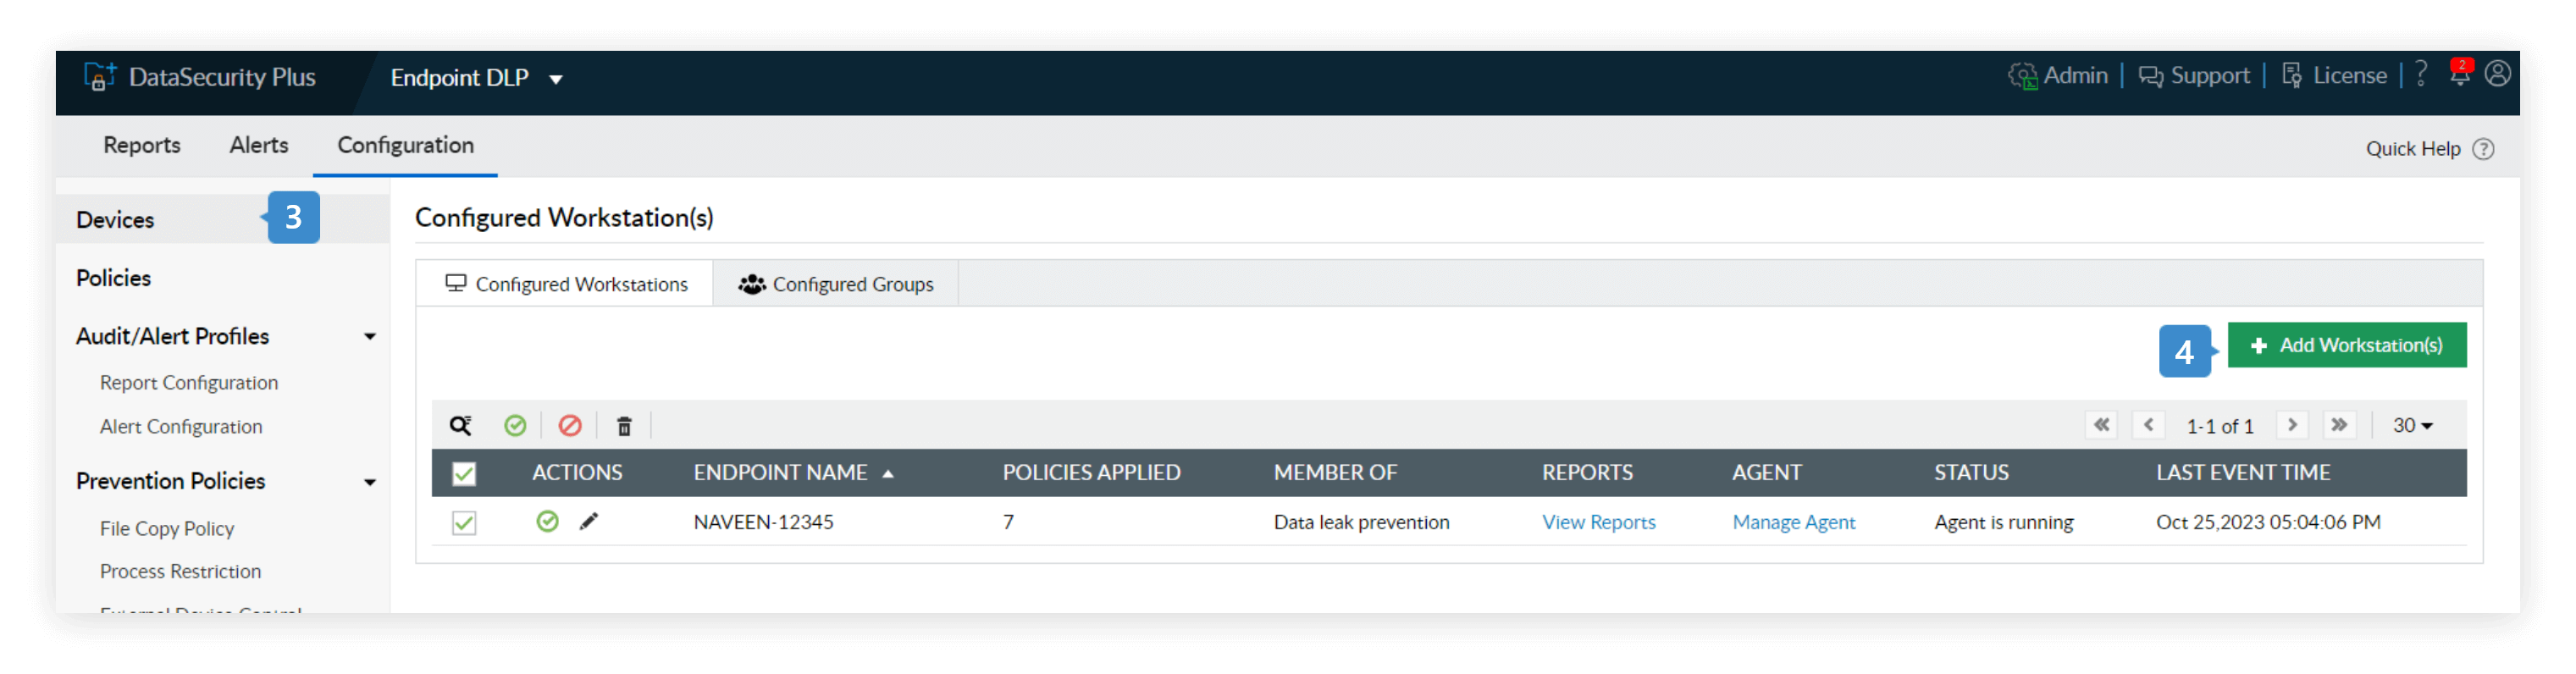
- Select Endpoint DLP from the application drop-down. Go to Configuration → Devices.
- In the Configured Workstation(s) page, click Add Workstation(s) in the top-right corner.
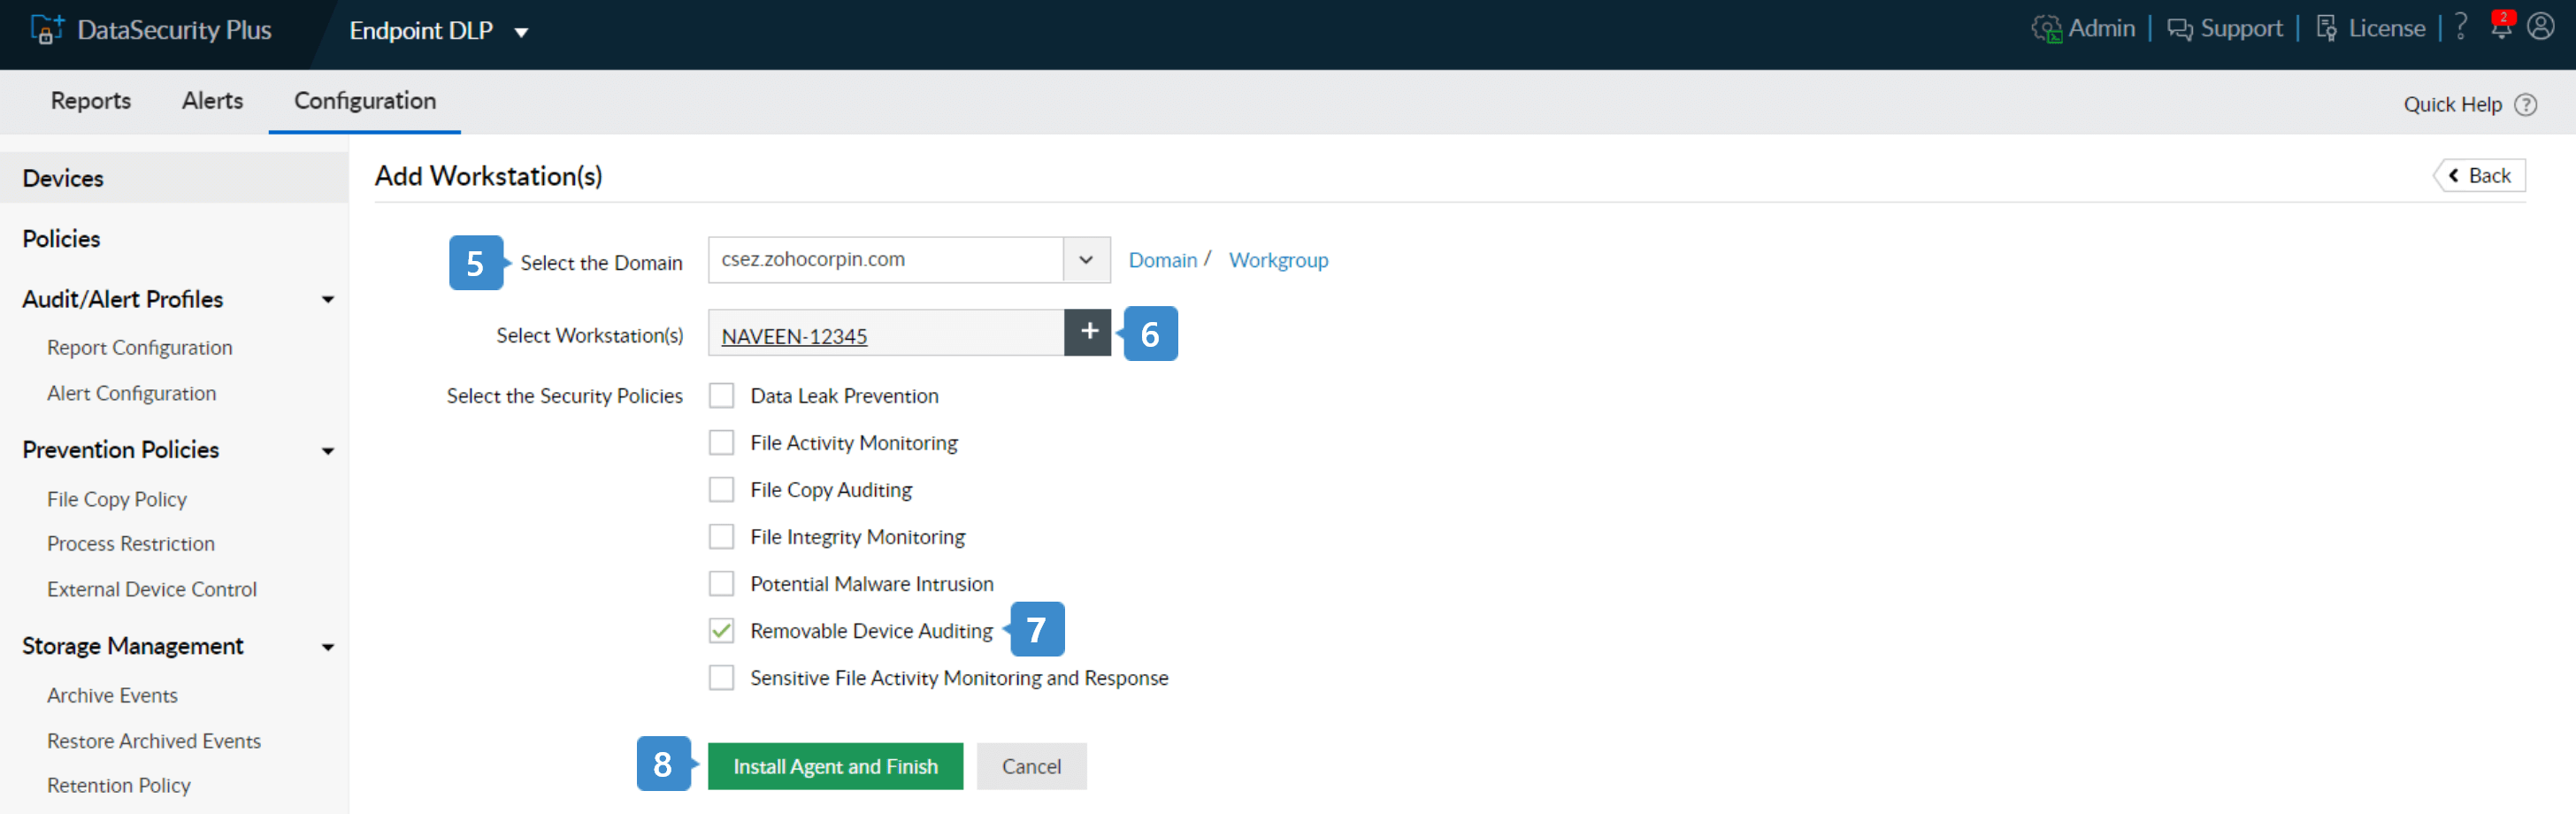
- Select your Domain.
- Select the + symbol next to the Select Workstation(s) text box, and add the workstations that you want to audit and secure.
- Choose Removable Device Auditing.
- Select Install Agent and Finish.
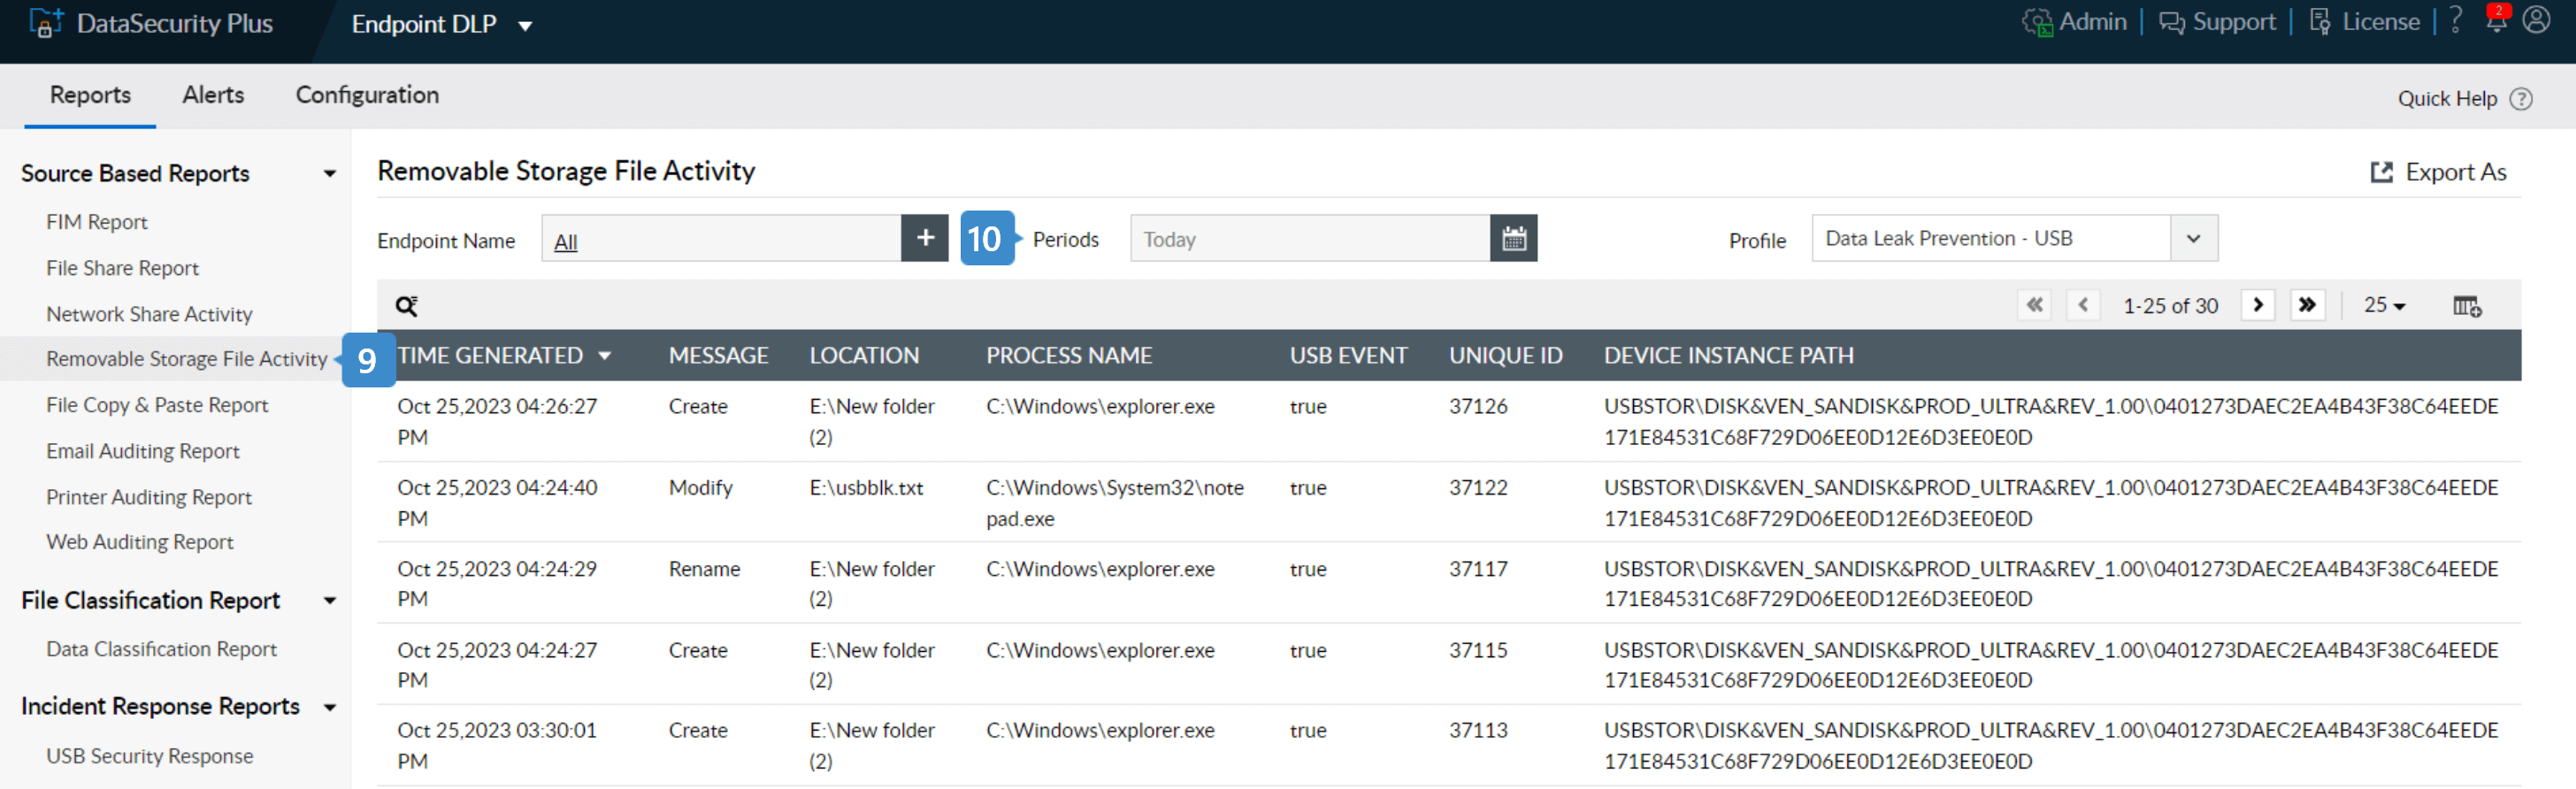
- Navigate to Reports. Under Source Based Reports, select Removable Storage File Activity Report.
- Use the Periods drop-down to select the desired time range over which file activities on removable storage devices such as USBs are to be monitored.
- The report displays all file activities made on removable storage media.
Steps to track only files copied to USB drives:
- Select Endpoint DLP from the application drop-down.
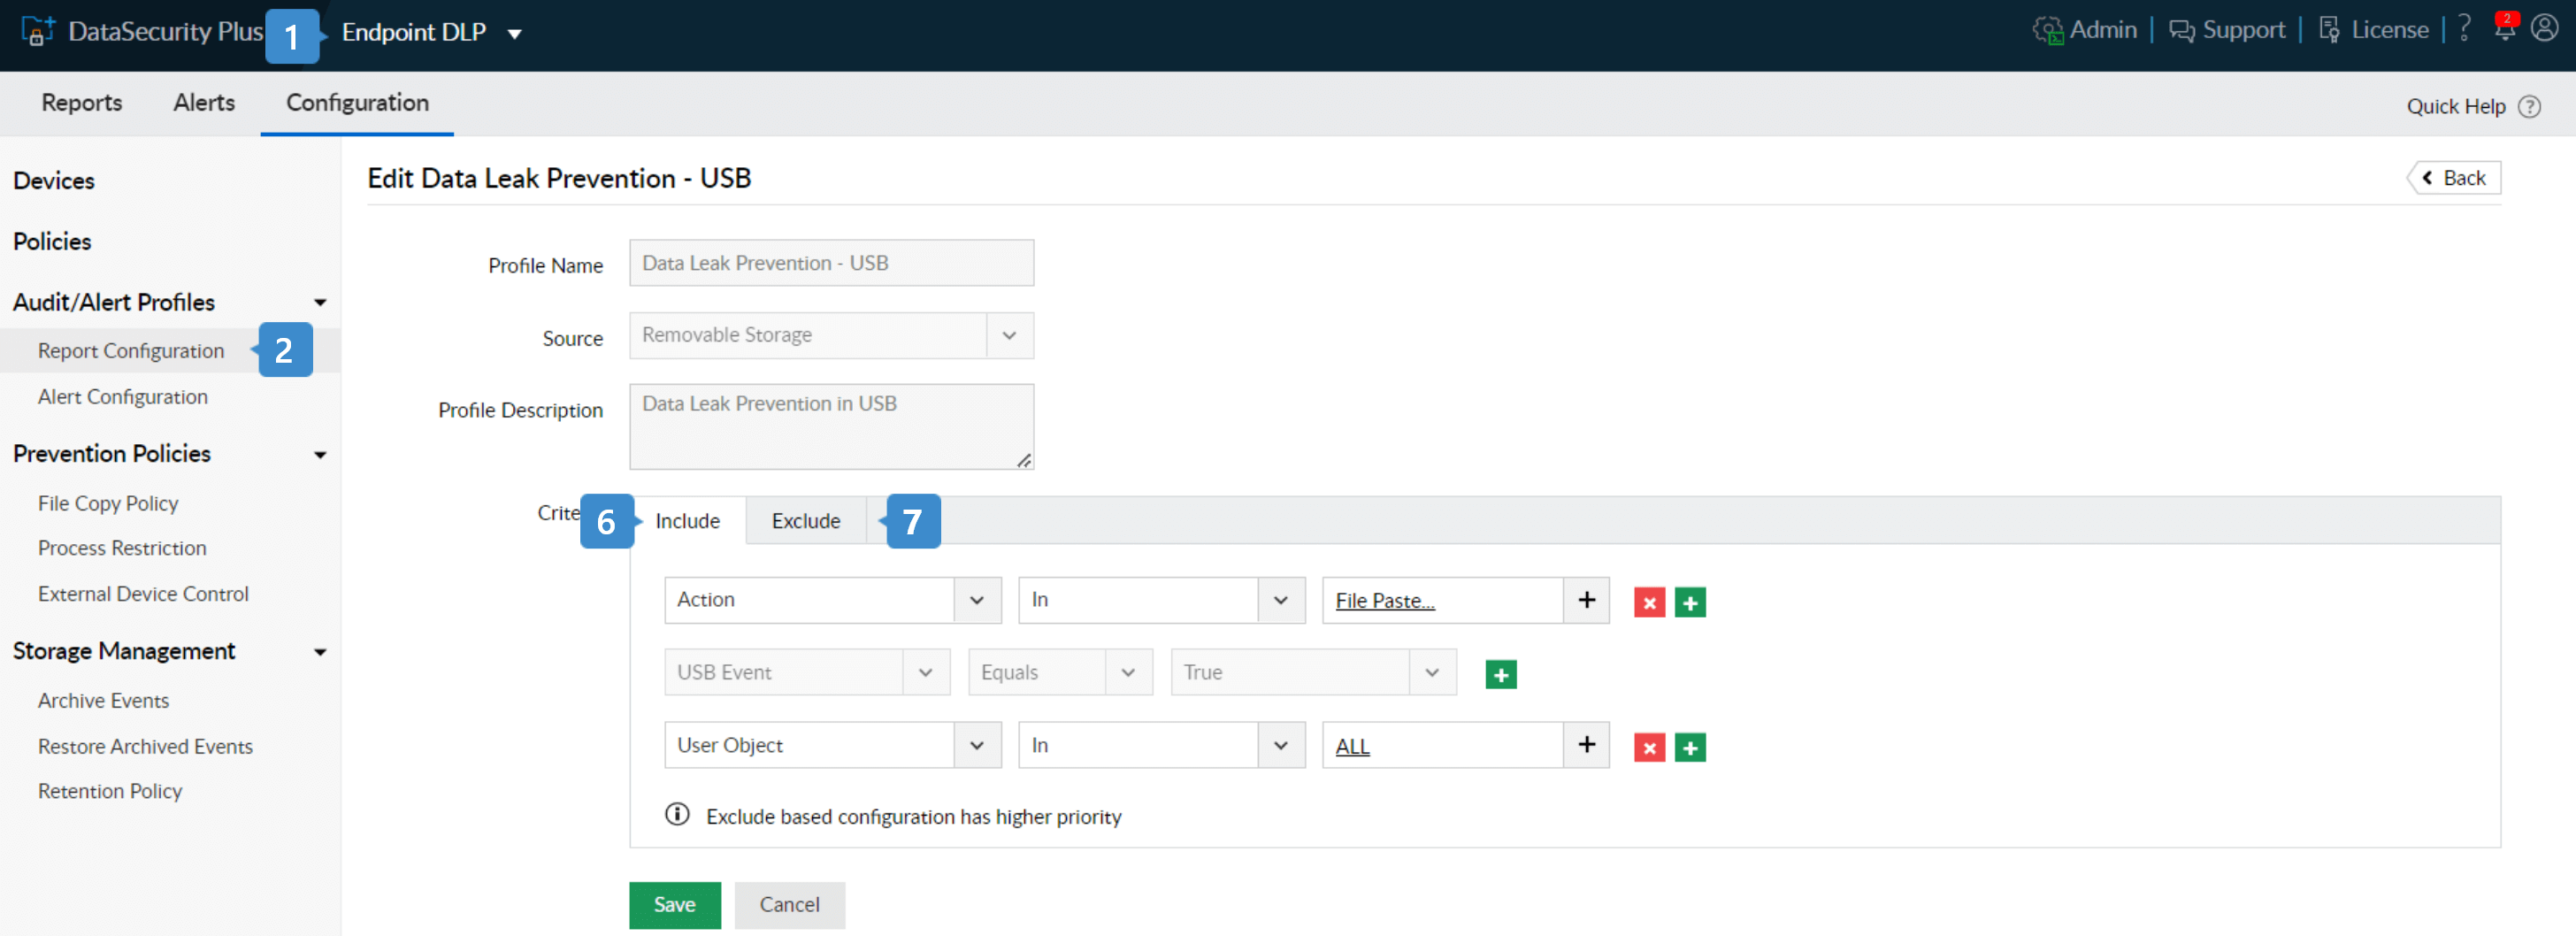
- Go to Configuration → Audit/ Alert Profiles → Report Configuration.
- Choose Removable Storage from the available audit profiles.
- Select Edit for the Data Leak Prevention - USB audit profile.
- The audit profile is predefined with an appropriate Name, Source, and Description.
- Navigate to the Criteria section, and add these filters under the Include tab:
- Actions = In = Files pasted.
- User Object = In = All.
- USB event = Equals = True
- Use the Exclude option to exempt trusted users, groups, or nonessential files from the File copied report.
Steps to block USB drives and trigger instant alerts in response to sensitive files copied to USB devices:
- In the DataSecurity Plus console, select Endpoint DLP from the application drop-down.
- Go to Configuration → Audit/ Alert Profiles → Alert Configuration.
- Choose Removable Storage from the available Alert Profiles.
- Select the Edit option for the Sensitive Data Leak Prevention - USB alert profile.
- The alert profile is predefined with an appropriate Name, Source, Description, and Severity.
- Navigate to the Criteria section, and add these filters under the Include tab:
- Actions: Files pasted.
- Users: All.
- USB Event = Equals = True
- File classification*: Restricted.
Note: Use other criteria such as File Type, File Size, File Name, and more to selectively monitor critical data being copied.
- Use the Exclude option to exempt trusted users, groups, or nonessential files from the File copied report.
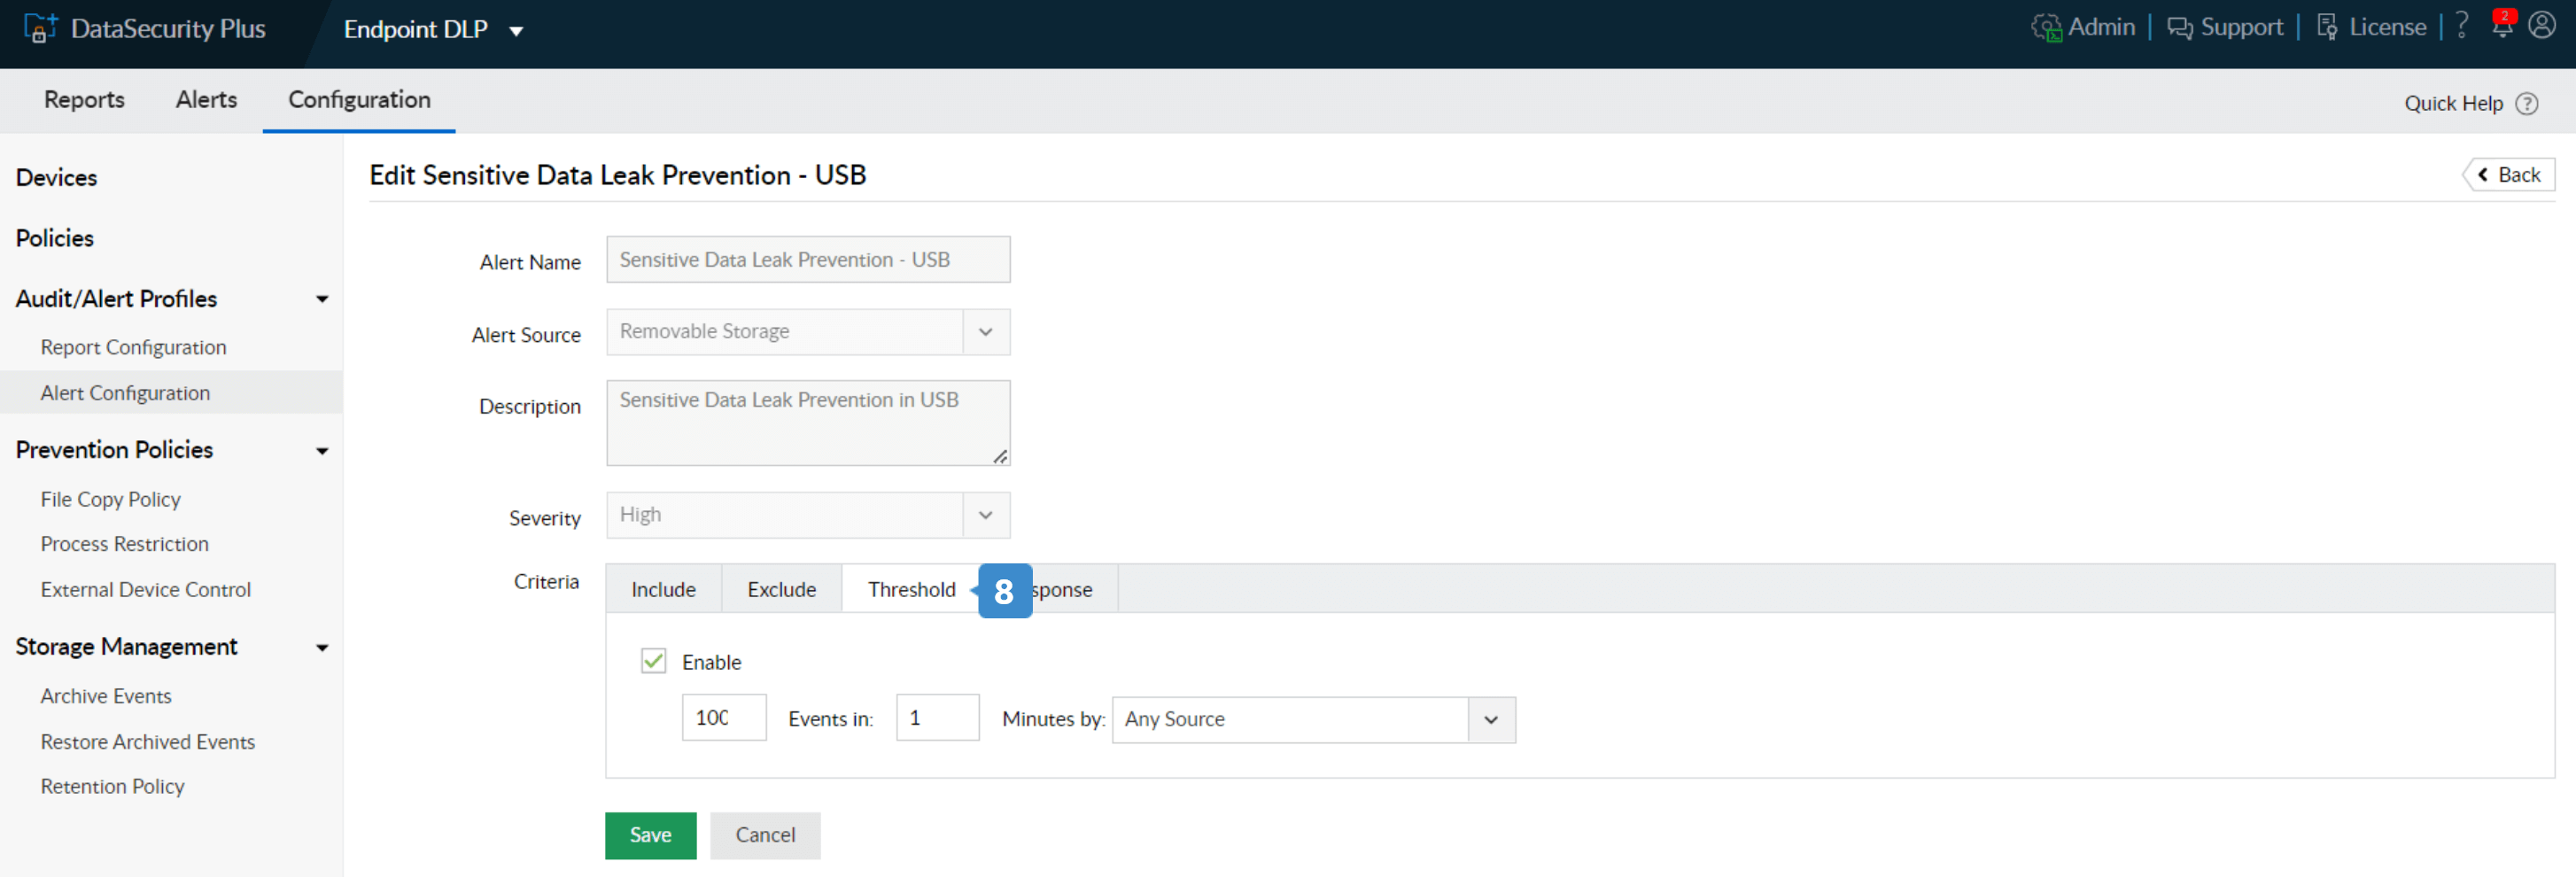
- Under the Threshold tab:
- Check Enable.
- Specify the desired threshold value (e.g., configuring "100 events in 1 minute by any source" will raise an alert when 100 or more files are copied/pasted in under a minute.)
Note: The threshold limit can be customized to your organization's needs.
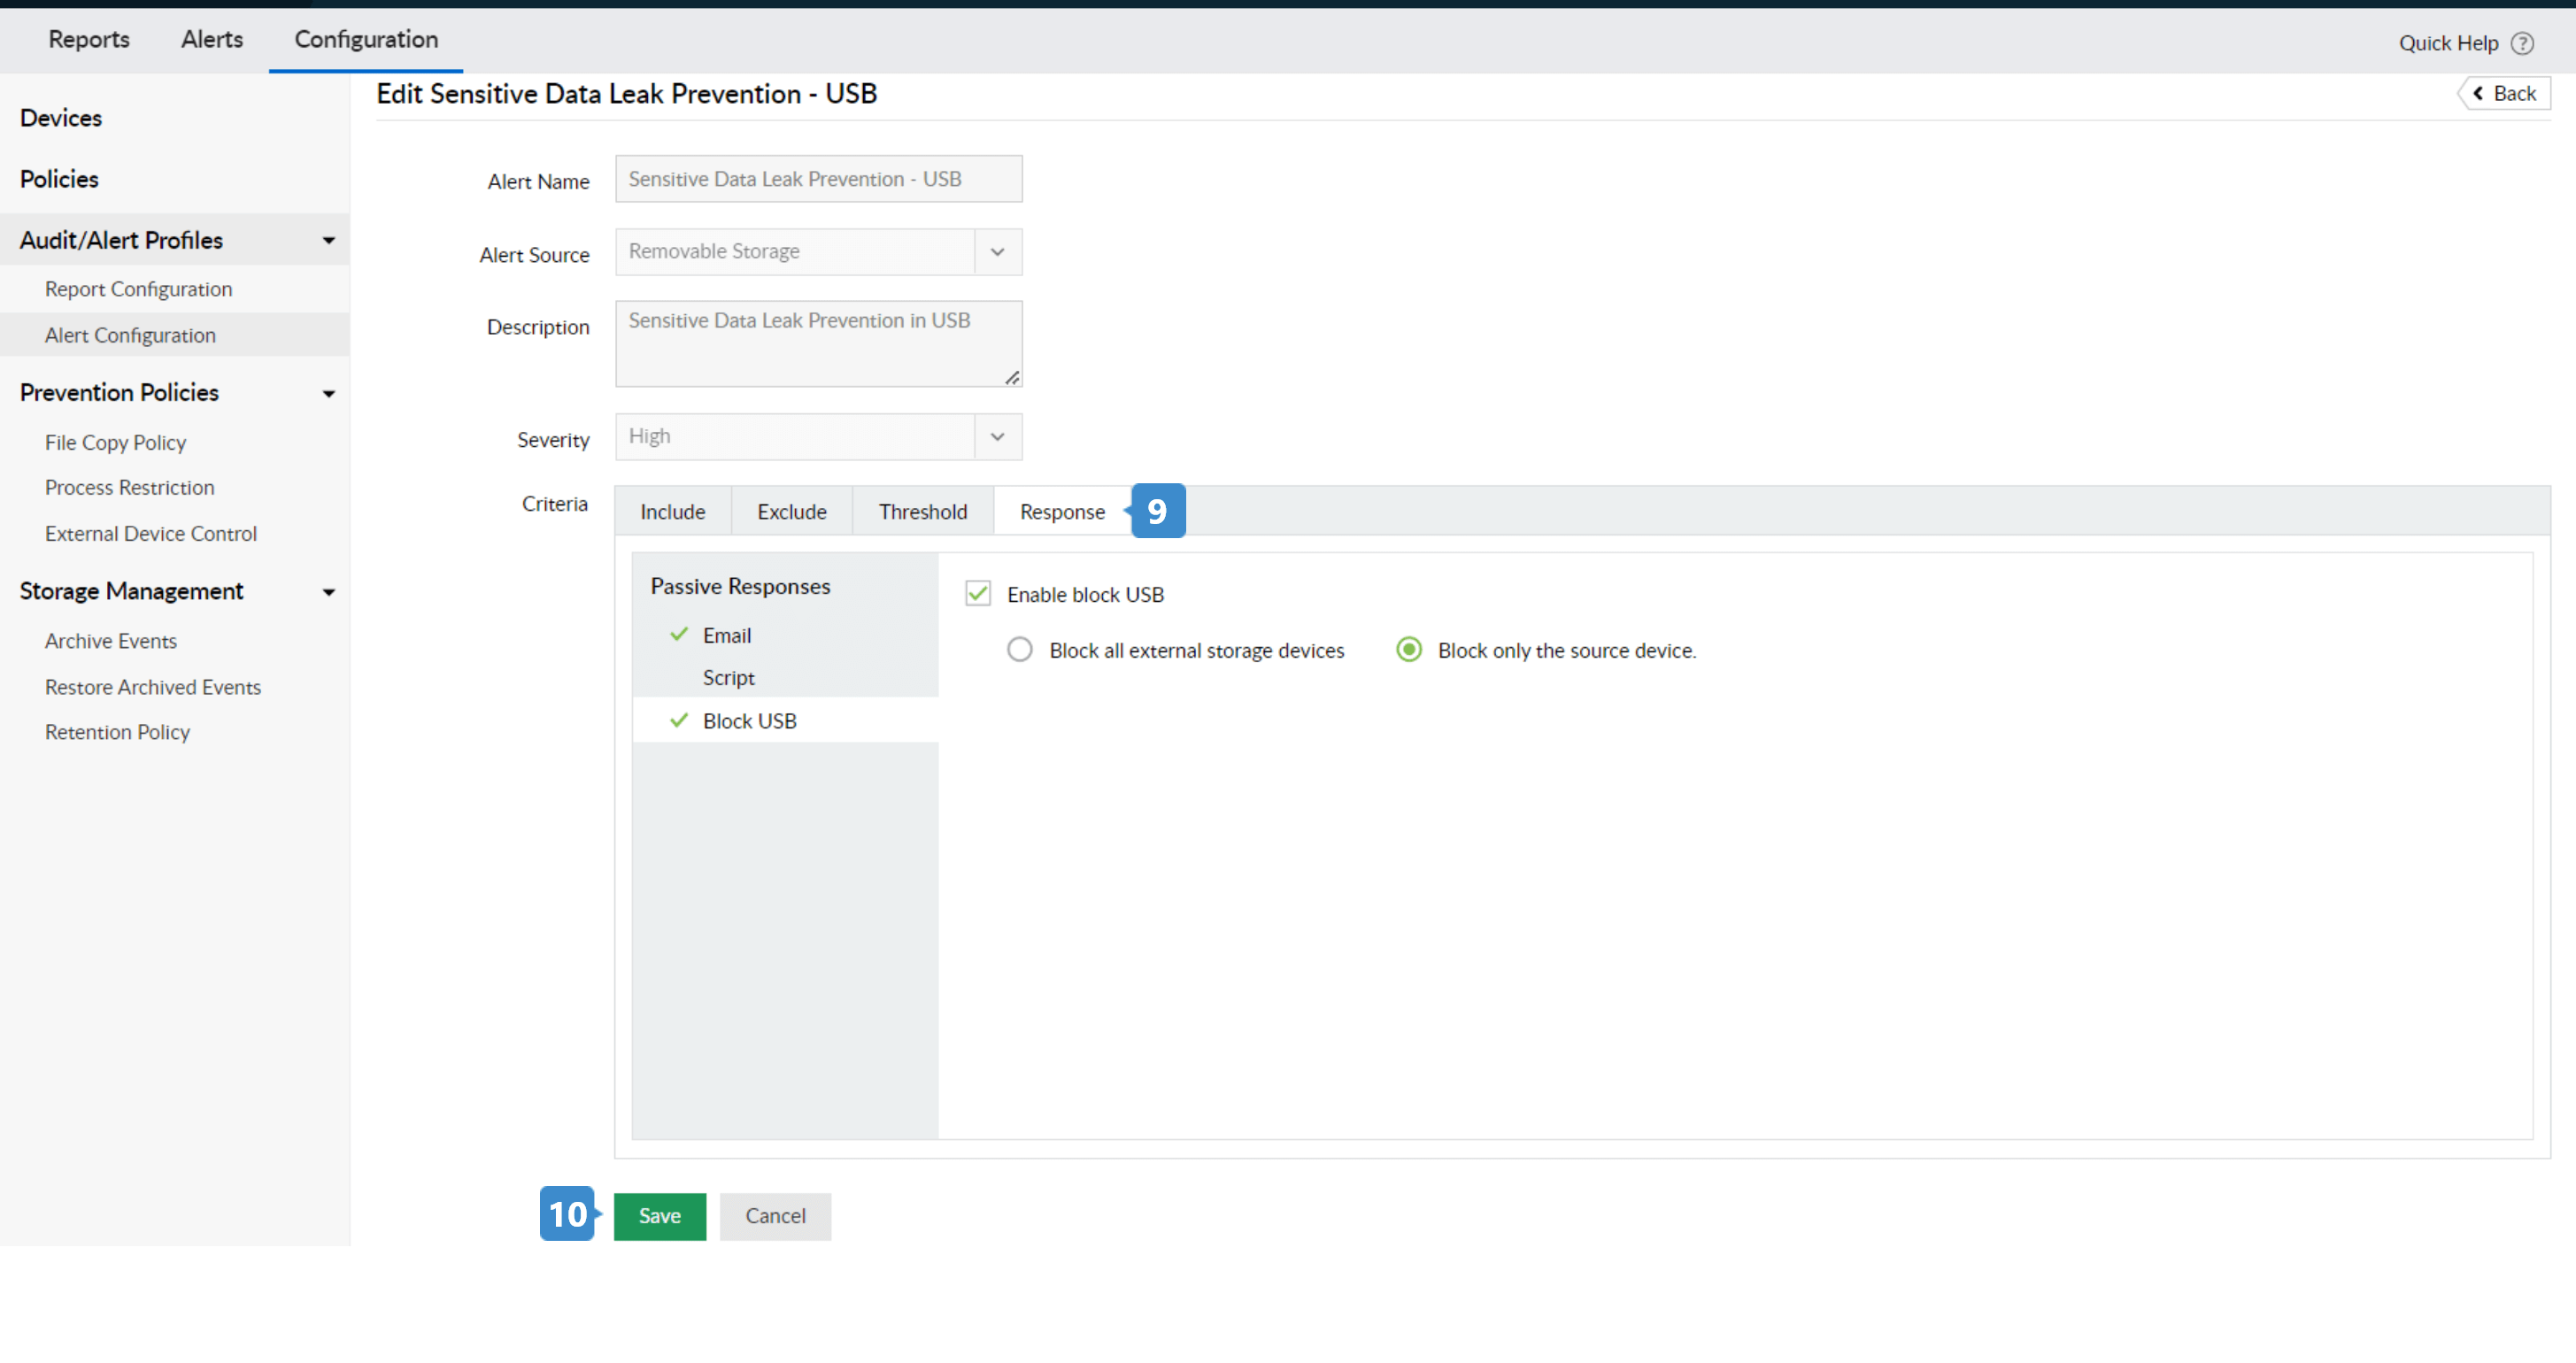
- Under the Response tab:
- Select Email, and check Enable email notification.
- Specify one or more email addresses you would like to send alerts to.
- Set the email Priority to High.
- Add an appropriate Subject and Message for your email.
- Select Block USB and check Enable Block USB and choose either Block all external storage devices or Block only the source device.
- Click Save.
You have now successfully configured DataSecurity Plus to audit, alert, and respond to sensitive files being copied.
*File classification: Files need to be classified manually based on their sensitivity as Public, Internal, Sensitive, or Restricted.