Direct Inward Dialing: +1 408 916 9892
Note: To enable the required auditing, please refer to Step 1 on the Native AD Auditing tab. After this you can follow the steps below to view the relevant events.
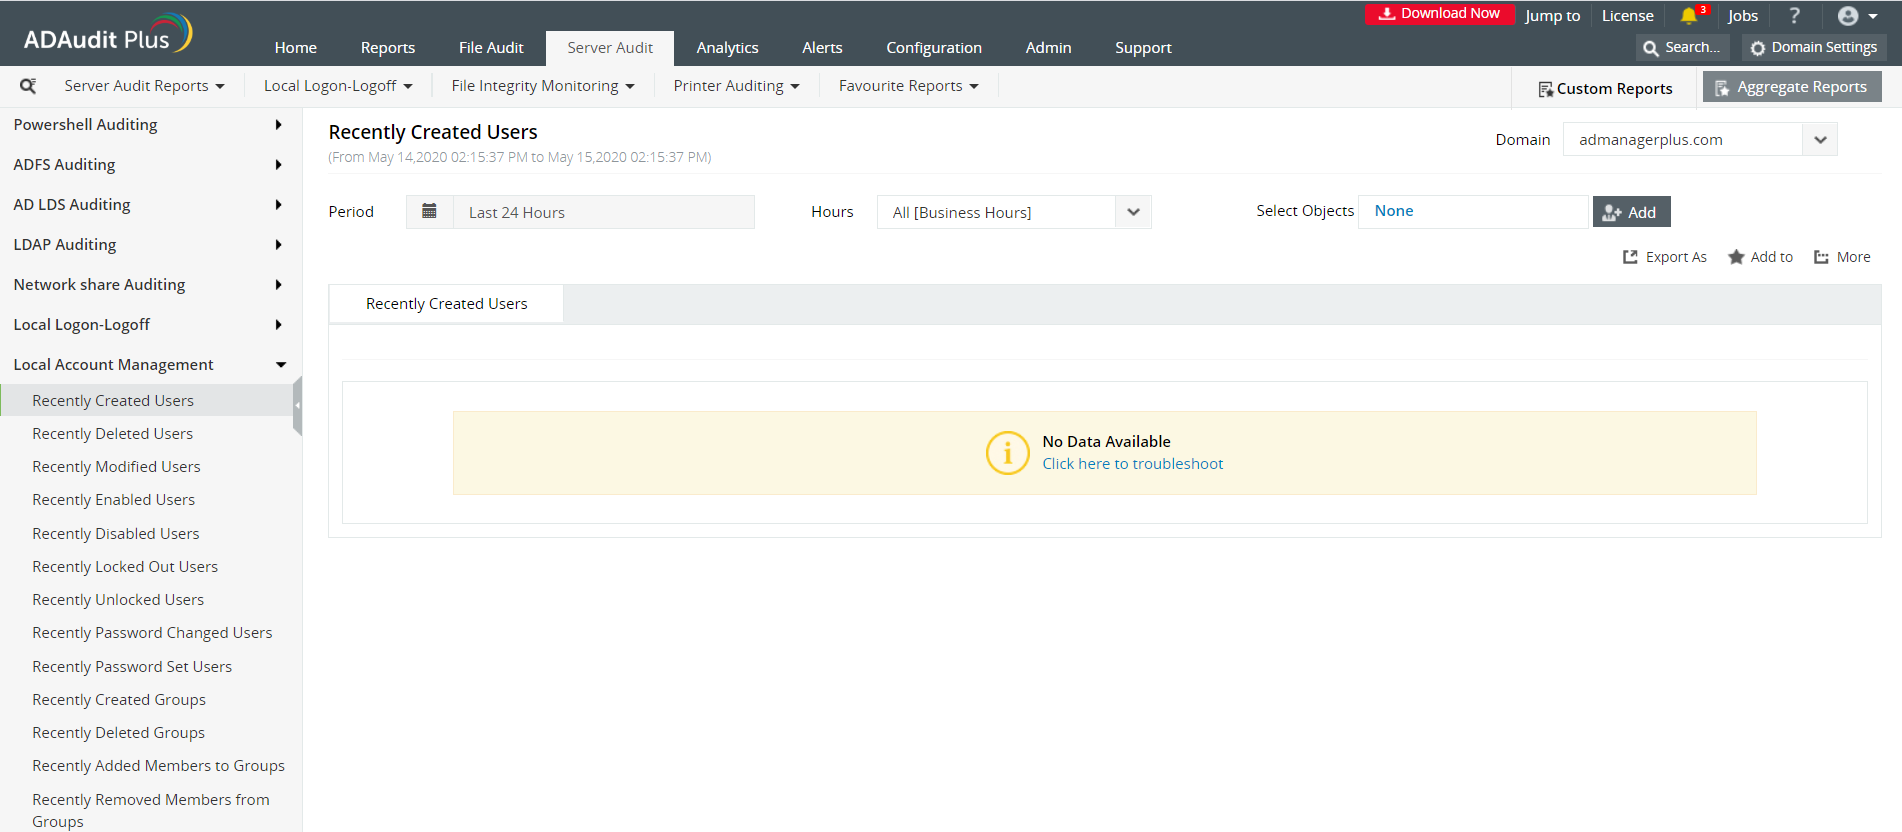
Select the Server Audit Tab and navigate to Local Account Management tab.
You can then navigate to the pre-configured report named Recently Created Users.
This gives you a report of newly created users. You can check when a local user account was created.
Customize the Period to the desired time range. You can also define a custom period and save for quick reference.
A detailed audit information report is generated for the selected period.
Clicking on an event in the bar graph, filters the report view highlighting only the selected event.
Advanced filter options help you locate the specific event that youre looking for.
Launch theServer Manager and open the Group Policy Management Console (GPMC).
In the left pane, expand the Forestand Domains nodes to reveal the specified domain you want to track the changes for.
Expand the domain and right-click Default Domain Policy. You can also choose a domain policy that is universal throughout the domain, or create a new GPO and link it to the Default Domain Policy.
Click on Edit of the desired group policy, to open up the Group Policy Management Editor.
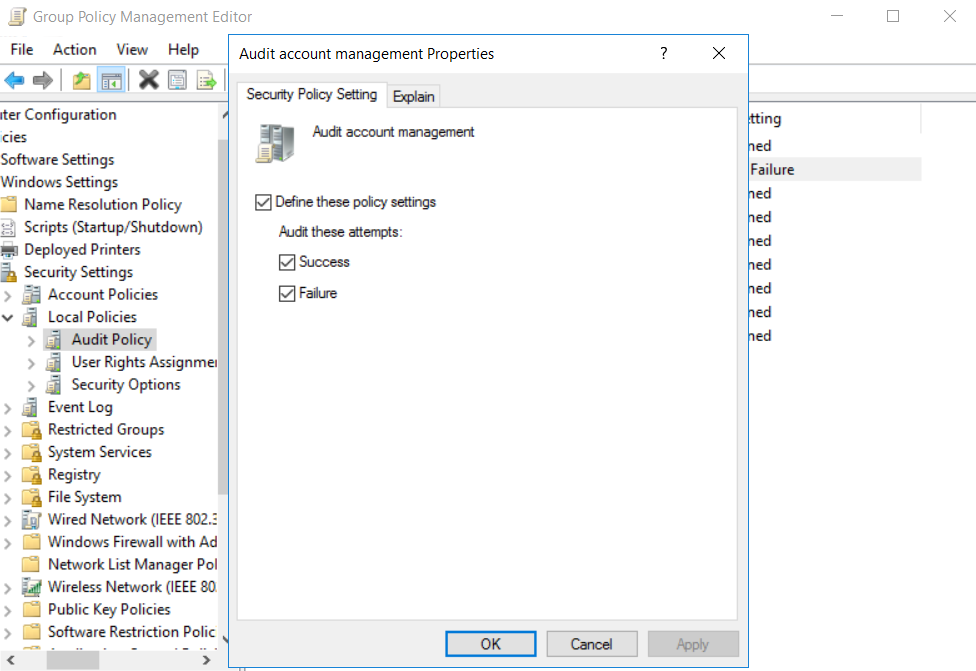
ExpandComputer Configuration-->Policies-->Windows Settings-->Security Settings--> Local Policies-->Audit Policies.
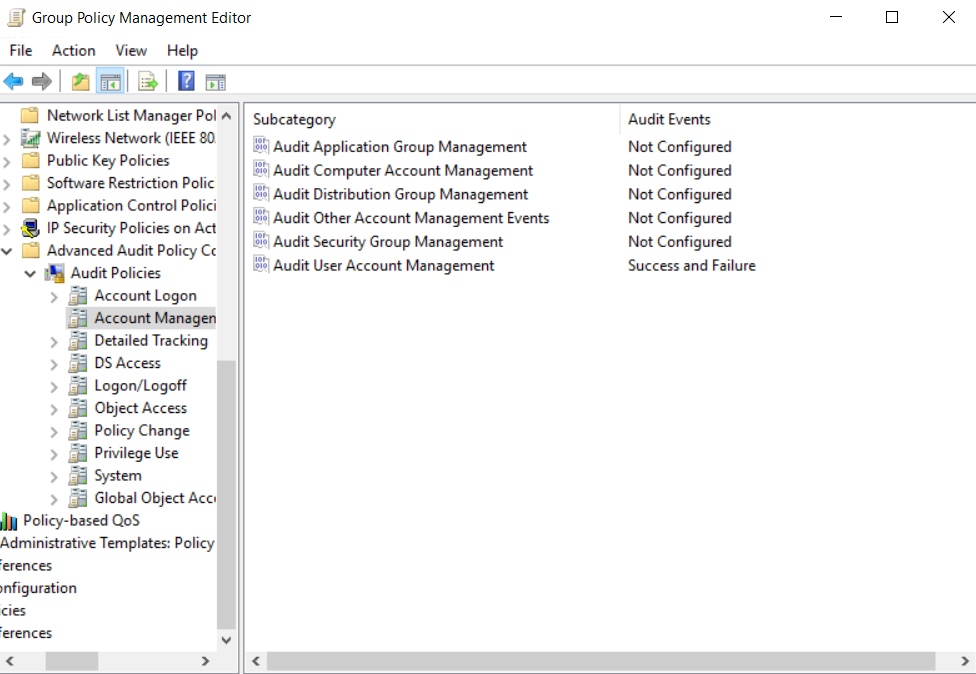
Enable success and failure options for Audit account management. You can also allow for more granular auditing. Select the Advanced Audit Policy--> Audit Policy-->Account Management-->Audit User Account Management. Exit Group Policy Management Editor.
In the GPMC, choose the modified GPO, and click Add in the Security section on the right pane. Type 'Everyone' in the text box and click Check Names to track the changes made by everyone who has logged into the domain. Exit the GPMC.
From your Server Manager go to Tools and select ADSI Edit.
Right click ADSI Edit node from the left pane and select Connect to option. This pulls up the Connection Settings window.
Select the Default Naming Context option from the Select a well-known Naming Context drop down list.
Click Okay and return to the ADSI Edit window. Expand Default Naming Context and select the associated DC subnode. Right-click this subnode and click Properties.
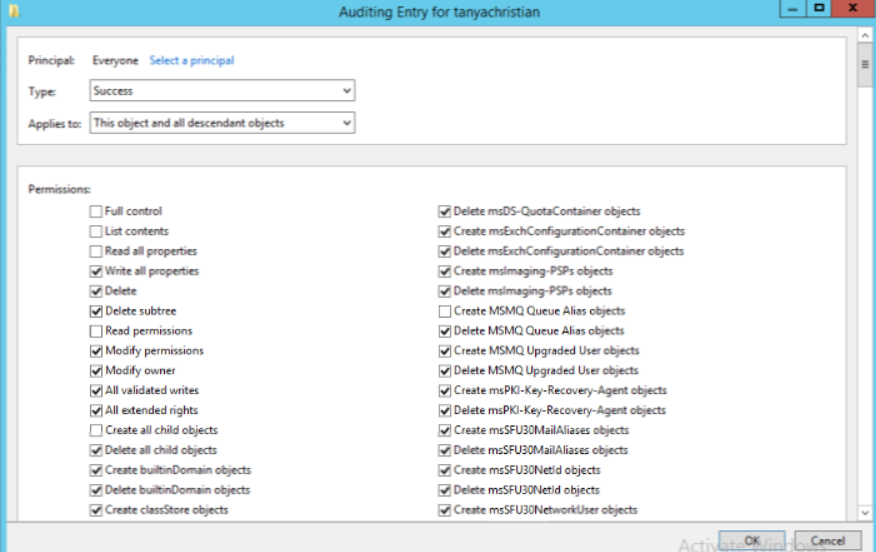
In the Properties window, go to the Security tab and select Advanced. After that select Auditing tab and click Add.
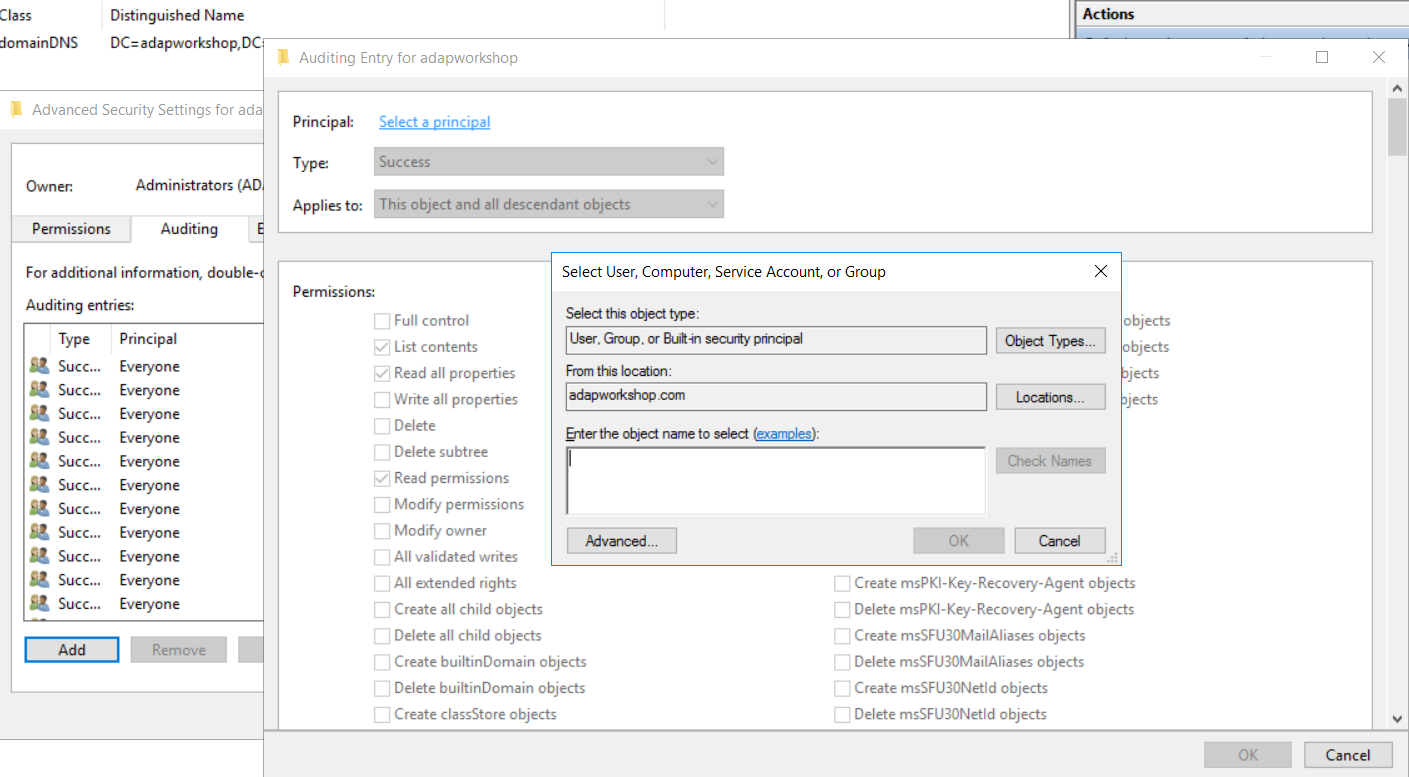
Click on Select a principal. This will bring up a Select User, Computer or Group Window. Type Everyone in the textbox and verify it with Check Names.
The Principal in the Auditing Entry window now shows Everyone. In the Type drop-down select All to audit for both success and failure events.
In the Select drop-down choose This object and all descendant objects. Select Full Control in the Permissions section.
This selects all the checkboxes available. Unselect the following check boxes:
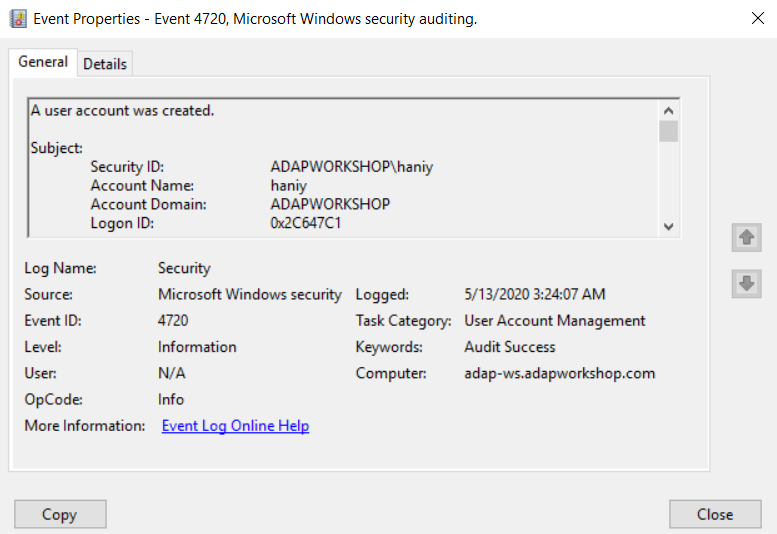
You can view the following event in the Event Viewer.
Event ID 4720 describes a user account that is created.
You can check who created the user account and when the account was created by referring to the details published in Event properties. If the user account is a local user account, then the Account Domain field will contain the device name from which it was created.
Does native auditing become a little too much?
Simplify local account management auditing and reporting with ADAudit Plus.
Get Your Free Trial Fully functional 30-day trialActive Directory Auditing just got easier!
ADAudit Plus comes bundled with more than 300 predefined reports that makes your AD auditing easier. The solution also sends real-time alerts for critical events and thereby help you to secure your network from threats and boost your IT security posture. Check out the capabilities of ADAudit Plus here.
Download ADAudit Plus
