Direct Inward Dialing: +1 408 916 9892
Open Synology DiskStation Manager on the Synology device and click on Control Panel. Navigate to File Services and Enable Transfer Log.
Then, open Log Center and select Log Sending and click on Send logs to a Syslog server. Enter the name of the target server and the port number that ADAudit Plus is listening to. Click Apply and you are done.
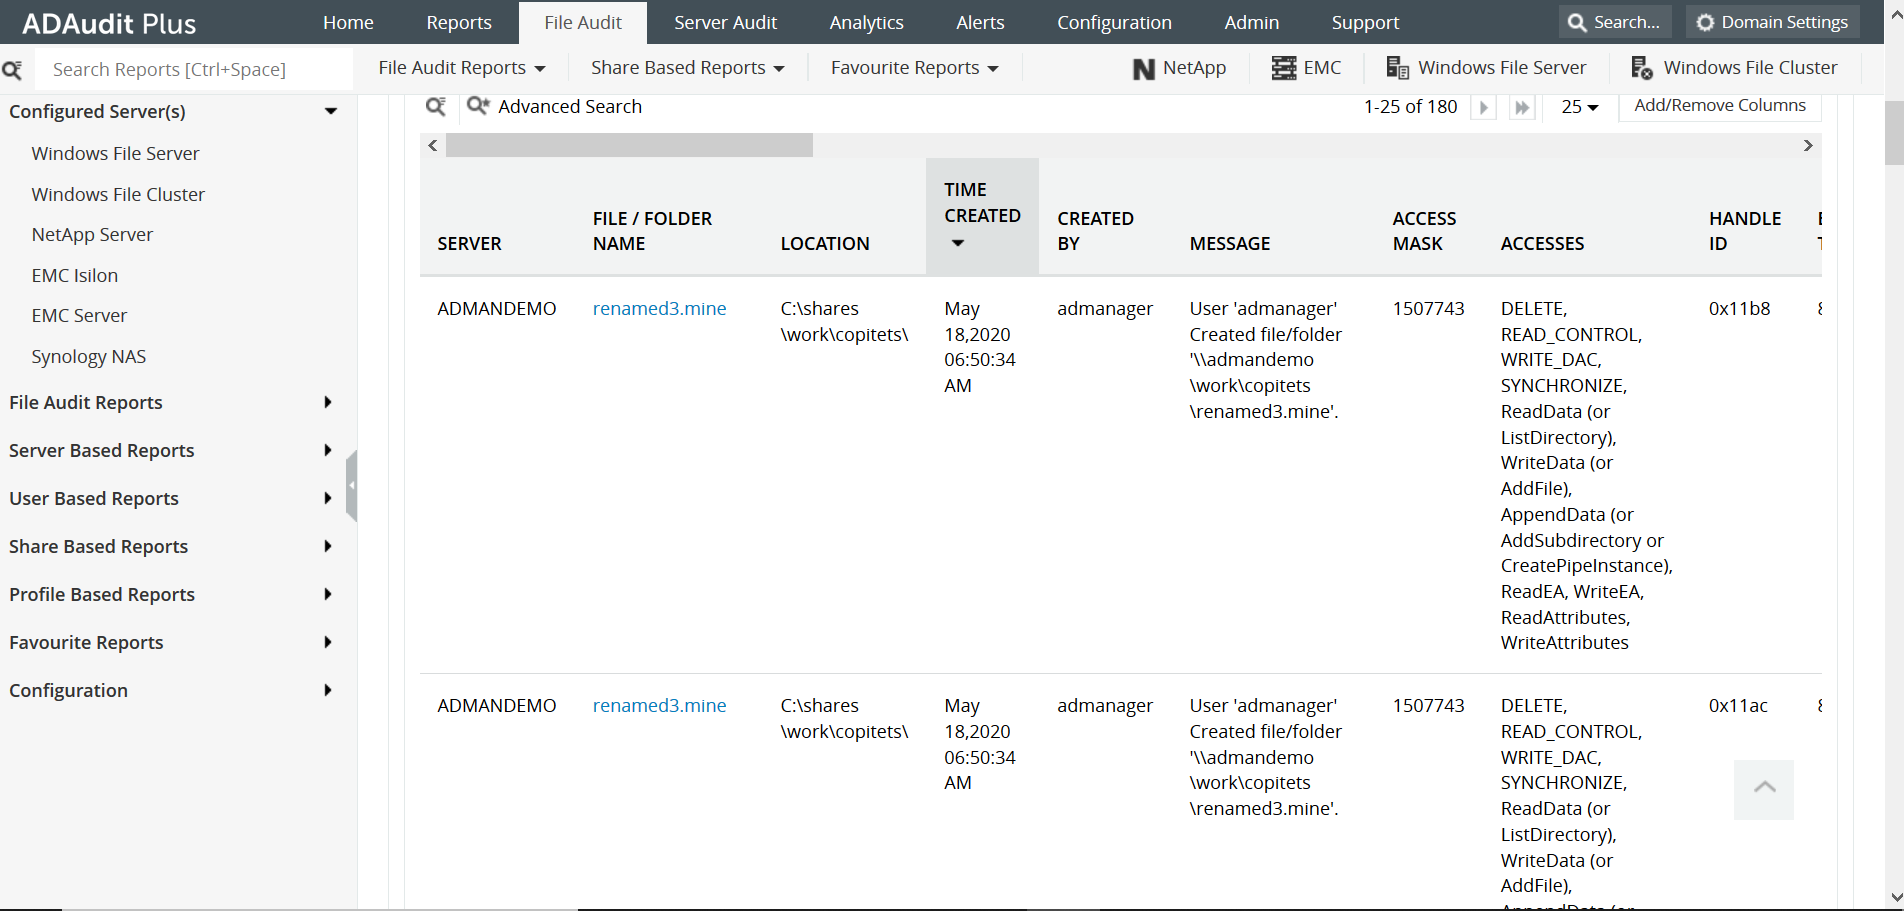
Now, you can simply open ADAudit Plus console and navigate to File Audit > Member Servers > Synology NAS to get multiple reports on file modifications, deletions and so on. Here is a sample report:
Set up auditing for different events by navigating to the Settings option in their respective applications on the Synology interface. For example, open File Station to set up auditing for file access.
To view the logs, open Package center and download and install the Log Center package. Log Center gives the general details of the events connected to the DSM such as user activities (file access, addition, deletion and so on) from the different networked devices.
Open Support Center in the NAS device and navigate to Support Services > Log generation. The Support Center logs give more information about the system itself, its performance and so on. Select the logs you need from the options and click Generate Logs tab to get a zip file of the relevant logs.
Once Synology NAS is configured on the ADAudit Plus console, it can audit the NAS device and generate all the different reports mentioned above.
Native auditing becoming a little too much?
Simplify Active Directory auditing and reporting with ADAudit Plus.
Get Your Free Trial Fully functional 30-day trial