Direct Inward Dialing: +1 408 916 9892
Once ADAudit Plus has been installed, it automatically configures audit policies required for Active Directory auditing.
To enable automatic configuration: Log in to the ADAudit Plus web console --> Domain Settings --> Audit Policy: Configure.
Deletions in DNS records can be identified by following the below mentioned steps:
Login to ADAudit Plus
Select the required Domain from the dropdown list
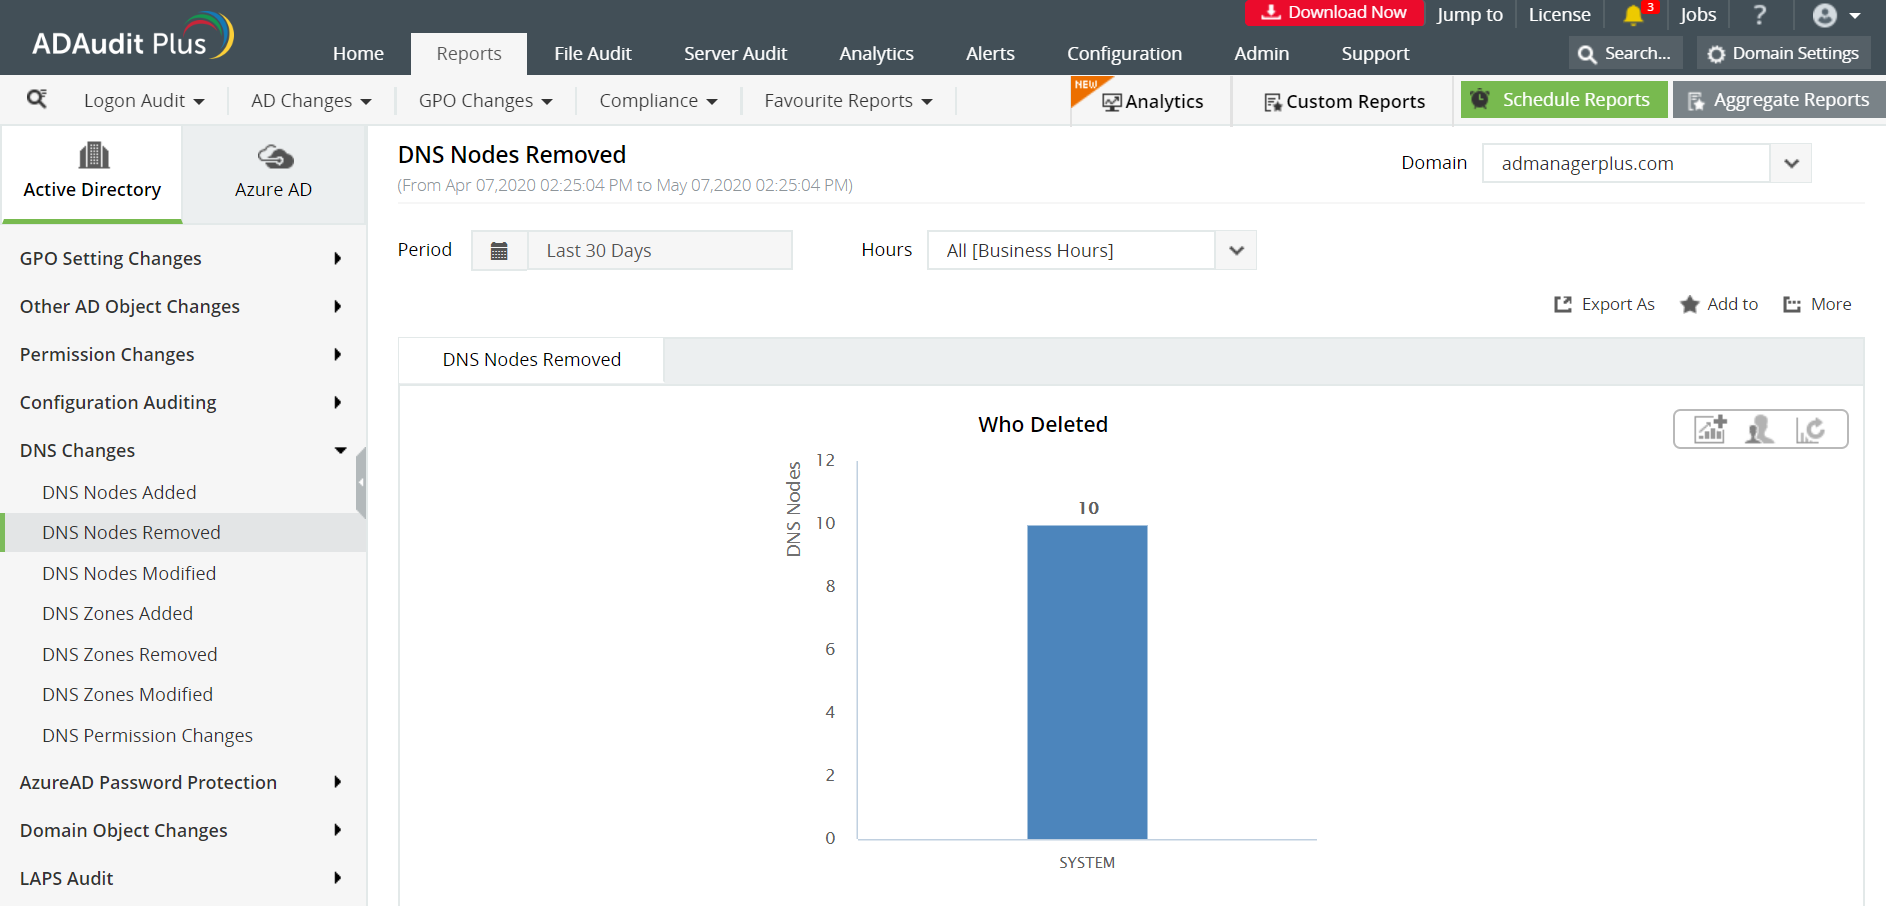
Go to the Reports tab
Navigate to DNS Changes.
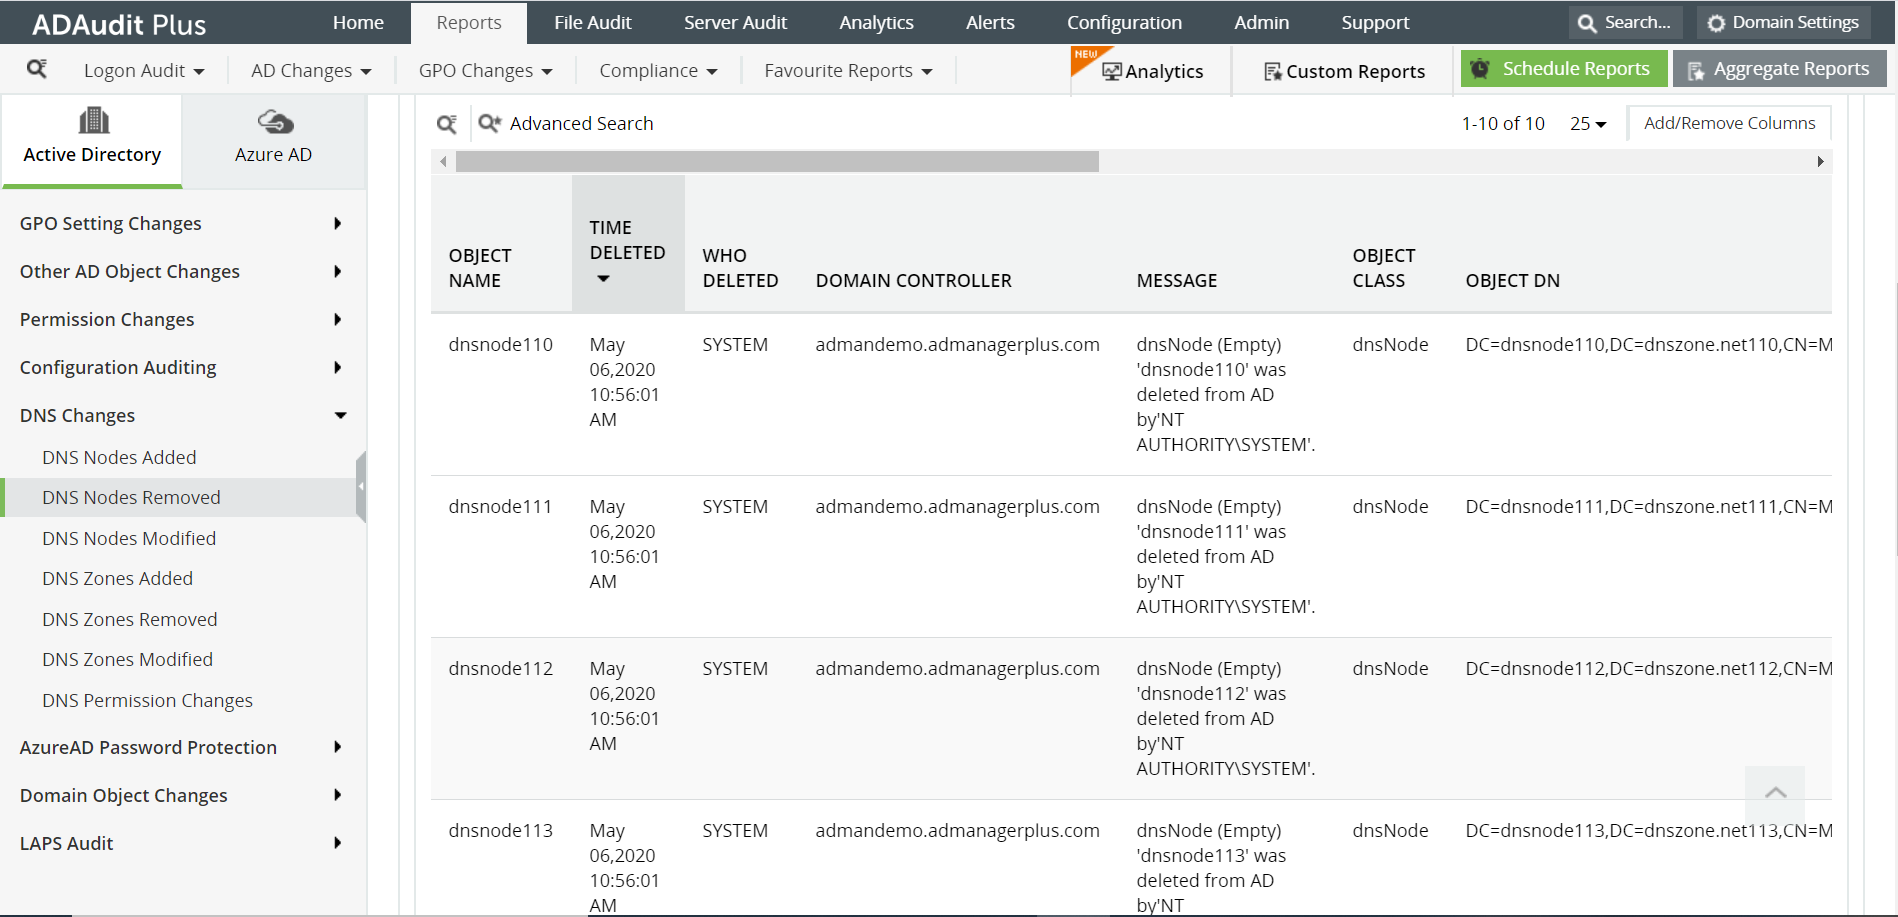
Select DNS Nodes Removed.
Select Recent User Logon Activity
[Highlight reports, domain, DNS changes, DNS Nodes Added, DNS Nodes removed, DNS Nodes modified]
Similarly the reports on DNS records that have been added or modified can be fetched as follows:
Go to the Reports tab.
Navigate to DNS Changes.
Select DNS Nodes Added / DNS Nodes Modified.
ADAudit Plus enables IT administrators to have a comprehensive picture of all the activities that happen within their organization's network. The real-time monitoring and out-of-the-box reports offered by ADAudit Plus makes it easier to track critical changes in DNS records, and detect and prevent mishaps.
With native AD auditing, here is how you can monitor the DNS record history:
Launch Server Manager in your Windows Server instance.
Under Manage, select Group Policy Management and launch the Group Policy Management console.
Navigate to Forest --> Domain --> Your domain --> Domain Controllers.
Create a new GPO and link it to the domain containing the computer object, or edit any existing GPO that is linked to the domain to open the Group Policy Management Editor.
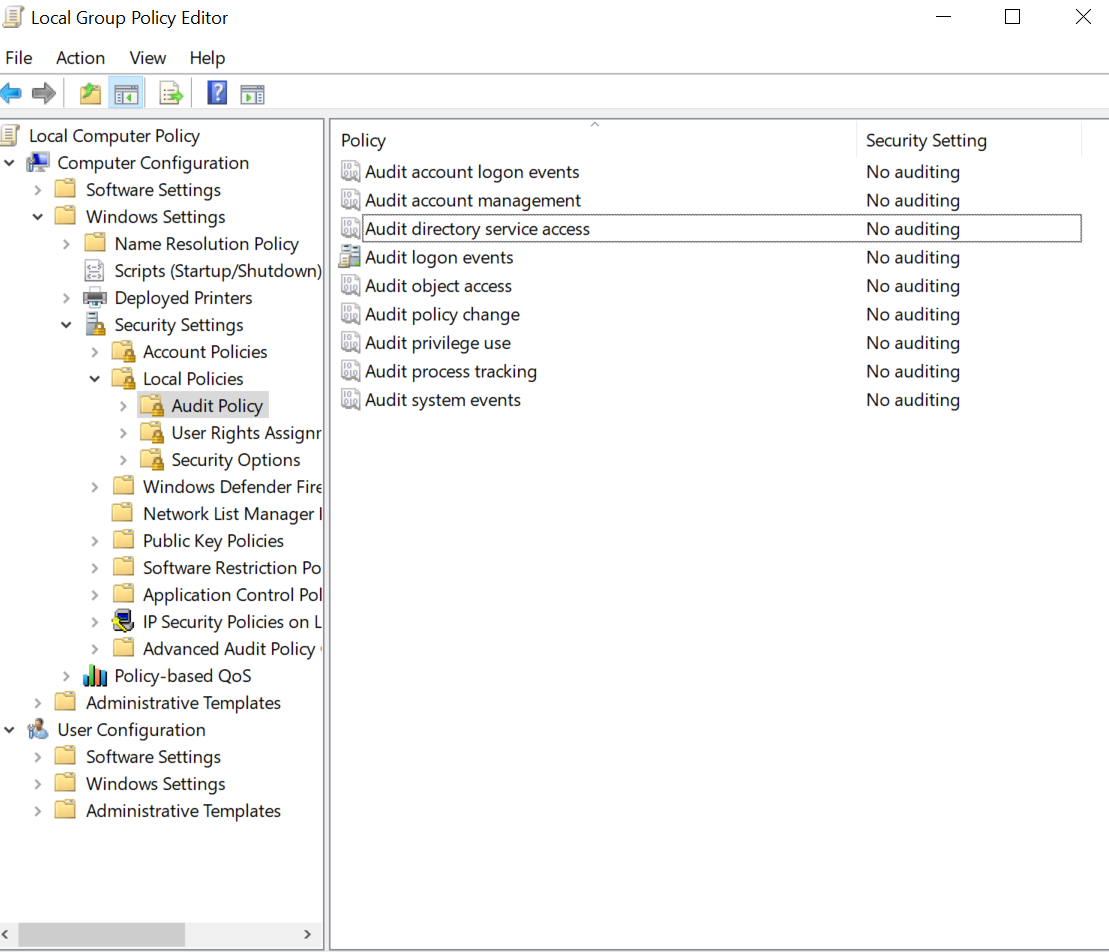
Navigate to Computer Configuration -> Windows Settings -> Security Settings ->Local Policies -> Audit Policy.
Under Audit Policy turn auditing on for Success of Audit Directory Service Access policy.
From your Server Manager go to Tools and select ADSI Edit.
Right click ADSI Edit node from the left pane and select Connect to option. This pulls up the Connection Settings window.
Select the Default Naming Context option from the Select a well-known Naming Context drop down list.
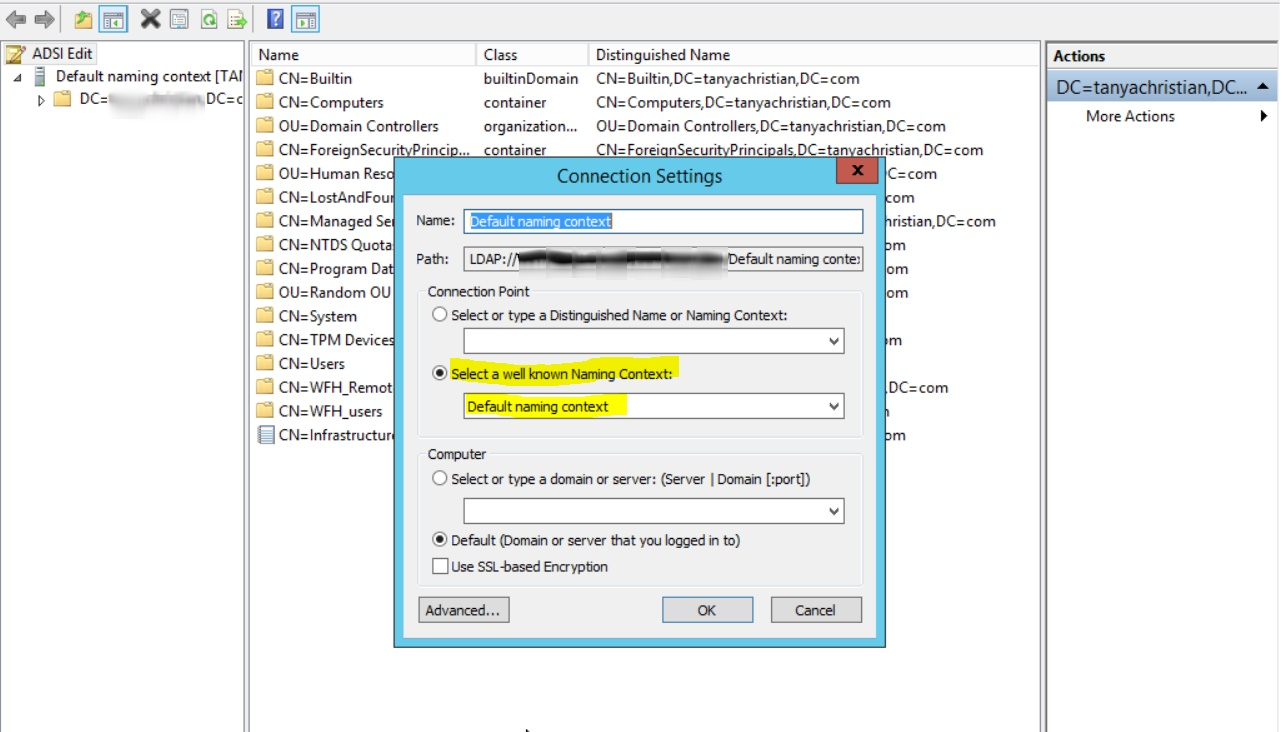
Click OK and return to the ADSI Edit window.Expand Default Naming Context and select the associated DC subnode. Right-click this subnode, and click Properties.
In the Properties window, go to the Security tab and select Advanced. After that select Auditing tab and click Add.
Apply the following settings
Click Apply,then OK, and close the console.
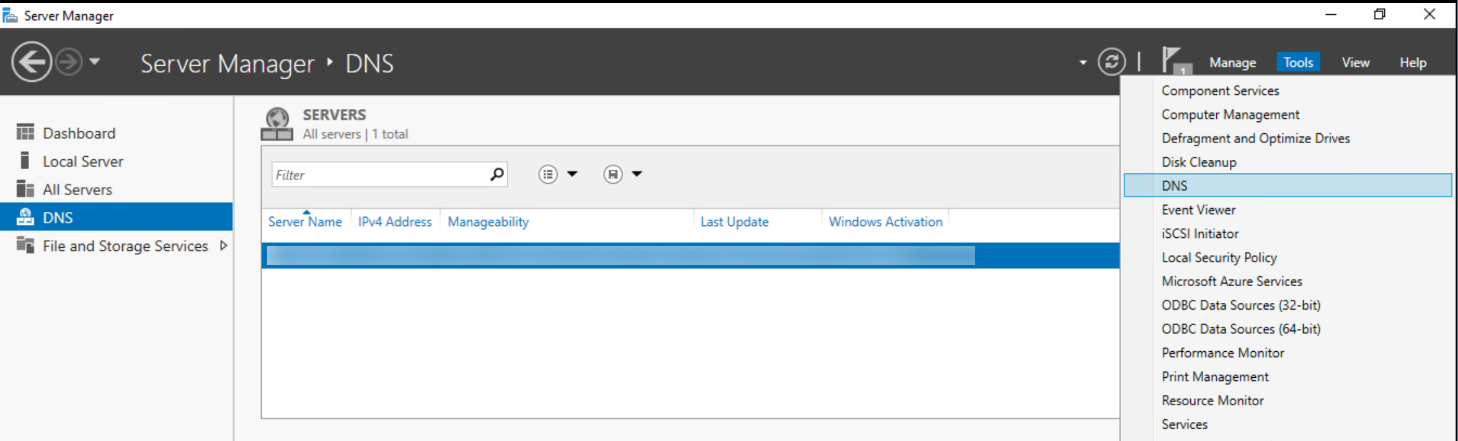
From your Server Manager go to Tools and select DNS.
Expand your servername and select Forward Lookup Zone.
Right click the zone you want to audit, and click on Properties.
In the Properties window, go to the Security tab and select Advanced. After that select Auditing tab, and click Add.
Apply the following settings
Click Apply,then OK, and close the console.
In Event Viewer window, go to Windows Logs -->Security logs.
Click on Filter current log under Action in the right panel.
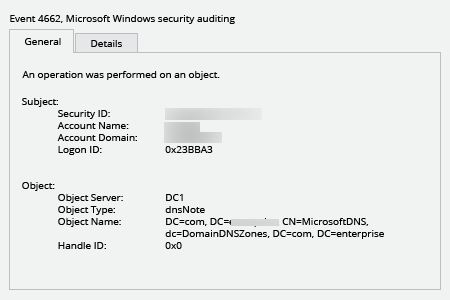
Search for Event ID 4662 that identifies DNS record changes.
You can double-click on the event to view Event Properties.
These steps need to be repeated for all the zones to audit changes in DNS records. Manually checking every event is time-consuming, inefficient and practically impossible for large organizations.
Native auditing becoming a little too much?
Simplify DNS record auditing and reporting withADAudit Plus.
Get Your Free Trial Fully functional 30-day trialADAudit Plus simplifies DNS record history tracking by offering several predefined DNS Changes reports along with intuitive graphical representation of the same for ease of comprehension. ADAudit Plus also provides the option to generate custom reports and export them in your preferred format ,PDF, XLS, HTML, and CSV.
