Direct Inward Dialing: +1 408 916 9892
Login to ADAudit Plus web console as an administrator.
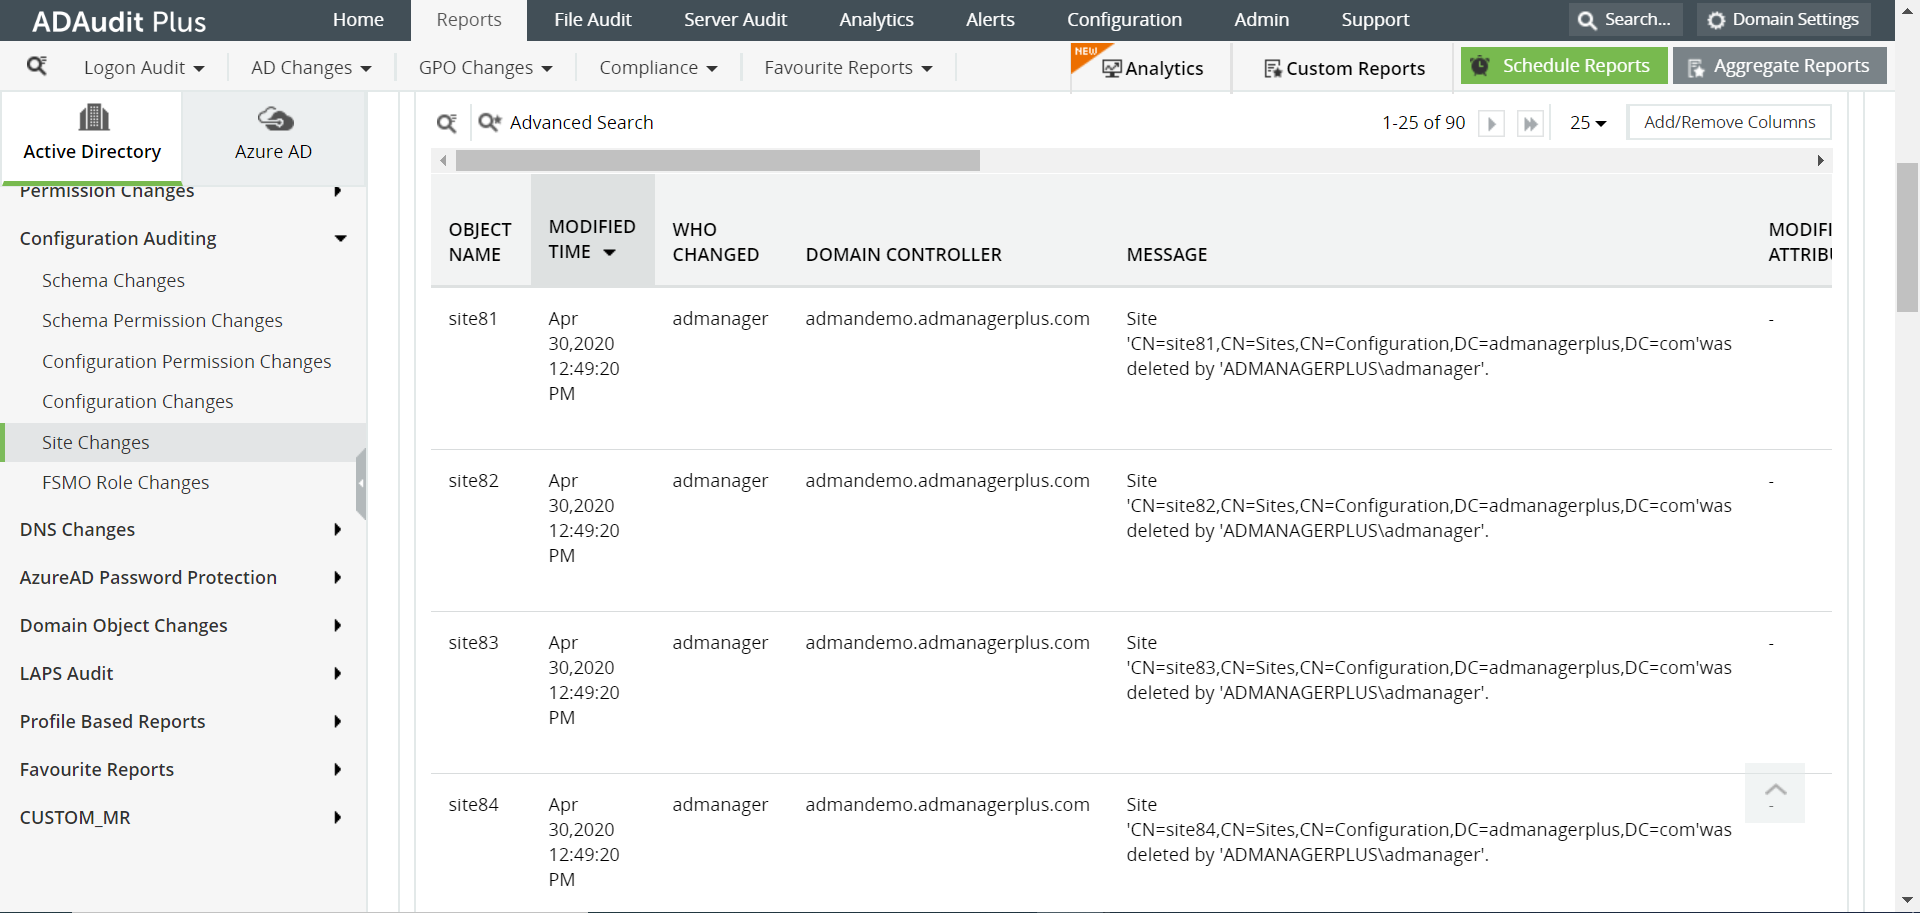
Navigate to the Reports tab and from the Configuration Auditing section in the left pane, select the Site Changes report.
Select the domain and click Generate.
Select Export As to export the report in any of the preferred formats (CSV, PDF, HTML, CSVDE and XLSX).
Follow the steps given below to enable Directory Service Objects auditing:
Go to Start Menu -> Administrative Tools.
Open “Group Policy Management Console”.
Go to Forest -> Domains -> Domain Controllers.
Next, right-click on the “Default Domain Controllers Policy”. From the context menu, click on “Edit” to open the “Group Policy Management Editor” window.
Go to “Computer Configuration” -> “Policies” -> “Windows Settings” -> “Security Settings” -> “Advanced Audit Policy Configuration” -> “Audit Policies” in the editor window.
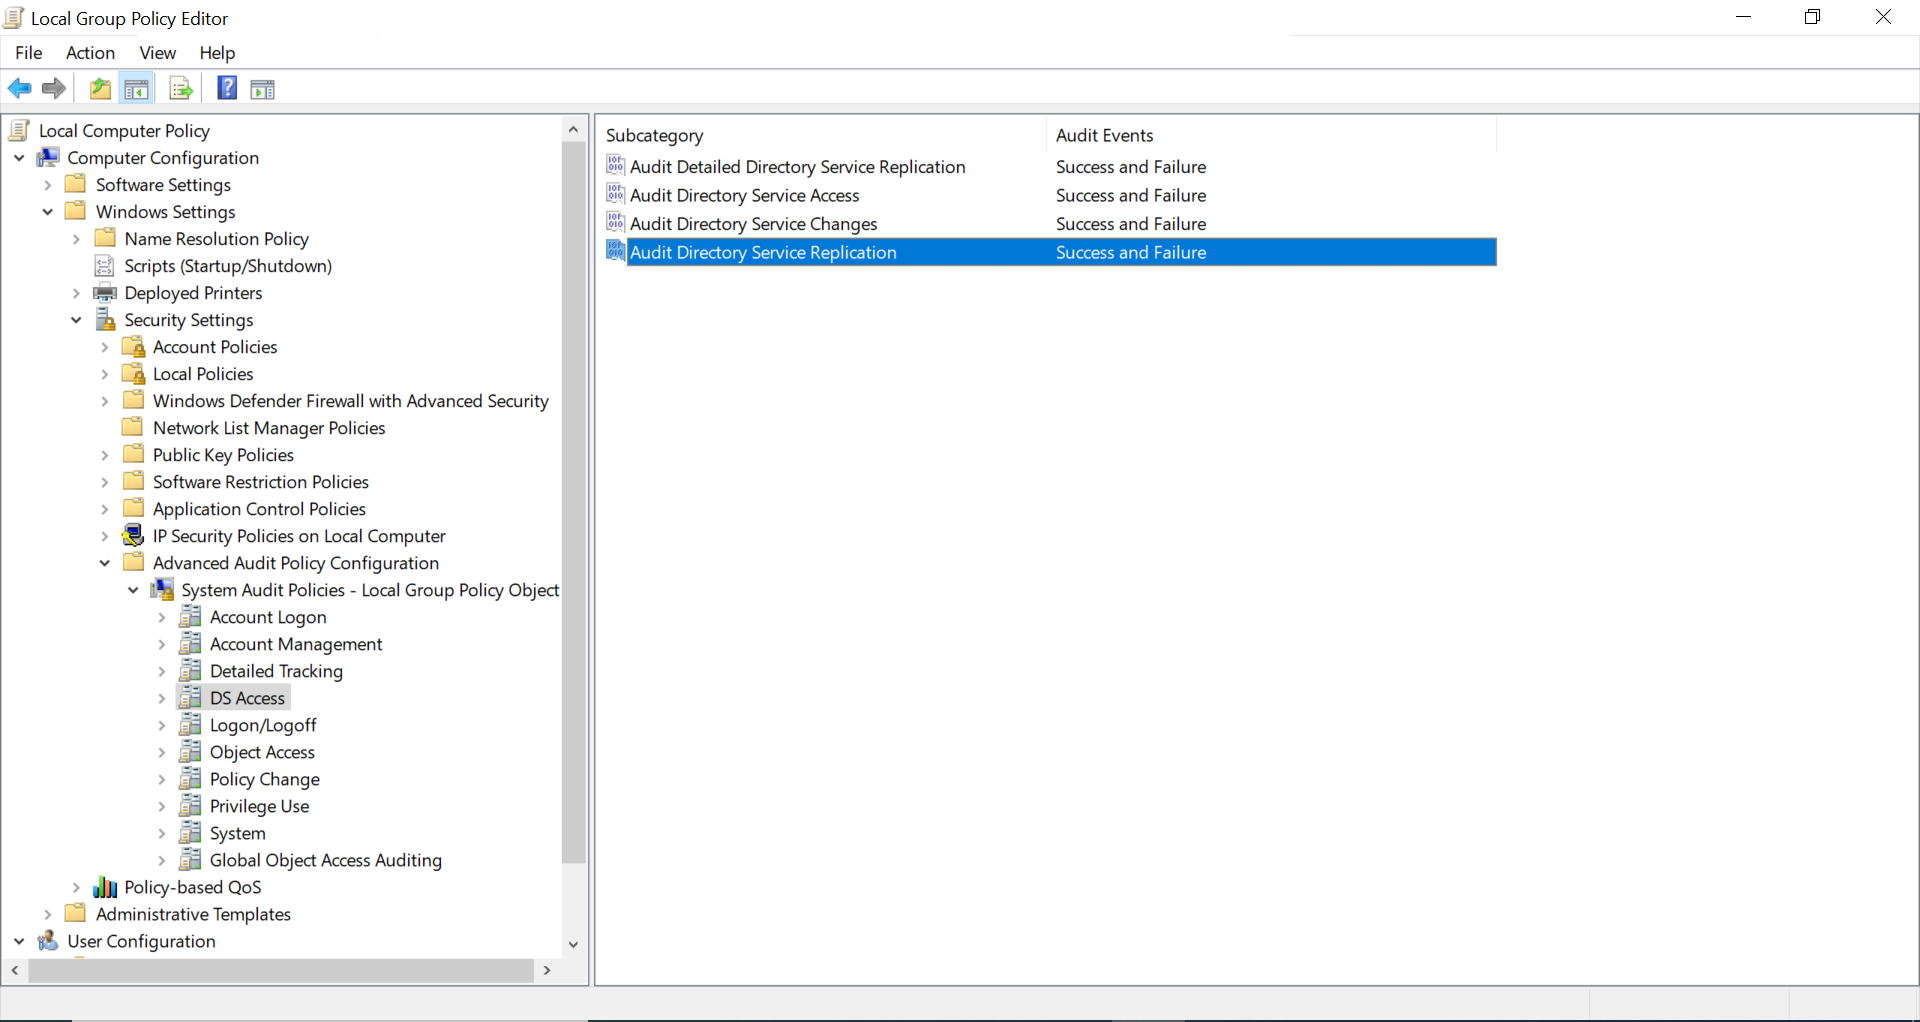
In the “Audit Policies”, click on “DS Access”. The following policies will be displayed:
Audit Directory Service Access
Audit Directory Service Changes
Audit Directory Service Replication
Audit Detailed Directory Service Replication
Double-click on each of these policies and enable both “Success” and “Failure” auditing as shown in the figure below.
Follow the same steps to enable the auditing of “Object Access” -> “Audit File System” in “Advanced Audit Policy Configuration”.
Follow the steps given below to enable Group Policy Container Objects auditing:
Follow the steps given below to enable Group Policy Container Objects auditing:
Go to the left pane and right-click on the root “ADSI Edit”. Select “Connect to” option from the context menu. Connect to the current domain controller (DC), which appears with “Default Naming Context”.
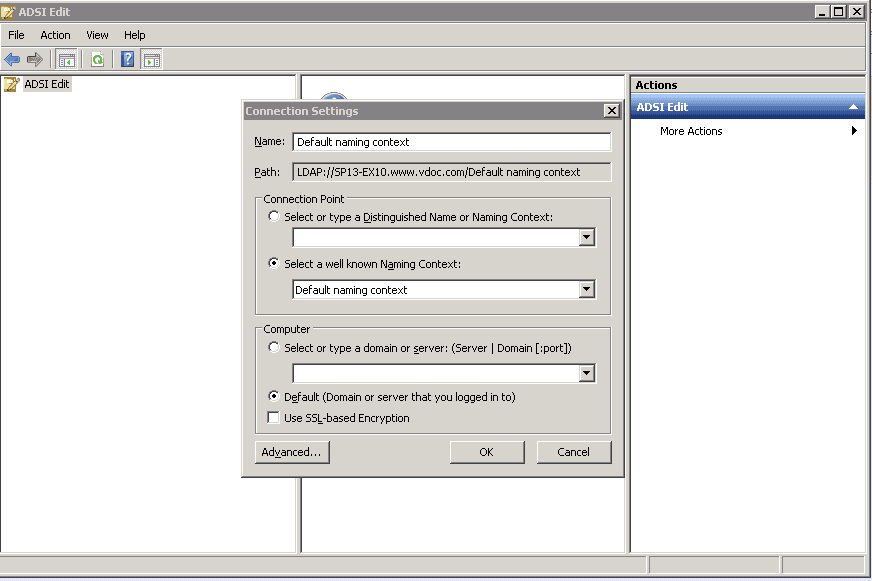
Click “OK” to connect.
In the left panel, a tree will appear. Double click on the node of “Default naming Context” and go to “DC=www,DC=domain,DC=com” -> “CN=System” -> “CN=Policies”.
Right click on the “CN=Policies” and navigate to "Properties".
Go to “Security” tab and click on “Advanced” button to access its Advanced Security Settings.
Navigate to “Auditing” tab in the Advanced Security Settings.
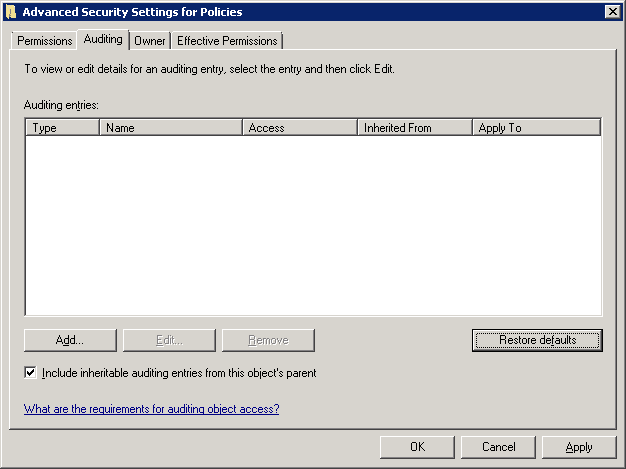
Use the “Add” button to add the user for whom the auditing has to be enabled. The following window appears.
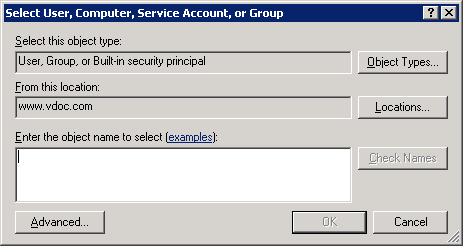
Enter name of the user for which you want to enable the auditing. You can also type “Everyone” to audit all users’ changes.
Click “Check Names” to confirm the username.
Click on “OK” to add the user. “Auditing Entry for Policies” dialog box appears.
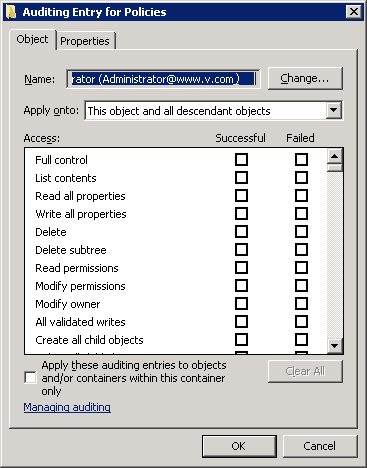
Choose the entries for which the user’s action will be audited. Select “Full Control” for auditing both “successful” and “failed” events.
Select the “Apply these auditing entries to objects and/or containers within this container only” checkbox to apply the changes to the child objects as well.
Click on “OK” to apply these auditing entries. “Auditing” tab of Advanced Security Settings will appear. Click “Apply” and “OK” to apply the auditing settings.
In “Event Viewer” window, go to “Windows Logs” ➔ “Security” logs.
Click on “Filter current log” under “Action” in the right panel.
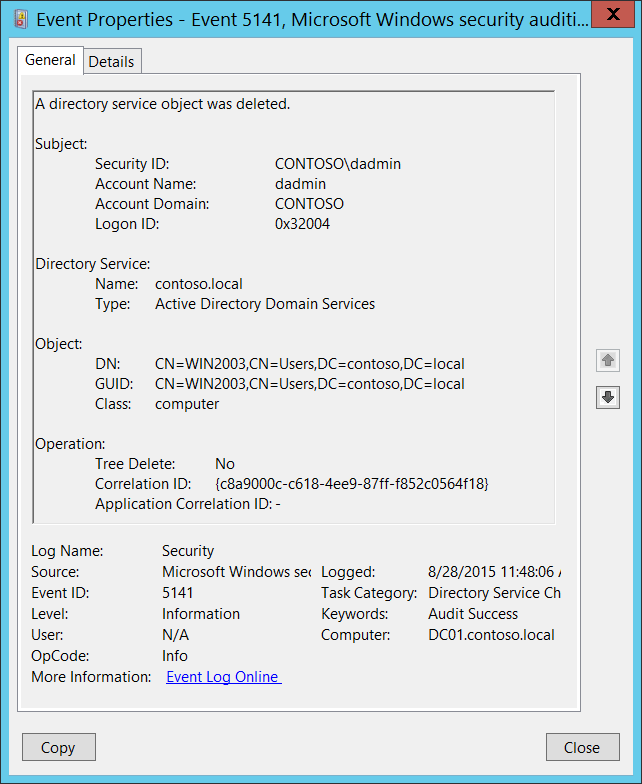
Search for Event ID 5141 that identifies permission changes in Active Directory.
You can double-click on the event to view “Event Properties”.
Native auditing becoming a little too much?
Simplify Active Directory auditing and reporting with ADAudit Plus.
Get Your Free Trial Fully functional 30-day trialThe following are the limitations to track the changes made to subnets in a particular Active Directory site using native auditing:
ADAudit Plus will generate the report of changes made to subnets in an Active Directory site and display it in a simple and intuitively designed UI. ADAudit Plus can also alert the system administrators in real-time based on conditions set by the organization's IT team.
