How to deploy Cisco Secure Client for Mac through Software Deployment?
Note: Install the package manually on one of your test machines to check the behavior and prerequisites of the software. Use this information to configure the pre-deployment settings before deploying the package.
Pre-requisites
1. Deploying the System Extensions configuration
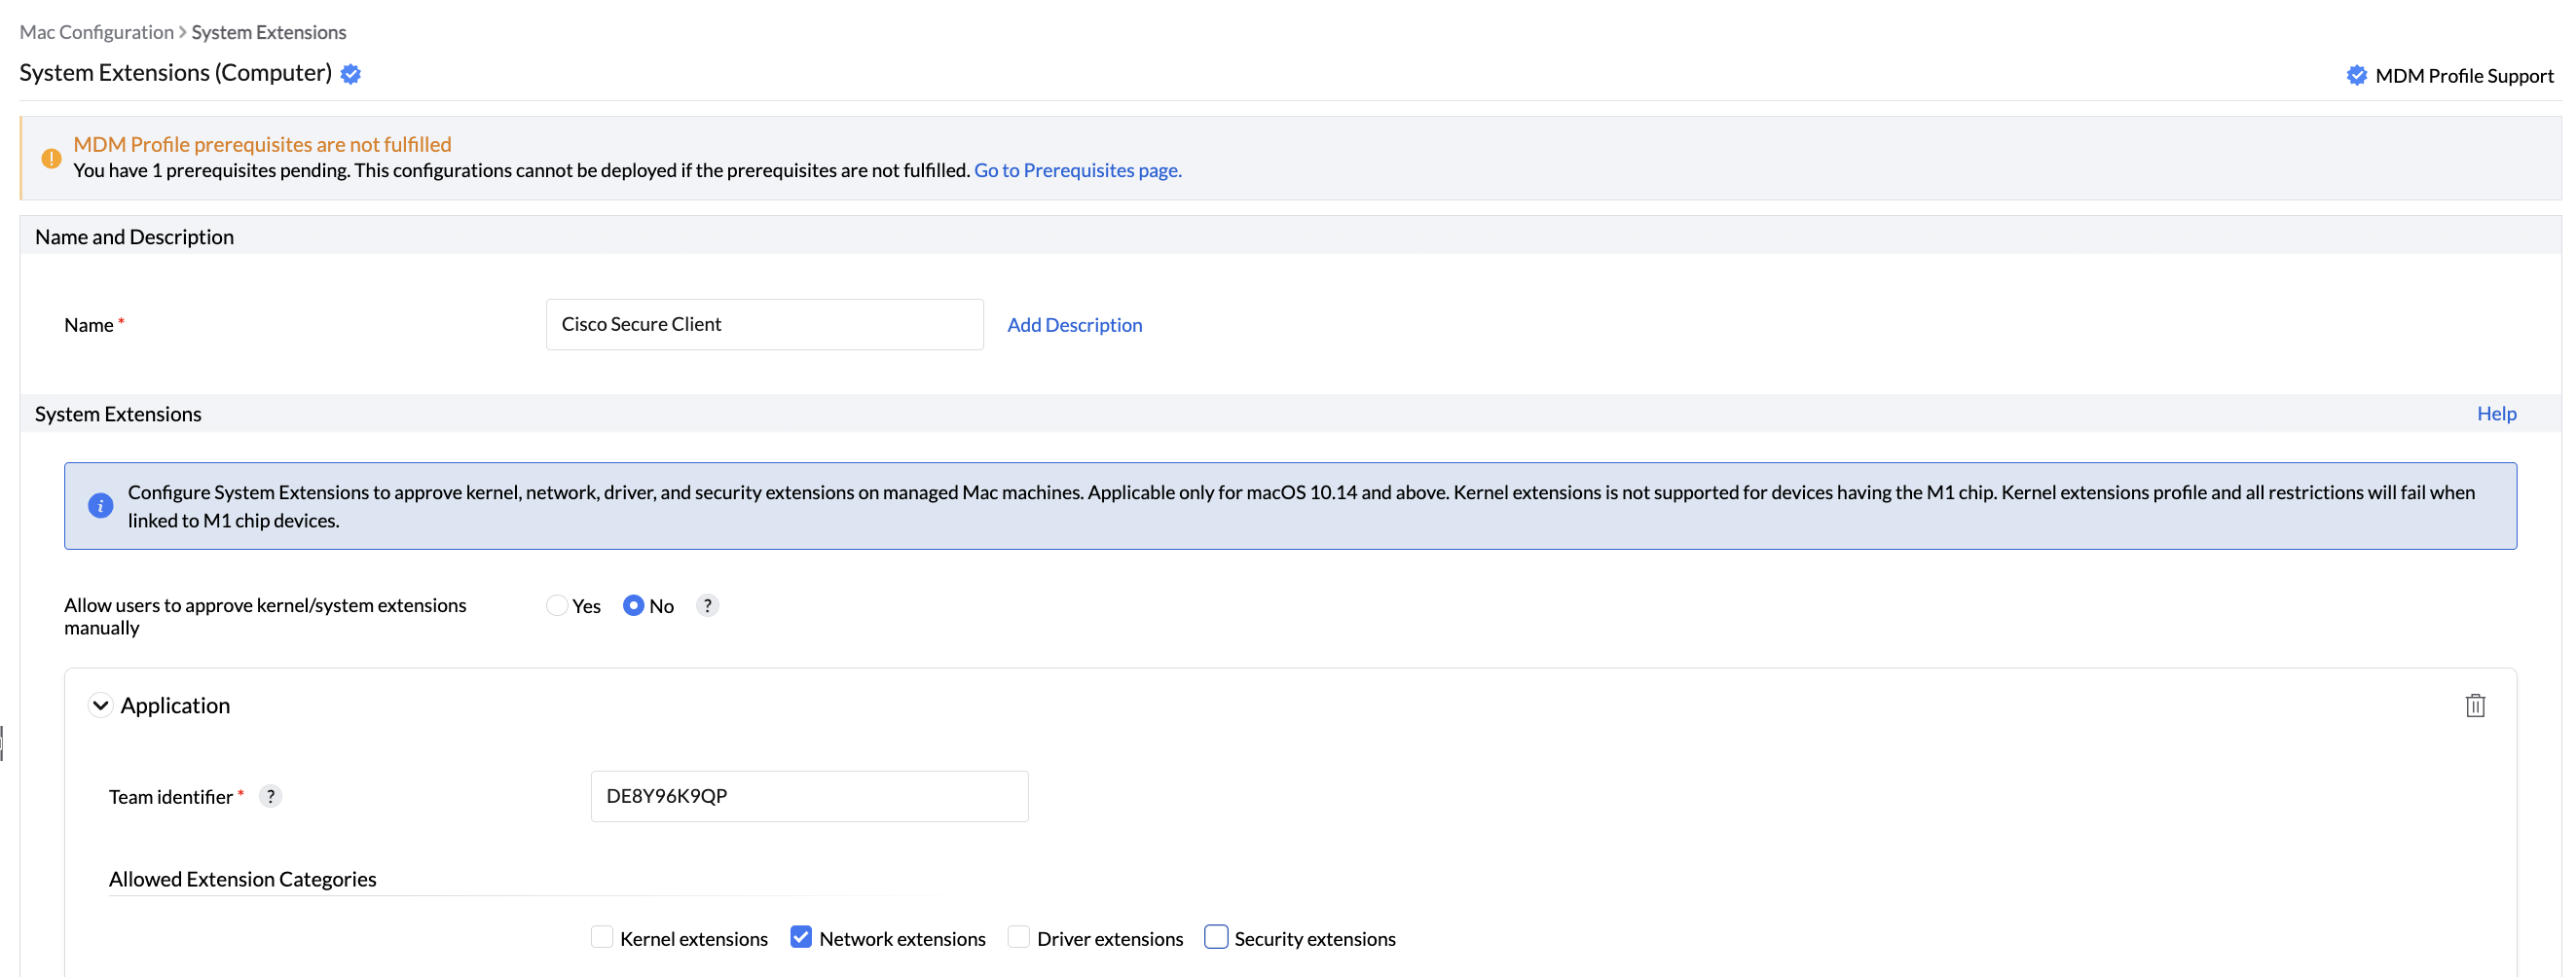
1. Log in to the Endpoint Central server web console and navigate to Configurations tab-> Configuration -> Mac -> System Extensions.
2.Provide the configuration name as Cisco Secure Client - System Extensions
3. Under System Extensions, select yes to allow users to approve kernel/system extensions manually.
4. Enter the Team Identifier as (For example: DE8Y96K9QP)
5. Select Network Extensions for Allowed Extensions Categories.
6. Define the Target.
7. Enable the option to receive notifications if required.
8. Click Deploy.
2. Deploying the Background Service Management configuration
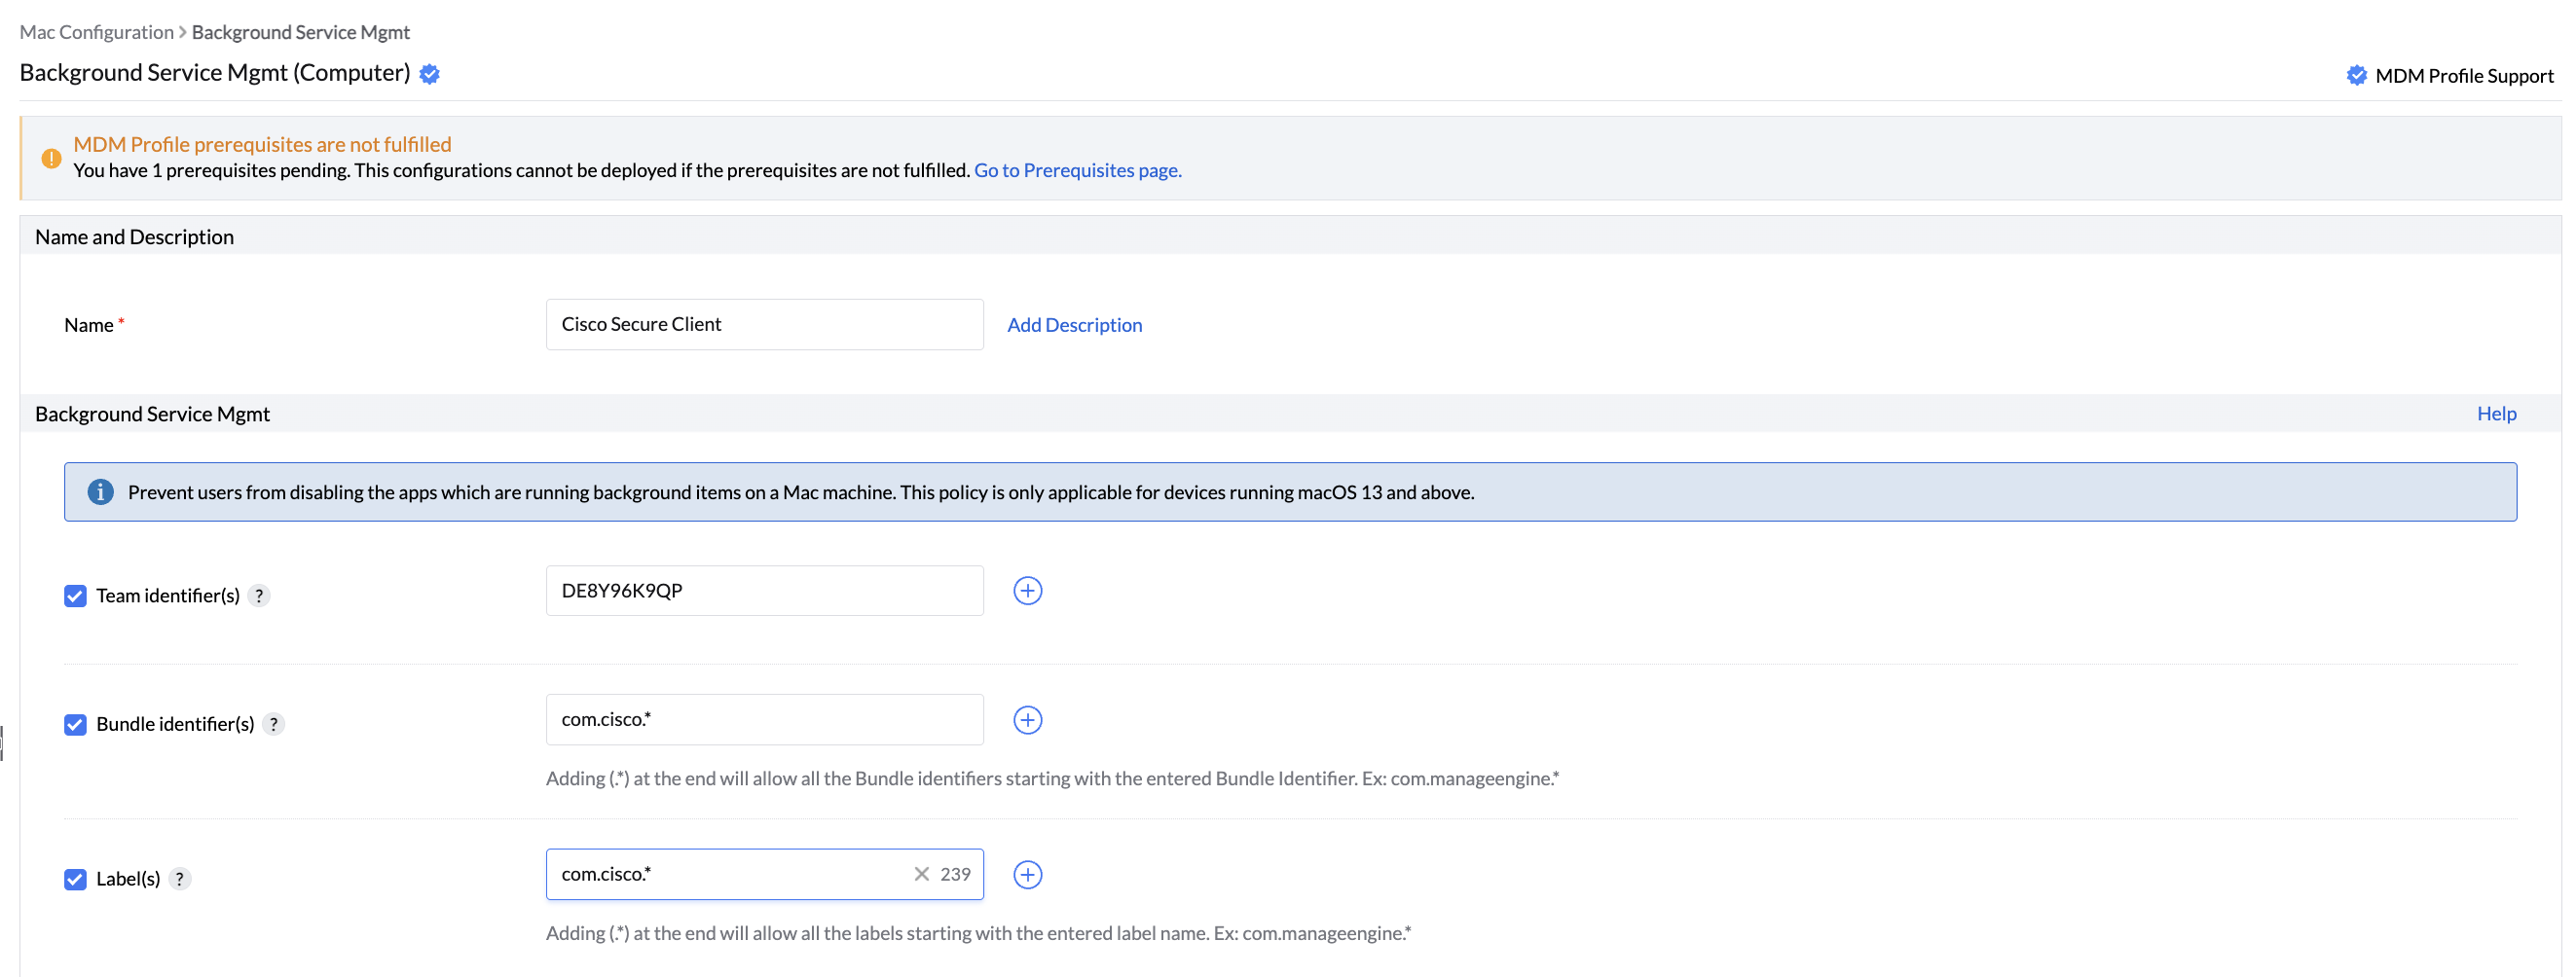
1. Log in to the Endpoint Central server web console and navigate to Configurations tab-> Configuration -> Mac -> Background Service Management configuration.
2. Provide the Team Identifier as (For example: DE8Y96K9QP)
3. Enter the Bundle ID as (For example: com.cisco.secureclient.gui or com.cisco.*)
4. Specify the Labels: com.cisco.*
5. Define the Target
6. Enable the option to receive notifications if required.
7. Click Deploy.
3. Deploying the Web Content Filter Configuration
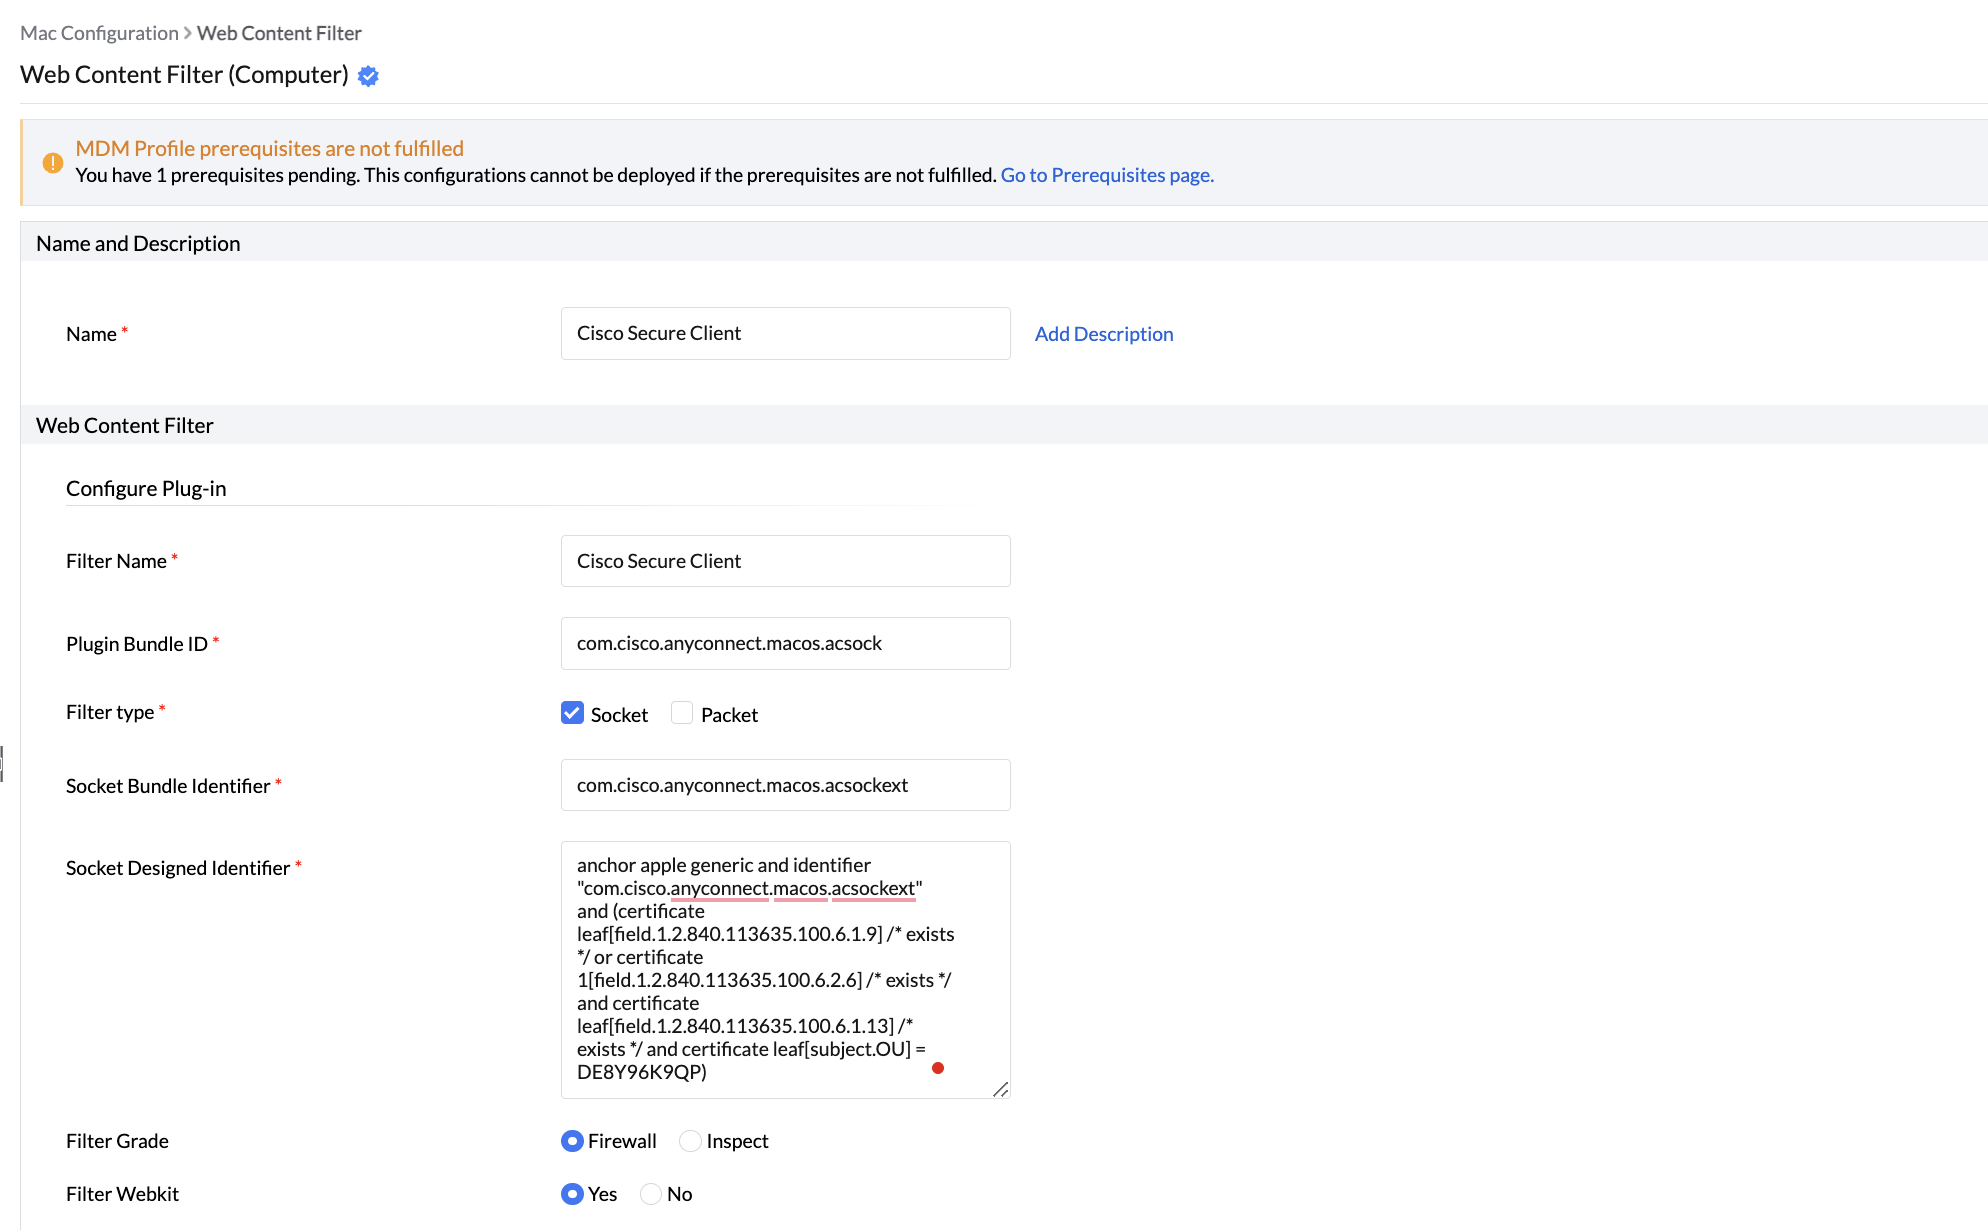
1. Log in to the Endpoint Central server web console and navigate to Configurations tab-> Configuration -> Mac -> Web Content Filter.
2. Provide the name and filter name as Cisco Secure Client.
3. Enter the Plugin Bundle ID as (For example: com.cisco.anyconnect.macos.acsock)
4. Select the filter type as Socket.
5. Provide the Socket Filter Bundle Identifier as (For example : com.cisco.anyconnect.macos.acsockext)
6. Enter the Socket Designed Requirement as, for example: anchor apple generic and identifier "com.cisco.anyconnect.macos.acsockext" and (certificate leaf[field.1.2.840.113635.100.6.1.9] /* exists */ or certificate 1[field.1.2.840.113635.100.6.2.6] /* exists */ and certificate leaf[field.1.2.840.113635.100.6.1.13] /* exists */ and certificate leaf[subject.OU] = DE8Y96K9QP)
7. Define the Target.
8. Enable the option to receive notifications if required.
9. Click Deploy.
Deploying Cisco Secure Client package
1. Manual Package Creation Steps for Mac (Silicon processor machine)
- Navigate to the Software Deployment tab in the Endpoint Central Server web console and under Package creation, click Packages. Click Add Packages and select Mac.
- Enter the package name and select the license type.
- Upload all the necessary installation files.
- Provide the installation command as "/usr/bin/arch -arm64 /usr/sbin/installer -pkg "" -target "/Applications""
- Click Add Package for the package to be added.
2. Package Creation Steps for Mac (Intel processor machine)
- Navigate to the Software Deployment tab in the Endpoint Central Server web console and under Package creation, click Packages. Click Add Packages and select Mac.
- Enter the package name and select the license type.
- Upload the installer directly without any installation command
- Click Add package for the package to be added.
Steps for installation/uninstallation of the software package
- Click Install/Uninstall software for Mac under Software deployment tab and enter the package name and description.
- Choose the operation type as Install/Uninstall and select the required package.
- Select the deployment policy.
- Define the Target.
- Choose the execution settings if required.
- You can select the options to retry the configuration on failed targets according to your choice.
- Select Enable notifications and Scheduler settings as per your requirements.
- Click Deploy to deploy the software.