Microsoft does not provide a way to back up Office 365 mailboxes using the native tools; the easiest workaround is enabling litigation hold for your mailboxes. In cases where a copy of your Exchange Online mailboxes has to be stored separately, Office 365 allows you to export the contents of the mailboxes to PST format.
This guide will explain the steps needed to export mailboxes to PST format.
Exporting mailboxes to PST using eDiscovery.
To export Office 365 mailboxes, the administrator must be a member of the eDiscovery Administrators group.
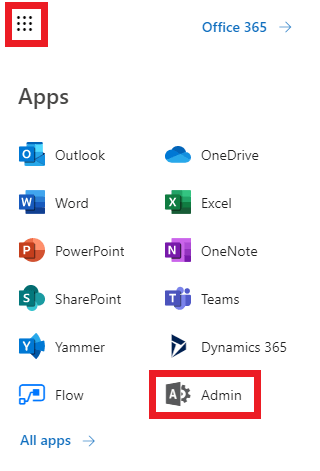
- Log in to the Office 365 portal, and open the Microsoft 365 Administrative center from the bento menu at the top-left corner of the screen.
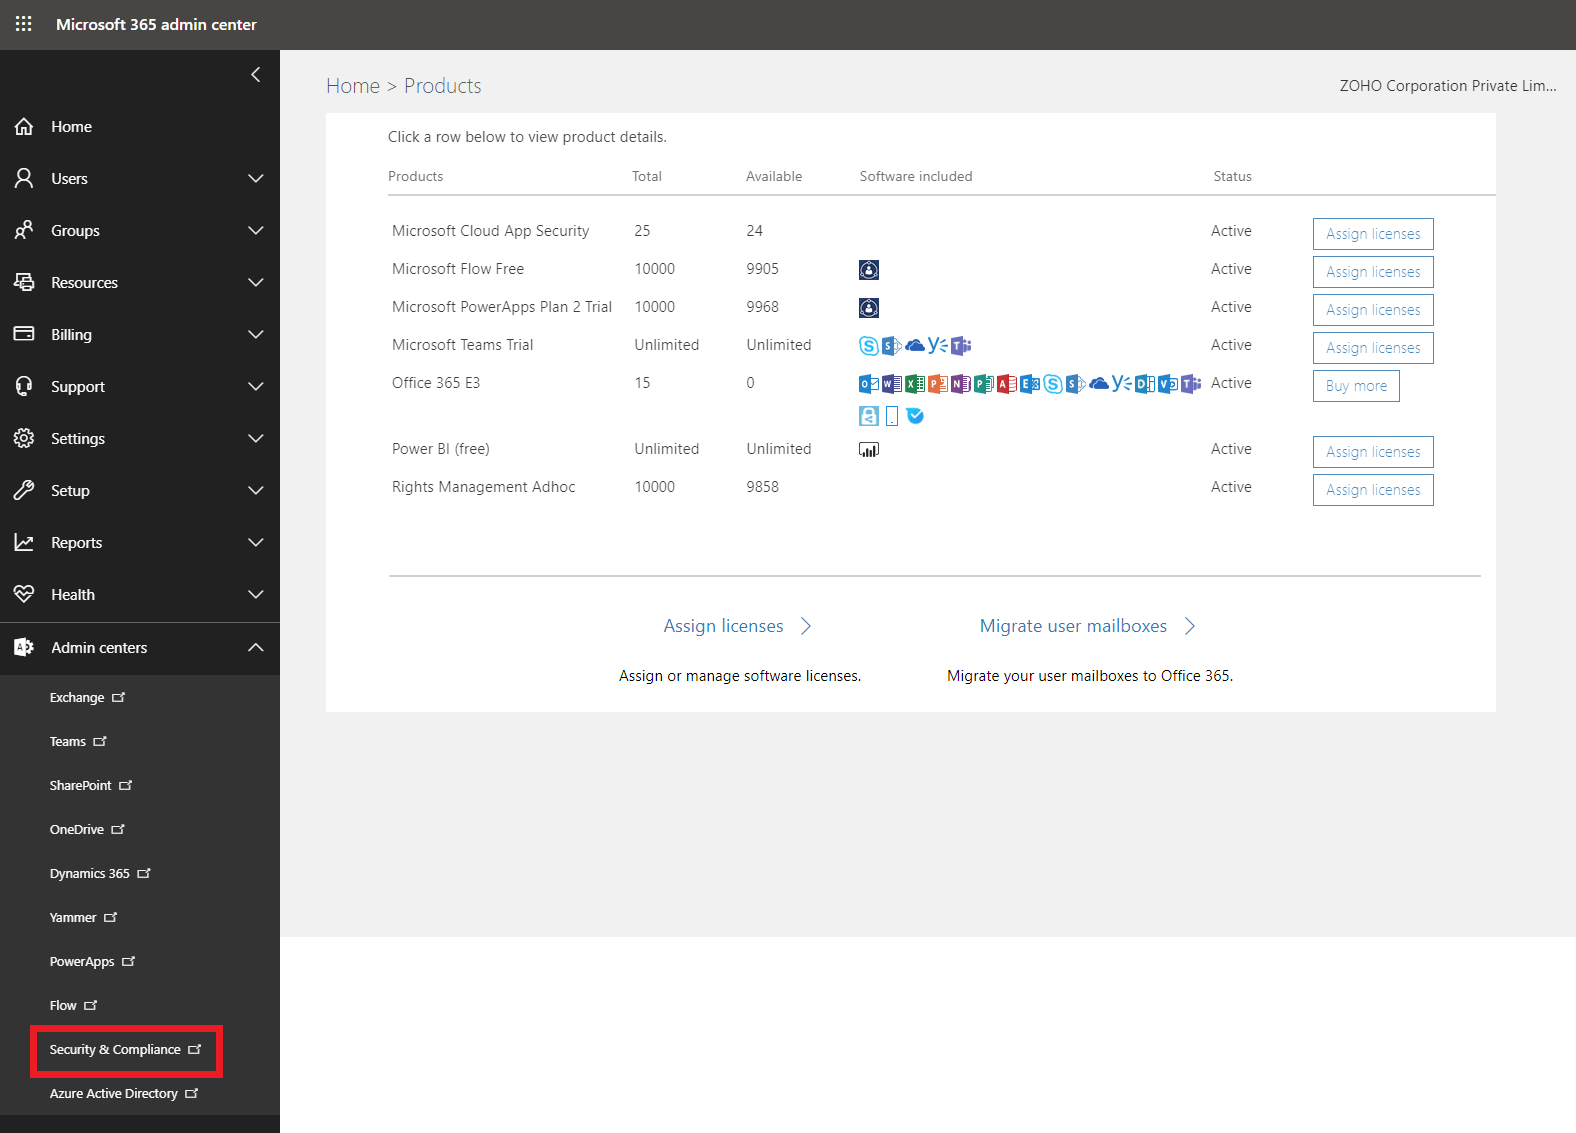
- In the Microsoft 365 Administrative center, select Security & Compliance from Admin centers.
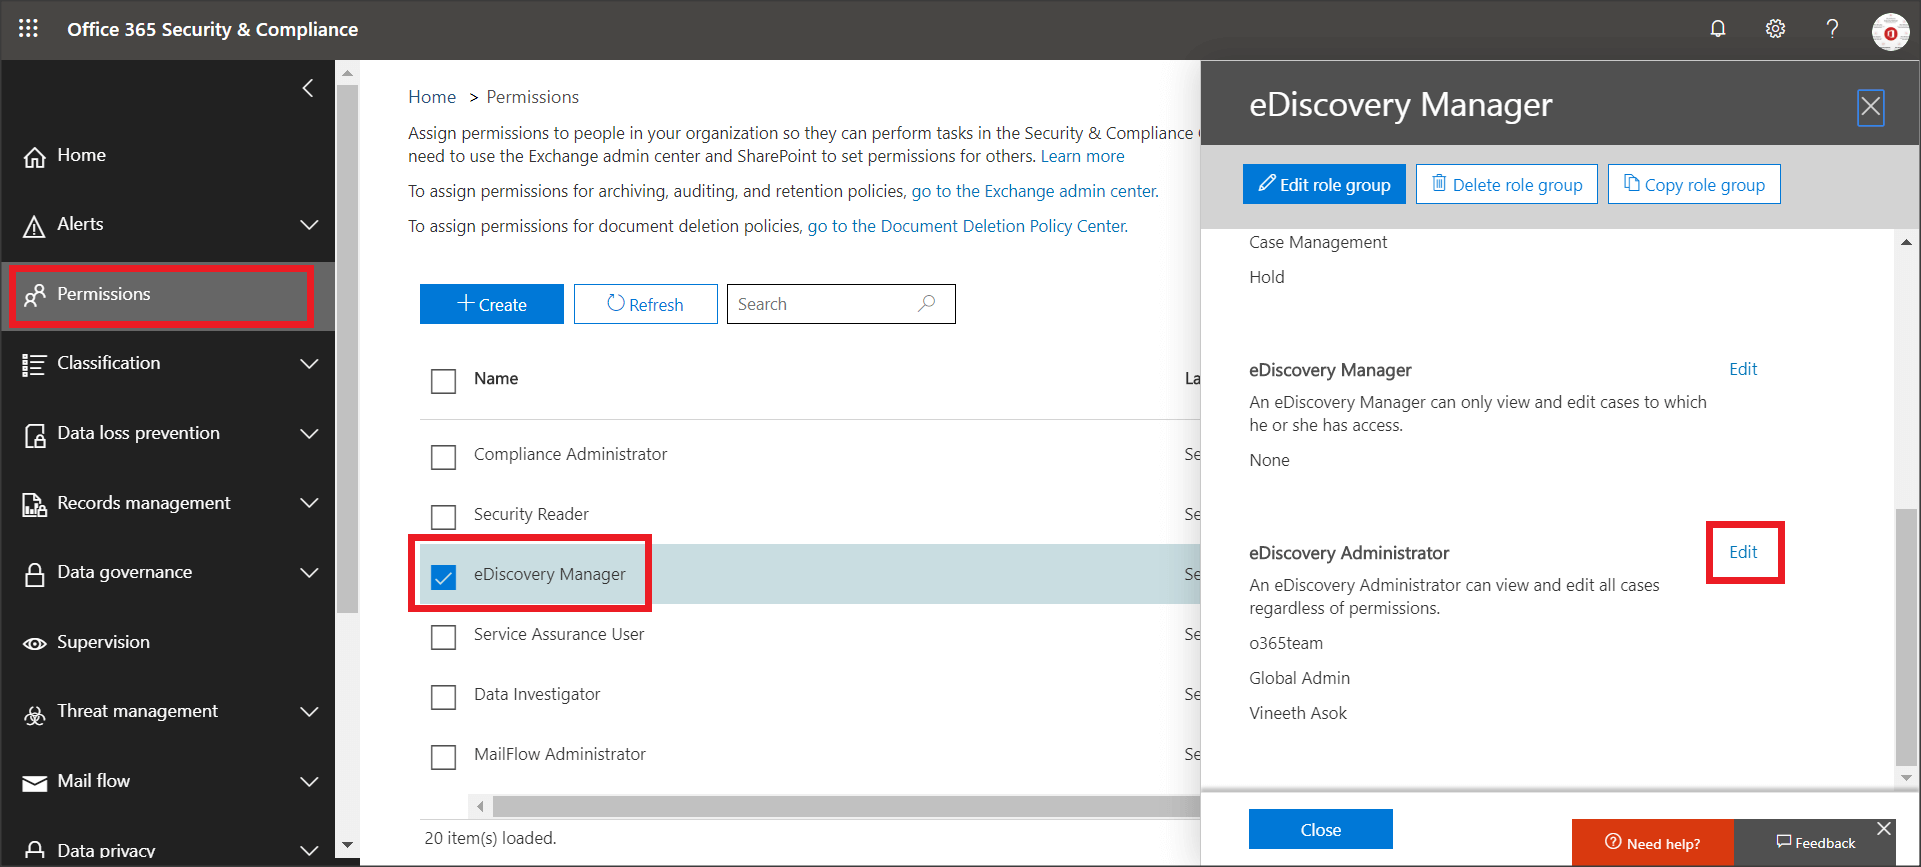
- In the Security & Compliance center, navigate to Permissions, and select eDiscovery Manager.
- Click on the Edit link corresponding to the eDiscovery Administrator segment. Check if the account with which you have logged in is on the list. If it is, proceed with the next step. If not, click Edit and then Add. This will display the list of all users in the Office 365 tenant. Select the user and click Add. The account has now been added to the eDiscovery Administrator group.
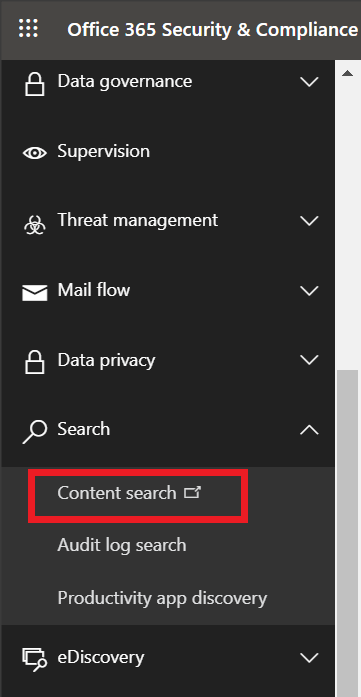
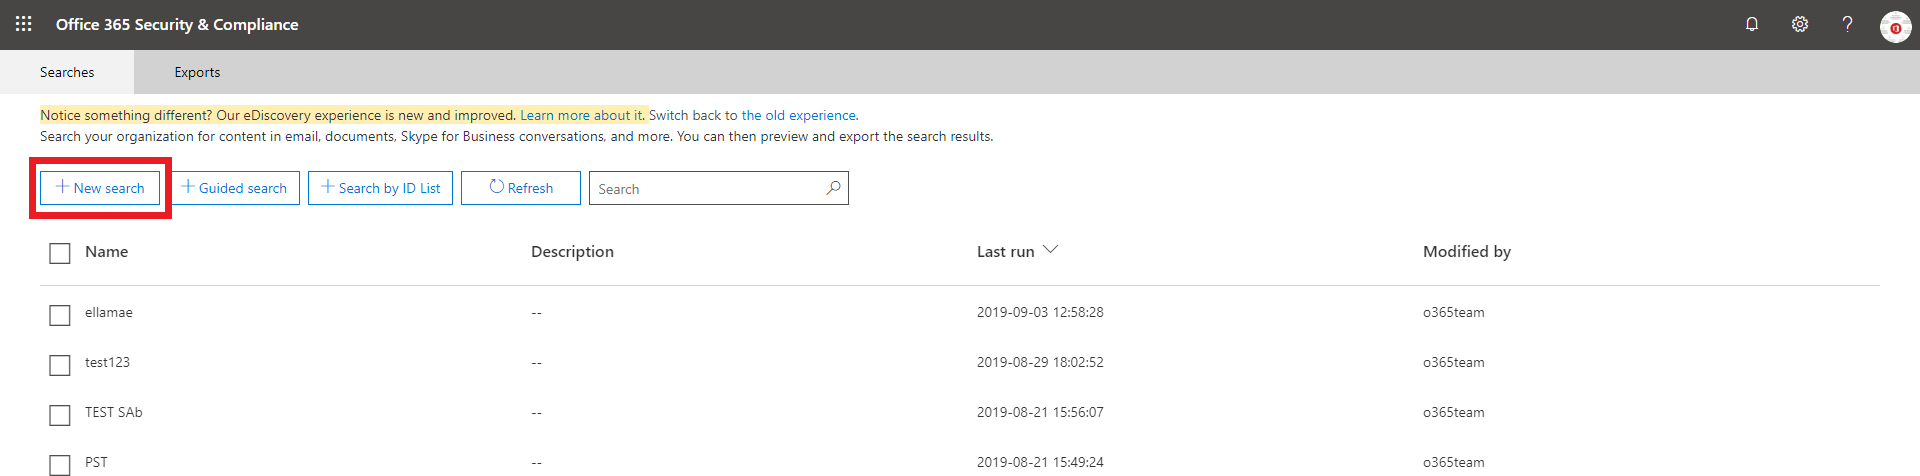
- Click the Search tab in the left pane and select Content search.
- In the new window, click New Search.
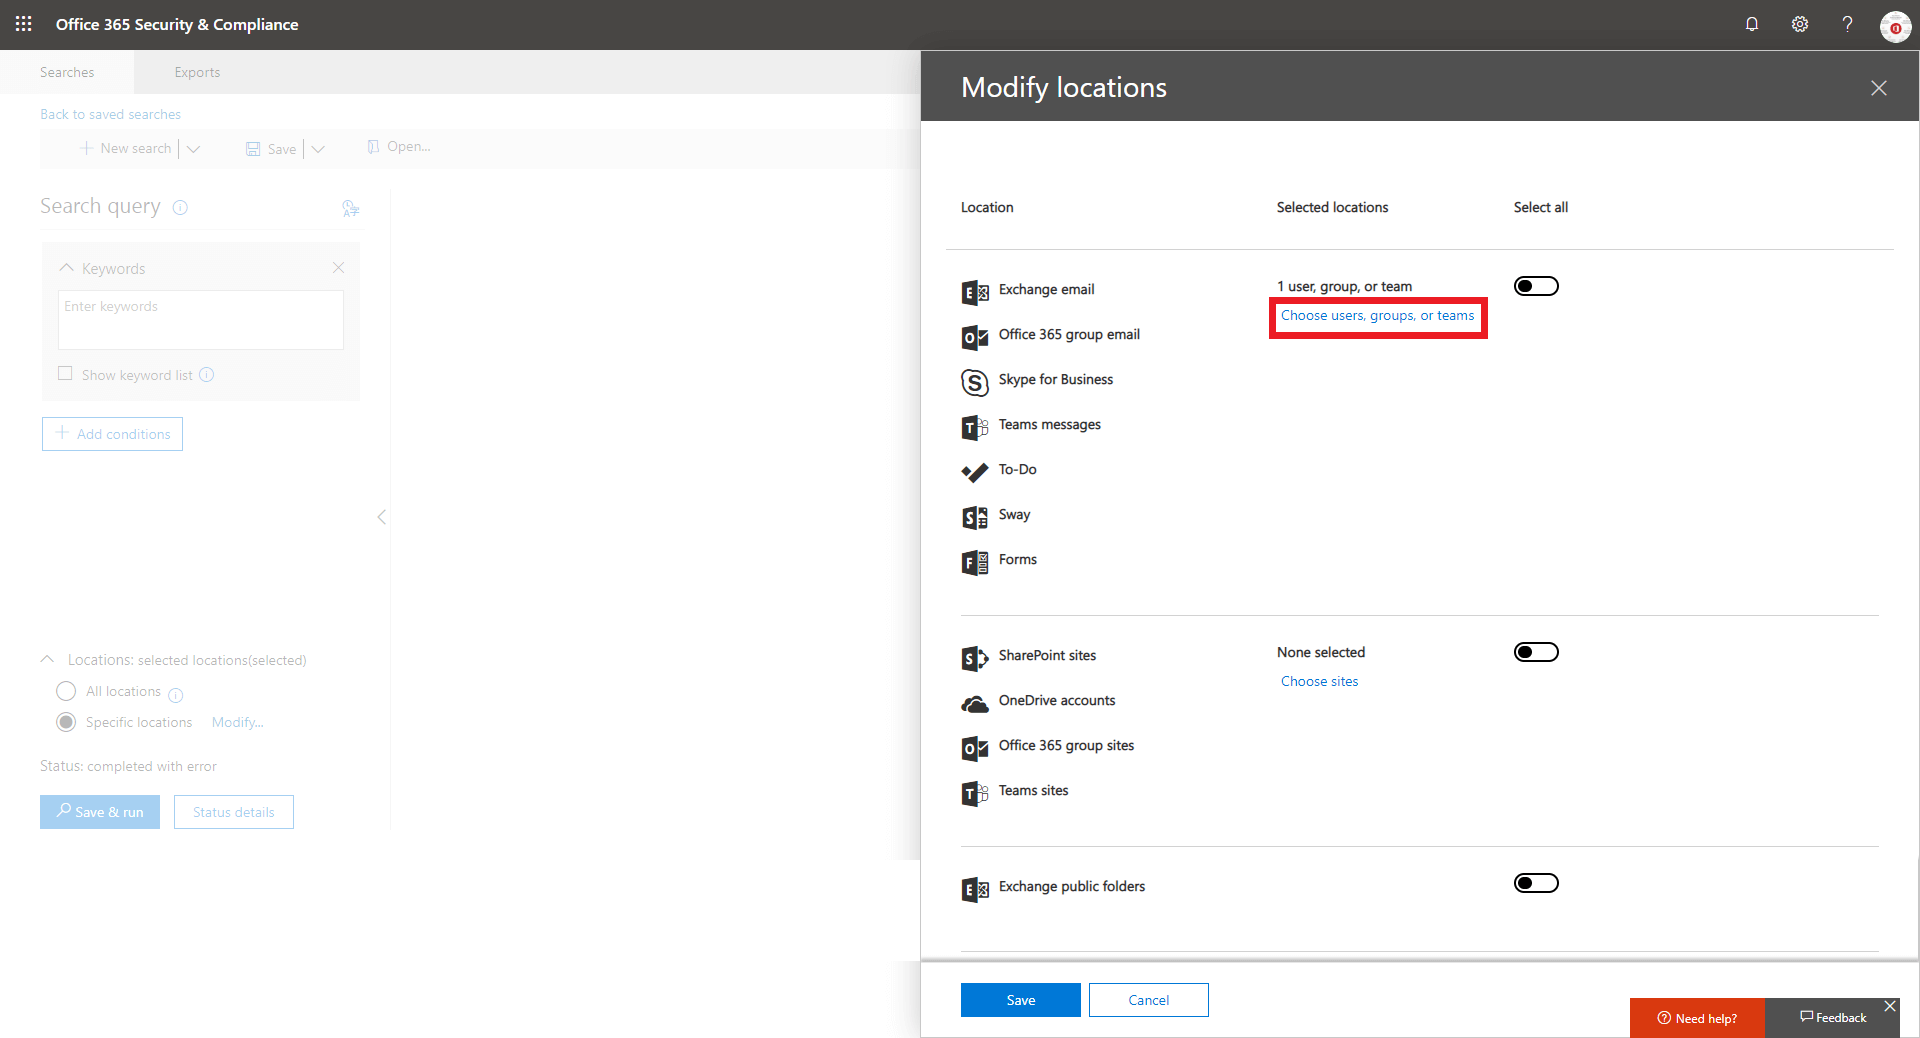
- In the window that appears, click the Choose users, groups, or teams option to select the mailbox that you wish to export.
- You can also export a particular subset of the mailbox to PST by using the following filters:
- Keywords/phrases separated by logical operators AND, OR, NEAR, NOT, etc.
- Time range
- From/To/CC/BCC fields
- Message types
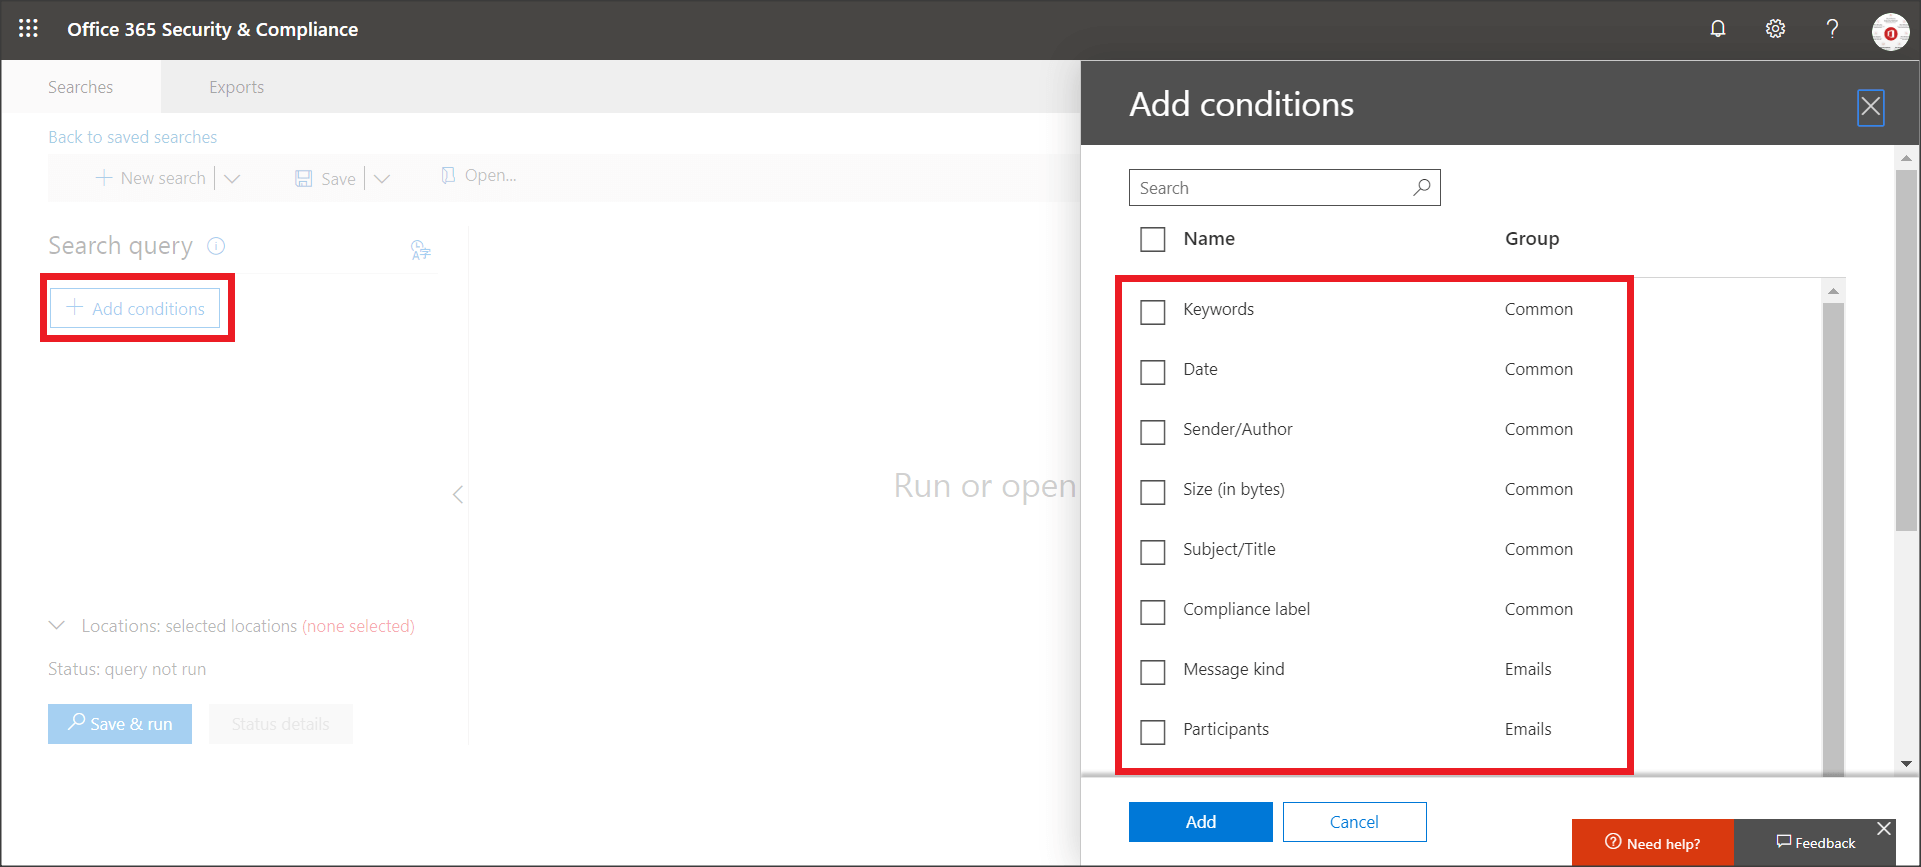
You can check these options by clicking the Add conditions button in the search window.
- To export all mailbox data, do not add any conditions or keywords.
- Click Save and run, and you will be prompted to enter a name of the search and its description.
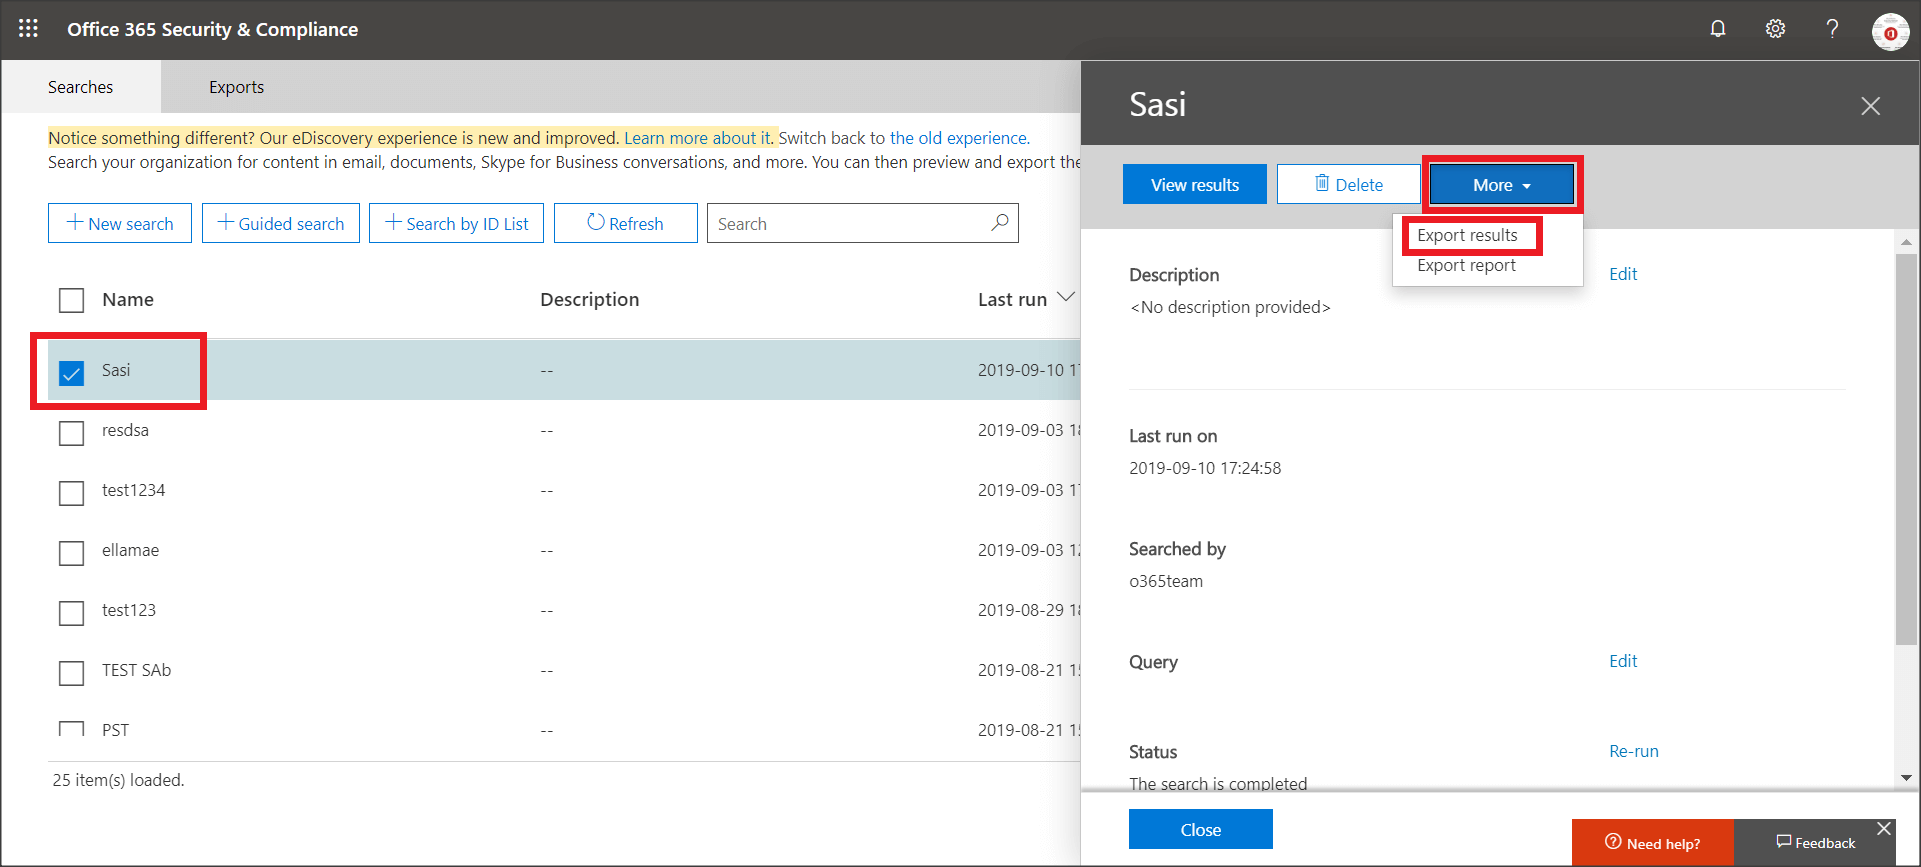
- After clicking Save, the wizard will perform the search in the background. Now go back to the Content Search window, hit Refresh, and choose your search.
- In the window that pops up, you can see if the search has been completed along with the details concerning its result. Click More, and select Export results.
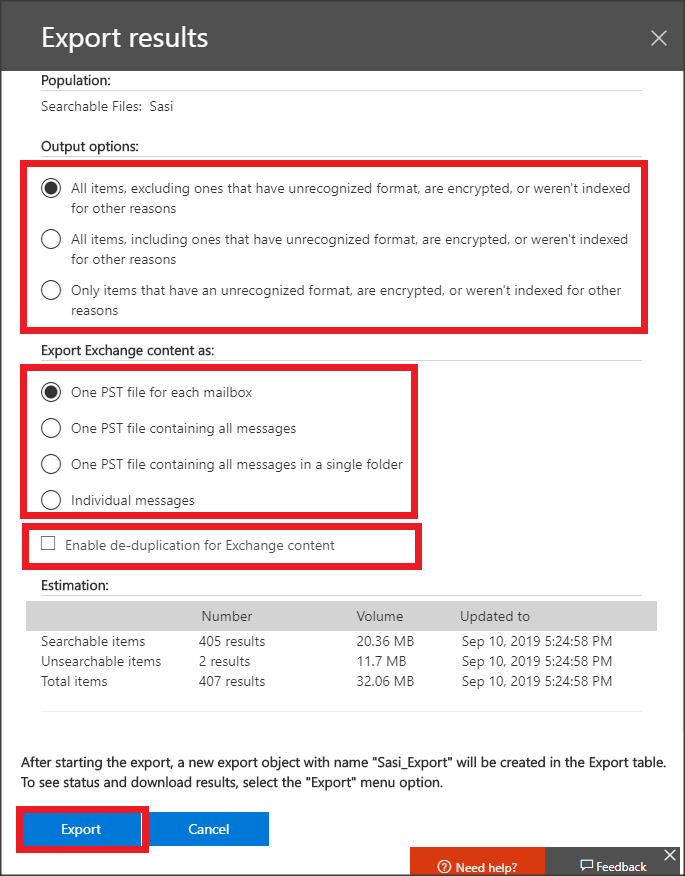
- In the window that appears, you can choose if you want to include encrypted files. You can also decide how to export the Exchange content. Do not select the Enable de-duplication option unless you want the search results to be exported to a single PST file.
- When you are finished, click Export at the bottom of the window.
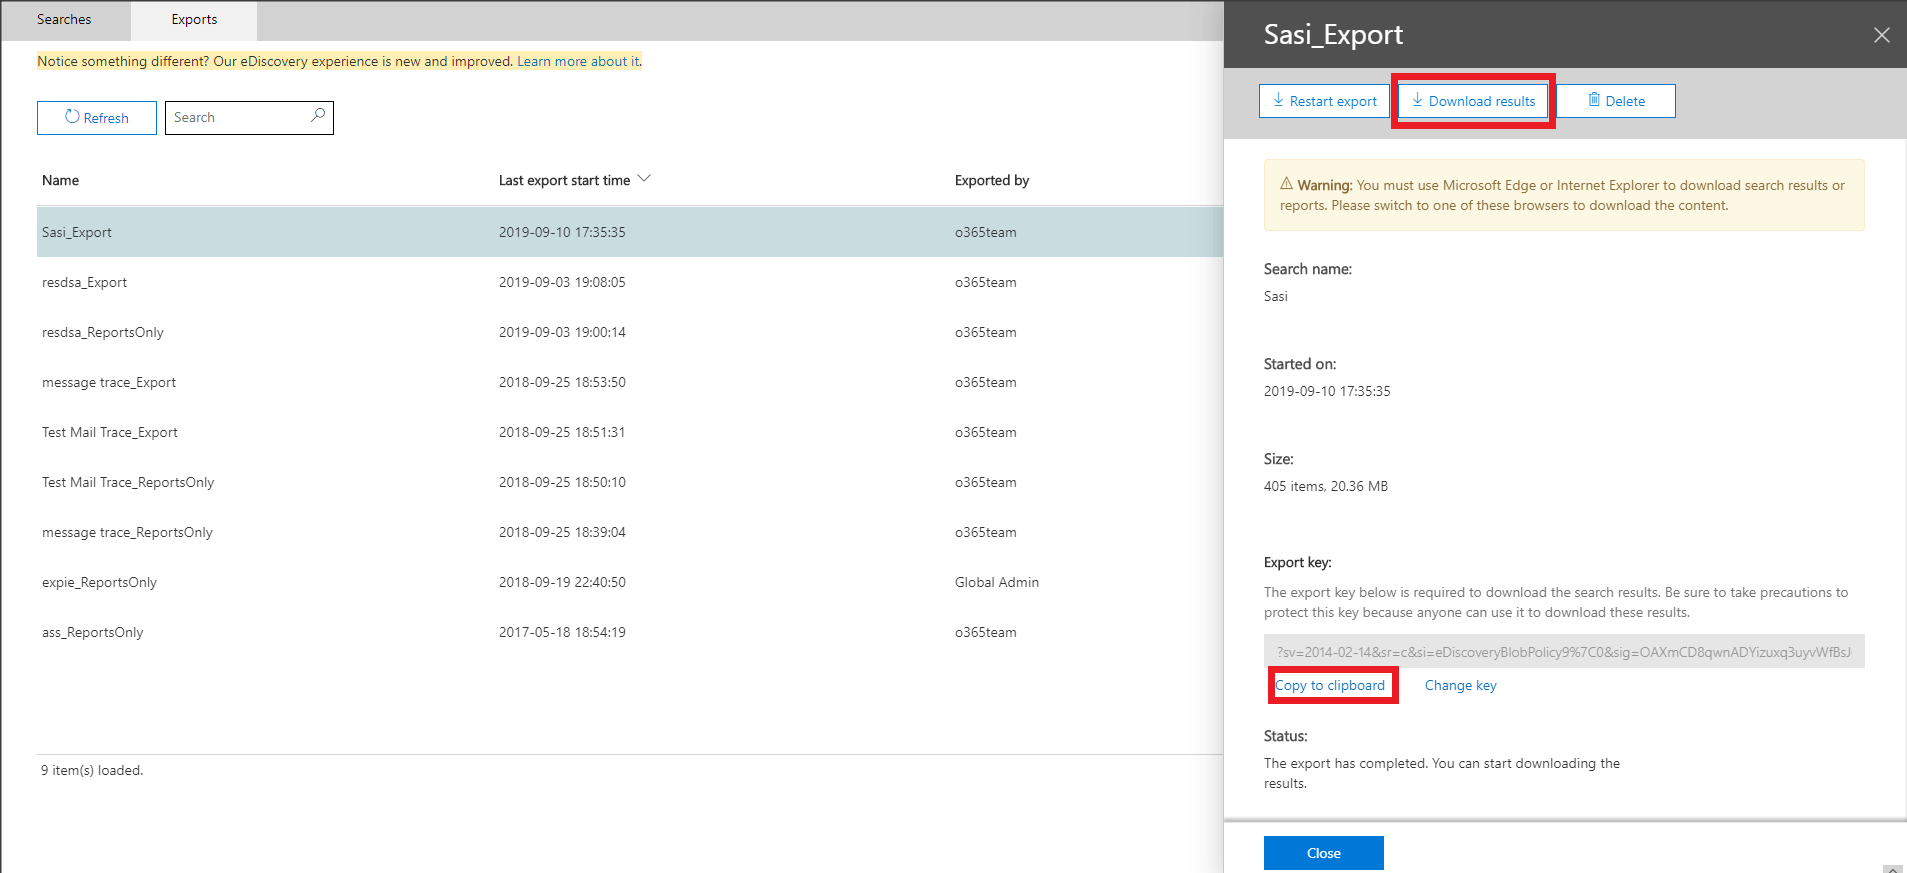
- The wizard will start exporting data. Navigate to the Export tab, and choose your search again to see its progress.
- Click the Copy to clipboard link to copy the export key. You’ll need the key to download the PST file in the next step.
- Click the Download results button.
- An application called the eDiscovery PST export tool will be downloaded if this is the first time you’re exporting a mailbox to PST. Paste the export key copied in the previous step in the corresponding field. Next, click on Browse, and provide the location where you want to store the PST file.
- After you click Start, the tool will begin the export. When it completes, close the application.
Shortcomings of using eDiscovery to export mailboxes to PST.
- You need to use Internet Explorer or Edge browser. It’s not possible to export mailboxes to PST using other browsers.
- The Export Key needs to be stored securely as anyone can use it to download the PST.
- The tool does not allow you to secure the exported PST files with a password.
- Office 365 eDiscovery export creates duplicated items. eDiscovery often finds several instances of the same email message and treats them as separate items. Office 365 provides the Enable de-duplication option to counter this, but it’s not foolproof.
RecoveryManager Plus: Exporting mailboxes to PST made simple.
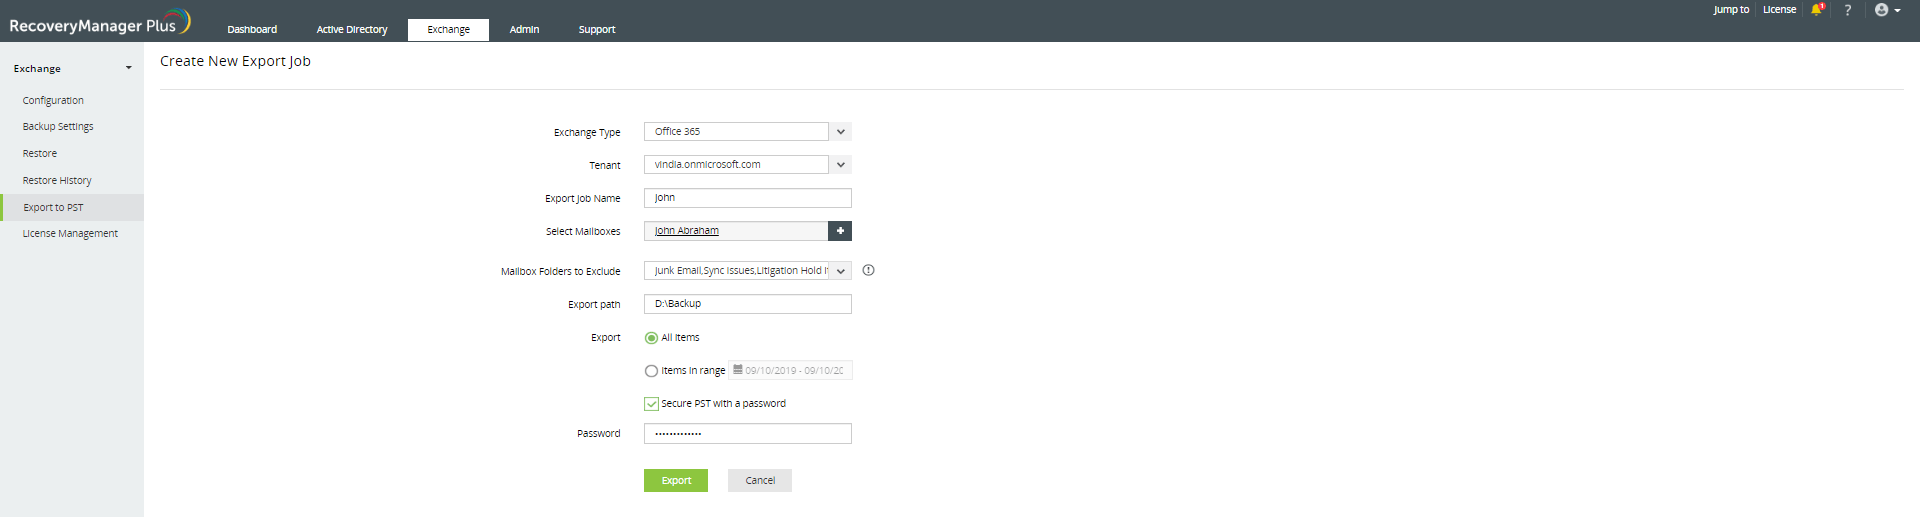
- Log in to RecoveryManager Plus and navigate to Exchange > Export to PST.
- Click the New export job button located at the top-right corner of the screen.
- Select the tenant that has the mailbox to be exported.
- Provide a name for the export operation.
- Select the mailboxes that you want to export to PST from the Select mailboxes field.
- Specify the mailbox folders that you wish to exclude from exporting using the Mailbox folders to exclude field.
- Provide the location where you wish to store the PST file.
- To export all items in the selected folders since the mailbox was created, select All items in the Export field. To export items created or modified in a specific time range, select Items in range, and select the time period from the calendar.
- Check the box beside Secure PST with a password, and provide a password for an additional layer of security.
- Click Export to start the process.
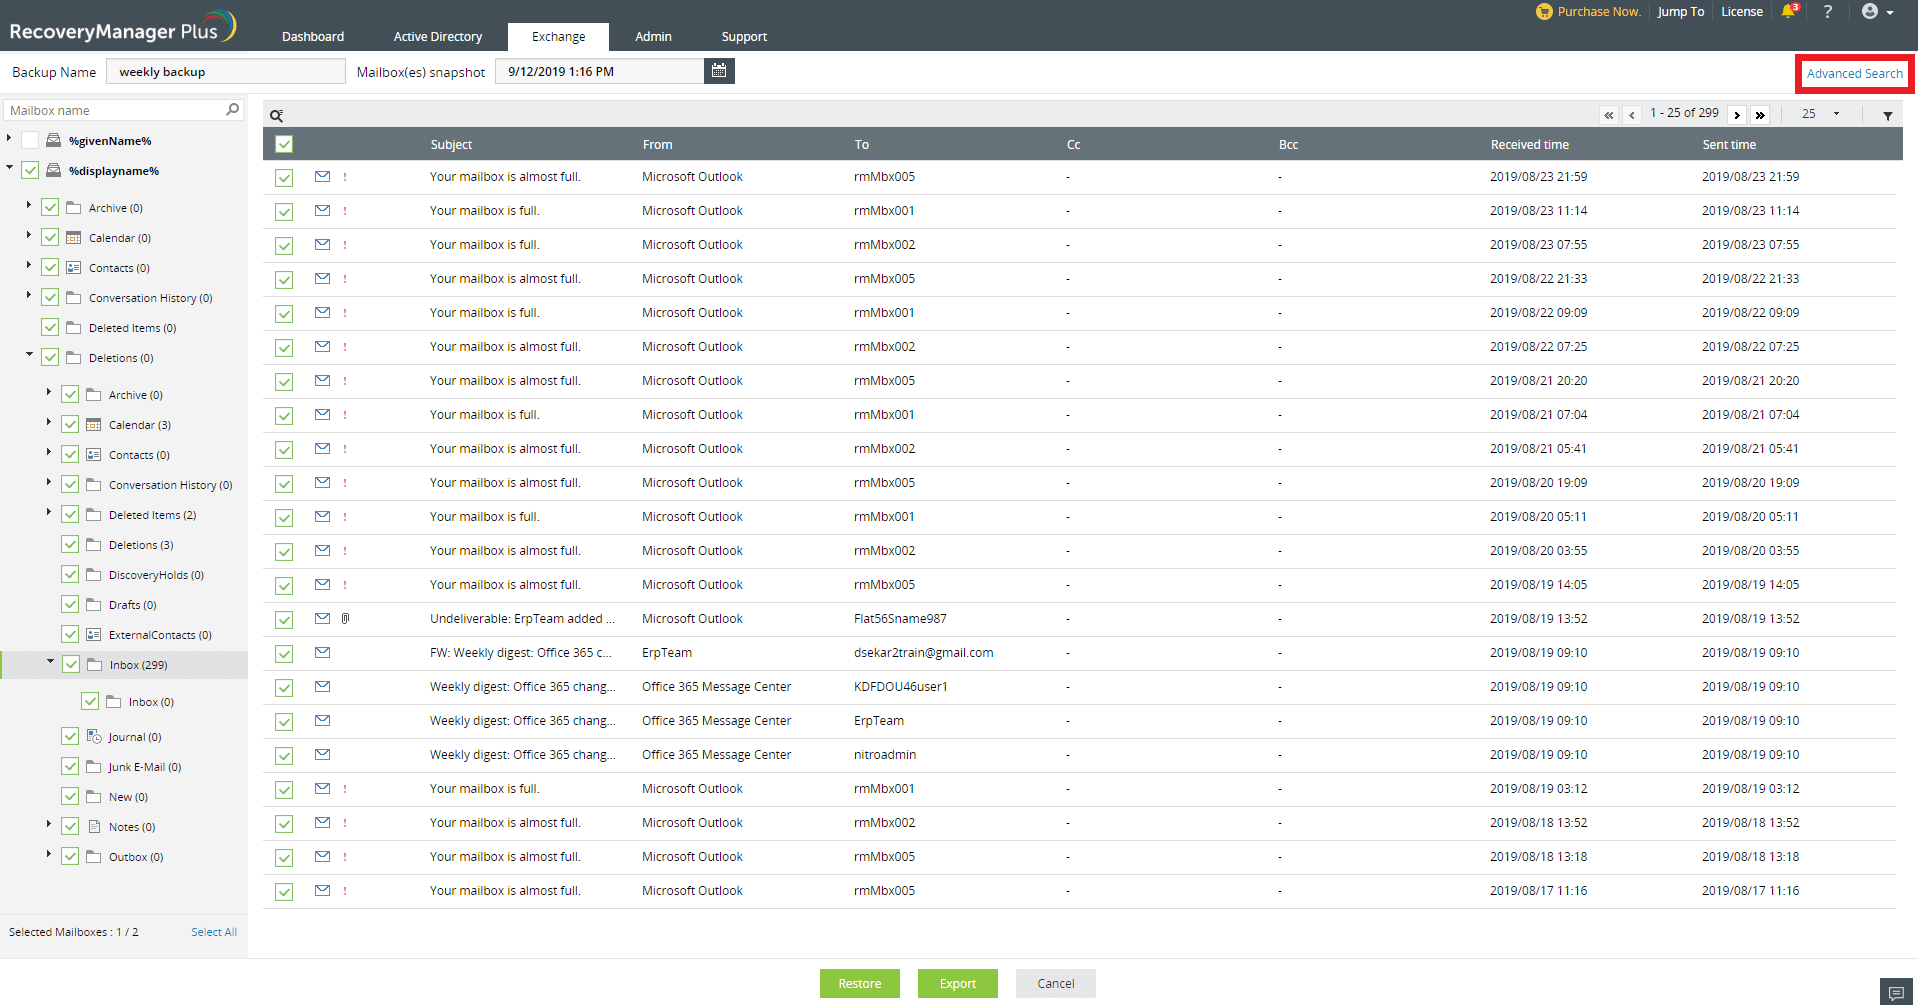
You can also export mailbox items that meet a specific criteria to PST using RecoveryManager Plus. You can search for the mailbox items by following the steps listed below.
- Navigate to the Exchange tab.
- Select the mailboxes that contain the contents to be exported. If you’re not sure which mailbox holds the necessary items, select all the mailboxes, and click Review and Restore.
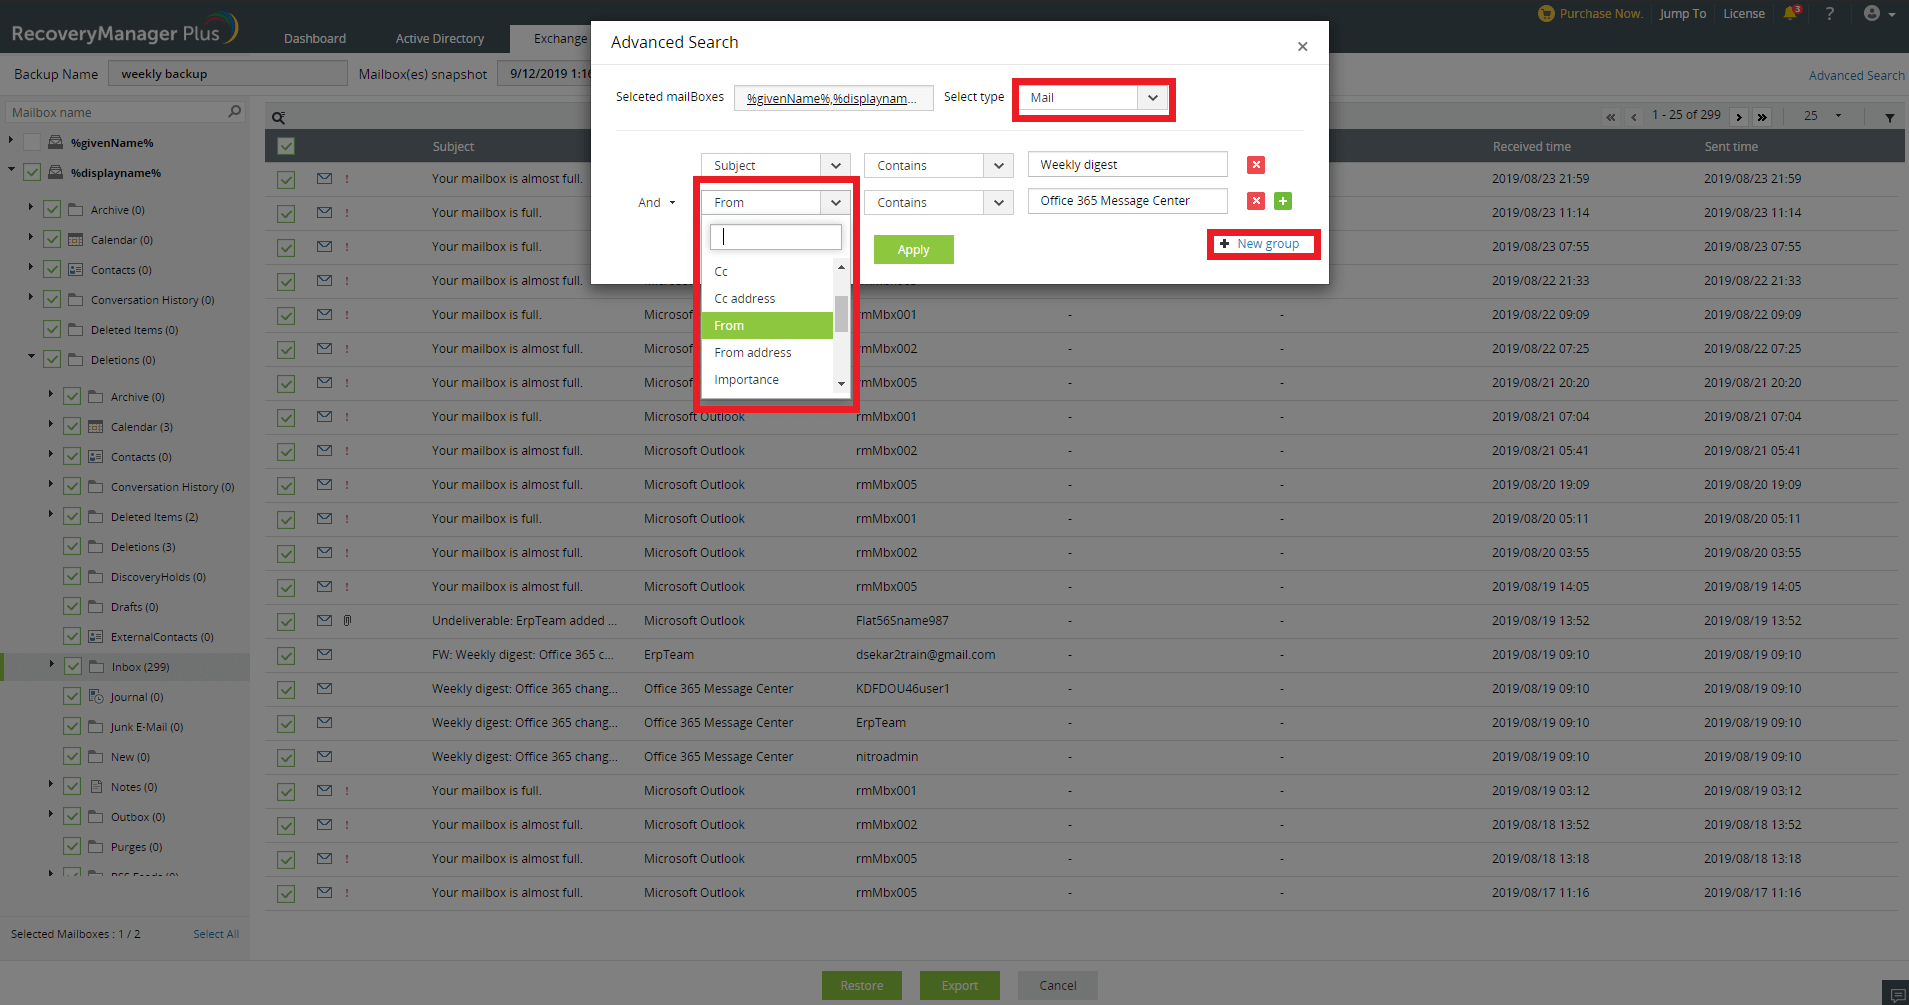
- Click the Advanced Search link located at the top-right corner of the screen.
- Select the type of item that you want to search for from the list of available options: Calendar, Contact, Journal, Mail, Note, Post, and Task.
- Once you have selected the type of item you want to export, you’ll be provided with a list of search criteria to choose from. Select the criteria to search, and click Apply.
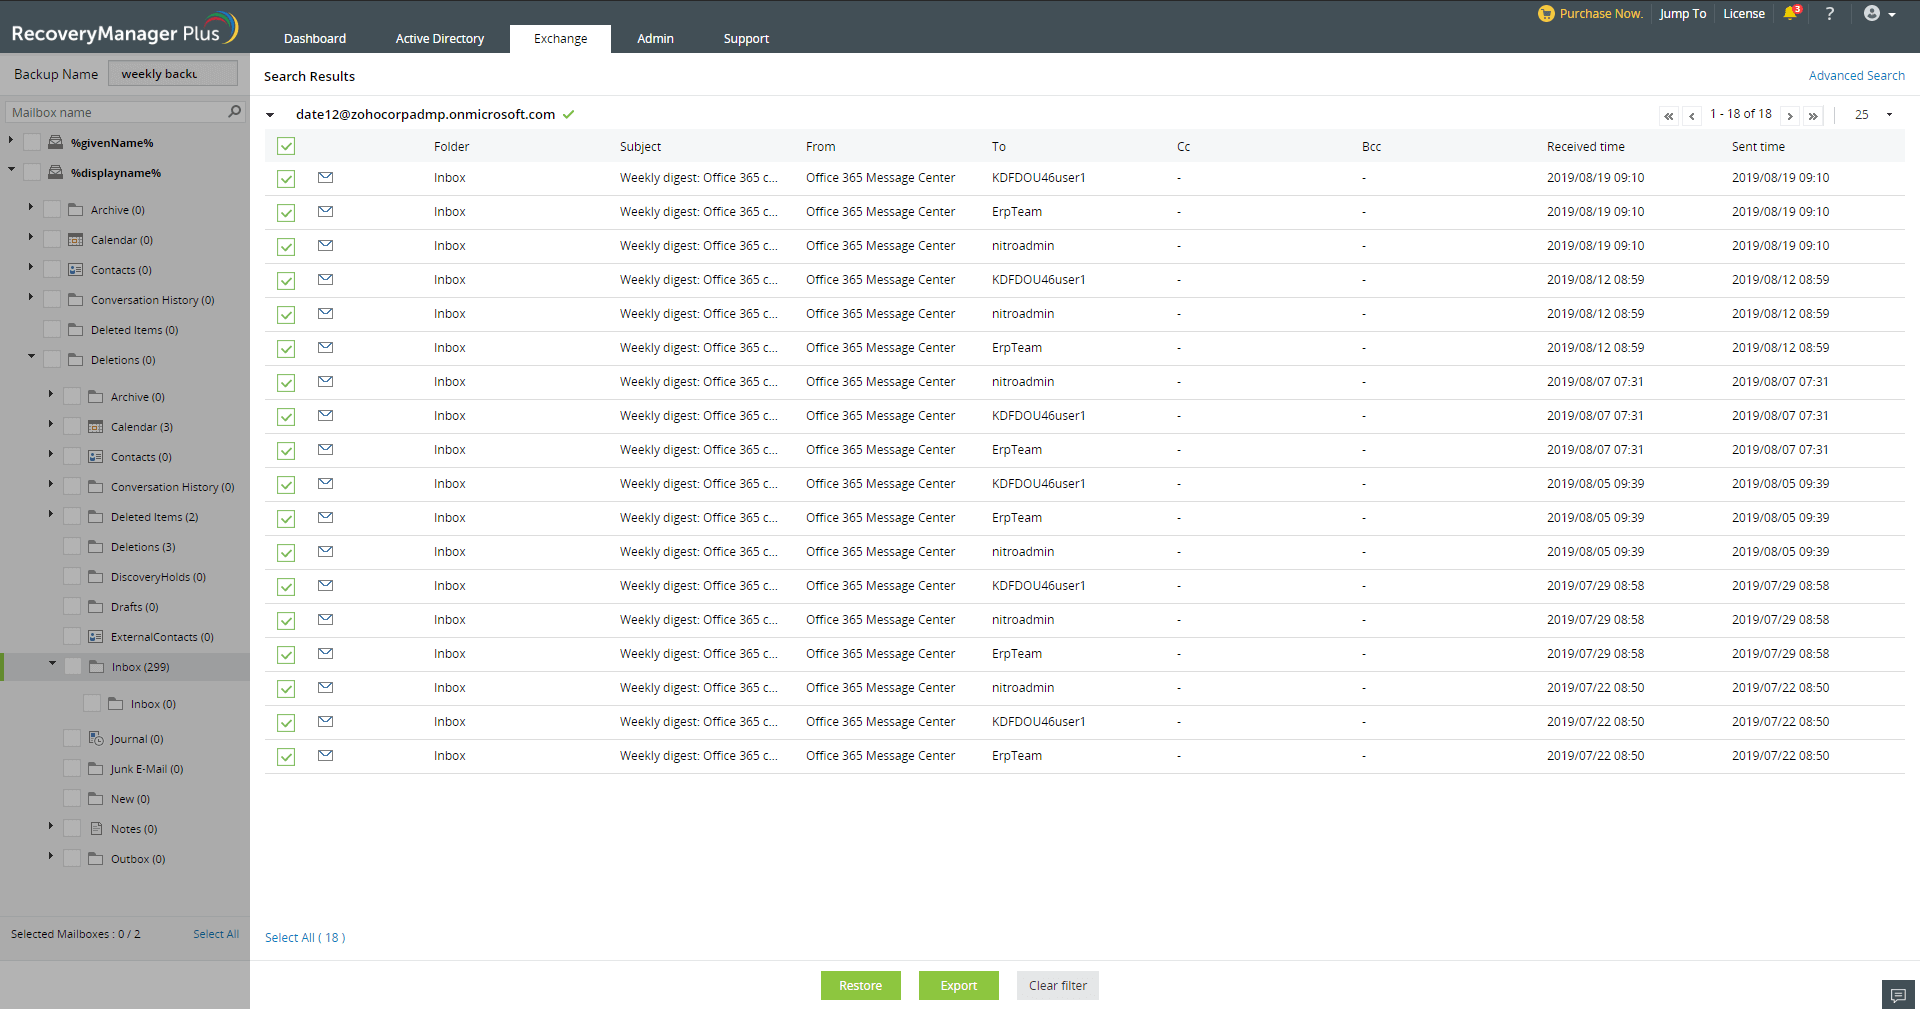
- From the results that are displayed, select the items that you want to export, and click Export.
- In the pop-up that appears, provide a name for the export job.
- Provide the path where the PST should be stored in the Export path field.
- If you wish to add an additional layer of security for your PST, select Secure PST with a password, and provide a password.
- Click Export to begin the process.
RecoveryManager Plus provides the same functionality of eDiscovery without the complex steps. Try RecoveryManager Plus to experience how exporting a mailbox to PST can be made simple.
Thanks!
Your download is in progress and it will be completed in just a few seconds!
If you face any issues, download manually here