Working with anomaly rules of User and Entity Behavior Analytics (UEBA) in Log360 Cloud
In this page
Overview
This section elaborates how you can manage anomaly rules and create custom anomaly rules. Learn about meta suggestions that help make the rule creation process easier and more efficient.
Managing anomaly rules
Pre-defined anomaly rules in Log360 Cloud's UEBA module can neither be edited nor deleted, they can only be activated or deactivated. Whereas the custom anomaly rules can be activated, deactivated, deleted or fine-tuned with the editing option. Further, the reports that contain the details of the triggered anomalies can be viewed or hidden from the console. This section elaborates how you can manage anomaly rules:
View rule
The "View Rule" option will show users the action on which the selected predefined rule is built along with the type of detections configured to that rule. This action will be available only for the pre-defined rules. You can view all of the anomaly rules from the complete rule list via the Correlation tab:
- Go to the Correlation tab, and in the left-hand side pane, click on "Manage Rules".

Image 1: Manage anomaly rules in ManageEngine Log360 Cloud
- The list of the Correlation rules appears . Click on the "Anomaly Rules" sub-tab just above the rules list.

Image 2: Anomaly rules in ManageEngine Log360 Cloud
- Click on the available rule types dropdown as shown in the below image.

Image 3: Anomaly rules category in ManageEngine Log360 Cloud
- Type and search from the search box or, scroll down to find and click on the rule you wish to view from the pre-defined rules, and the complete list of anomaly rules of that category will appear.
- Click on the View Rule
 icon available before the rule name. You will be shown all the details about that anomaly rule including the meta behind it. These details cannot be edited.
Activating and Deactivating rules for both pre-defined and custom anomaly rules
- Activate:
Upon activating a particular rule, the model will start the analyzing cycle and will detect the said anomaly as it occurs.
In the case of custom rules- both single rule creation and bulk rule creation, once a rule has been created successfully, it will be activated by default.
- Deactivate:
Once a rule is deactivated, logs matching the rule will not be sent to the model for analysis, and no anomalies will be detected. All pre-defined rules will be deactivated by default, and users have to activate them manually in order to apply them.
Steps to activate/deactivate anomaly rules:
- Go to the Correlation tab, and in the left-hand side pane, click on "Manage Rules".
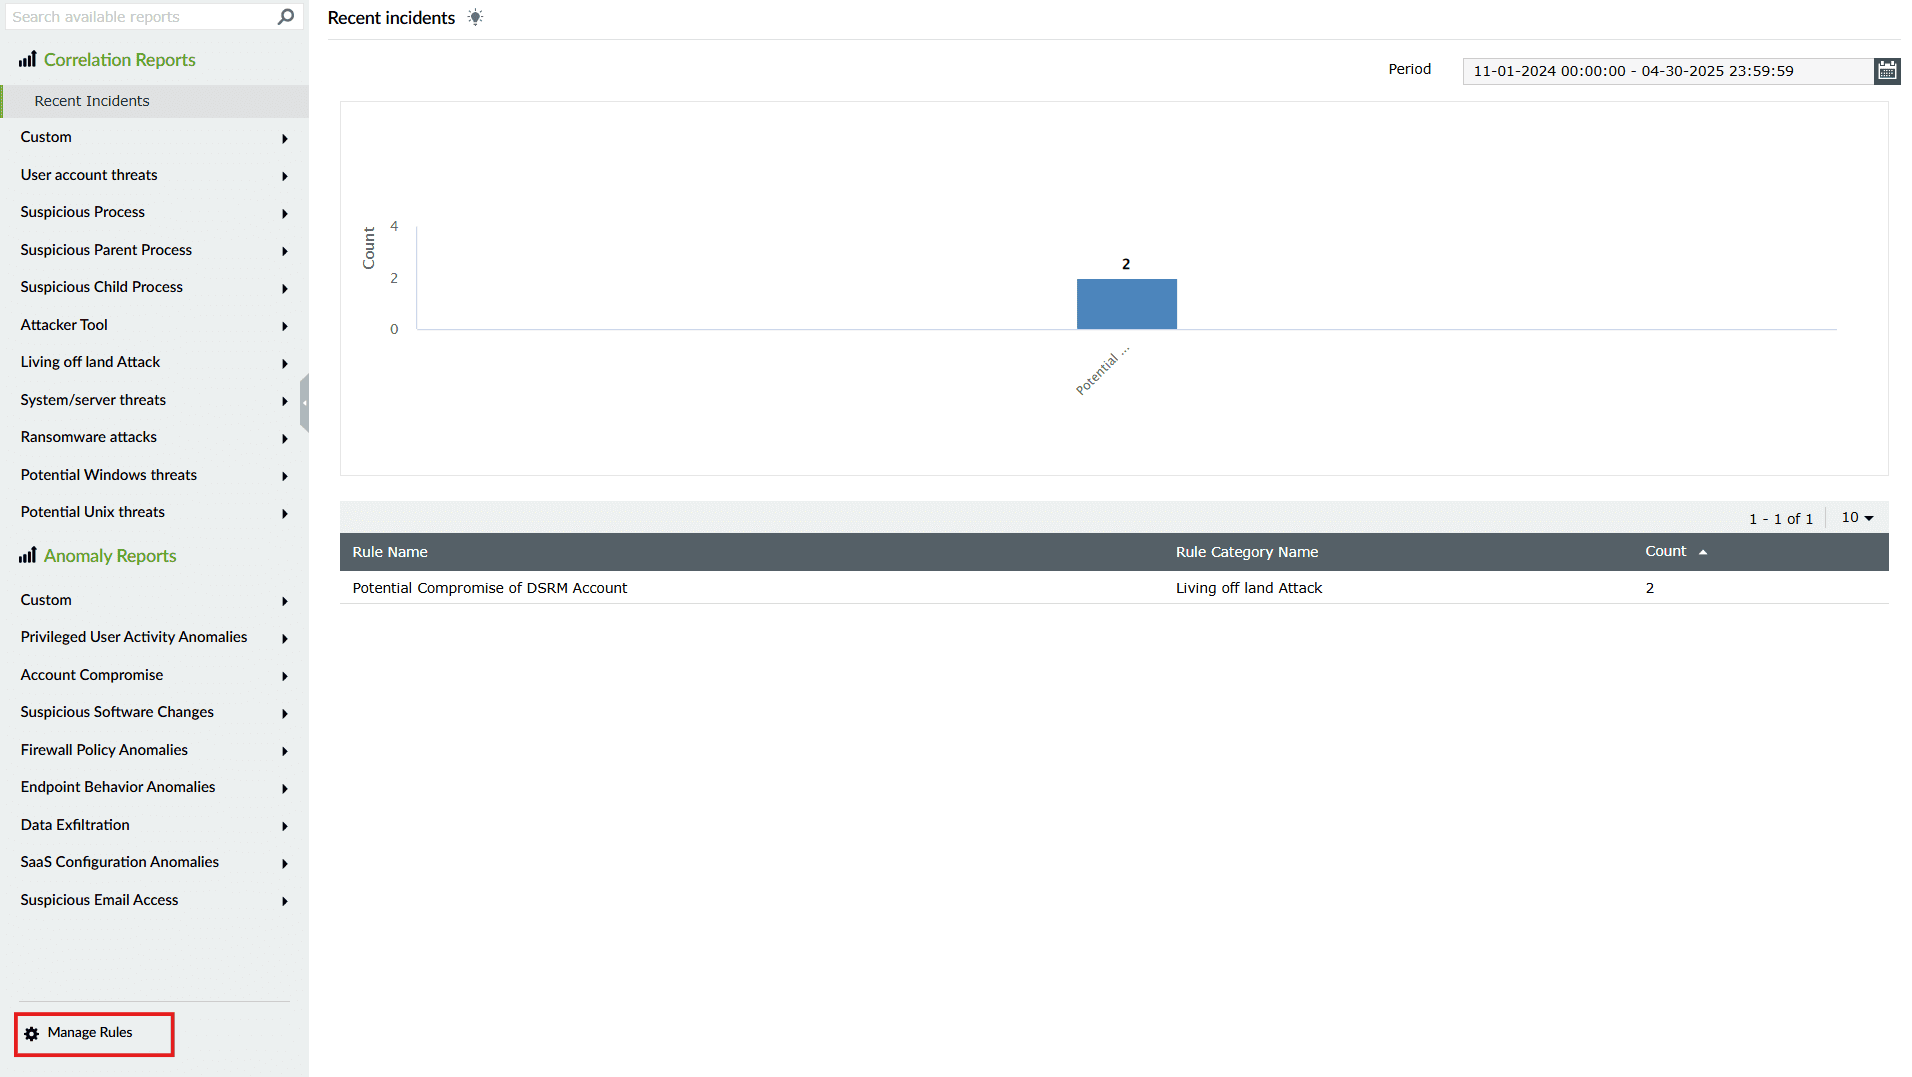
Image 4: Activate anomaly rules in ManageEngine Log360 Cloud
- The list of the existing rules appears. Click on the "Anomaly Rules" sub-tab just above the rules list.

Image 5: Activating anomaly rules in ManageEngine Log360 Cloud
- Search for the rule(s) in the rule list and go to the "Rule Status" column and hover over the now "Inactive" button, and the option to activate it appears as shown below.

- Click on "Activate". Once the action is carried out, a pop-up appears briefly like the below.

- Similarly, in order to deactivate a rule, hover over the now "Active" button, and the option to deactivate it appears as shown below.

- Click on "Deactivate". If you are deactivating a single rule, a pop-up appears asking if you want to hide the report . Click on the checkbox if you do want to hide the report or proceed without choosing to hide and click on "Yes".

- Once the action is carried out, a pop-up appears briefly like the below.

Managing multiple anomaly rules at once
If you want to manage a set of multiple anomaly rules for a specific action, all at a time, follow the steps below:
- Go to the Correlation tab, and in the left-hand side pane, click on "Manage Rules".

Image 6: Managing anomaly rules in ManageEngine Log360 Cloud
- The list of the existing rules appears. Click on the "Anomaly Rules" sub-tab just above the rules list.
- Filter the rules by your desired rule category from the Rule Category dropdown.
- In the rule list, the first column contains check boxes
 beside each rule.
- Click on the checkboxes with a check
 for all the rules you wish to manage.
- Click on the Manage button above the rule list and the dropdown expands, listing all the available actions for the rule sets- custom and pre-defined.
Available actions for custom created rules:

Image 7: Available actions for custom anomaly rules in ManageEngine Log360 Cloud
Available actions for pre-defined rules:

Image 8: Available actions for pre-defined anomaly rules in ManageEngine Log360 Cloud
- Select the action you wish to take, and it will be implemented instantly.
Creating custom anomaly rules
While creating custom anomaly rules, users can choose between two methods:
Single rule creation:
In this method, users can select a single action at a time and create an anomaly rule for it. Meta suggestions will also be shown to guide rule setup.
Steps for single rule creation:
- Go to the Correlation tab, and in the left-hand side pane, click on "Manage Rules".

Image 9: Creating custom anomaly rules in ManageEngine Log360 Cloud
- The list of the existing rules appears. Click on the "Anomaly Rules" sub-tab just above the rules list.
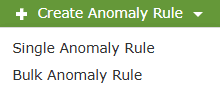
- Click on the green button that says "Create Anomaly Rule" in the upper right corner present above the rule list.

Image 10: Create custom anomaly rules in ManageEngine Log360 Cloud
- The dropdown to choose between "Single Anomaly Rule" and "Bulk Anomaly Rule" appears. Click on "Single Anomaly Rule".
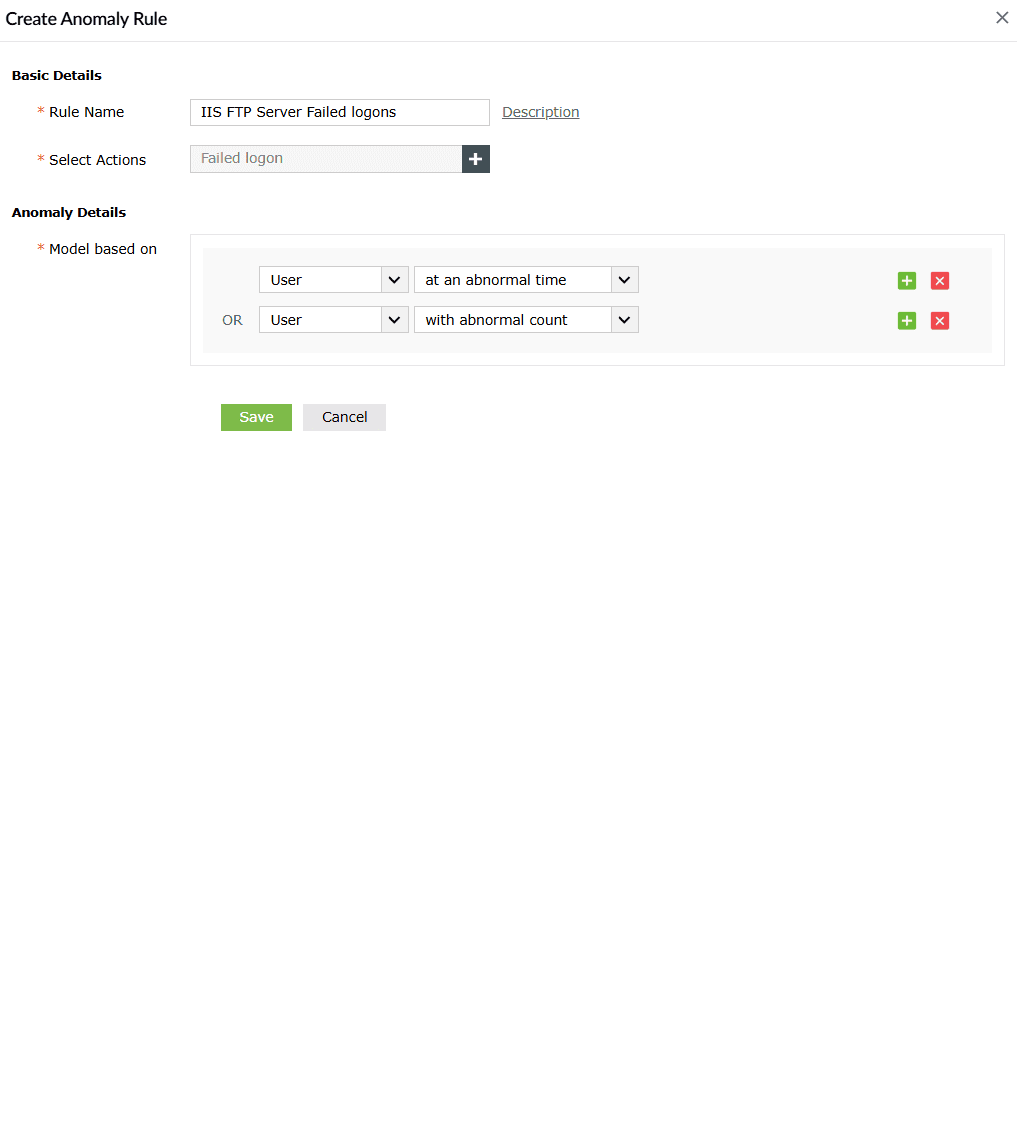
- Fill in the preferred rule name and select the particular action you want the rule to be based on, as shown in the below image.

- After you select an action, you will find the meta suggestions to specify the details associated with this rule, like in the below image. You can choose to proceed with the given recommendations or refine the details based on your personal will . In this same manner, for a single rule, a maximum of 10 models can be custom created.
- You can also create a personal description for the rule by clicking on the "Description" button, filling in the description box, and then clicking on the "OK" button.

- Once all the mandatory fields and details are entered, click on "Save".
- Once the action is carried out, a pop-up appears briefly like the below.

Once a rule is successfully created, the UEBA module will start processing the events specified in the rule for anomaly training. Baseline will then be defined depending on the model. After the training period and once the baseline is set, anomalies will be detected.
Bulk rule creation:
In bulk rule creation, multiple actions can be selected at once to generate separate anomaly rules quickly. Unlike single rule creation, meta suggestions are not shown in this view.
Steps for bulk rule creation:
- Go to the Correlation tab, and in the left-hand side pane, click on "Manage Rules".

Image 11: Bulk rule creation in ManageEngine Log360 Cloud
- The list of the existing rules appears. Click on the "Anomaly Rules" sub-tab just above the rules list.
- Click on the green button that says "Create Anomaly Rule" in the upper right corner present above the rule list.

Image 12: Custom anomaly rules in ManageEngine Log360 Cloud
- The dropdown to choose between "Single Anomaly Rule" and "Bulk Anomaly Rule" appears. Click on "Bulk Anomaly Rule".

- Enter a Rule name suffix to identify easily and filter these rules for future configuration.
- Under Select Action, choose the desired actions. Selected items will appear on the right, with an ⨯ icon when hovered, to remove any if needed.
- Once done, click Save to create the rules in bulk.
- Once the action is carried out, a pop-up appears briefly like the below.


Editing and deleting custom anomaly rules
- Edit Rule:
Users can custom create rule sets and will have the flexibility to edit them. On clicking Edit, users will be presented with a view including the action on which this rule is built, along with the type of detections configured. Users can edit the detection types according to their preference.
- Delete Rule:
Upon deleting a custom created anomaly rule, all anomaly models associated to it will be deleted along with their corresponding reports.
Steps to edit/delete custom anomaly rules:
- Go to the Correlation tab, and in the left-hand side pane, click on "Manage Rules".

Image 13: Custom anomaly rules in ManageEngine Log360 Cloud
- The list of the existing rules appears. Click on the "Anomaly Rules" sub-tab just above the rules list.
- Filter the Custom category from the rule type dropdown as shown in the below image.

- In the "Actions" column, you will find the respective icons to edit
 and delete
  the rule(s).

Image 14: Edit/Delete custom anomaly rules in ManageEngine Log360 Cloud
- To edit a rule, click on the edit icon . The Edit Anomaly Rule box opens upon clicking.

NOTE: During editing, If the user clicks the

button in the meta, the trained model will be deleted.
- You can only edit the Rule Name, Description and Anomaly Details with meta recommendations. The action associated with this rule cannot be edited.
- Make the necessary edits and click on "Save".
- Upon completion of action, the below pop-up appears.

- To delete a rule, click on and confirm by clicking on "Yes" in the confirmation pop-up.

- Upon completion of action, the below pop-up appears.

The Meta recommends appropriate detections based on the selected actions. These suggestions are integral to both predefined and single custom rule creation.
For instance, when a user is creating a single custom rule under 'Windows logons' for the event type 'Failed logons', based on this specific event type of 'Failed logons', the required fields to complete the rule creation will already be filled with a few suggestions. Hereupon, the user can either choose to follow the said suggestions as they are or, create their own criteria in those fields.
- In predefined rules, meta is used behind the scenes to define the rule logic. Users can only view it via the View Rule option but cannot modify it.
- In single custom rule creation, users can view, accept, modify, or remove suggested detection types derived from the Meta.
- In bulk rule creation, meta-based suggestions are applied automatically, but not shown to users during creation. However, if a user wants to edit a bulk rule, the meta information (which was automatically applied during the bulk rule creation) can be edited, as discussed in Steps to edit/delete custom anomaly rules section in this page.

Above is a sample set of meta suggestions during single rule creation in custom anomaly rule creation. As you can see, the fields are pre-filled with the said suggestions with very common/recommended configuration to save time taken to manually configure the same. However, these fields can still be edited with different configurations based on the requirements.
Read also
This document explained a detailed step-by step guide for working with anomaly rules of Log360 Cloud's UEBA. For leveraging the capabilities of UEBA, refer the below articles: