Configuring Failover Server
This document provides a detailed guide on setting up a Failover Server in ManageEngine Endpoint Central. A Failover Server ensures high availability by taking over when the primary server goes offline, maintaining uninterrupted services for your network. This guide is intended for IT administrators responsible for server setup and maintenance. To know more about Failover Server, click here.
Table of Contents
Pre-requisites for Failover Server Management
- Failover Server License: To check whether you have a Failover Server license, navigate to Profile > License > Additional Details in the Endpoint Central web console. If you do not have failover service enabled, contact Sales.
- Remote MSSQL Database: Check whether you have a remote MSSQL Database by navigating to Support in the Endpoint Central web console. Scroll down to General Details and check the Database Type. It is mandatory to have a remote MSSQL Database in the same domain as the Primary and Secondary Server. If you do not have a remote MSSQL database, refer here.
- Remote Repositories: Ensure remote repositories are configured on a computer within the same domain, not on the primary or secondary servers.
- Static IP Address: Required for consistent network identification.
Note:
- Ensure all components (central server, failover server, and remote MSSQL database) are within the same domain.
- Verify that NAT settings are properly configured for communication redirection.
- If you are a workgroup user, please contact the support for assistance.
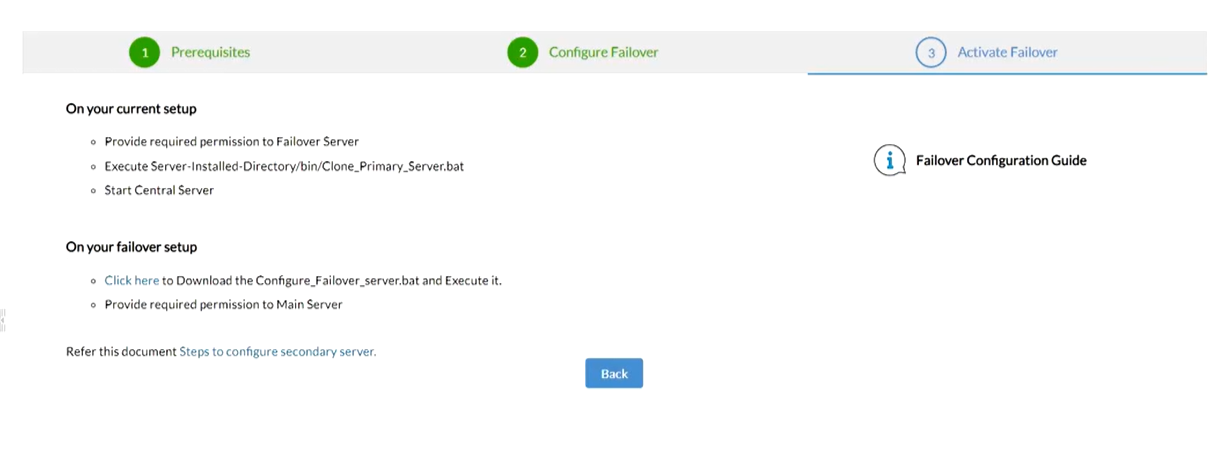
Configure Failover Server
- Go to Admin > Server Settings > Failover Server in the Endpoint Central console.
- Primary Server IP: Enter the IP addresses of Endpoint Central Server.
- Secondary Server IP: Enter the IP address of Failover Server.
- Set up the Virtual IP for the agents to communicate with the correct server.
- Configure the Secondary Server FQDN if servers are in different subnets.
- Save the configurations.
- Download the Configure_Failover_server.bat by clicking the below highlighted hyperlink and move on to the next steps.

Note: A single IP address cannot be used to access the server in scenarios where you are utilizing the failover server across different subnets. Furthermore, only one server IP can be employed for integration, as there is no provision for a shared IP when utilizing the failover server across different subnets.
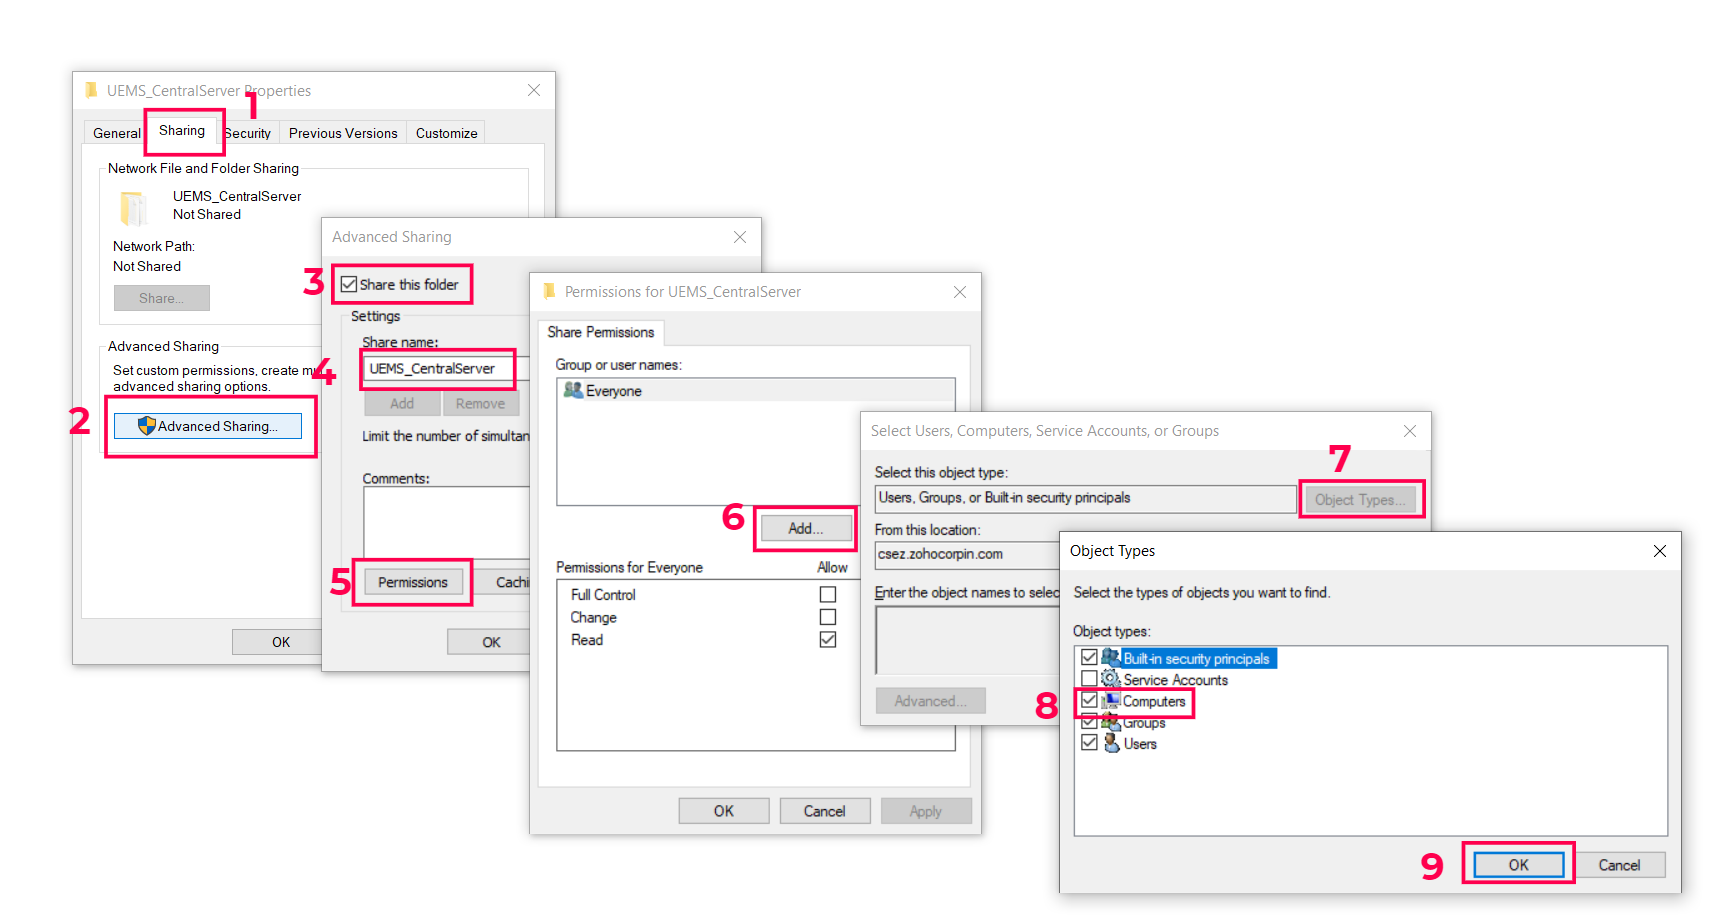
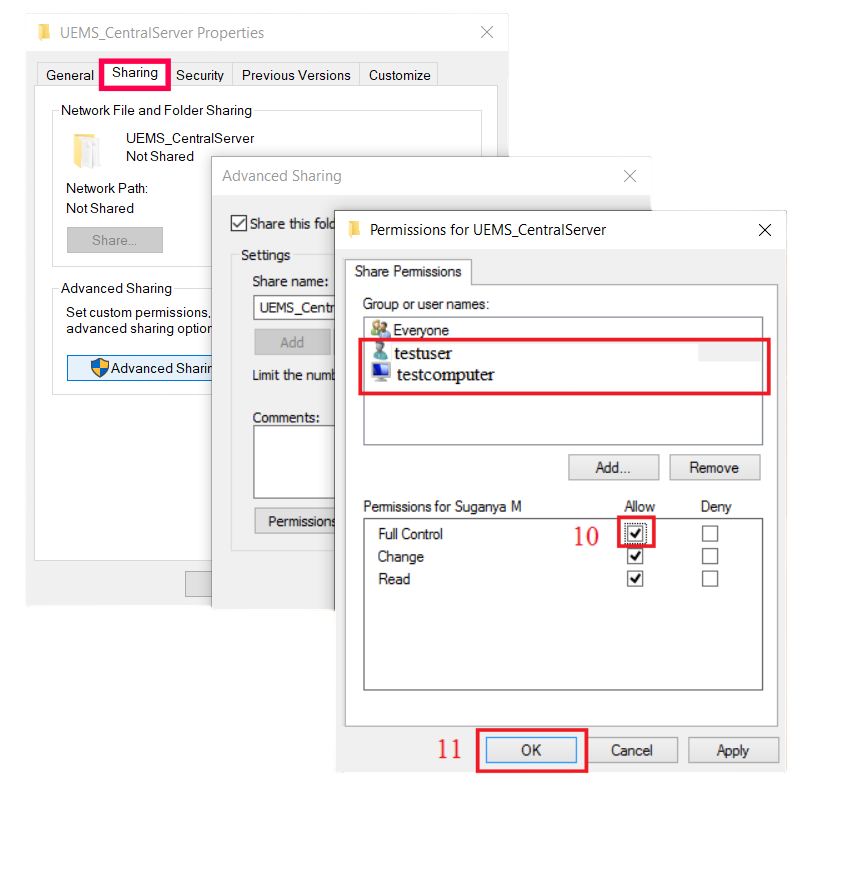
Configuring Share Permissions
Note:Ensure that the the secondary server do have permissions to synchronize the data from the primary server and vice versa.
To configure, enable the following settings
- Access the computer where the Endpoint Central Primary Server is installed.
- Open the primary server folder and add the system user of the secondary server as shown in the steps below.
Perform the below mentioned step on the computer where the Secondary server is installed: