

Inventory scan is the automated process of discovering and collecting information about all hardware, software, and digital assets across the managed endpoints in your network. It provides IT administrators with real-time visibility into their organization's asset landscape, helping them maintain compliance, and streamline troubleshooting and audits.
The inventory scan process is initiated automatically in an end-user's machine once the Endpoint Central Agent is installed. This scan collects all the asset data from the Agent and it posts this data to the Central Server for processing and management. Inventory scan is initiated automatically when any software or hardware changes are detected in the end-user's machine. In addition, an Inventory scan is performed automatically each time a user logs into his/her computer to collect user specific details.
For immediate audit or troubleshooting, you can initiate an on demand scan to immediately scan your end-user machines to retrieve the necessary asset data. If you want to collect and maintain up-to date asset data beyond software and hardware asset such as certificates, shares, driver information or services running in the background, you can configure a schedule scan to collect this asset data periodically.
The following types of Inventory scans are initiated in Endpoint Central to collect asset details from your end-machines:
This scan is initiated in the end-user machine when the Agent is installed in the end-machine. This scan will be triggered immediately after the Agent installation to gather all necessary asset data from the end-user machine.
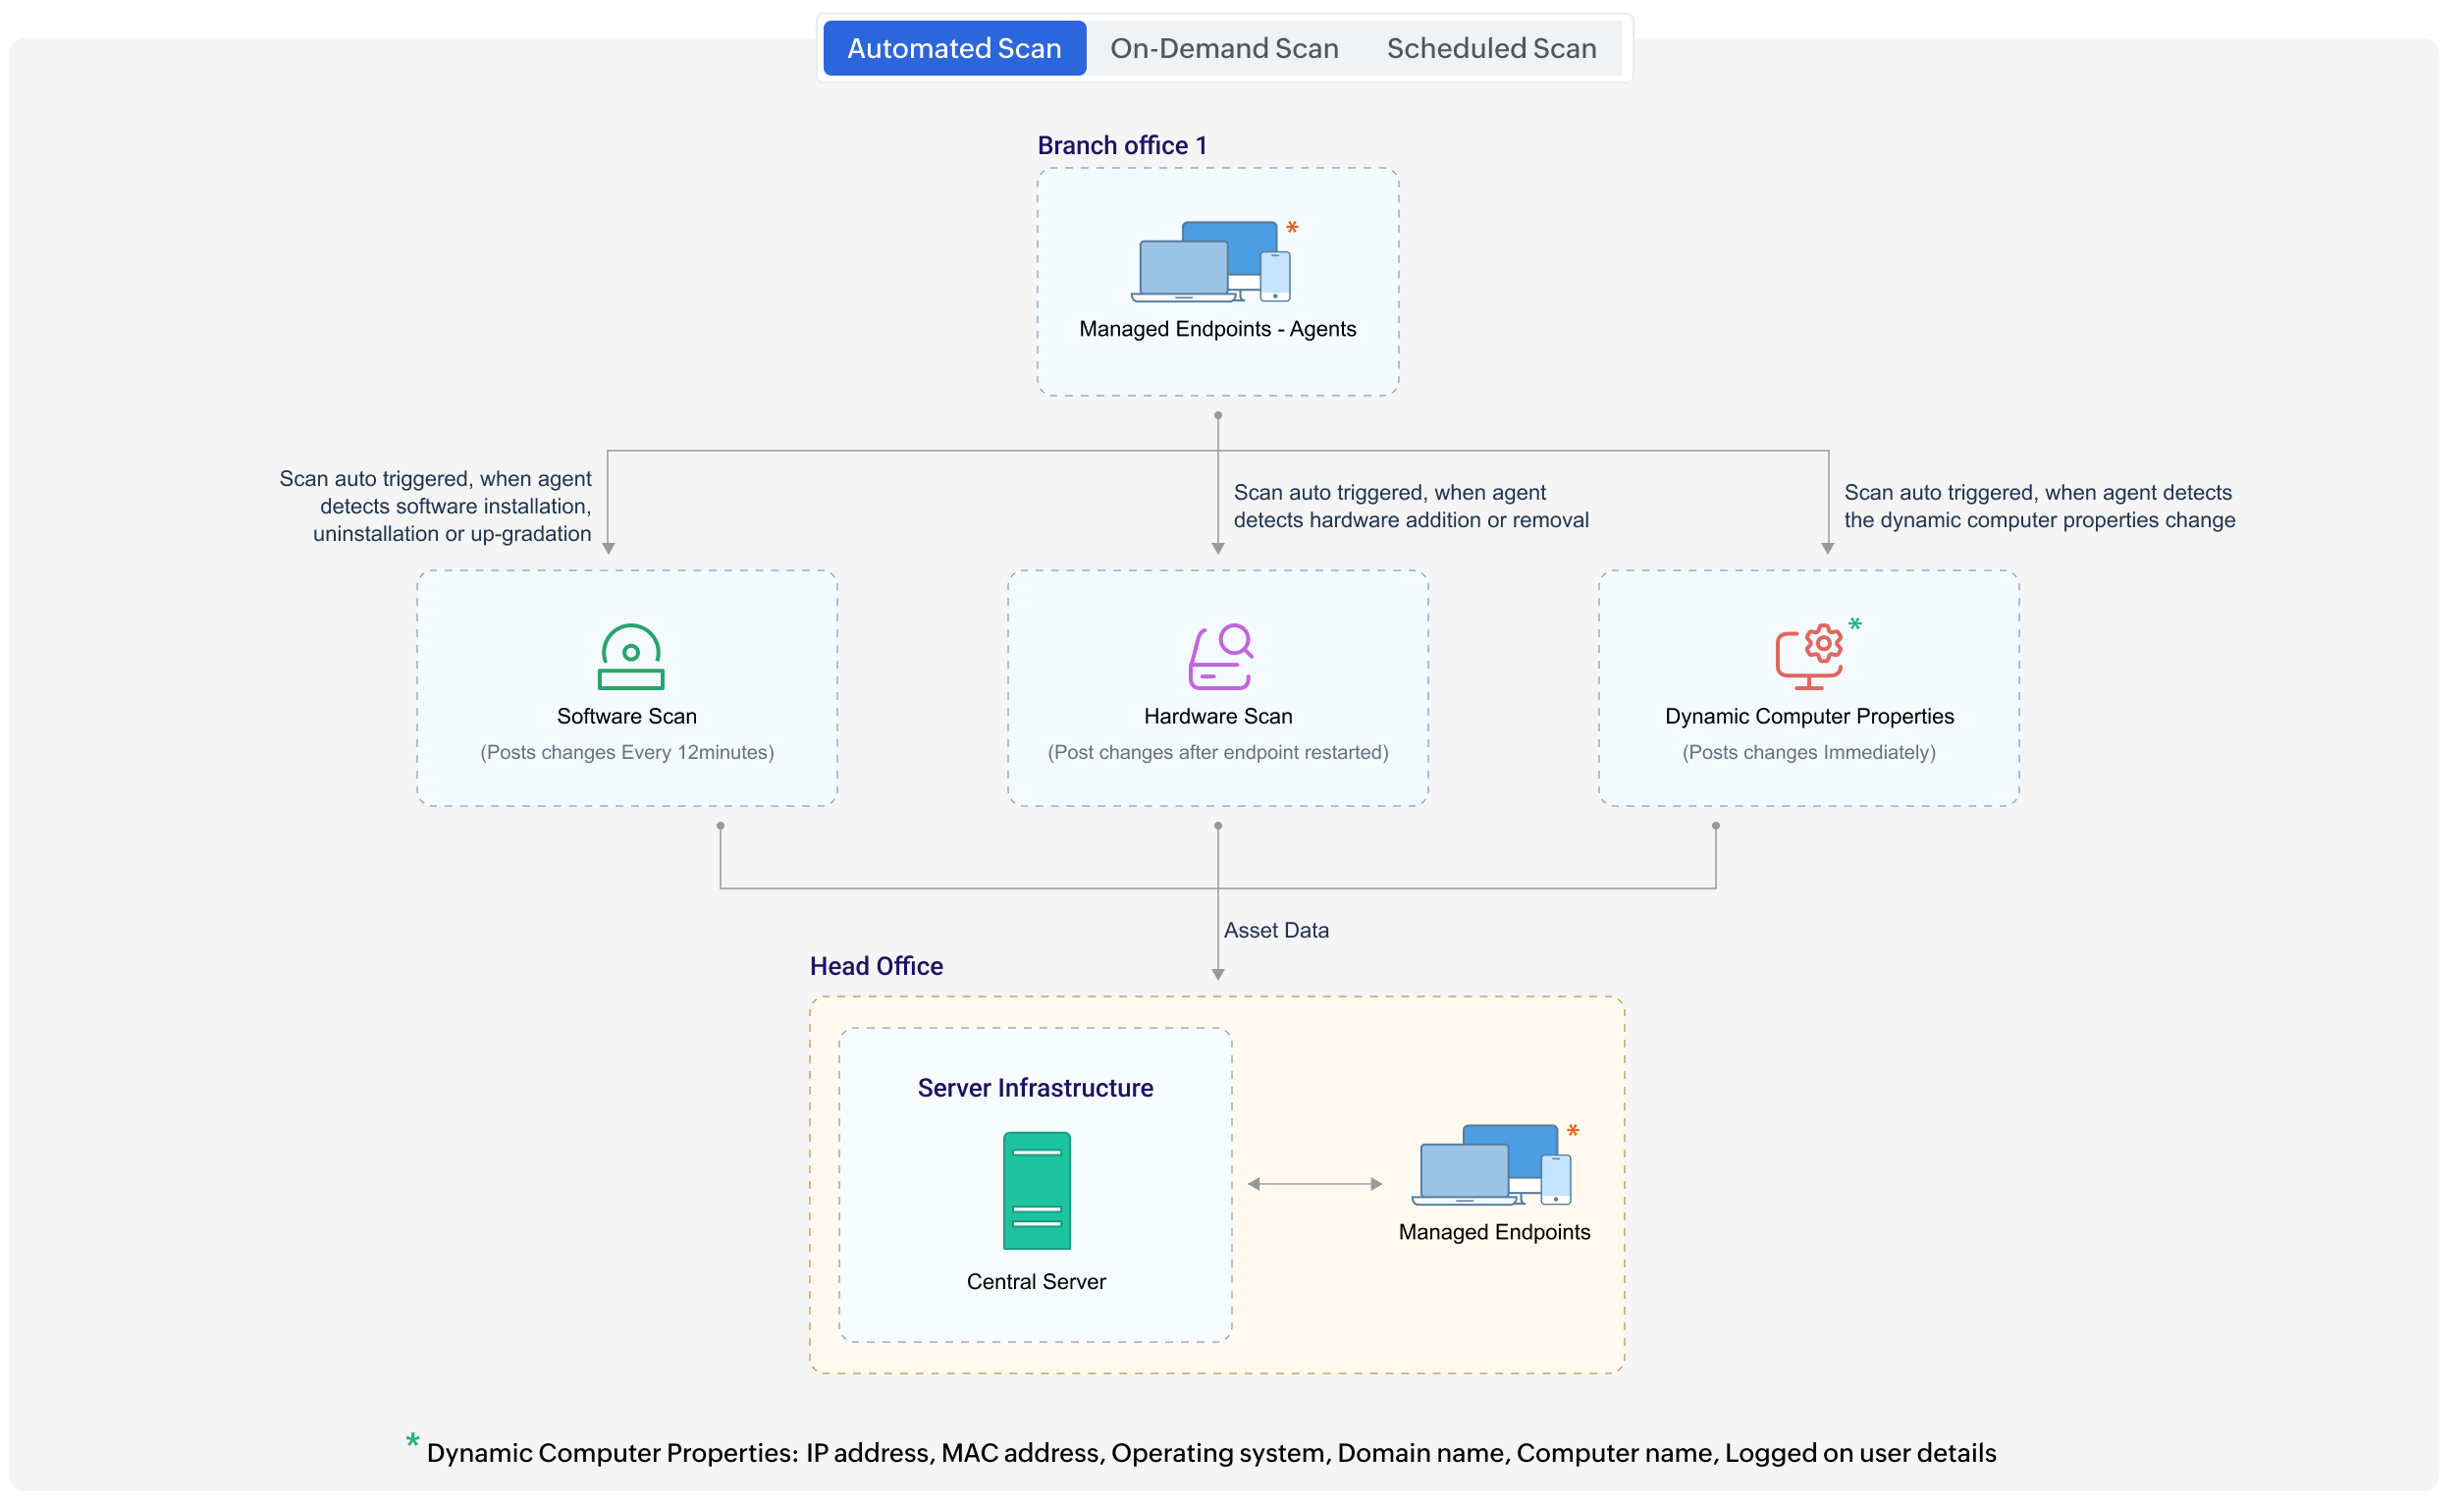
This scan will be triggered automatically in the end-user machine whenever any software installation, uninstallation, or upgradation is detected by the Endpoint Central Agent. The detected software changes are posted to the server within the next 12 minutes.
This scan will be triggered automatically in the end-user machine whenever any hardware changes, such as the removal of hardware, a new hardware connection is detected by the Endpoint Central agent. This details of hardware changes will be posted to the Central server after the end-user machines are restarted.
This scan will be triggered automatically in the end-user machine whenever any dynamic computer properties changes are detected by the Endpoint Central agent. This details of the core properties will be posted to the server immediately after the detection. The dynamic computer properties data includes, IP address, MAC address, Operating System, Domain Name, Computer Name, and Logged on User details.
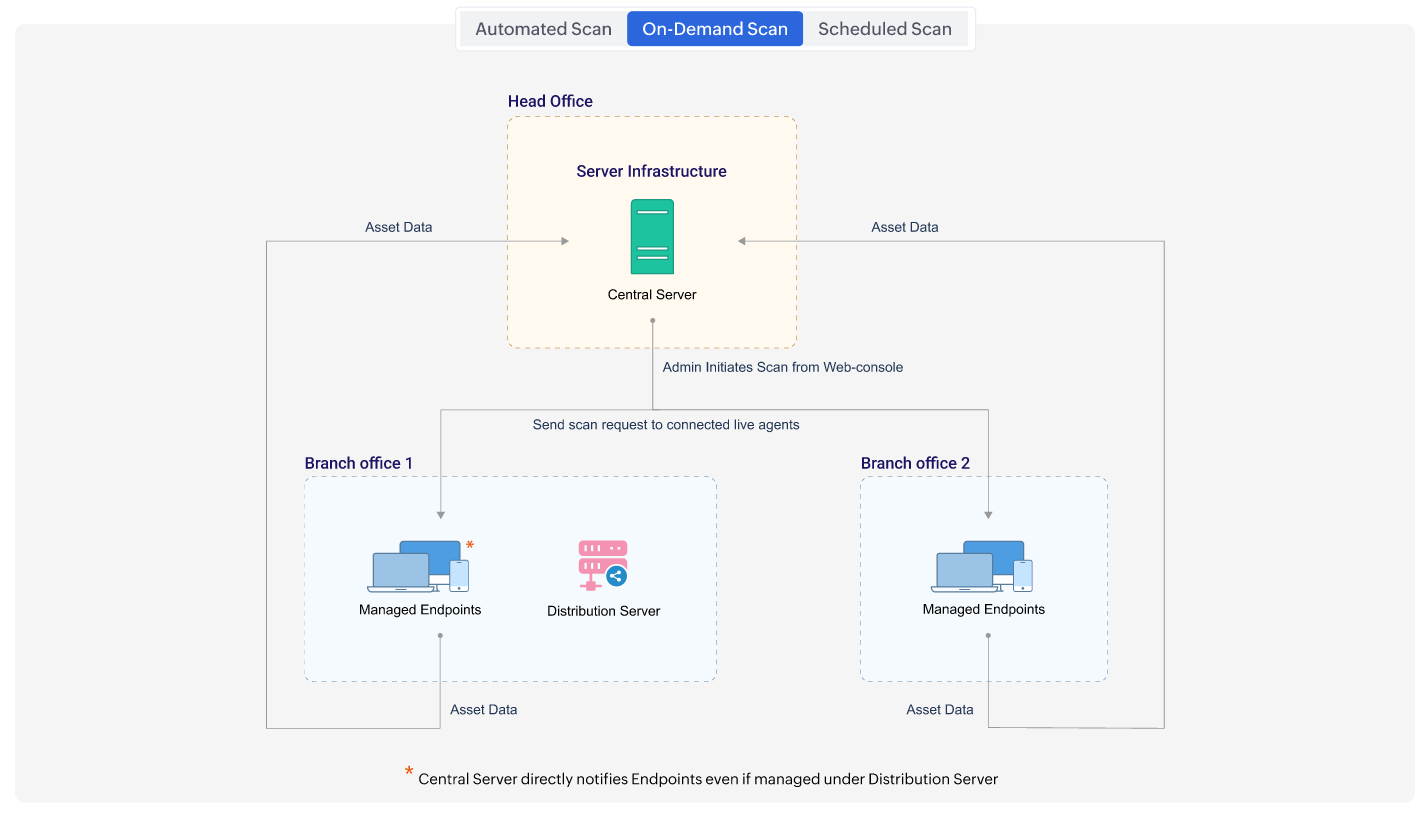
This scan is manually initiated by the Administrator from the Endpoint Central console. The Endpoint Central agent starts the inventory scan and posts the asset data to the Central server; the Central server updates the inventory details.
To initiate an On Demand Scan, in the Endpoint Central console navigate to Inventory > Actions/Settings > Scan Systems. To scan specific computers, select one or more computers from the list and click the Scan System button located in the top-left corner.
To collect asset data at regular intervals, configure the Schedule Scan to automatically retrieve asset information based on the schedule configured. You can set the scan frequency to daily, weekly or monthly based on your requirement. To learn more about Schedule Scan refer to this link
This scan will be automatically triggered when a user logs into an end-user machine. For the user login scan to take place, a schedule scan has to be configured by the Administrator.
This scan is manually triggered by the end user from the Agent Tray Icon.
When the Endpoint Central server encounters a failure while processing asset data received from Endpoint Central Agent, it automatically initiates an on-demand scan to re-collect the asset data. The agent then reposts the asset information to the Central server, which processes it and ensures the inventory database is accurately updated.
Here is a list of considerations that needs to be checked before initiating an inventory scan.
Note:The above mentioned procedure is applicable only for windows machines running on Windows 7 and above versions.


