ADSelfService Plus in action
How to set up MFA for macOS
When employees are required to manage multiple passwords, they often resort to reusing the same password across various applications or creating simple, easy-to-remember passwords that lack sufficient strength. This behavior significantly increases their vulnerability to attackers employing brute force or dictionary attacks to compromise accounts. ADSelfService Plus—a comprehensive identity security solution offering multi-factor authentication (MFA), single sign-on (SSO), and advanced password management capabilities—addresses this issue by enabling MFA for macOS logins.
MFA for macOS using ADSelfService Plus
Systems running macOS can be configured to authenticate users using multiple factors before granting them access. A user's Active Directory (AD) credentials serve as the first factor, while additional factors can include:
- Biometric authentication
- YubiKey authentication
- Google Authenticator
- Microsoft Authenticator
- Microsoft Entra ID MFA
- Push notification authentication
- Duo Security
- TOTP authentication
Find the complete list of supported authenticators here.
Even if attackers manage to get a user's password, they are unlikely to be able to authenticate themselves through the user's email or phone.
Configuring MFA for macOS
To enable MFA for macOS logins, administrators must deploy the login agent on each user's machine. Once deployed, users can authenticate securely and even reset their passwords directly from the Mac login screen.
Prerequisites
- Endpoint MFA: Your ADSelfService Plus license must include Endpoint MFA. Visit the store to purchase it.
- SSL must be enabled: Log in to the ADSelfService Plus web console with admin credentials. Navigate to Admin > Product Settings > Connection > Connection Settings. Select the ADSelfService Plus Port [https] option. Refer to this guide to learn how to apply a SSL certificate and enable HTTPS.
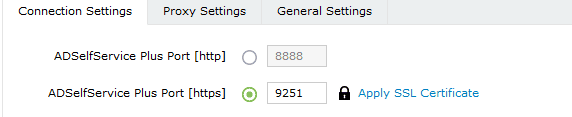
Fig. 1: Enabling HTTPS in ADSelfService Plus.
- Access URL must be set to HTTPS: Navigate to Admin > Product Settings > Connection > Connection Settings > Configure Access URL and set the Protocol option to HTTPS.
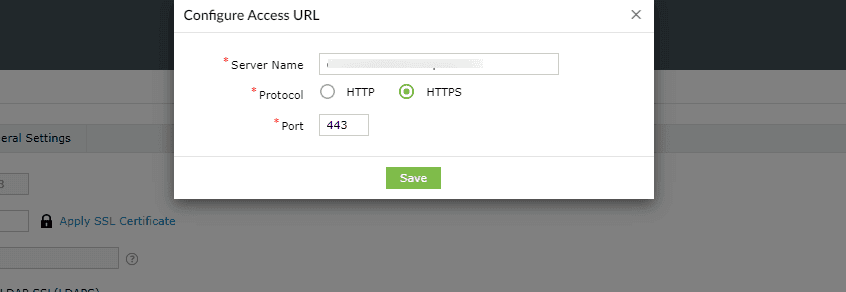
Fig. 2: Configuring the Access URL to use HTTPS in ADSelfService Plus.
Step 1: Install the ADSelfService Plus macOS login agent through the admin console.
- To install the login agent from the ADSelfService Plus admin console, go to Configuration > Administrative Tools > GINA/Mac/Linux (Ctrl+Alt+Del).
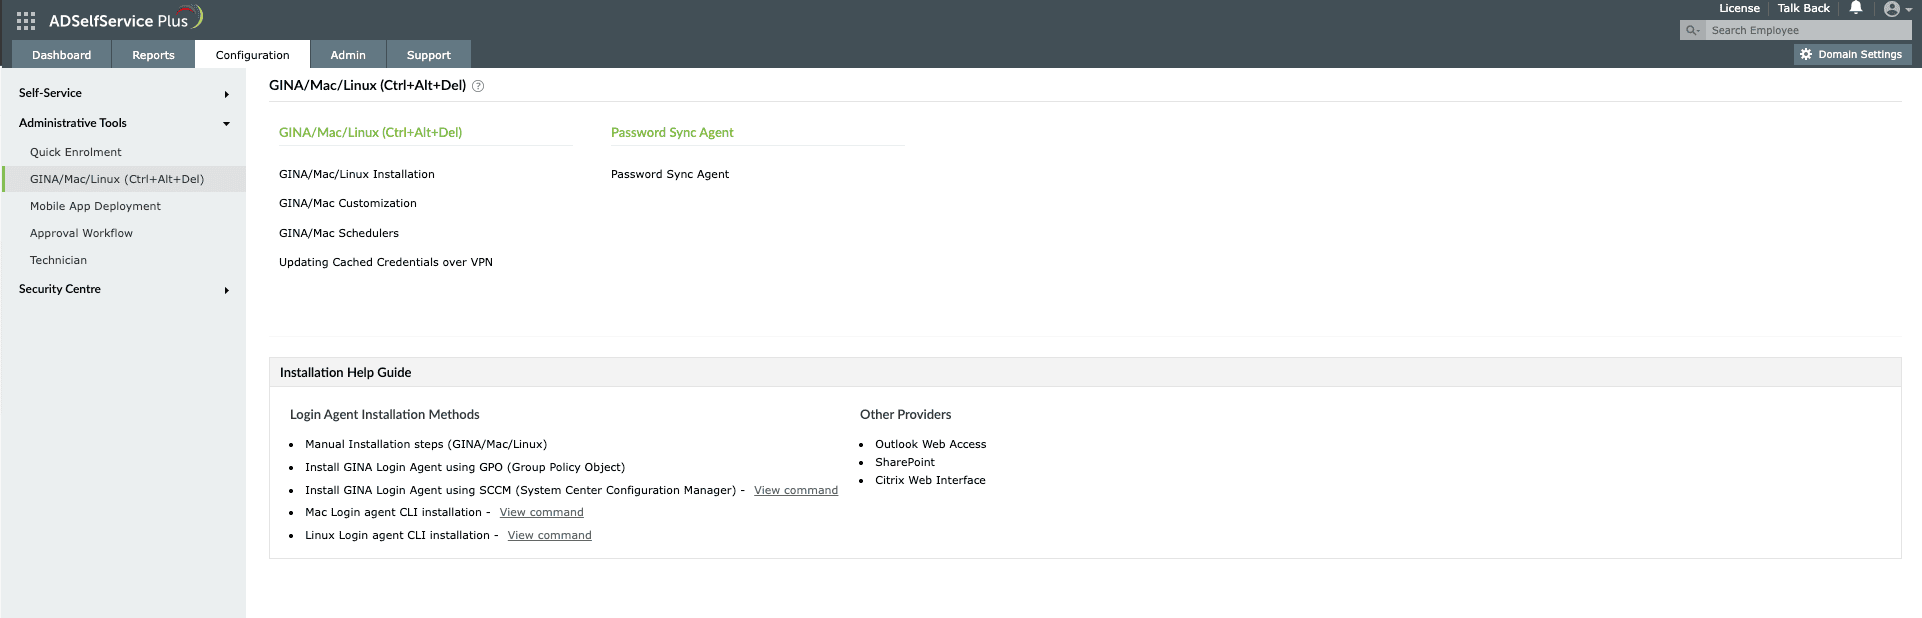
Fig. 3: Installing the macOS login agent from the ADSelfService Plus admin console.
- Click GINA/Mac/Linux Installation, then in the New Installation section, choose the required domain from the drop-down.
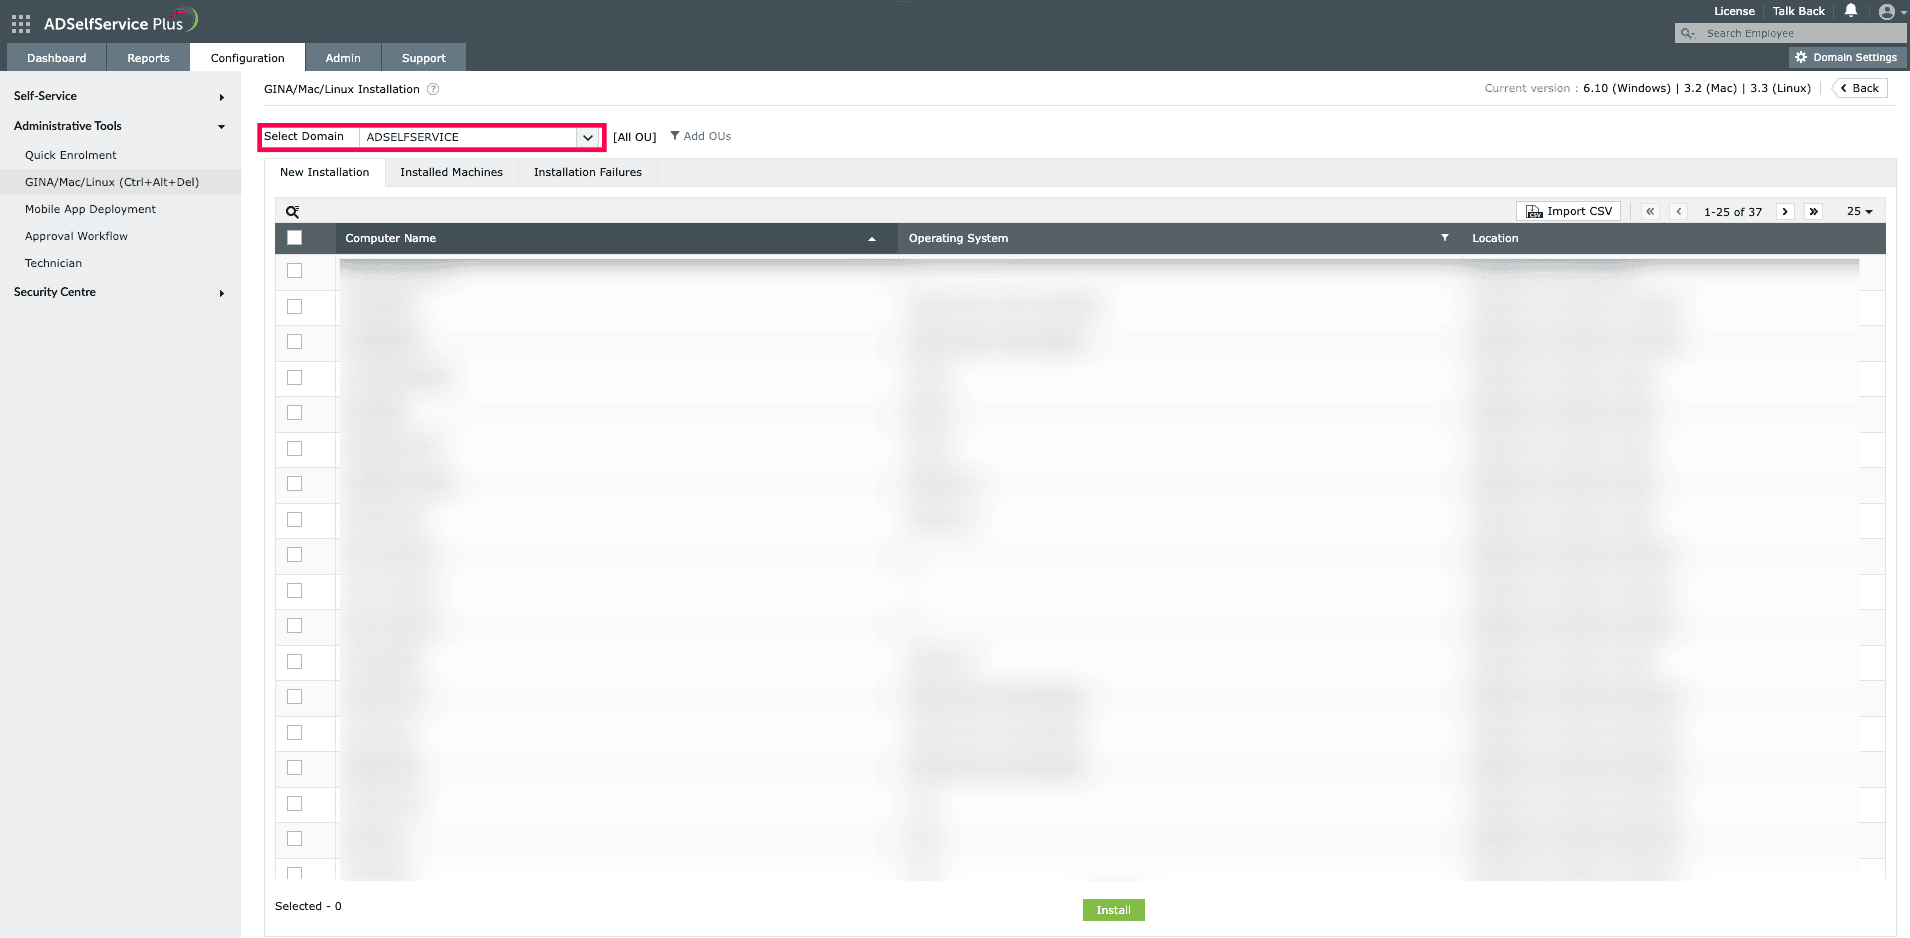
Fig. 4: GINA/Mac/Linux Installation page in ADSelfService Plus.
- You can also choose the specific organizational units for which the login agent has to be installed. To do this, click Add OUs and select the required OUs.
- Choose the computers for which the login agent needs to be pushed, then click Install.
Step 2: Enable authenticators
- Go to Configuration > Self-Service > Multi-factor Authentication > Authenticators Setup.
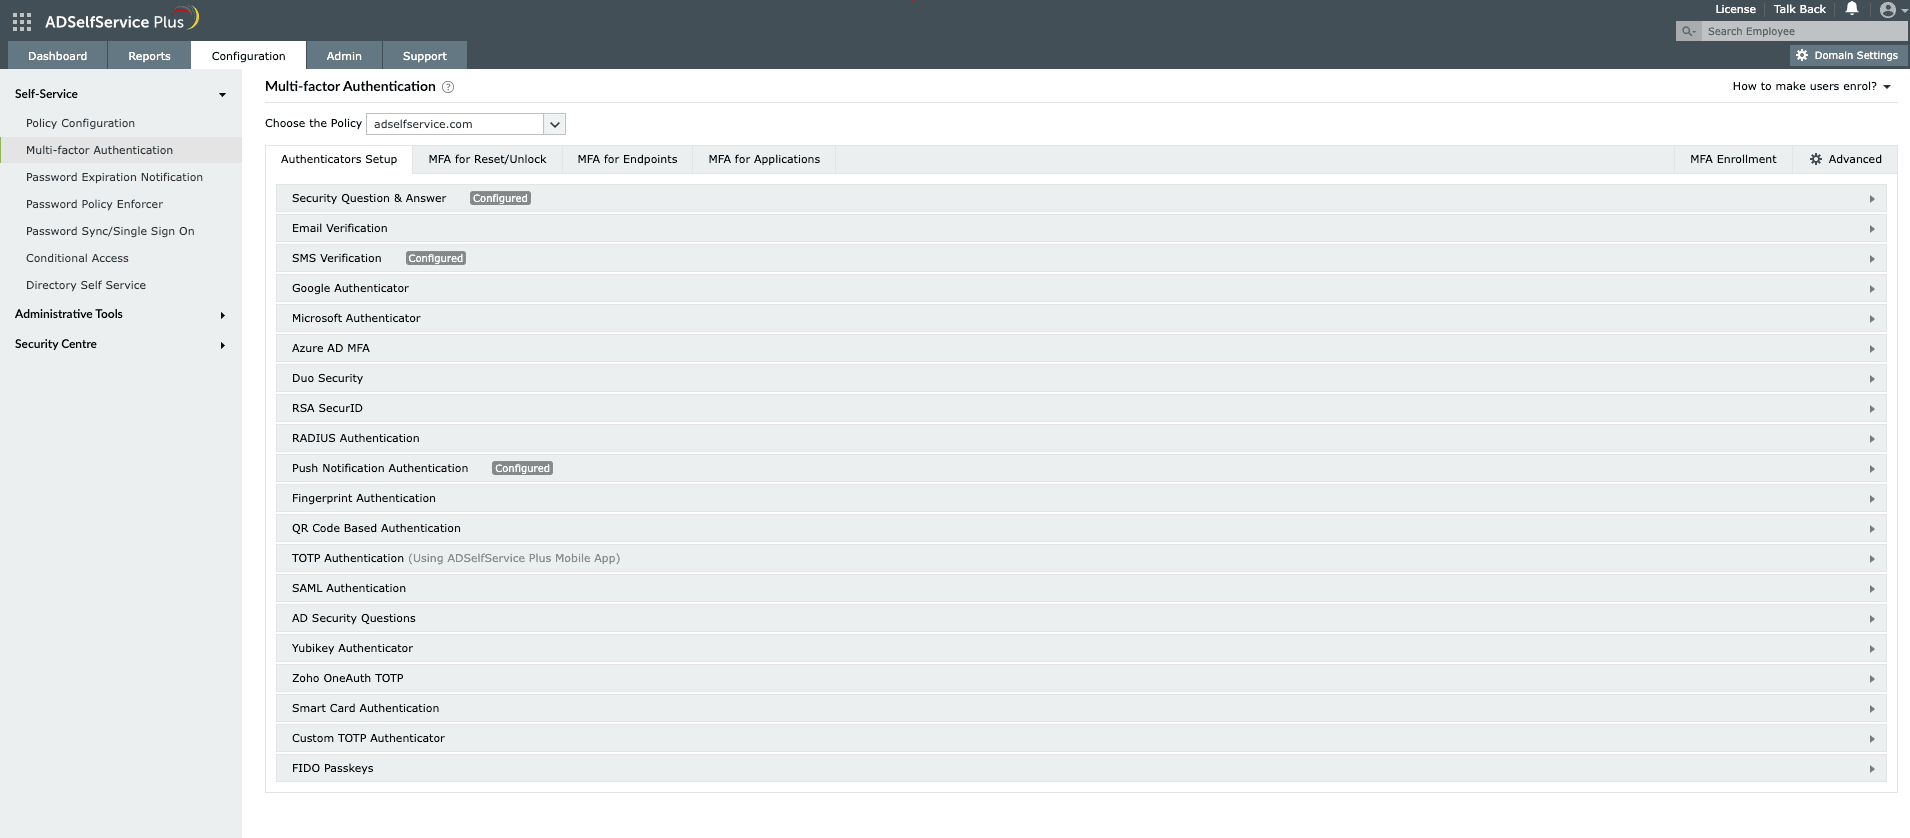
Fig. 5: Enabling authenticators in ADSelfService Plus.
- Select the desired authenticator that you want to enable.
- Each authenticator comes with its own group of settings. Enter the appropriate information in each field.
- For authenticators like Google, Microsoft, push notification, fingerprint, QR-based, and TOTP, just click Enable
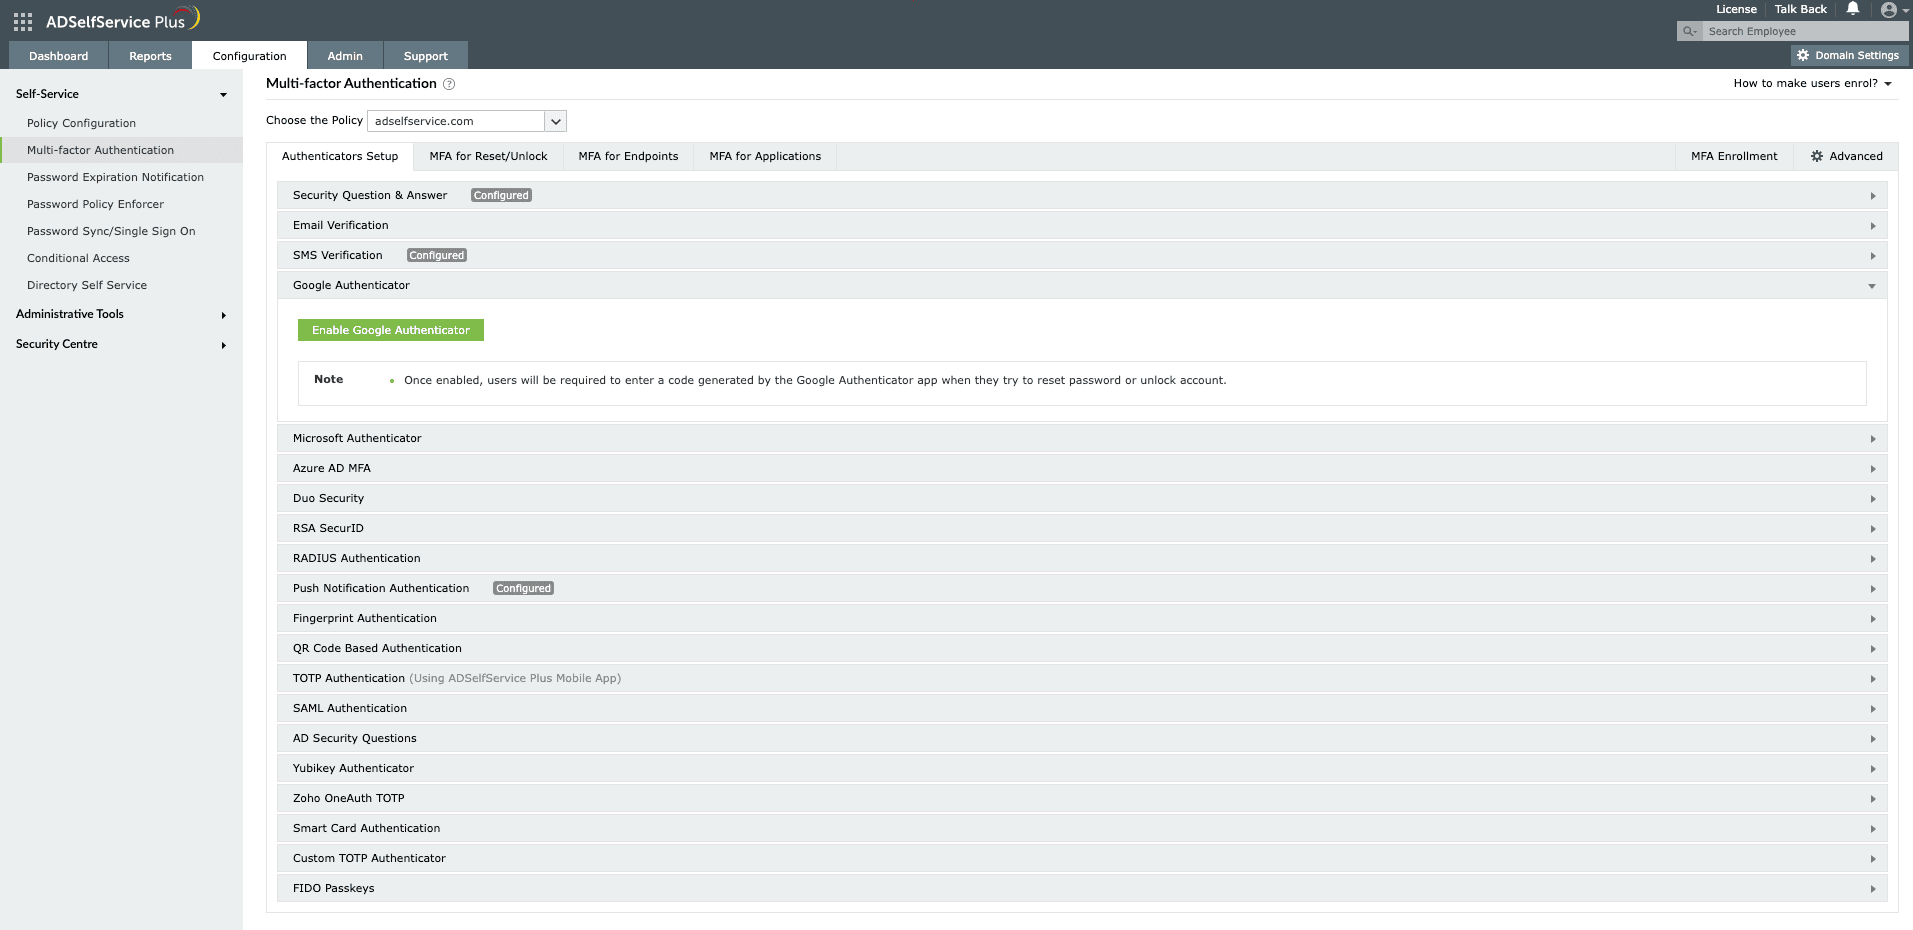
Fig. 6: Enabling Google Authenticator in ADSelfService Plus.
Step 3: Enable MFA for macOS logins
- Go to Configuration > Self-Service > Multi-factor Authentication > MFA for Endpoints.
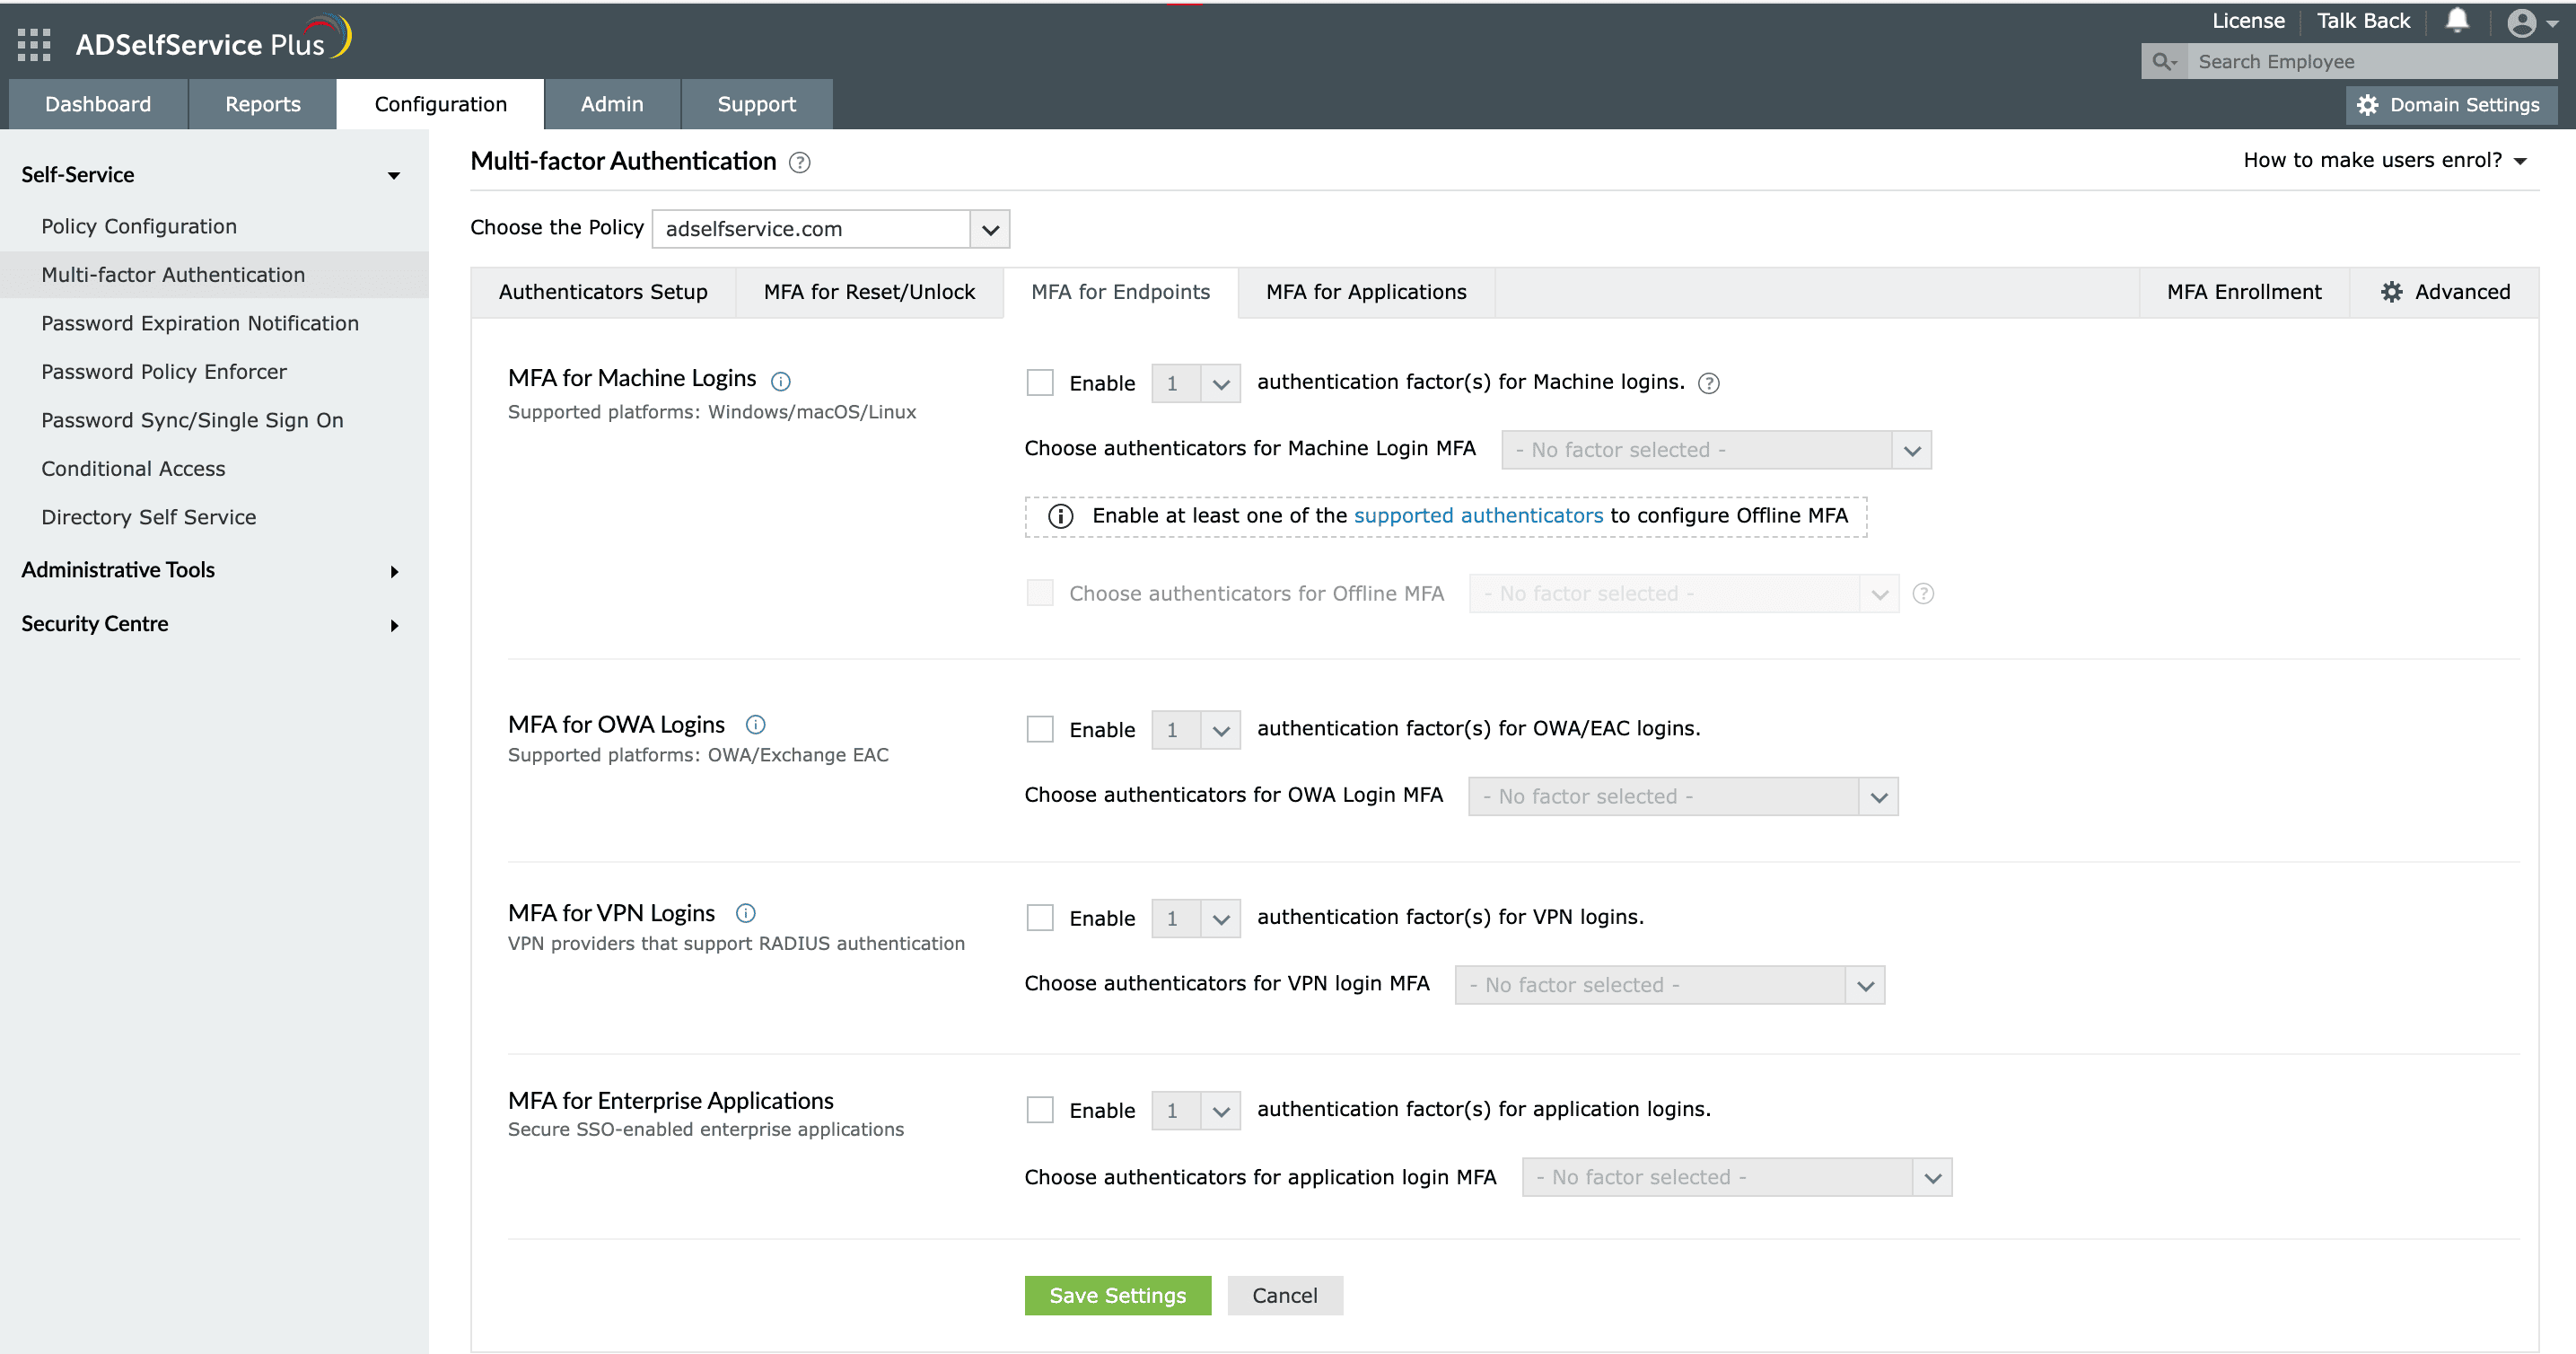
Fig. 7: Configuring authenticators for macOS login in ADSelfService Plus.
- Select a policy from the Choose the Policy drop-down. This will determine which authentication methods are enabled for which sets of users.
- In the MFA for Machine Login section, check the Enable __ authentication factor(s) for machine logins box, select the number of authentication methods, and specify which ones you would like to use from the drop-down.
- Click Save Settings.
Your users accounts will now have better security, thanks to ADSelfService Plus' endpoint MFA.
Some useful features of ADSelfServicePlus
-
1Single Sign-On (SSO)
-
2Password Policy Enforcer
-
3Password expiration notification
-
4Directory self-update
Single Sign-On (SSO):
ADSelfService Plus provides Active Directory-based authentication for SAML-enabled enterprise apps to give users access to multiple enterprise applications via SSO.
Password Policy Enforcer:
ADSelfService Plus has numerous options to enforce conditions such as creating passwords with a preset number of unique characters and restricting the use of palindromes, dictionary words, or words with certain patterns.
Password expiration notification:
ADSelf Service Plus keeps track of users' password expiration dates in Active Directory and sends email notifications to users whose passwords are about to expire.
Directory self-update:
Using ADSelfService Plus, admins can set up a layout with various fields for just the information that they need from users. The users can self-update their Active Directory information, saving valuable help desk time.
Tighten Windows/macOS/Linux logon security with multi-factor authentication.
Get Your Free Trial Fully functional 30-day trial