Customer Portal
MSSPs can create and manage customer portals, which serves as an option for their customers to view their information securely across all features in their customer account.
Adding an Admin Portal User
The portal admin user is created using the customer’s email ID when adding a new customer.
- Navigate to Settings -> Configurations -> General -> Manage Customers.
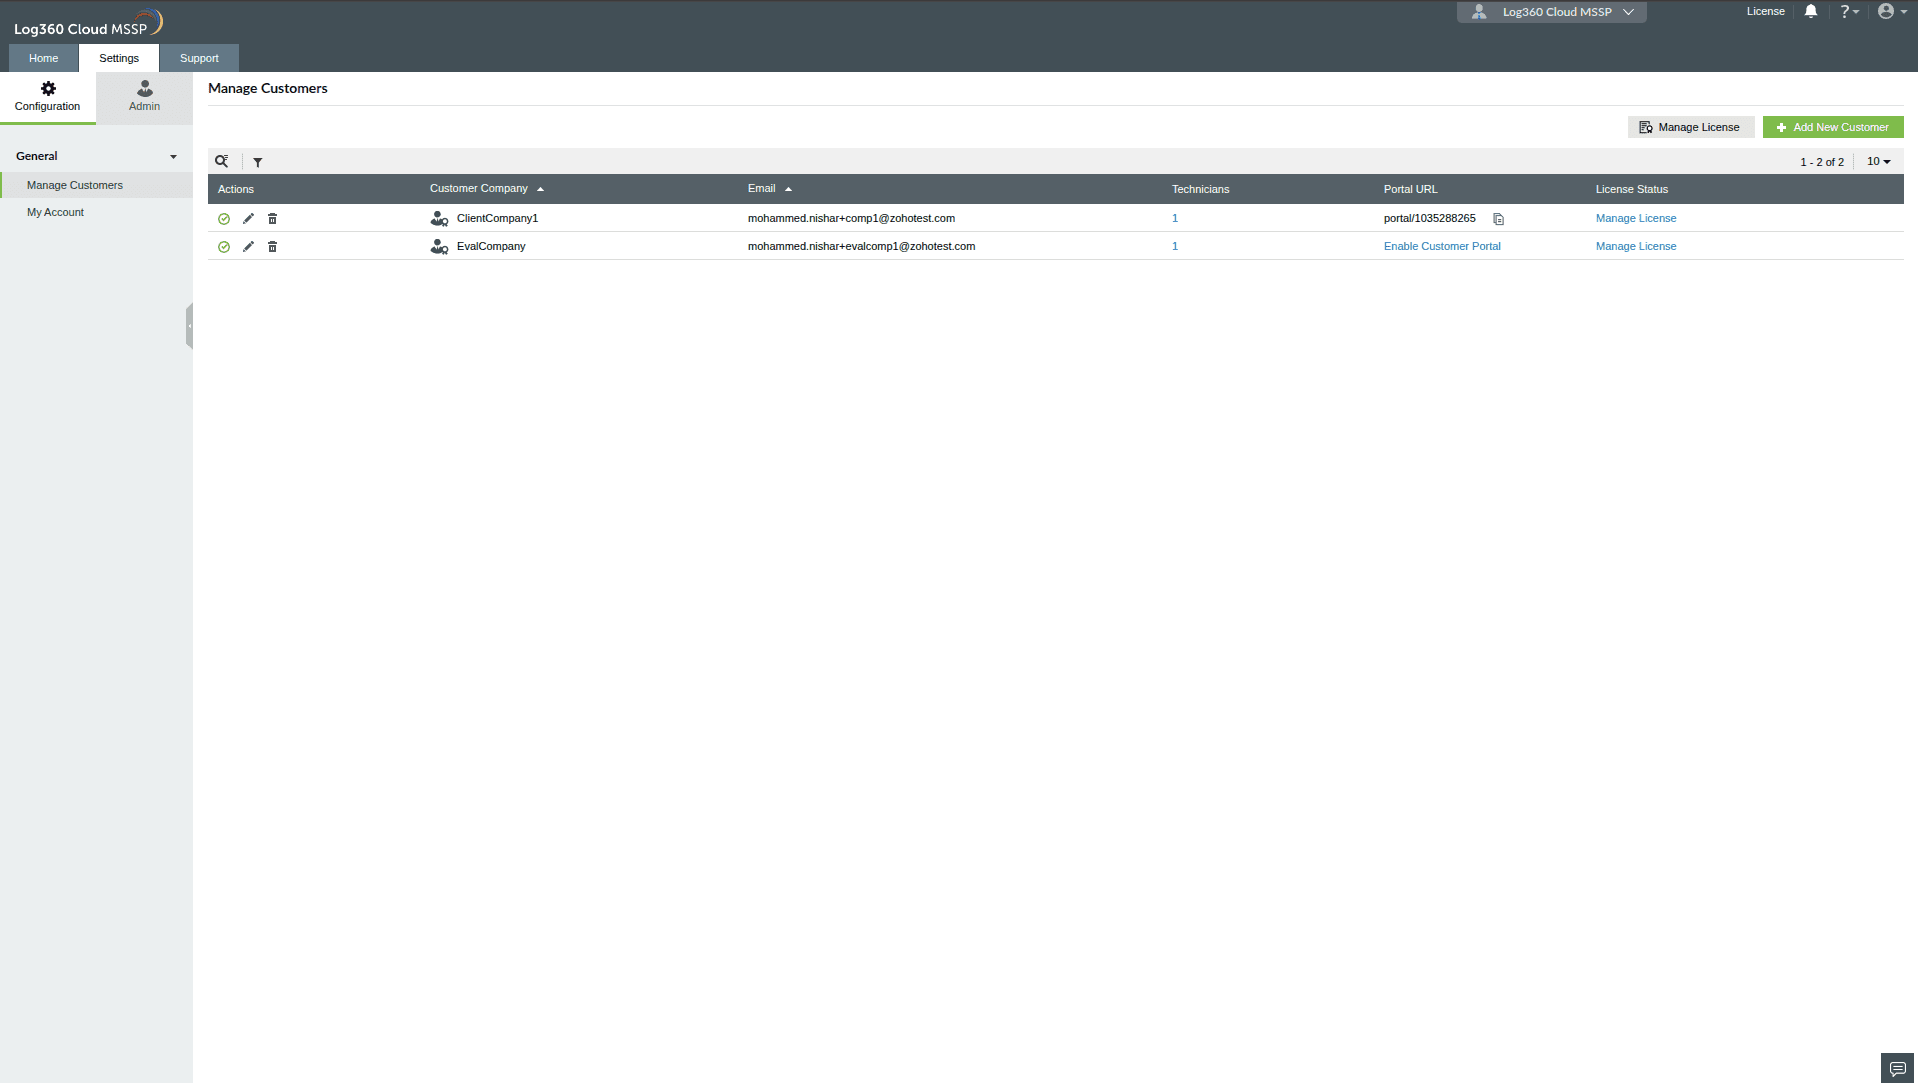
- Click the Add Customer button in the top-right corner.

- Fill in the required customer information.
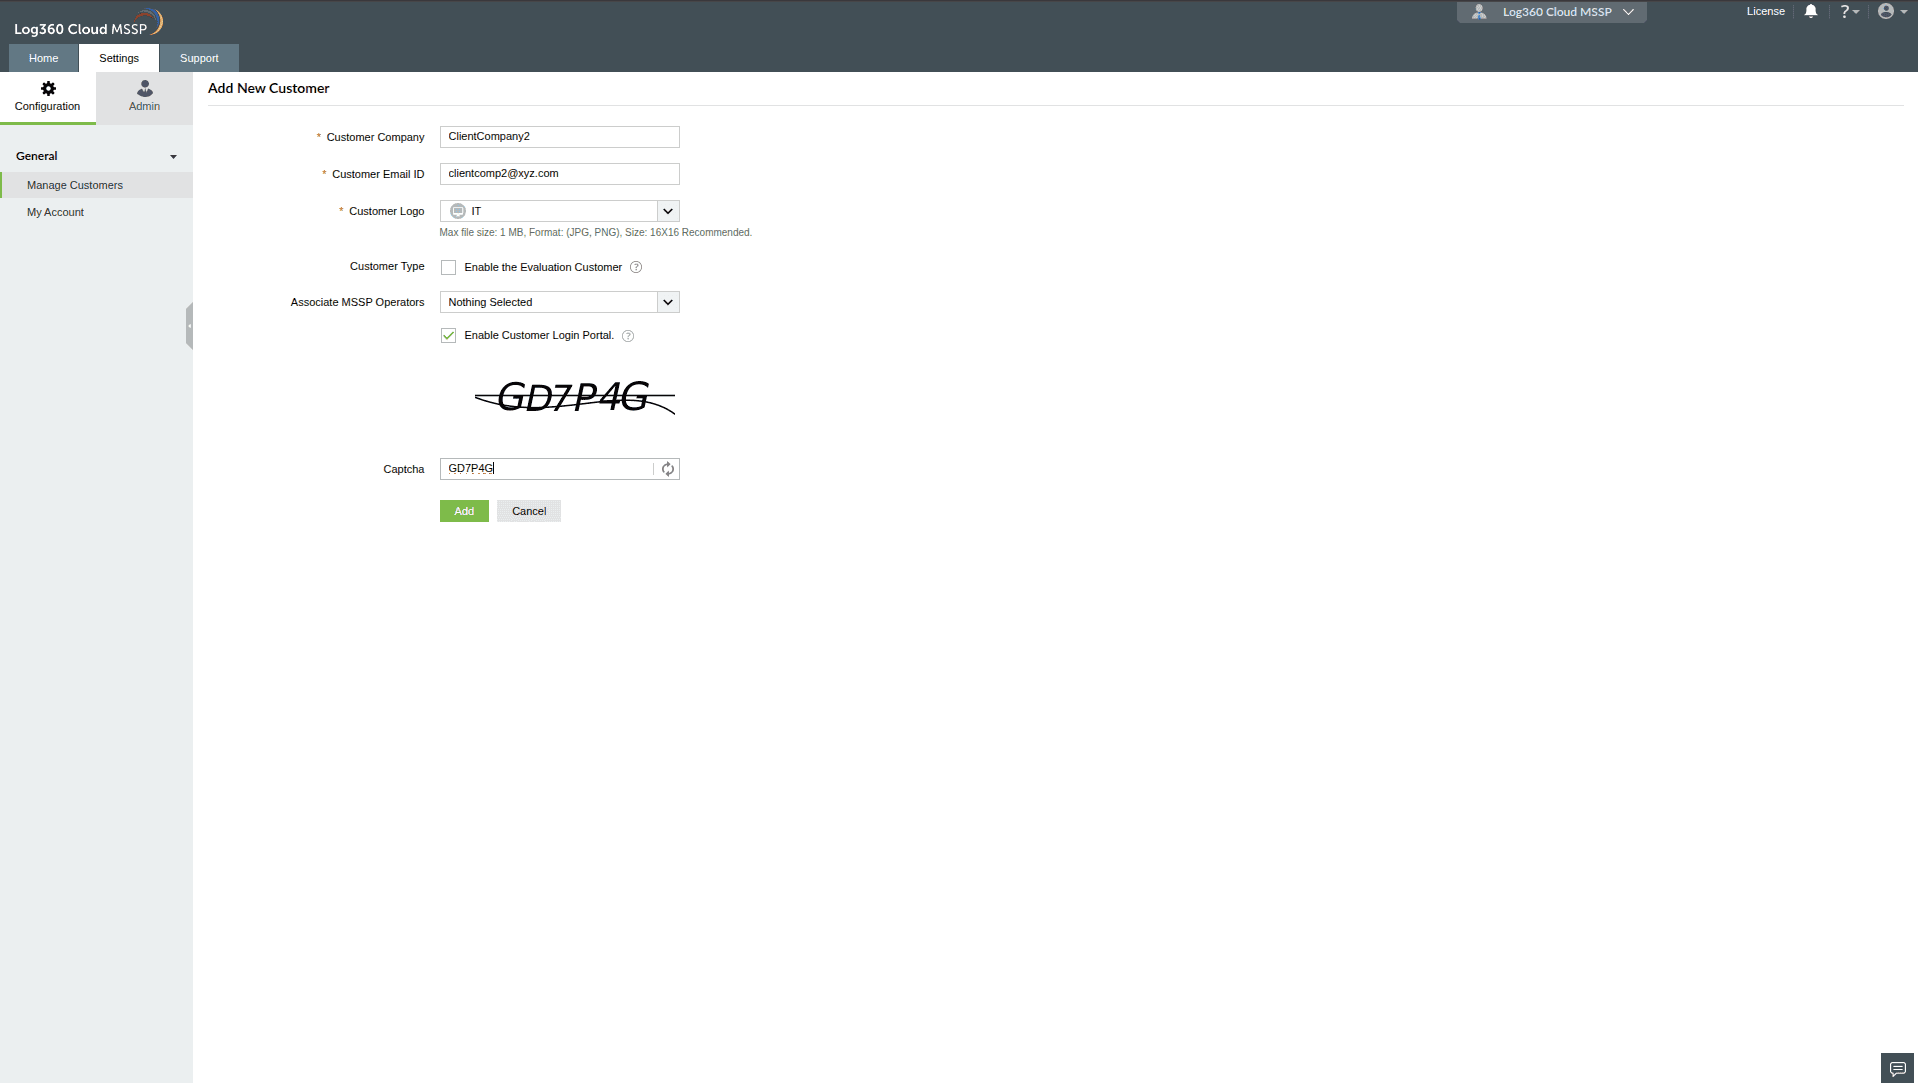
- Check the Enable Customer Login Portal box if you want to create a portal for this customer.
- Click Add to create the customer account with the portal.
- A customer portal will be created with the provided customer email ID as the login credential.
- An invitation email will be sent to the portal admin user for confirmation.
Note: The portal can be accessed after the user confirms the invitation. This user will have admin privileges to add other users. Learn more about portal user management
here.
Adding Other Portal Users
Both MSSPs and portal admins can add additional portal users. Learn more about this in the portal user management section.
Enabling or Disabling a customer Portal
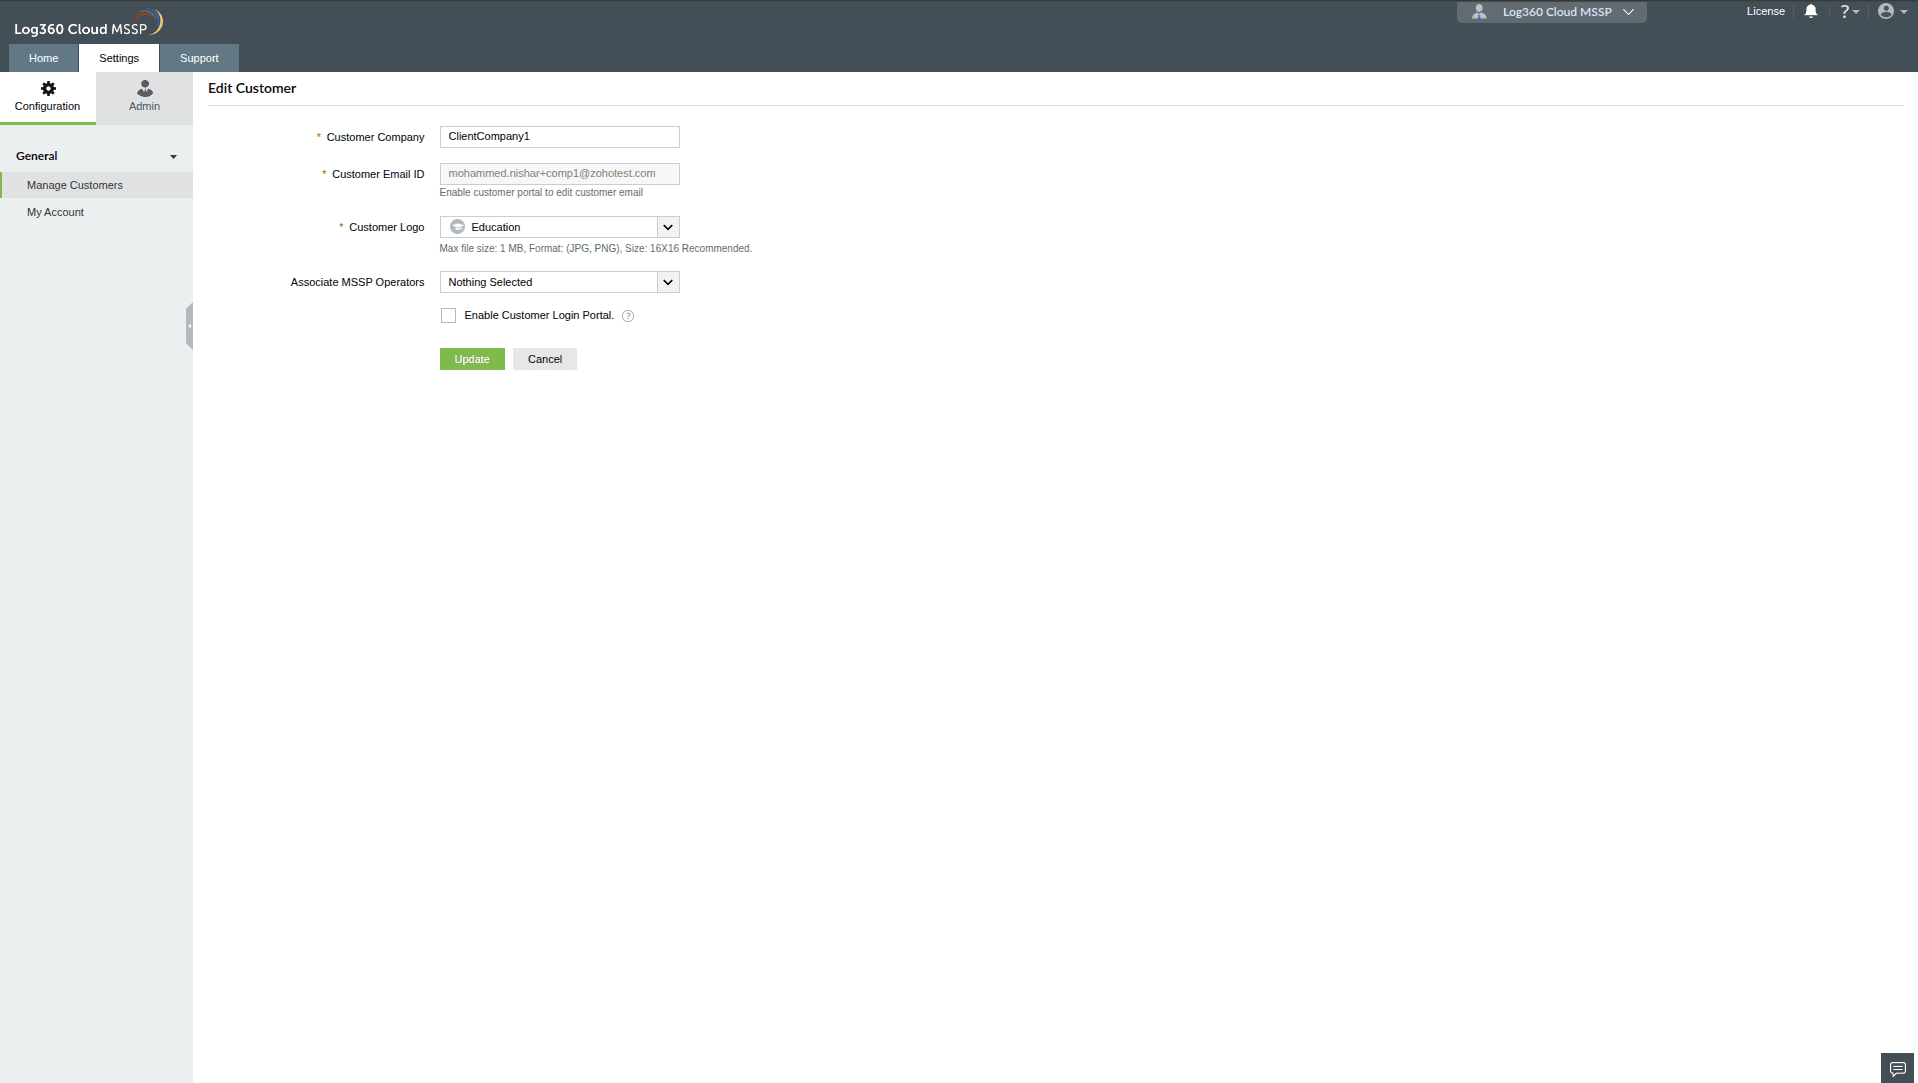
- Navigate to Settings -> Configurations -> General -> Manage Customers.

- Click the Edit icon for the relevant customer.

- In the customer edit page, check or uncheck the Enable Customer Portal box to enable or disable the portal as needed.

- Click Update to apply the changes.
Alternatively, you can enable a portal by clicking the Enable Customer Portal link for the specific customer in the Manage customers table.

Note:
- If the customer portal hasn’t been created yet, enabling it will automatically create a new portal.
- If the customer is disabled, the customer portal will also be disabled.
Changing the Admin User
To change the portal admin user:
- Navigate to Settings -> Configurations -> General -> Manage Customers.

- Click the Edit icon in the Actions column for the relevant customer.

- In the edit customer page, update the Customer Email ID.
- Click Update.
- The new admin user will receive an invitation to sign in to the portal.
- The previous admin user will lose admin privileges and become a regular portal user.
Note: The portal admin email ID cannot be changed if the portal is disabled.
Accessing the Customer Portal
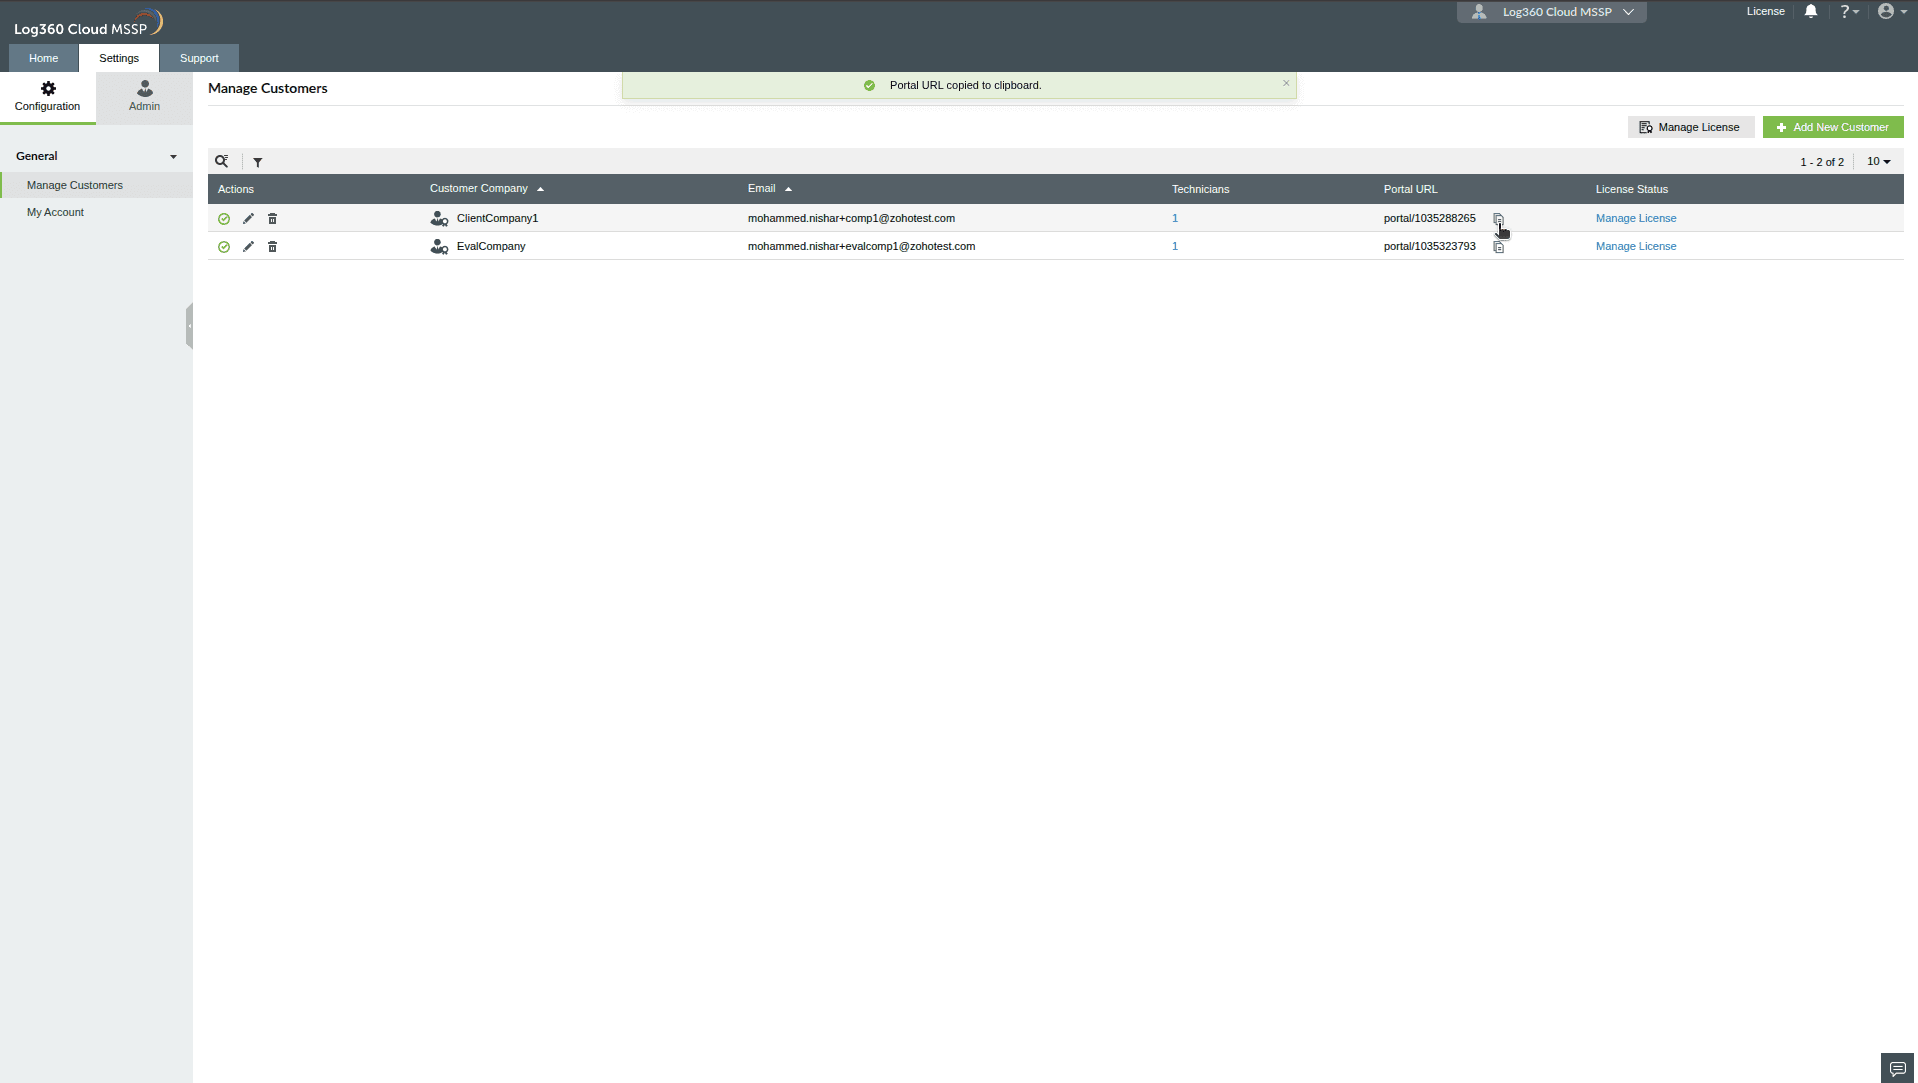
- Navigate to Settings -> Configurations -> General -> Manage Customers.
- Locate the Portal URL for the customer.

- Click the copy icon next to the URL to copy it.
- The portal can then be accessed using the copied URL.
Note: A welcome email with the Portal URL will be sent to all portal users once they accept the invitation.