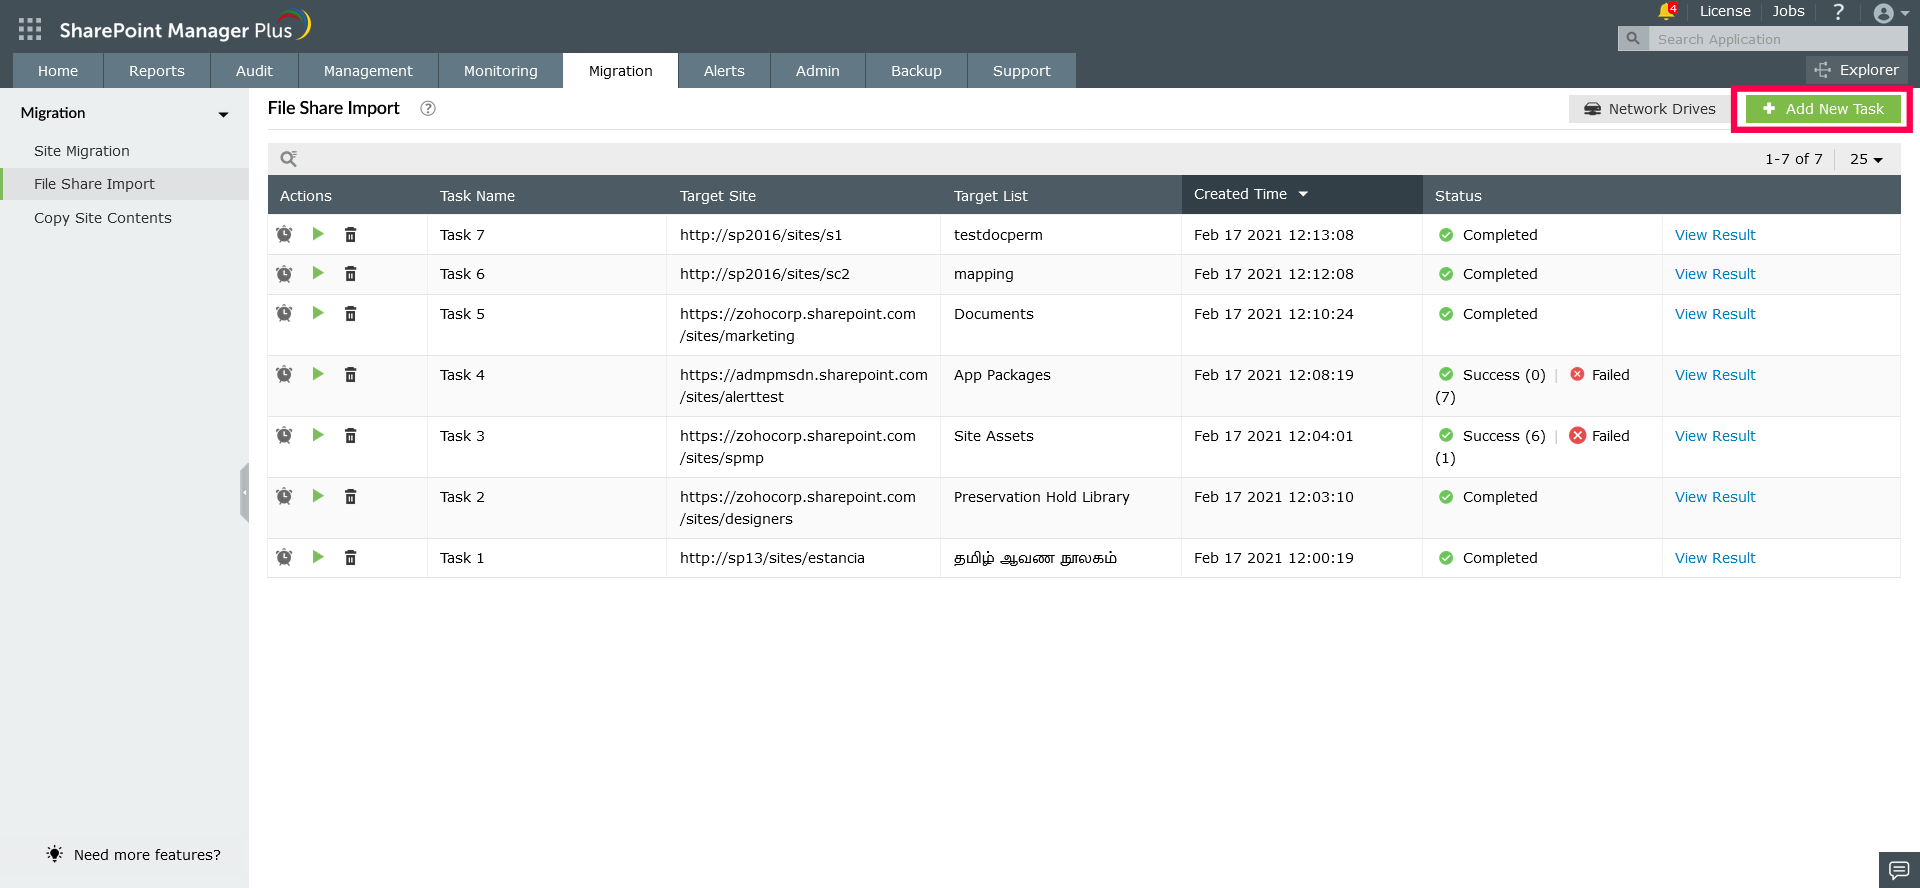
File Share Import
Import files from your file system / network drives to SharePoint or Office 365.
- To import files, navigate to Migration → File Share Import. Click on Add New Task button to add new task.
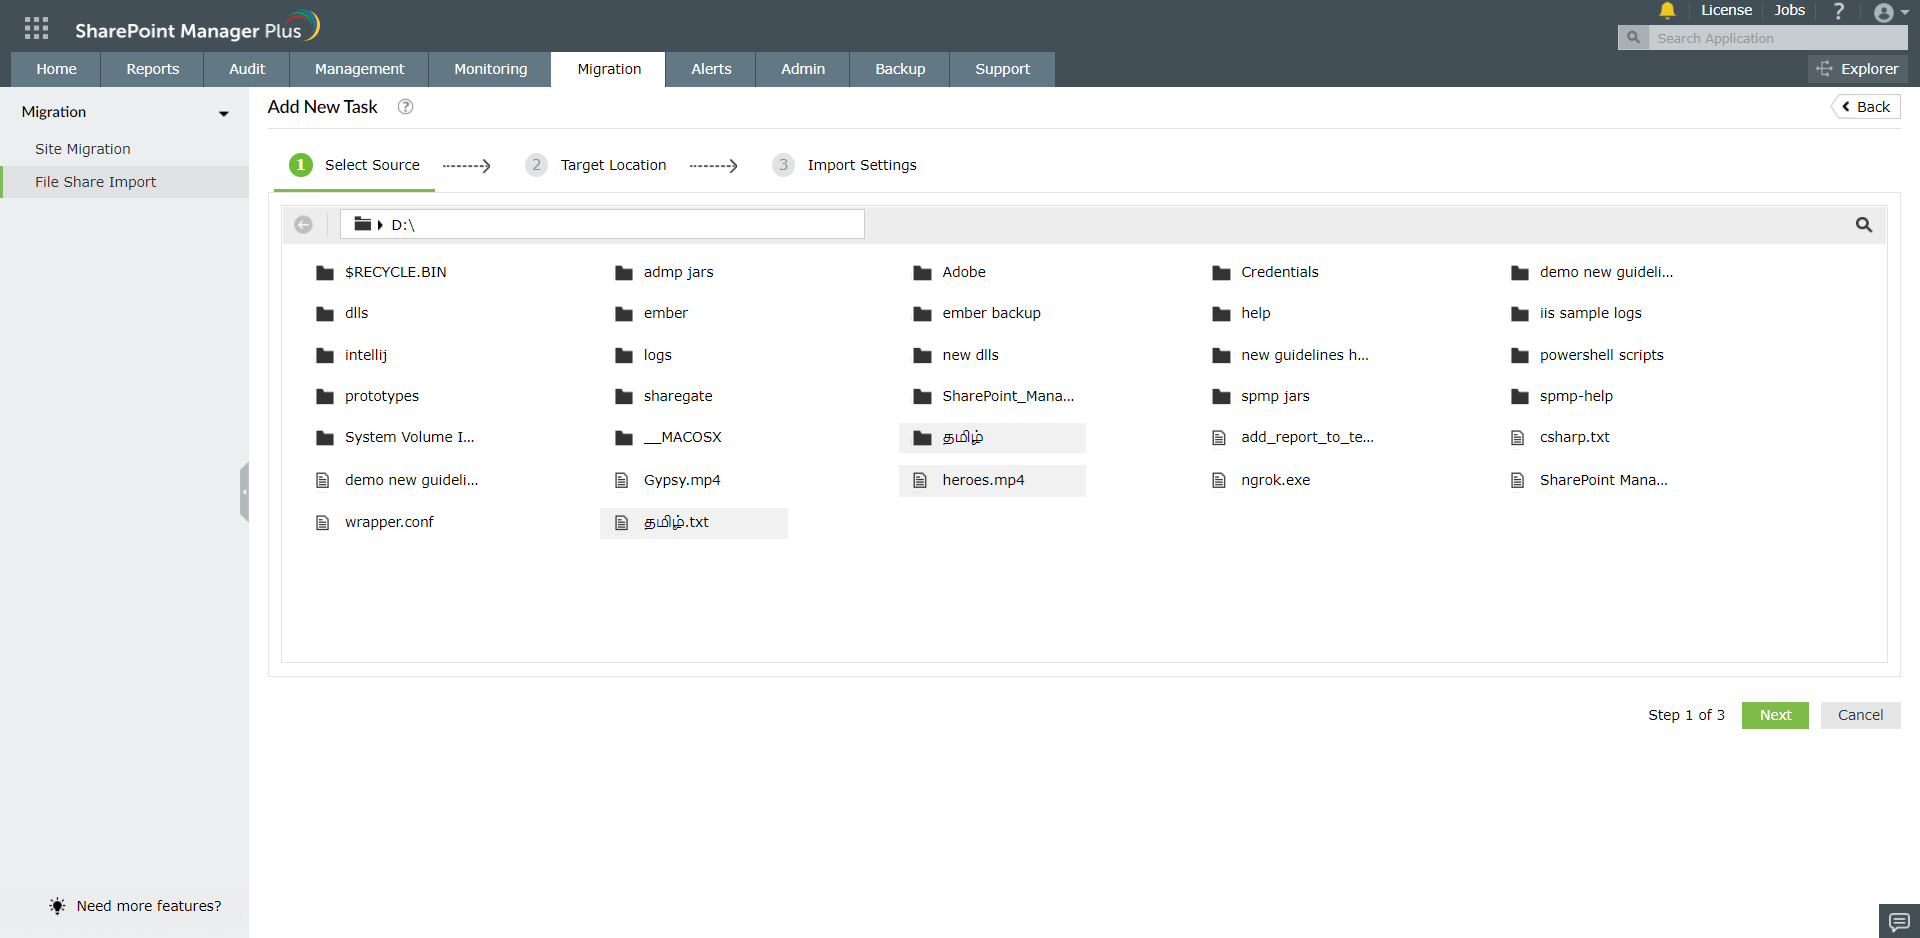
- In the Add New Task page, navigate to the source location and select the required source files to import and click Next.
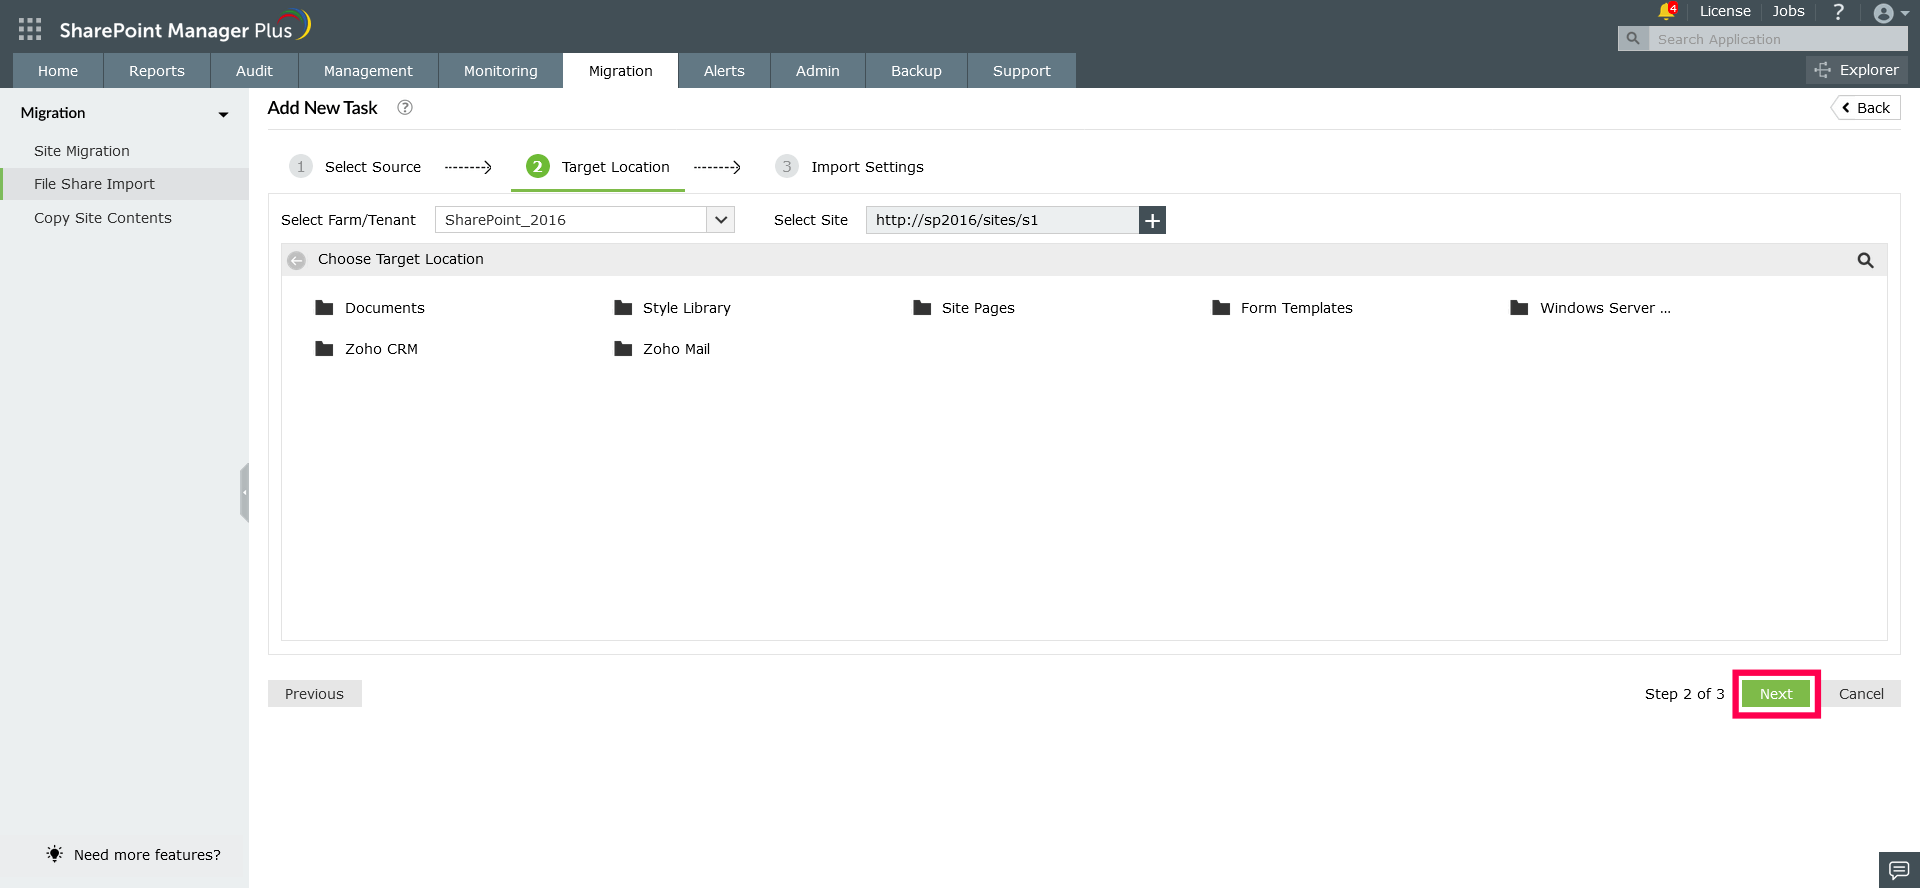
- Choose the target site by clicking + button or Click here link and select the target site from the listed sites in the popup.
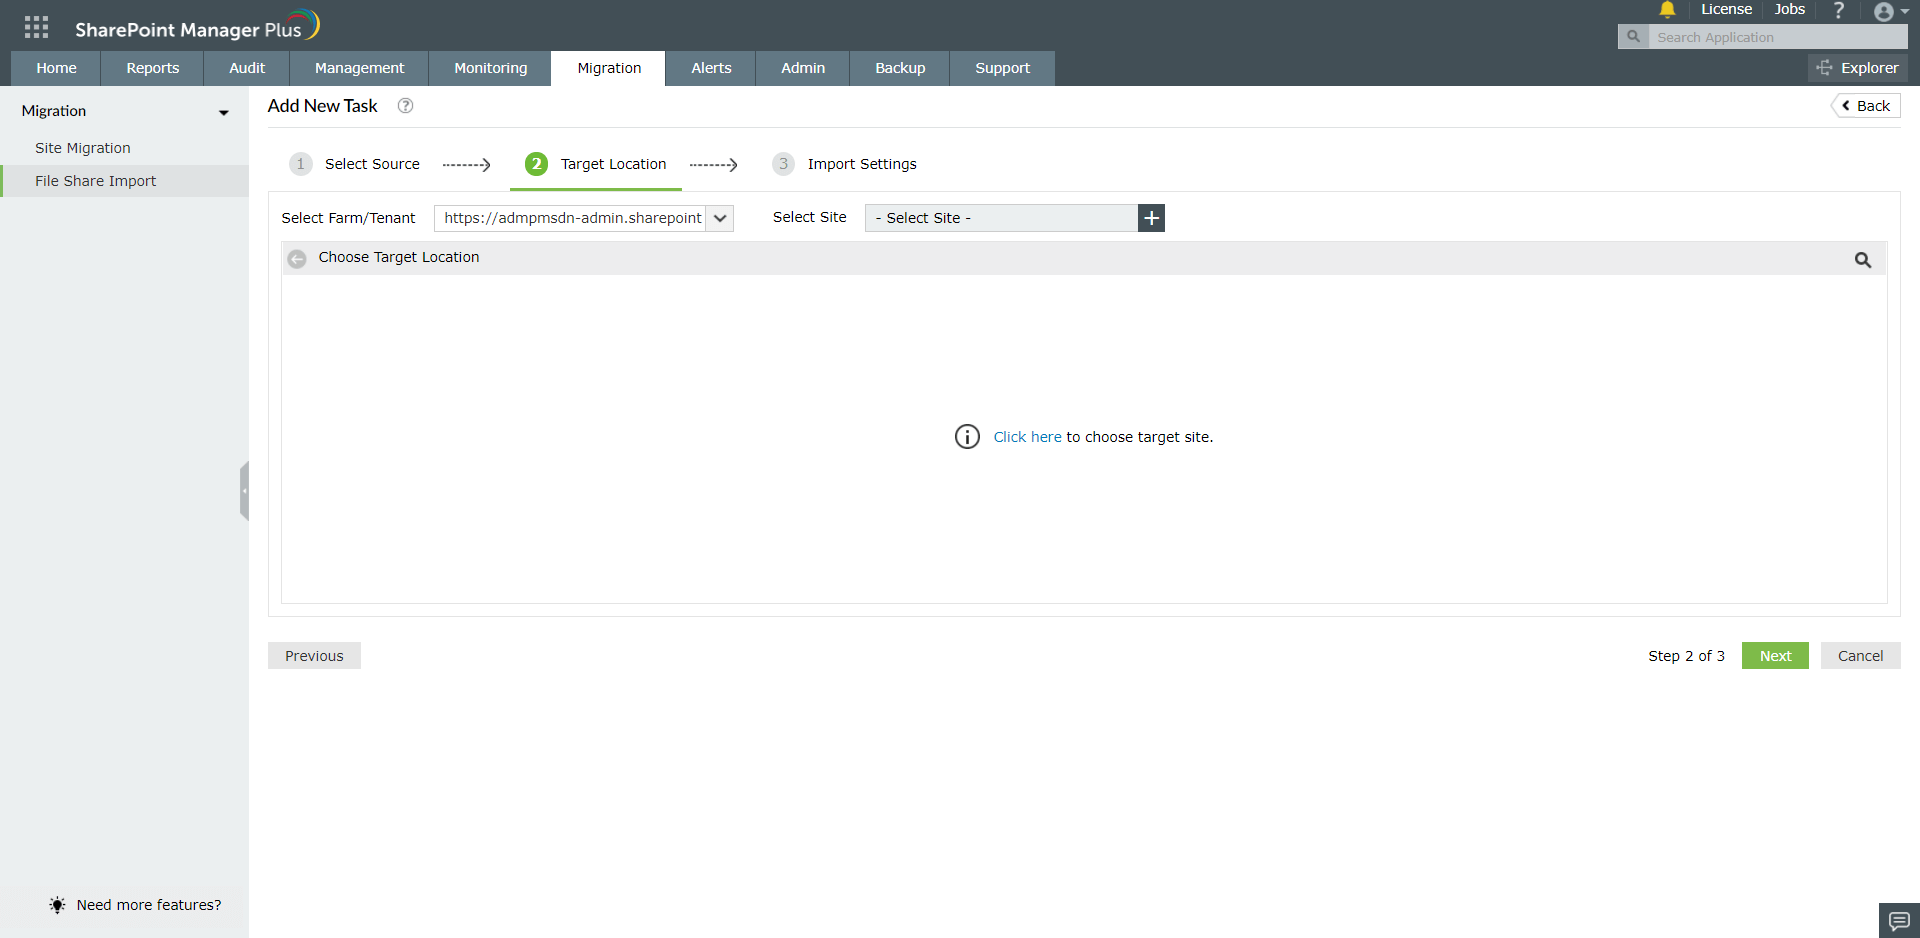

- Navigate to the target location and select the location. Click Next.
- Enter the task name and select the required filters. To start the task click Apply
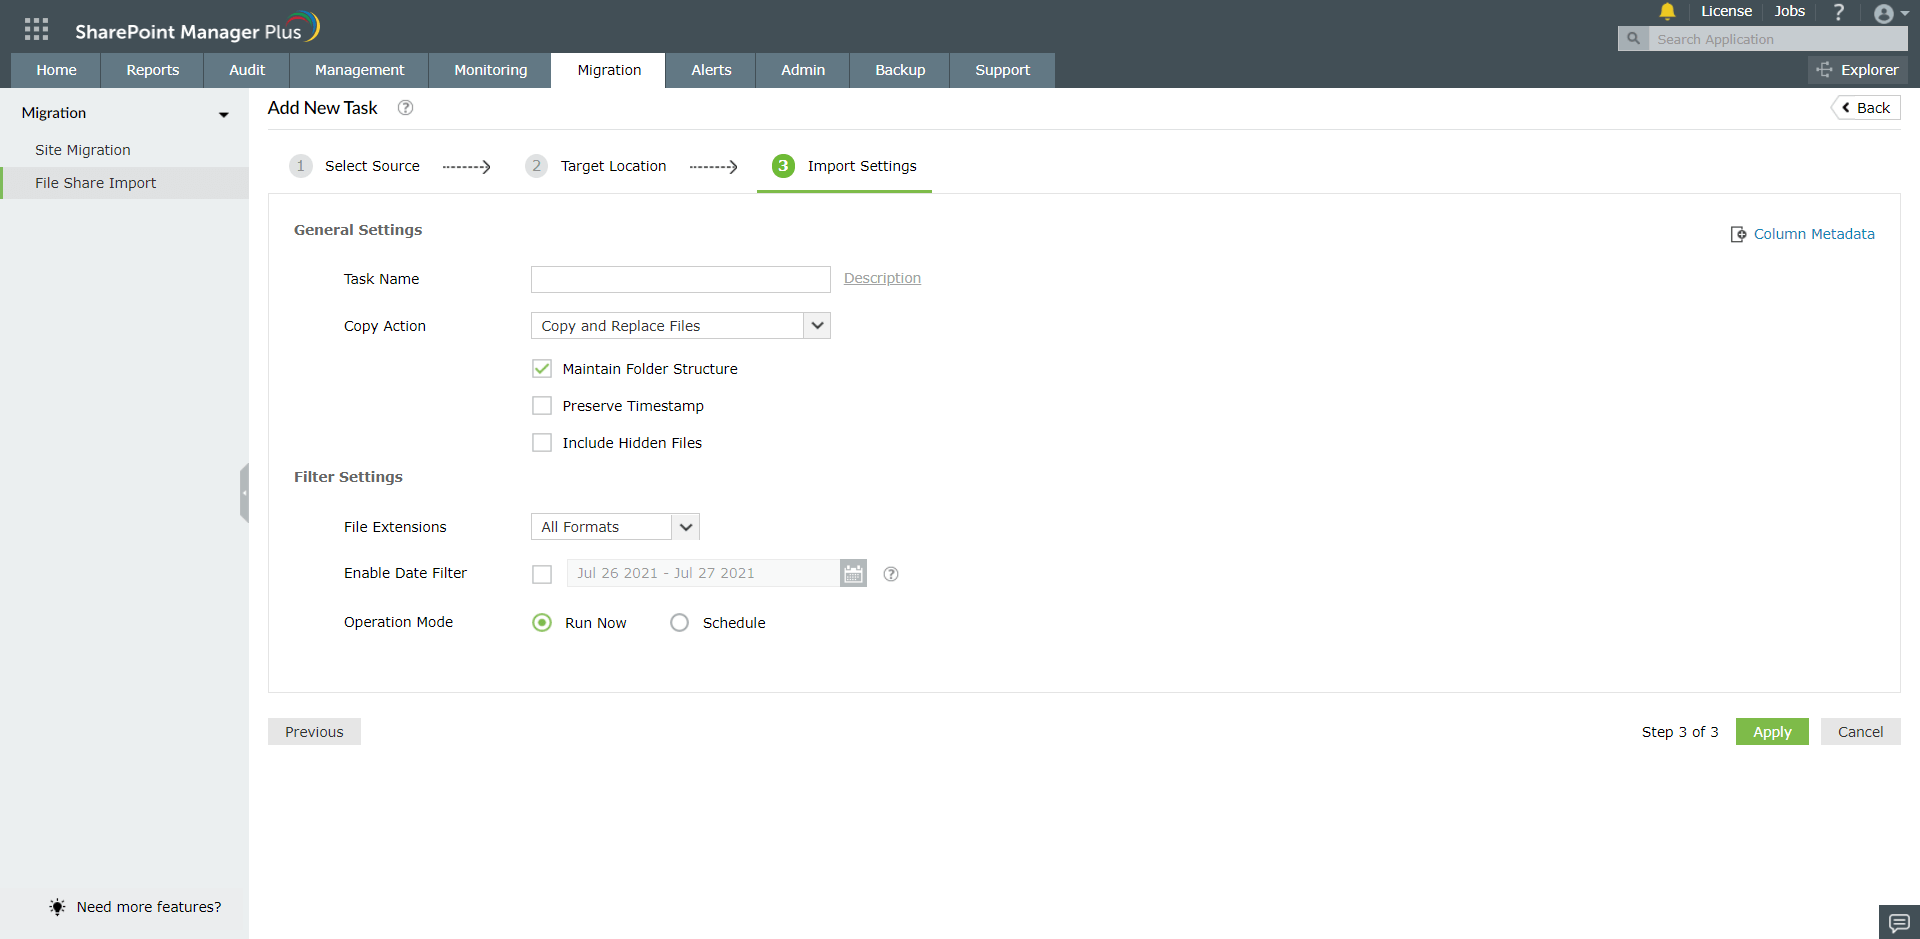
General Settings
- Copy Action - There are 4 types of actions available in File Share Import.
- Copy and Replace Files - If the same file name exists at the target location, then it is replaced with the copied file.
- Skip If File Exists - If the same file name exists at the target location, the new file is not copied.
- Keep Both Files - If the same file name exists at the target location, then the new file is imported with a different name. For example, Document - Copy(1).pdf
- Incremental - During the first time it replaces all the files at the target location. From the next time, it copies only the files which were modified at the source location.
- Maintain Folder Structure - Copy the source files to the target location without changing folder order. If this is not selected, then copy all the files into the same location without maintaining the folder hierarchy.
- Preserve Timestamp - To copy the created and modified time of the source files.
- Include Hidden Files - To include hidden files while importing.
Filter Settings
- Files Extensions - Either include or exclude file which contains given extensions.
- Enable Date Filter - To import files which contain modified/created time within the given date range.
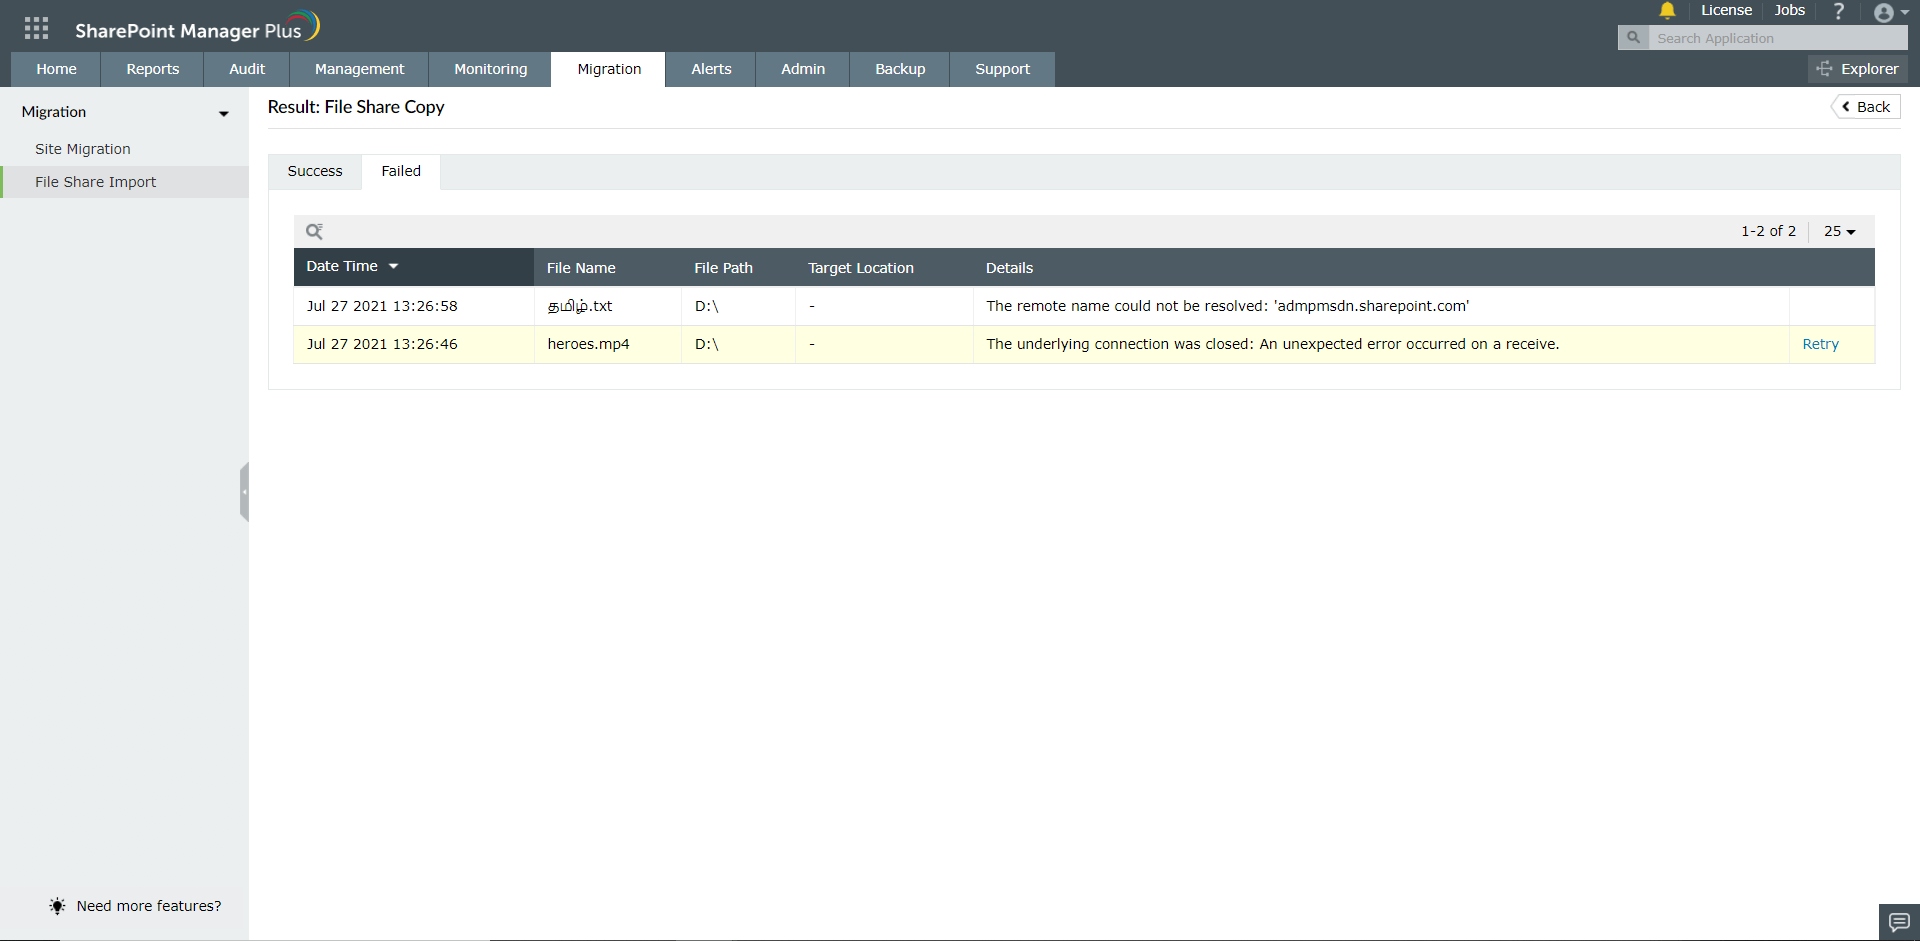
- The task will add under File Share Import page. You can see the result once the task is completed. Find the View Result link by hovering the cursor over the task row. Click View Result to see the results.

- If any file has failed to import, click Retry to try again.
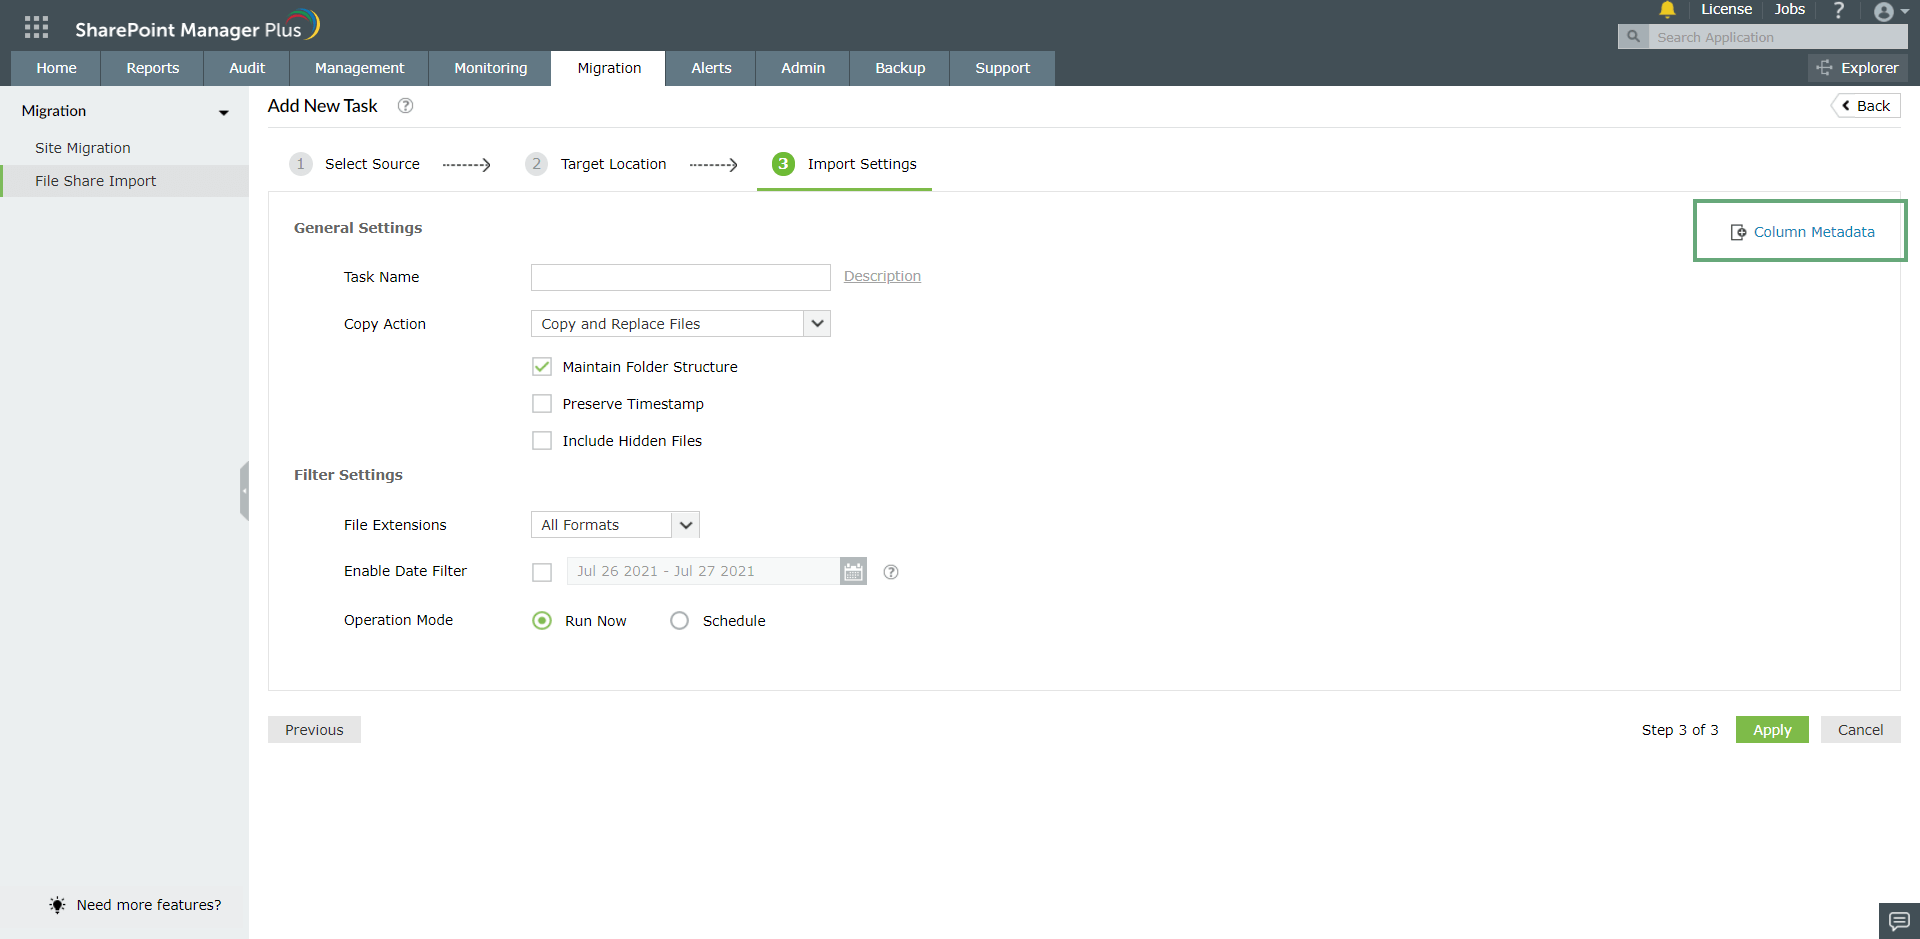
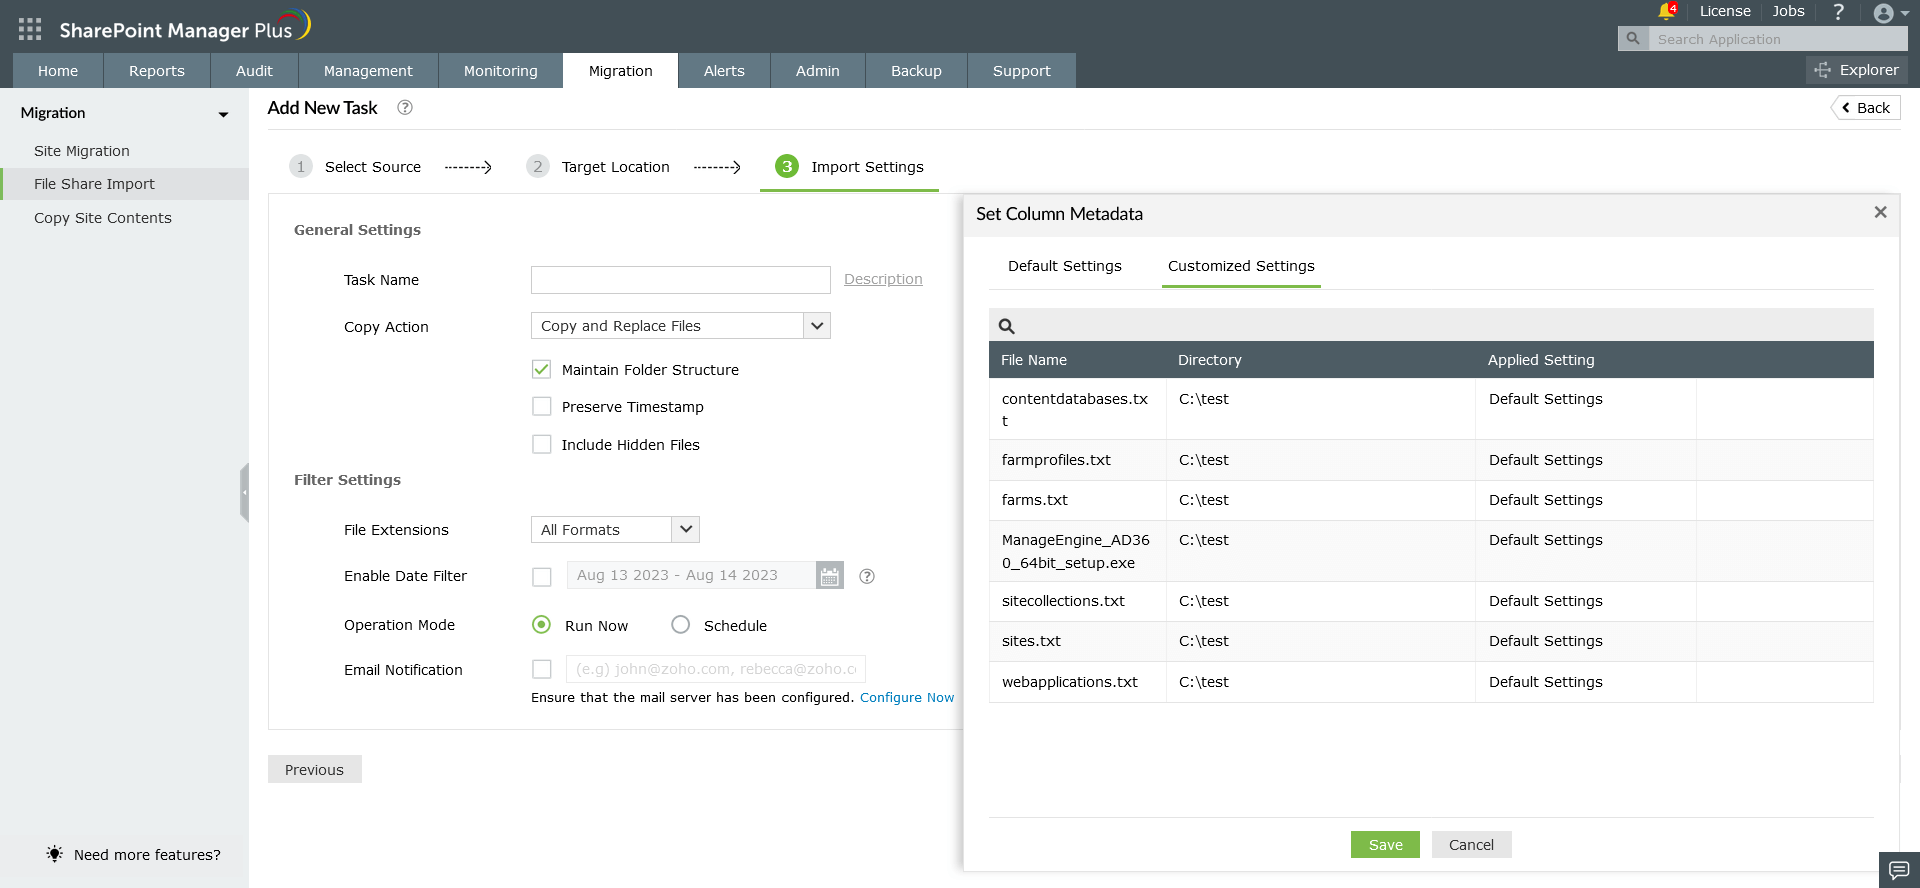
Column Metadata
This option lets you set values for the custom columns created in SharePoint. It is available at the top right corner of the Import Settings page.
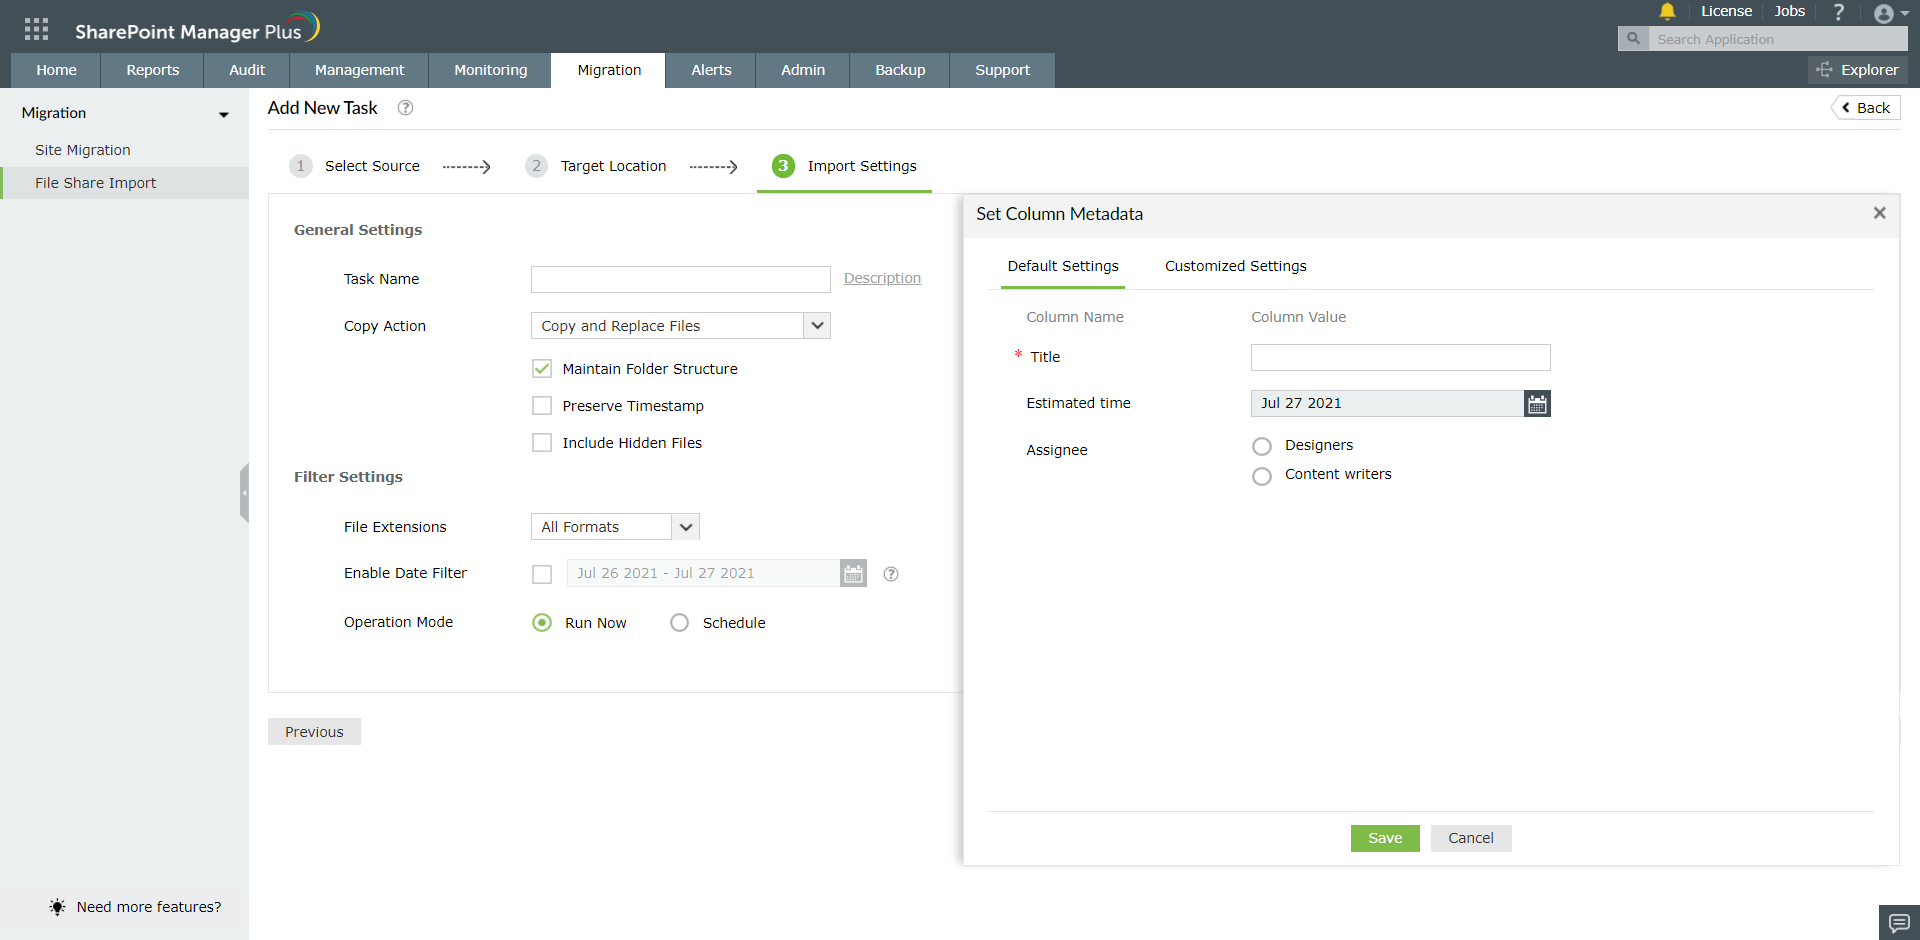
Default Settings: It applies to all the selected files in one go.
Customized Settings: We can use Customized Settings to set different values for each file.
Note: Supported metadata columns in file share import are Text, Note, Number, Currency, DateTime, Boolean, URL, Choice and Multiple Choice.
Map network drives for file sharing
Follow the below steps to map network drives to the product for importing files:
- Navigate to the Migration tab.
- Choose File Share Import → Map Network drive.

- Click the Map Network Drive button from the Network Drives page to add a new drive.

- Enter the desired drive name and the drive or folder path to be mapped in the Drive Name and Drive/Folder Path fields. If the drive is from a different domain or is secured, select the Authentication check box and enter the Username and Password of a user who has read and write access.

- To unmap a network drive or to refresh the drive details, click the
 or
or  icons, respectively.

 ADManager Plus
 ADAudit Plus
 ADSelfService Plus
 SharePoint Manager Plus