Support
 
Phone Live Chat
 
Support
 
US: +1 888 720 9500
 
Intl: +1 925 924 9500
Aus: +1 800 631 268
UK: 0800 028 6590
CN: +86 400 660 8680

Direct Inward Dialing: +1 408 916 9393


Service pack installation for ADManager Plus

Update Path Finder


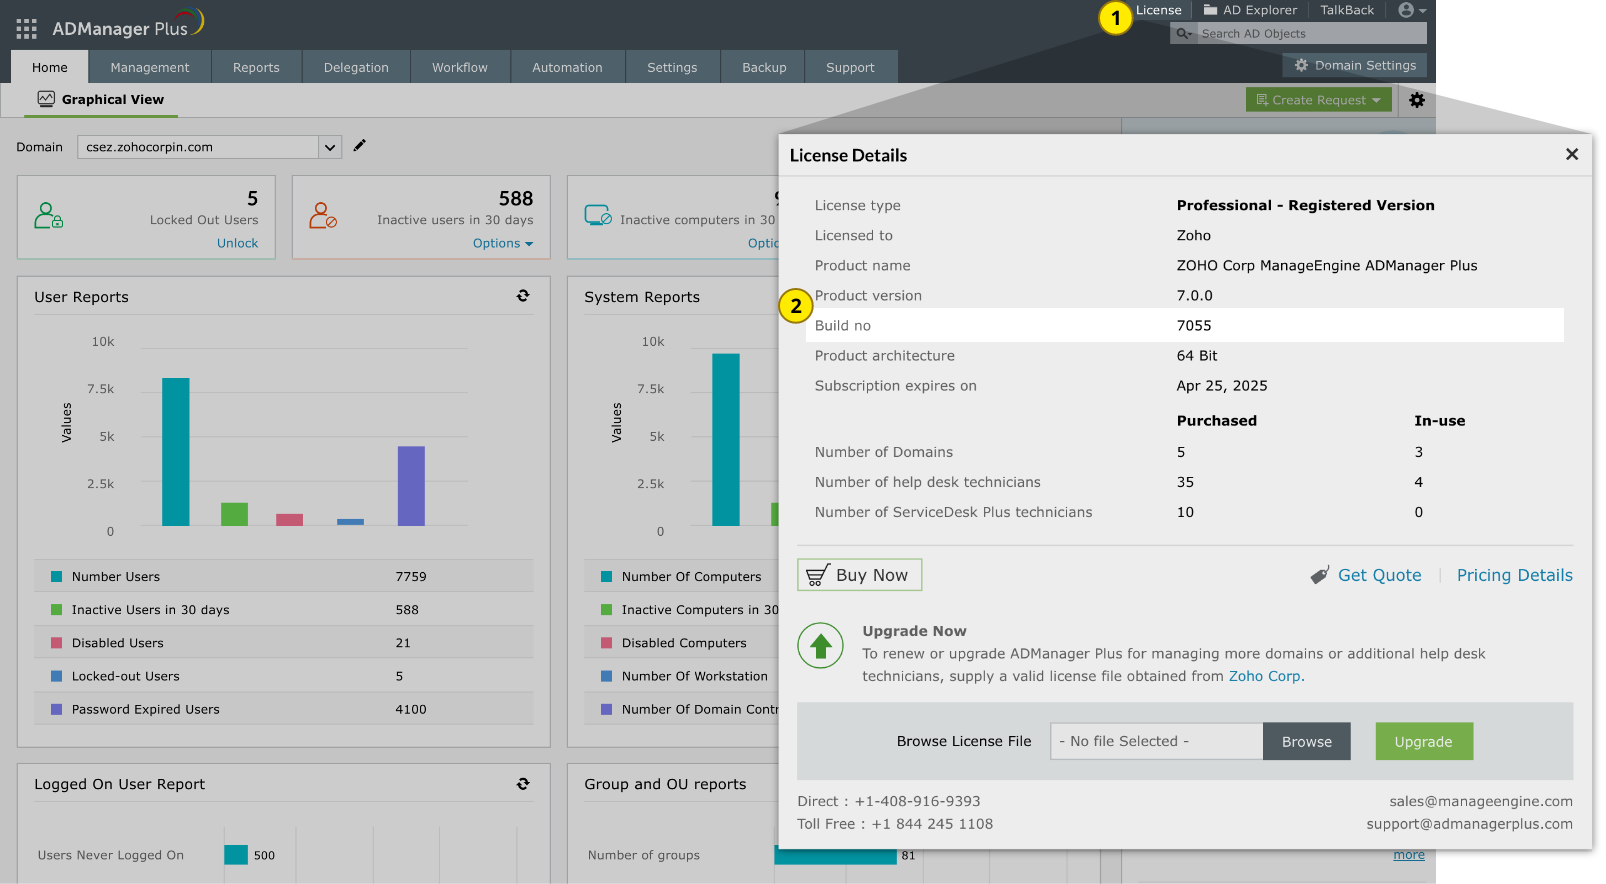
How do I find my current build number?

Important: We strongly recommend you to take backups before applying the service pack. This helps prevent accidental loss of data. Steps to update builds

If High Availability (HA) is enabled, proceed with these steps after applying the service pack.

Alternatively, if Load Balancer (LB) is enabled, follow these steps.

Service packs

If your build number is Update to build number SHA256 Checksum hash value
8002 through 8042
8043Latest
Readme
Download
8c87c8a9bdfa46babdb9bf1c65dff87274dd82c6c73f671f85e71233dc239503
7222 through 8001
be11d4a23045b78b739b84cb9232bd7adfb346765977f052794f6206927a673a
7203 through 7221
b7de07c6d0e623f1f7235c0b4ba75dd2b9f251e9923aed51605667210f1f010f
7102 through 7202
dfd47a275d9759a8b229db28100d043a6155ee88934a569b6de12247c91d9869
7000 through 7101
4763c9e1e5a0fafe10b0d921ed238b9c91d64a19356363596b176f98040c6894
Builds older than 7000
Please contact our support team or fill out this form for assistance in upgrading to the latest available build 8031

Service pack installation steps

Step 1: Shut down ADManager Plus

  1. If the product runs as an application, click Start > All Programs > ADManager Plus > Stop ADManager Plus.

  2. If the product runs as a Windows service, click Start > Run. Type services.msc and stop ManageEngine ADManager Plus.

Step 2: Stop the built-in PostgreSQL database

f you are using the built-in PostgreSQL database, execute the stopDB.bat file in the <ADManagerPlusHome>\bin to stop the database.

Step 3: Back up ADManager Plus

When using the built-in PostgreSQL database:

  1. Run the initPgsql.bat file located in <ADManagerPlusHome>\bin from the Command Prompt using the privileges of a domain or local admin account.

  2. Run the backupDB.bat file located in <ADManagerPlusHome>\bin directory.

  3. Back up ADManager Plus by zipping the contents of the <ADManagerPlusHome> directory.

Note:

  • If Microsoft SQL Server is configured as the backend database for ADManager Plus, ensure that the SQL Server database is backed up separately. .

Step 4: Update ADManager Plus

  1. Open the Command Prompt and execute the UpdateManager.bat file under the <ADManagerPlusHome>\bin directory.

  2. Click Browse and select the service pack file that you have downloaded.

  3. Click Install. Depending on the amount of data to be migrated, the installation procedure may take a few minutes. Please do not terminate this process prematurely.
    Having problems? Troubleshoot here

    .
  4. Once the service pack is installed, click Close and then Exit to quit the Update Manager.

Step 5: Start ADManager Plus.

  1. If the product runs as an application, click Start > All Programs > ADManager Plus > Start ADManager Plus.

  2. If the product runs as a Windows service, click Start > Run. Type services.msc, and in the window that opens, Start ManageEngine ADManager Plus.

Troubleshooting ADManager Plus installation issues

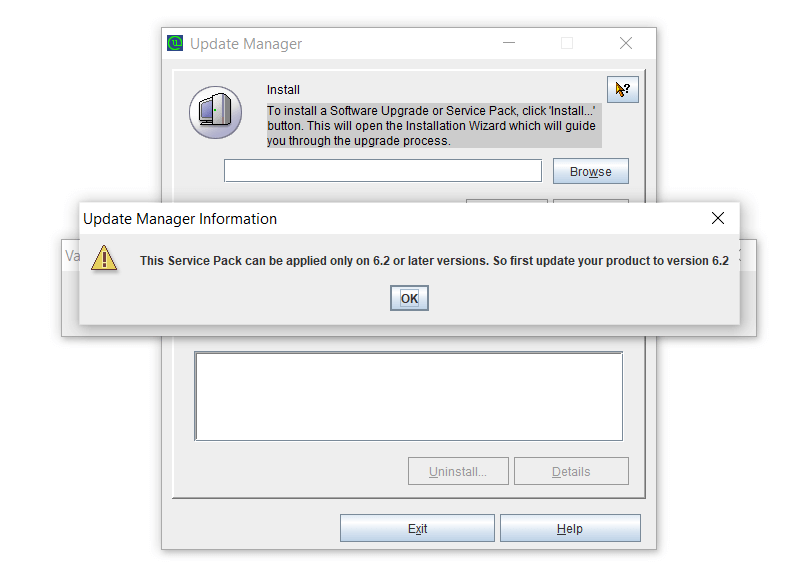
This Service Pack can be applied only on SP_X_X or later versions. So first update your product to version SP_X_X.

Reason: The server is running a significantly older version of ADManager Plus. Your installation will need updates installed during a few subsequent (major) versions of the product before it will be ready for the latest version.

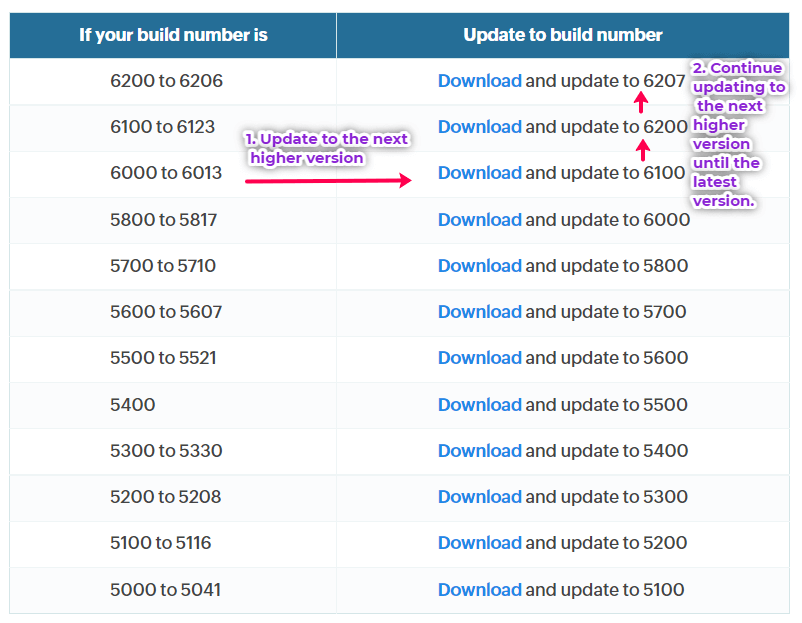
Fix: Download and install every major version of ADManager Plus until the latest one.

Steps:

  • If your version of ADManager Plus is significantly older than the latest build you might encounter an error such as this while trying to install the latest patch:

    ADManager Plus Service Pack

  • In this case, you will need to keep updating ADManager Plus to the next major version from your current one until the latest build. Note: You will have to reopen the Update Manager application every time you update the current version.

    So, for instance, if you are running version 6013, update to version 6100, then to version 6200, and then finally to version 6207 (the latest build). You can find these patches on the ManageEngine site.

    ADManager Plus Service Pack

IMPORT CERTIFICATE.

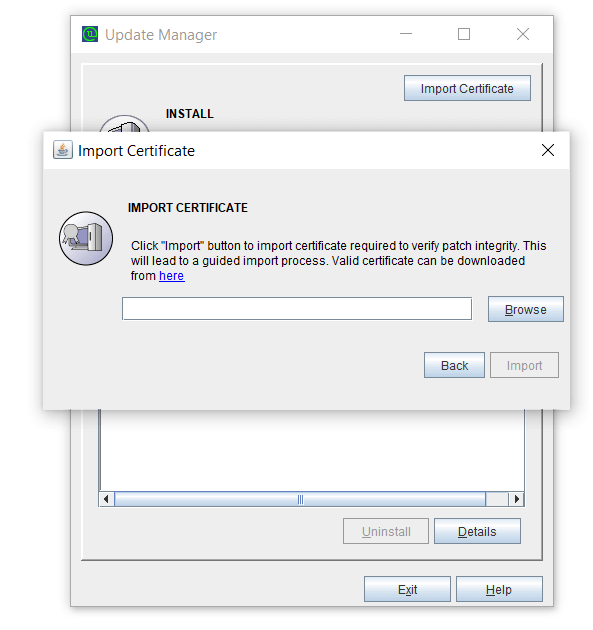
Reason: The server is running an older version of ADManager Plus (before version 6201) and cannot connect to the ManageEngine site (blocked port, firewall restrictions, no internet connection, etc). The Update Manager automatically imports the certificate when it is able to connect to the ManageEngine site. However, when it cannot do so, you will need to import the certificate manually.

Fix: Import the certificate manually.

Steps:

  • If your version of ADManager Plus is older than version 6200, follow all the steps in the section 1 until you have version 6200.
  • Now install the next version. If the server is unable to connect to the ManageEngine site, you might get this pop-up:
    ADManager Plus Service Pack

  • Since the Update Manager is unable to connect to the ManageEngine site to import the certificate, you will need to import the certificate manually.
  • Steps to import the security certificate manually:
    1. Download the certificate by clicking this link.

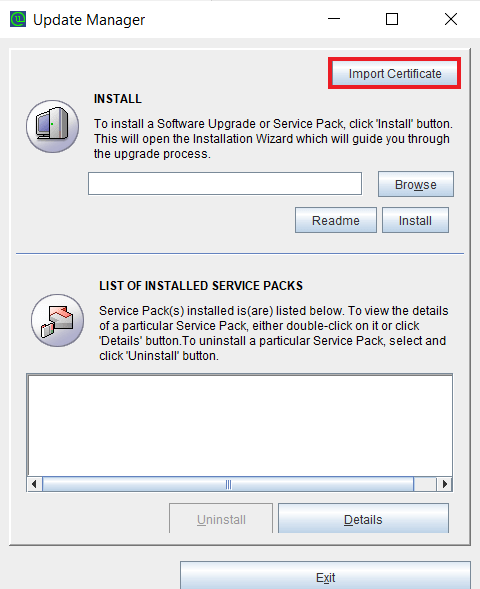
      Run the UpdateManager.bat file located in <ADManagerPlusHome>\bin (by default: C:\Program Files\ManageEngine\ADManager Plus\bin) from the Command Prompt using the privileges of a domain or local admin account (refer to the requirements for running the initPgsql.bat file mentioned above).
      ADManager Plus Service Pack

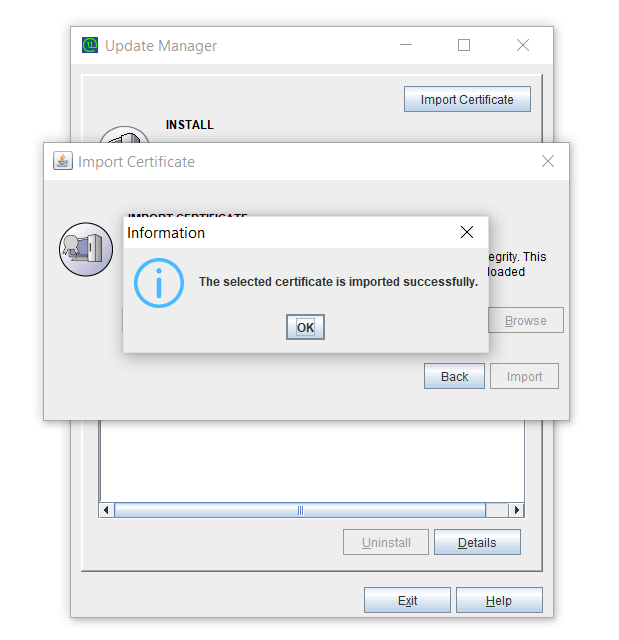
    2. Now, click Browse and select the downloaded certificate file. Click Import. You should get an information pop-up about the certificate being successfully imported.

      Click Browse and select the service pack file ManageEngine_ADManager_Plus_x_x_SP-x_x_x.ppm that you have downloaded.
      ADManager Plus Service Pack

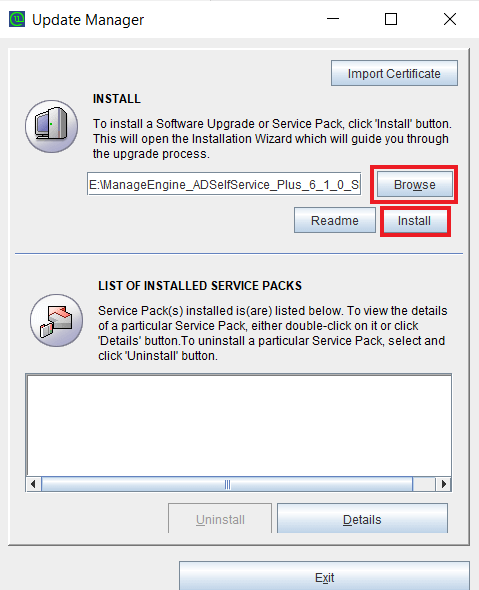
    3. Once imported, click Browse in the Update Manager and select the relevant PPM file. (greater than version 6200).
      ADManager Plus Service Pack

    4. Click Install. Depending on the amount of data to be migrated, the installation procedure may take a few minutes. Please do not terminate the process before completion.
    5. Once the installation is complete, click Close.
    6. Click Exit to quit Update Manager.
    7. Now, start ADManager Plus to use the updated build.

ADManager Plus Trusted By

The one-stop solution to Active Directory Management and Reporting