How do you enable conditional access in ADSelfService Plus?
ADSelfService Plus' Conditional Access feature helps organizations manage access to their IT environment without admin intervention. Access control decisions are automatically made based on users' IP address, device, time of access, and geolocation.
Conditional access can be used to allow or restrict access for:
This helps organizations improve their security posture without affecting the user experience.
How to configure conditional access rules
Implementing conditional access involves configuring conditional access rules. A conditional access rule is configured using three building blocks:
- Conditions: These are basics based on which the access will be controlled. ADSelfService Plus provides you an option to control access based on IP address, device, time of access, and geolocation conditions.
- Criteria: The conditions configured can be used to formulate criteria using Boolean operators such as AND, OR, and NOT.
- Associated self-service policy: Self-service policies in ADSelfService Plus govern which features users can utilize. These policies allow you to configure how features should work for different sets of users based on their OU and group membership. By associating the conditions and criteria with one or more self-service policies, you configure a conditional access rule.
Steps to configure conditional access rules
Step 1. Configuring a self-service policy
- Navigate to the Configuration tab.
- Click the Add New Policy button on the bottom-right side of the page.
- Enter an appropriate Policy Name.
- From the list of self-service features provided, select features for your user base. You need to select at least one self-service feature.
- Click the Select OU(s)/Groups button.
- Select the domain that the policy will be applied to. Here you have a choice; you can either apply the policy to all users in the selected domain or only to specific users based on their OU or group membership.
- Click OK.
- Click Save Policy.
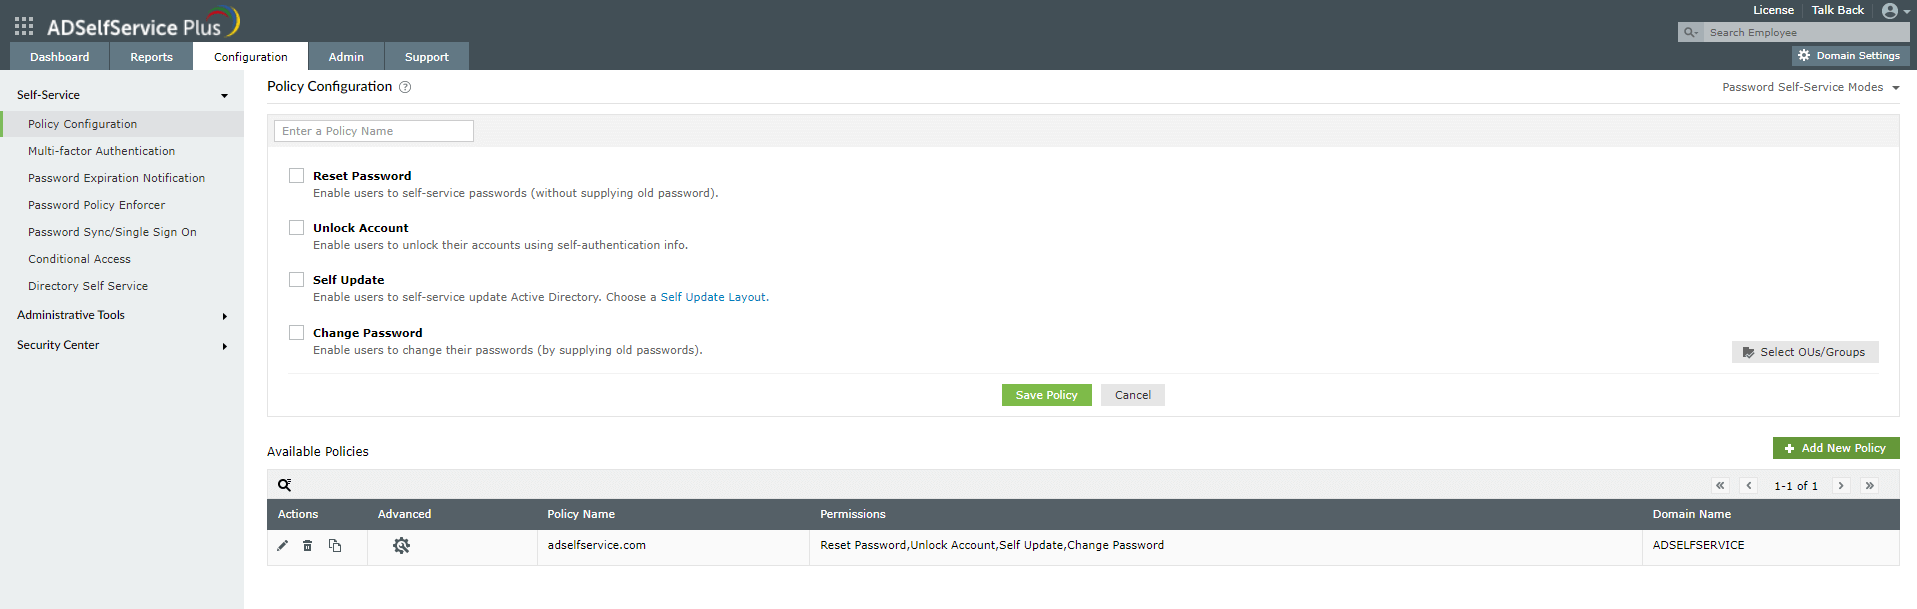
Note: You can also associate self-service policies with other capabilities, like MFA, SSO, and password synchronization, to ensure users under the policy have access to those features.
Step 2. Configuring conditions
- Navigate to Configuration > Self-Service > Conditional Access > Rule configuration.
- Click Configure New Conditional Access (CA) Rule.
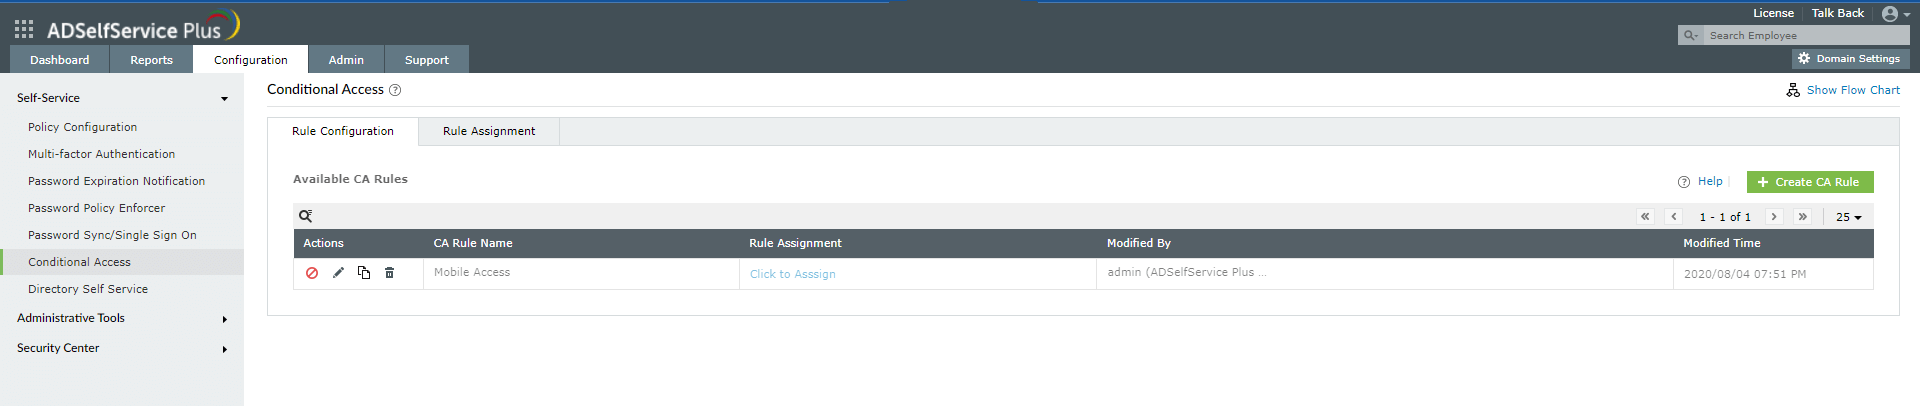
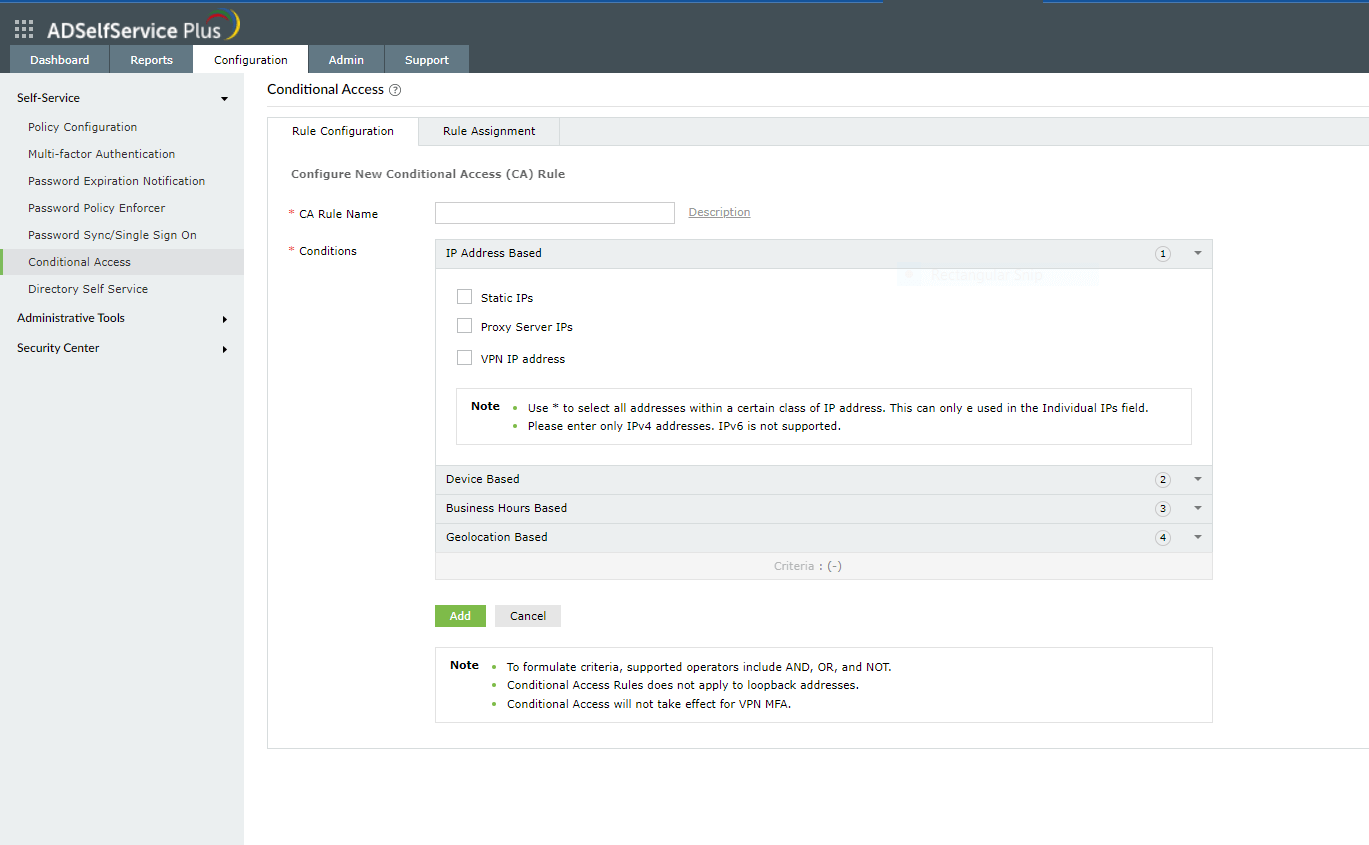
- Enter a CA Rule Name and Description.
- Configure any of the four conditions with these steps:
- IP Address
- Select the check boxes next to the necessary IP address types:
- Select whether to trust or not trust the entered IPs. Trusted IPs will be allowed access, and untrusted IPs will be blocked.
- For Static IPs, enter the range of IP addresses in the IP Range fields. Use the + icon to add more IP ranges. You can also enter individual IPs and use * as the wildcard character for selecting a whole class of IP.
- Device
- Select the Computers check box and then click the + icon.
- In the Select Client Computer dialog box that opens, select the domain and then the computer objects. Click OK.
- Select the Platforms check box and then use the drop-down to select the platforms. You can choose from Windows, macOS, Linux, mobile web app, and native mobile app.
- Business Hours
- Geolocation
Step 3. Creating criteria
After configuring the conditions, Criteria can be formulated using operators like AND, OR, and NOT. This criteria will decide how the different conditions will be evaluated to determine the access request's result. Each condition is assigned a number: IP Address is 1, Device is 2, Business hours is 3, and Geolocation is 4. You can use these numbers and operators to create the criteria.
For example, 1 AND (2 OR 3) and 1 AND (3 OR (NOT 4))
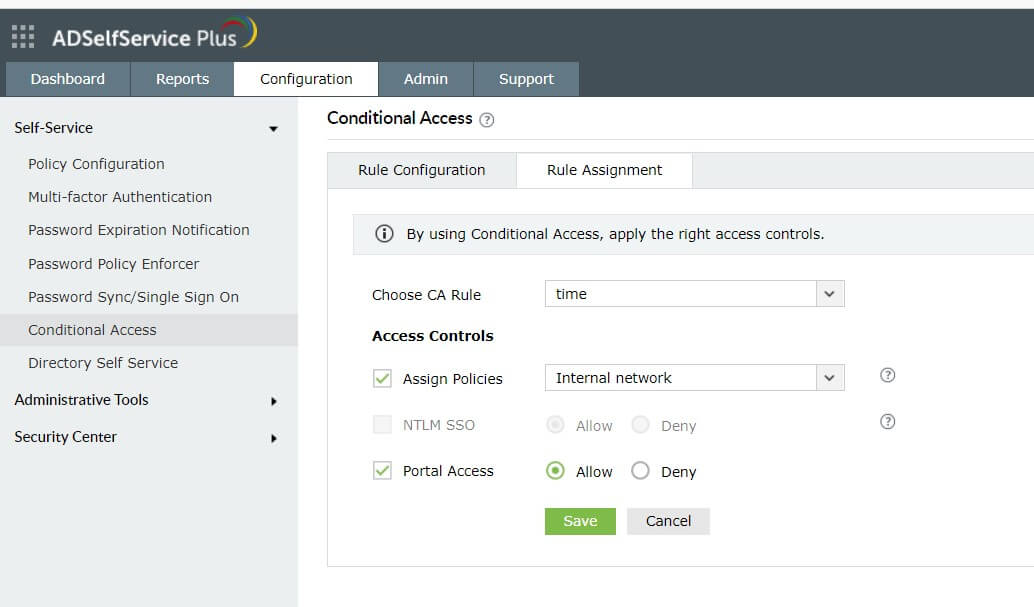
Step 4. Assigning rules
- Go to Configuration > Self-Service > Conditional Access > Rule assignment.
- Select the rule that you want to assign from the drop-down.
- Select the policy you want to assign this rule to.
Note: The policy will be assigned to a rule-satisfying user only if they originally belong to the group, organizational unit, or domain the self-service policy was created for.
- Allow or block NTLM SSO and ADSelfService Plus portal access. These settings will be applicable wherever the selected rule is satisfied.
Note: The option to allow or block
NTLM SSO will be enabled only if NTLM authentication is configured under
Admin > Customize > Login Settings > Single Sign-On.
Prioritizing conditional access rules
In case you create multiple conditional access rules, you can prioritize them so that the high priority rule gets applied first.
To prioritize the rules:
- From the Conditional Access configuration page, click the change priority icon in the top-right corner (next to the Configure New Conditional Access (CA) Rule button).
- All the configured conditional access rules will be listed. Drag and rearrange them based on your requirements. The rule at the top will be given the highest priority.
Editing or deleting the conditional access rules
A conditional access rule can be modified to change the conditions or criteria, copied to create a new rule, disabled, or deleted.
- Go to the Conditional Access configuration page. The configured conditional access rules will be displayed in a table.
- Under the Actions column, click on an icon based on the action you want to perform.
- Toggle the
 and
and  icons to enable or disable a rule. If there is a ☑ icon, it means the rule is enabled, and if there is a ☒ icon, it means the rule is disabled.
- Click the
 icon to modify the rule.
- Click the
 icon to copy the rule and create a new rule from it.
- Click the
 icon to delete a rule.
Highlights of ADSelfService Plus
Allow Active Directory users to self-service their password resets and account unlock tasks, freeing them from lengthy help desk calls.
Get seamless one-click access to 100+ cloud applications. With enterprise single sign-on, users can access all their cloud applications using their Active Directory credentials.
Intimate Active Directory users of their impending password and account expiry via email and SMS notifications.
Synchronize Windows Active Directory user passwords and account changes across multiple systems automatically, including Microsoft 365, Google Workspace, IBM iSeries, and more.
Strong passwords resist various hacking threats. Enforce Active Directory users to adhere to compliant passwords by displaying password complexity requirements.
Enable Active Directory users to update their latest information themselves. Quick search features help admins scout for information using search keys like contact numbers.
