Configuring SAML SSO for Active Directory Federation Services (AD FS)
The following guide elaborates on the steps to configure SSO for AD FS with ADSelfService Plus. This enables users to access all AD FS integrated applications by authenticating with ADSelfService Plus.
On this page:
Prerequisite
- Fetch the AD FS server federation metadata by pasting the following URL in a browser: https://<adfs_fqdn>/FederationMetadata/2007-06/FederationMetadata.xml
ADSelfService Plus (identity provider) configuration steps
- Log in to ADSelfService Plus as an administrator.
- Navigate to Configuration > Self-Service > Password Sync/Single Sign On > Add Application > Custom Application.
- Enter the Application Name, Description, and Domain Name in the respective fields.
- Choose the policy containing the users you wish to provide SSO access to AD FS from the Assign Policies drop-down.
- Select the checkbox Enable SSO using SAML.
- Set Support SSO flow to SP initiated.
- In the Upload Metadata field, upload the file downloaded previously in the prerequisite step.
- Under Provider Settings, enter the following information:
- Select RSA-SHA256 from the RSA SHA Algorithm drop-down.
- Set the SAML Response value to Signed.
- Select the option Exclusive Canonicalization from the Canonicalization Method drop-down.
- In the Name ID Format field, choose the format for the user login attribute value specific to the application.
- Click Advanced in the top-left corner.

Fig. 1: Configuring SAML SSO for AD FS with ADSelfService Plus as the IdP.
- Under the SAML Assertion Attributes Configuration section, create an attribute and enter the following values:
- Enter the attribute name as "http://schemas.xmlsoap.org/ws/2005/05/identity/claims/upn".
- In the Value field, we recommend you choose Mail or userPrincipalName from the drop-down menu.
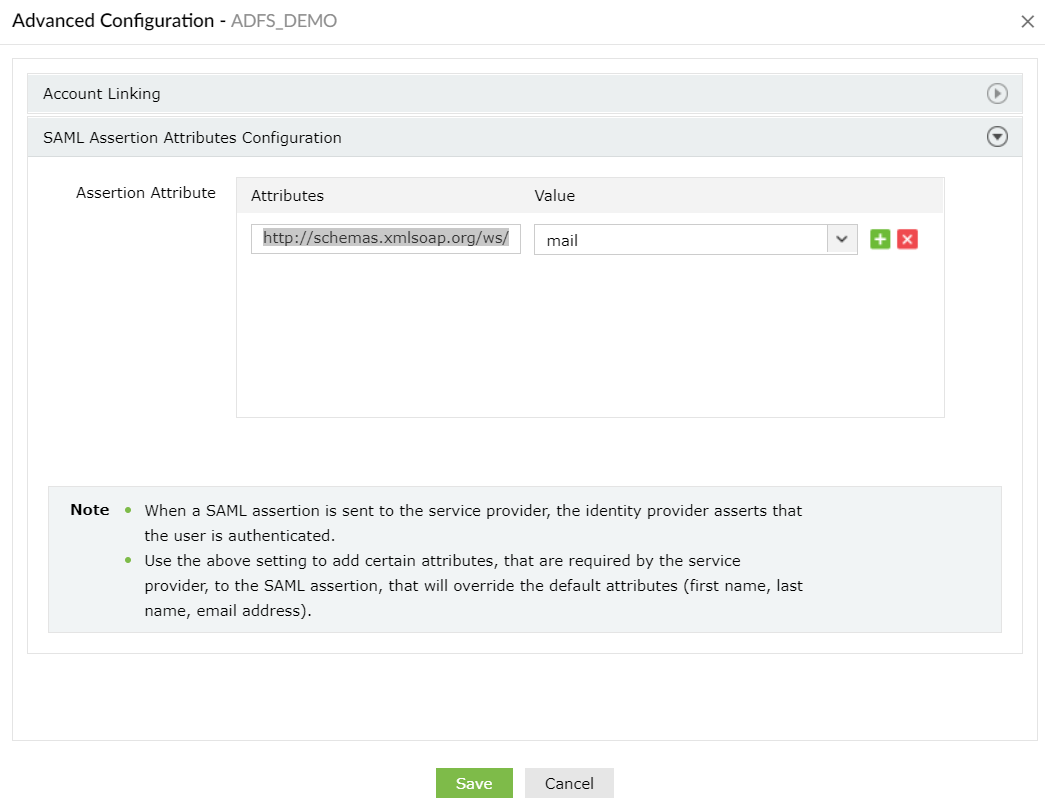
Fig. 2: Setting the assertion attribute value in the Advanced Configuration section.
- Click IdP details and select Download IdP Metadata, which will download the metadata file required for later.
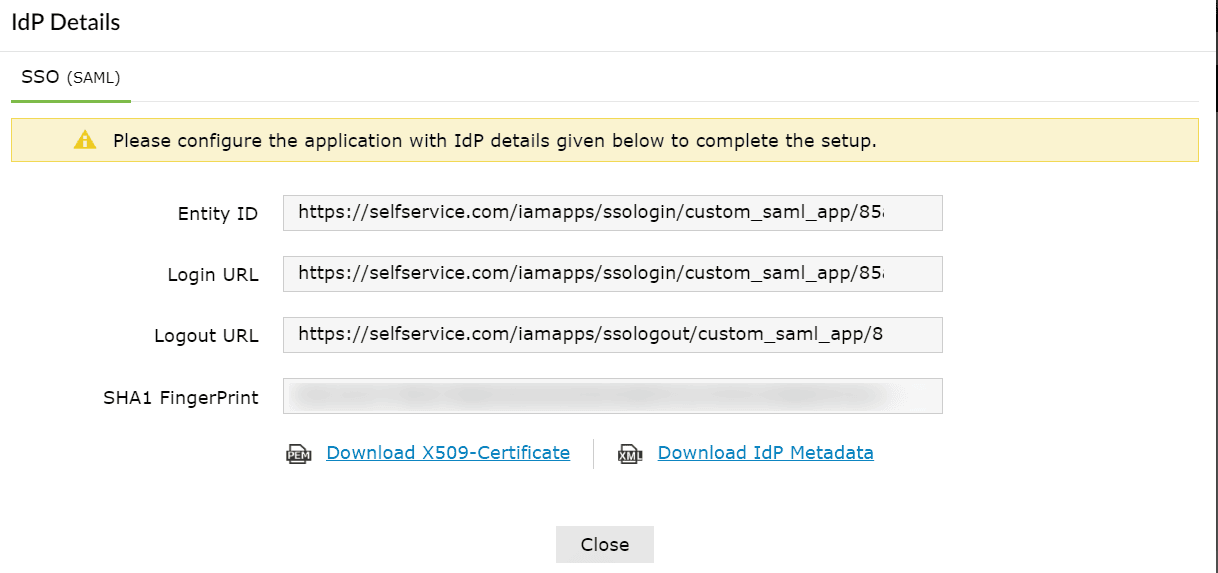
Fig. 3: Obtaining IdP details from ADSelfService Plus.
AD FS (service provider) configuration steps
Step 1: Adding a new claims provider trust
- Open the AD FS Management console. Navigate to AD FS > Claims Provider Trusts.
- Click Add Claims Provider Trust in the Actions pane. This will open the Add Claims Provider Trust Wizard. Click Start.
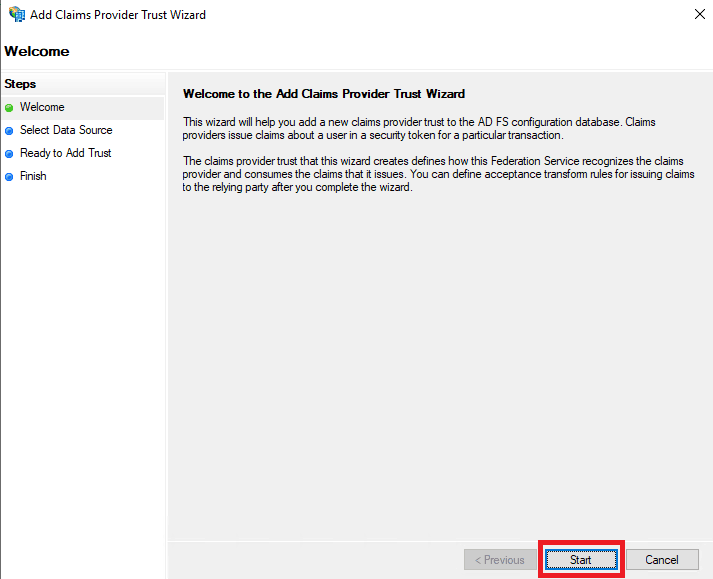
Fig. 5: Add Claims Provider Trust Wizard
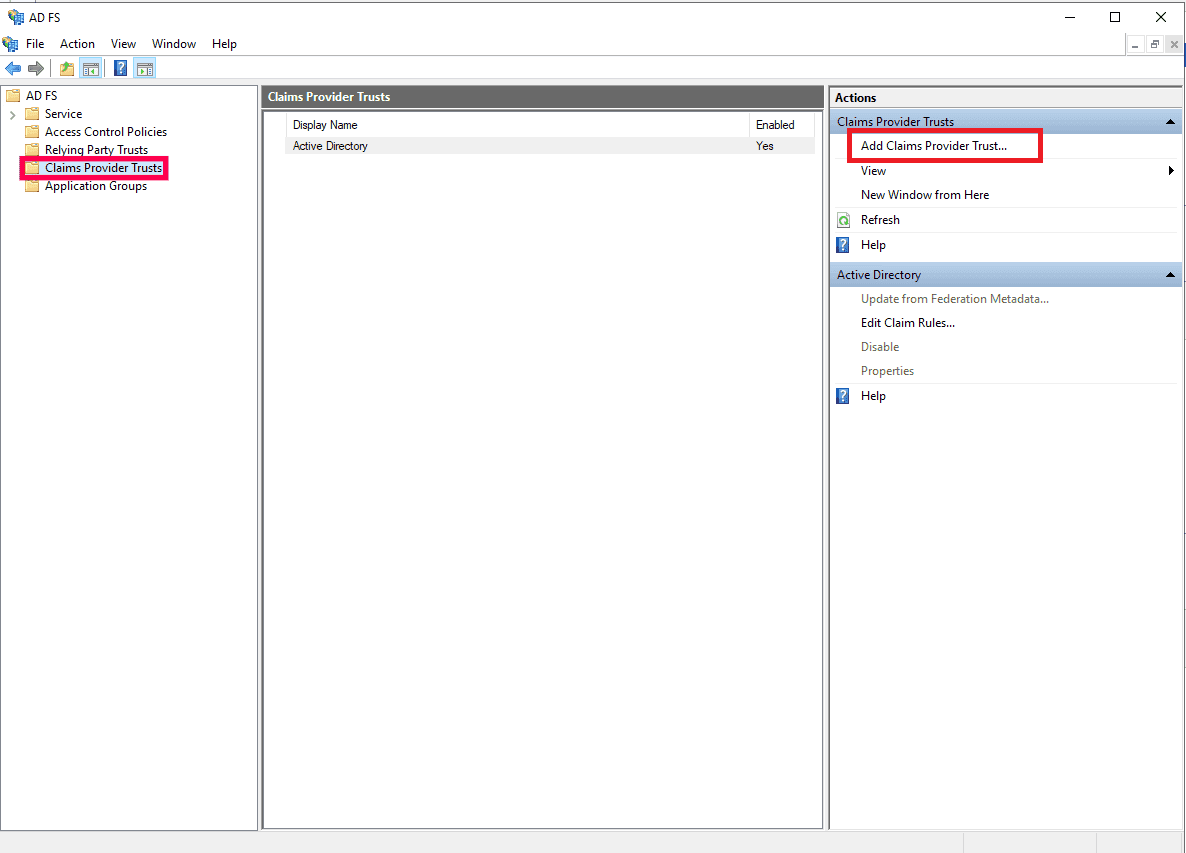
Fig. 4: Adding a new claims provider in AD FS.
- In the Select Data Source section, choose the option Import data about the claims provider from a file and upload the metadata file downloaded in Step 11 of the ADSelfService Plus configuration steps.
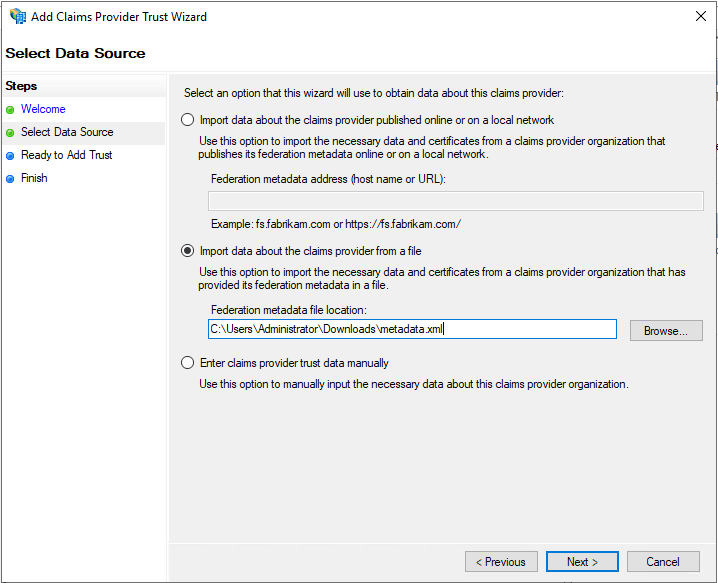
Fig. 6: Choosing claims provider data source.
- In the Specify Display Name section, enter the desired Display name.
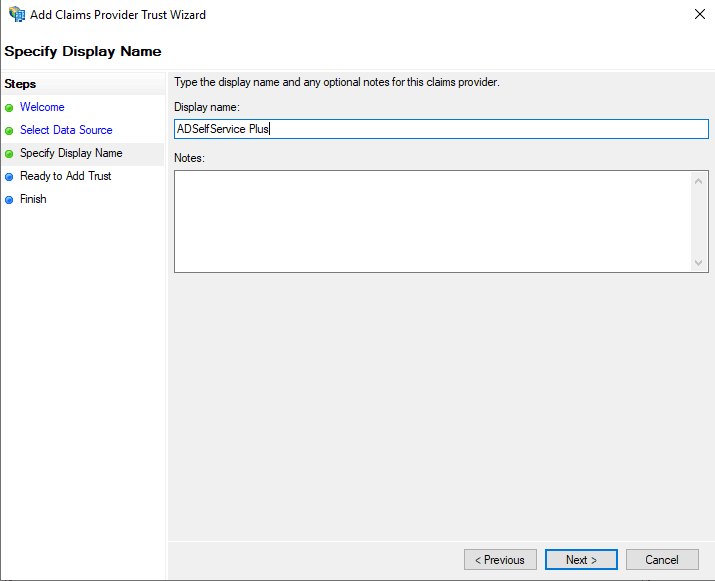
Fig. 7: Setting the display name for the new claims provider trust.
- Complete the remaining steps in the wizard by retaining the default values for the rest of the fields.
Step 2: Adding claim rules
- Once the claims provider trust configuration is complete, the Claims Rule Editor window opens. Click Add Rule.
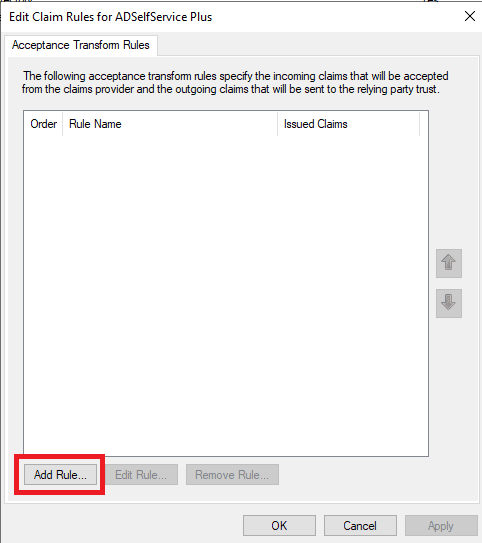
Fig. 8: Creating a new acceptance transform rule.
- From the Claim rule template drop-down, select the value Pass Through or Filter an Incoming Claim and click Next.
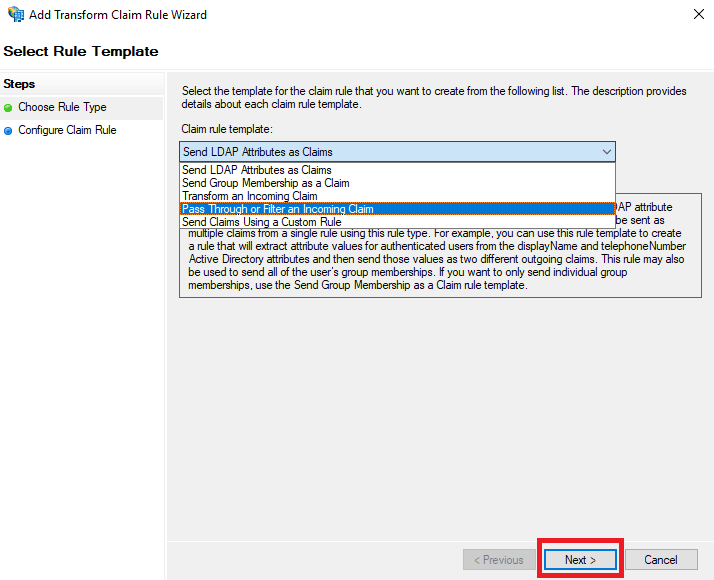
Fig. 9: Selecting a template for the new claim rule.
- In the next window, enter a Claim rule name and set any of the supported claim types as the Incoming claim type. For information regarding the supported claim types, click here. Choose the Pass through all claim values radio button. Click Finish to complete adding the claims rule.
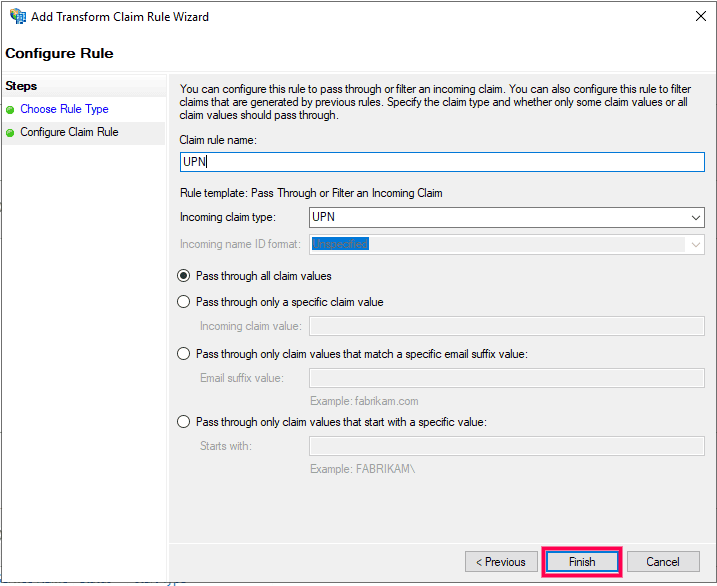
Fig. 10: Defining claim rule properties.
Step 3: Modify existing relaying party trusts
The existing relaying party trusts need to be modified for the required applications in order to map the incoming claim to an outgoing claim that will be sent to the relaying party.
- Click Relaying Party Trusts under AD FS. Right-click the desired SSO applications from the list and select Edit Claim Issuance Policy. Click Add Rule.
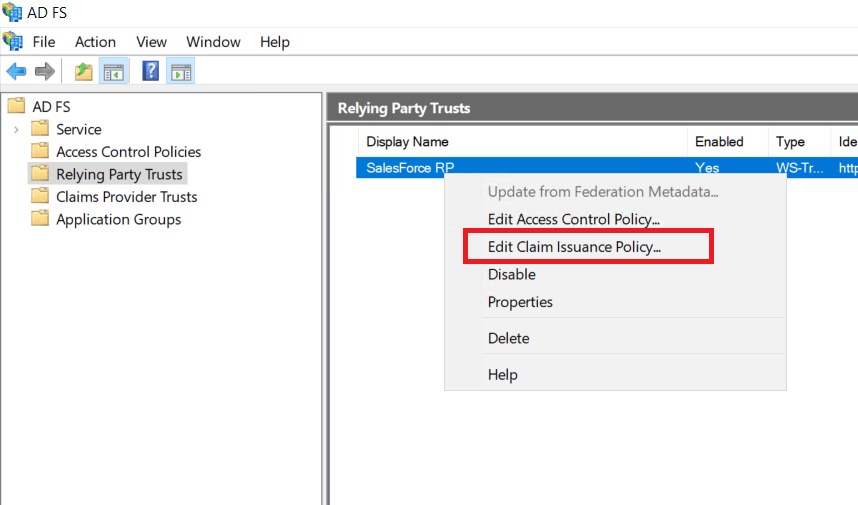
Fig. 11: Modifying existing relaying party trust.
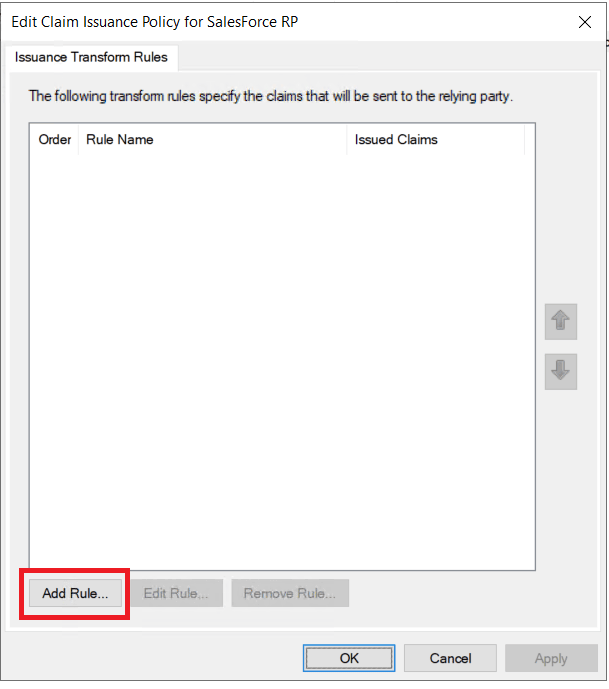
Fig. 12: Add or edit issuance transform rules.
- In the Add Transform Claim Rule Wizard, choose the option Transform an Incoming Claim from the Claim rule template drop-down and click Next.
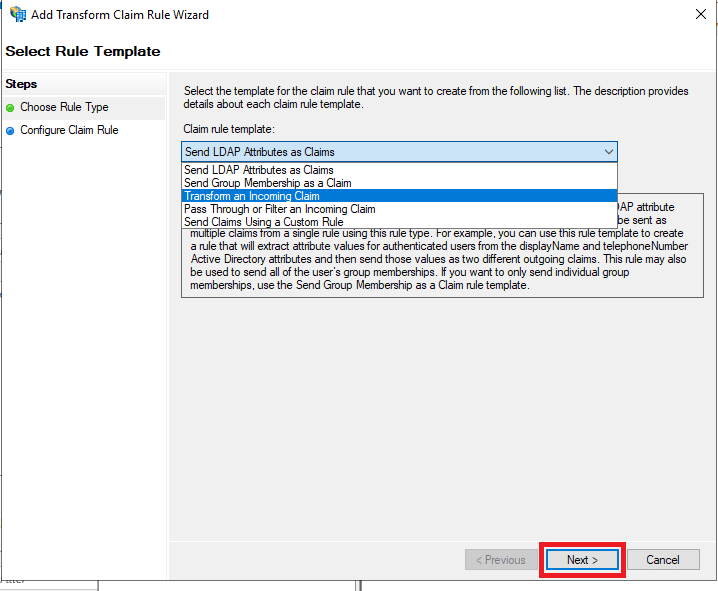
Fig. 13: Selecting the claim rule template.
- Enter Name ID in the Claim rule name field and set UPN as the Incoming claim type. Set Name ID as the Outgoing claim type and click OK.

Fig. 14: Configuring the claim rule properties.
To enable SSO for required AD FS integrated applications, configure claim rules by choosing the appropriate claim rule template.
You have now completed configuring ADSelfService Plus as the identity provider for AD FS.
Troubleshooting steps
If users are unable to log in to AD FS, please review and verify the accuracy of the following configurations:
- Federation settings: Ensure all configurations, including account mappings, are correct and consistent.
- Time synchronisation: Verify that the time on the AD FS server is accurate and synchronised with the ADSelfService Plus server.
Highlights of ADSelfService Plus
Allow Active Directory users to self-service their password resets and account unlock tasks, freeing them from lengthy help desk calls.
Get seamless one-click access to 100+ cloud applications. With enterprise single sign-on, users can access all their cloud applications using their Active Directory credentials.
Intimate Active Directory users of their impending password and account expiry via email and SMS notifications.
Synchronize Windows Active Directory user passwords and account changes across multiple systems automatically, including Microsoft 365, Google Workspace, IBM iSeries, and more.
Strong passwords resist various hacking threats. Enforce Active Directory users to adhere to compliant passwords by displaying password complexity requirements.
Enable Active Directory users to update their latest information themselves. Quick search features help admins scout for information using search keys like contact numbers.
