
How to install and uninstall ADSelfService Plus on Server Core
Last updated on:In this article
Objective
This article provides the steps for the installation and uninstallation of ADSelfService Plus on the Server Core OS, where installation is executed via Command Prompt. This process utilizes a response file to automate the setup, making it ideal for environments where GUI interaction is limited or unavailable.
Prerequisites
- The ADSelfService Plus executable file: Click here to download the ADSelfService Plus executable file.
- Response files: If not already available, generate response (.iss) files for both installation and uninstallation processes.
Steps to install ADSelfService Plus
Step 1: Create a response file for installation (optional)
To enable installation, create a response file by running the installer in record mode (-r). This response file will record the installation preferences and automate them during installation. Use a Windows machine with the Desktop Experience GUI to create the response file.
- Open Command Prompt.
- Execute the command below, replacing <Path> with the directory where the response (.iss) file should be saved:
"<Path>Setup.exe" -a -r -f1 "<Path>Install.iss"
In this command:
- -a: Runs the installer in administrative mode
- -r: Records the steps of the installation process
- -f1"<Path>Install.iss": Saves the recorded response file as Install.iss at the specified path
Example: "E:\SilentInstall\ManageEngine_ADSelfService_Plus_64bit.exe" -a -r -f1"E:\SilentInstall\Install.iss"
Running this command generates an Install.iss file, which stores the installation preferences.
Step 2: Execute installation with the response file
Once the response file has been created, use it to run the installation of the ADSelfService Plus executable file on Server Core, automating the setup based on the recorded preferences.
- Open Command Prompt.
- Run the following command for installation, specifying the paths to the installer, response file (Install.iss), and, optionally, a log file (Install.log):
"<Path>Setup.exe" -s -a -s -f1"<ISSPath>Install.iss" -f2"<logpath>Install.log"
In this command:
- -s: Runs the installation silently without user interaction
- -a: Runs the installer in administrative mode
- -s: Ensures silent mode for any nested processes or subprocesses called by the main installer
Example: "E:\SilentInstall\ManageEngine_ADSelfService_Plus_64bit.exe" -s -a -s -f1"E:\SilentInstall\Install.iss"
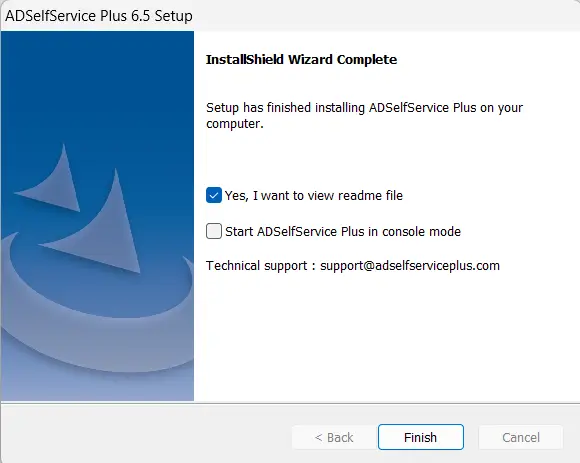
Steps to start ADSelfService Plus as a Windows Service
If you want to run ADSelfService Plus as a Windows Service, uncheck the Start ADSelfService Plus in console mode option while selecting installation preferences.
- After completing the installation, open Command Prompt as an administrator. Navigate to the following directory:
"<Installation folder>\ADSelfService Plus\bin"
- Run the following batch file:
"InstallNTService.bat"
This will set up ADSelfService Plus to run as a Windows Service.
Steps to uninstall ADSelfService Plus
Step 1: Create a response file for uninstallation (optional)
To enable uninstallation, create a response file by running the uninstaller in record mode (-r). This response file will record the uninstallation preferences and automate them during uninstallation. Use a Windows machine with the Desktop Experience GUI to create the response file.
- Open Command Prompt.
- Execute the command below, replacing <Path> with the directory where the response (.iss) file should be saved:
"<Path>Setup.exe" -a -r -f1"<Path>Uninstall.iss"
In this command:
- -a: Runs the uninstaller in administrative mode
- -r: Records the steps of the uninstallation process
- -f1"<Path>Uninstall.iss": Saves the recorded response file as Uninstall.iss at the specified path
Example: "E:\SilentUninstall\ManageEngine_ADSelfService_Plus_64bit.exe" -a -r -f1"E:\SilentUninstall\Uninstall.iss"
This command generates an Uninstall.iss file, which stores the uninstallation preferences.
Step 2: Execute uninstallation with the response file
Once the response file has been created, use it to uninstall ADSelfService Plus from Server Core, automating the process based on the recorded preferences.
- Open Command Prompt.
- Run the following command for uninstallation, specifying the paths to the uninstaller, response file (Uninstall.iss), and, optionally, a log file (Uninstall.log):
"<Path>Setup.exe" -s -a -s -f1"<ISSPath>Uninstall.iss" -f2"<logpath>Uninstall.log"
In this command:
- -s: Runs the uninstallation silently without user interaction
- -a: Runs the uninstaller in administrative mode
- -s: Ensures silent mode for any nested processes or subprocesses
Example: "E:\SilentUninstall\ManageEngine_ADSelfService_Plus_64bit.exe" -s -a -s -f1"E:\SilentUninstall\Uninstall.iss"
<Path>: The path of the executable file.
<ISSPath>: The path of the response file
<logpath>: The path where the log file needs to be created; -f2 is optional—by default, setup.log will be created in the current execution directory