How to Install/Uninstall/Migrate agents using GPO light-weight tool?
Windows GPO is a powerful and versatile tool. Agent can be installed, uninstalled or migrated using the GPO light-weight tool.
Advantages:
- The GPO Lightweight Tool is a simple and user-friendly tool for configuring Group Policy Objects (GPO) to deploy agent installations, whether through startup processes or scheduled tasks.
- It also allows to uninstall/ re-install agents through GPO without complexity on configuring the GPO.
Disadvantages:
- The disadvantages of the GPO startup script and scheduled task methods are inherited.
Note:
- The GPO lightweight tool only supports .EXE files and does not support .MSI files.
- Kindly use account with Domain Admin credentials .
- If a new GPO policy is applied, the installation for existing installed agents will be skipped on all machines. The remaining agents will be installed according to the new policy.
Follow the steps given below to create a Group policy and link it with OUs and Domains:
Steps:
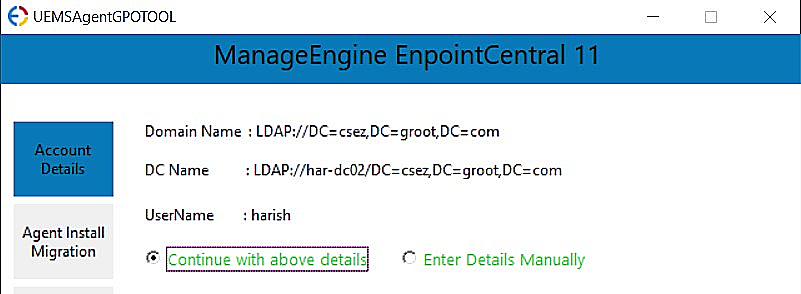
1. Select the account details
- Open the Domain Controller of the required AD in which the GPO needs to be configured.
- To download the GPO tool click here.
- Execute the Tool As an administrator
- Select "Continue with above details" and click next.
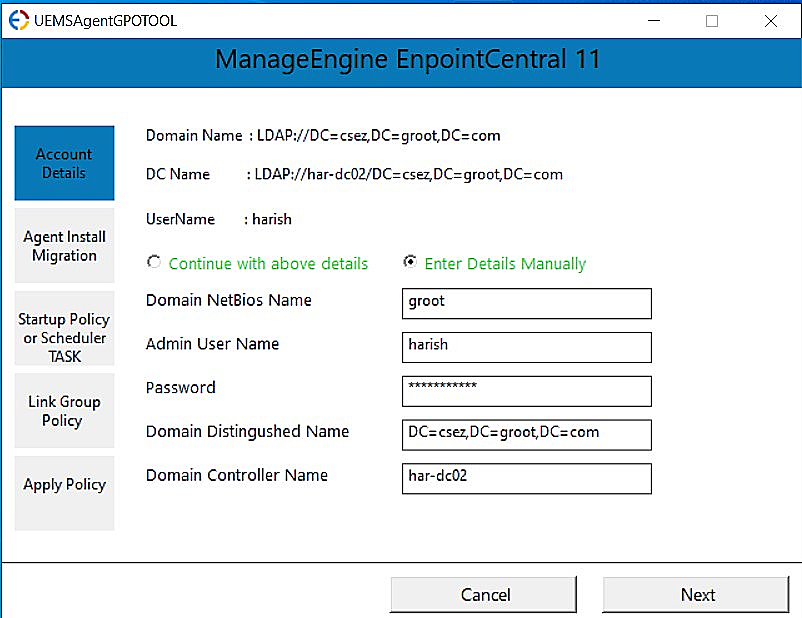
- If you encounter an error in fetching the domain or domain controller name or if you would like to execute the tool from another machine instead of the domain controller machine, select the enter details manually option. Kindly use account with domain admin credentials privilege.
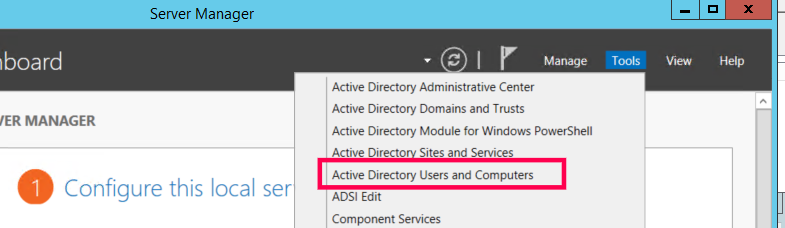
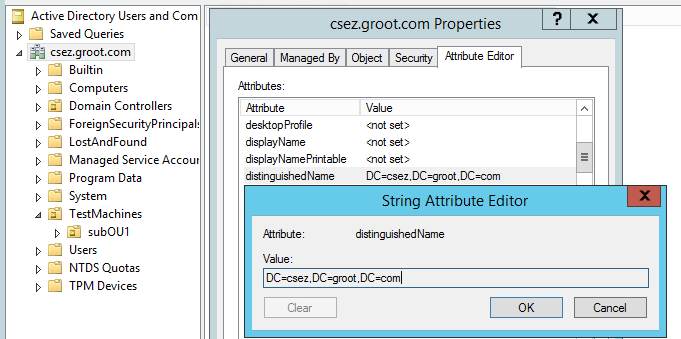
To get the domain or OU Distinguished name, follow these steps:
- Under Administrative tools, open the active directory users and computers.
- Under View, enable Advanced Features.
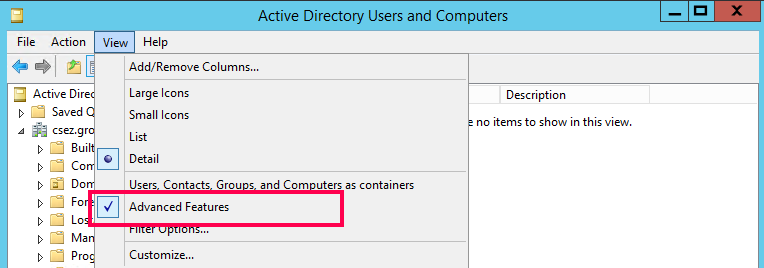
- Right click on the OU / Domain and Select Properties -> Attribute Editor -> distinguishedName -> View
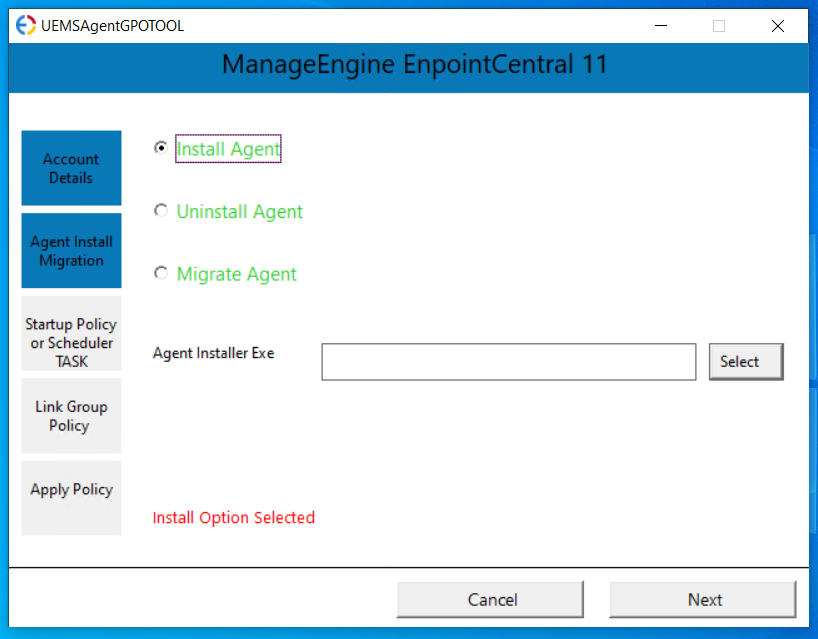
2. Choose the required action
- Select the required action ( Installation \ Uninstallation \Migration)
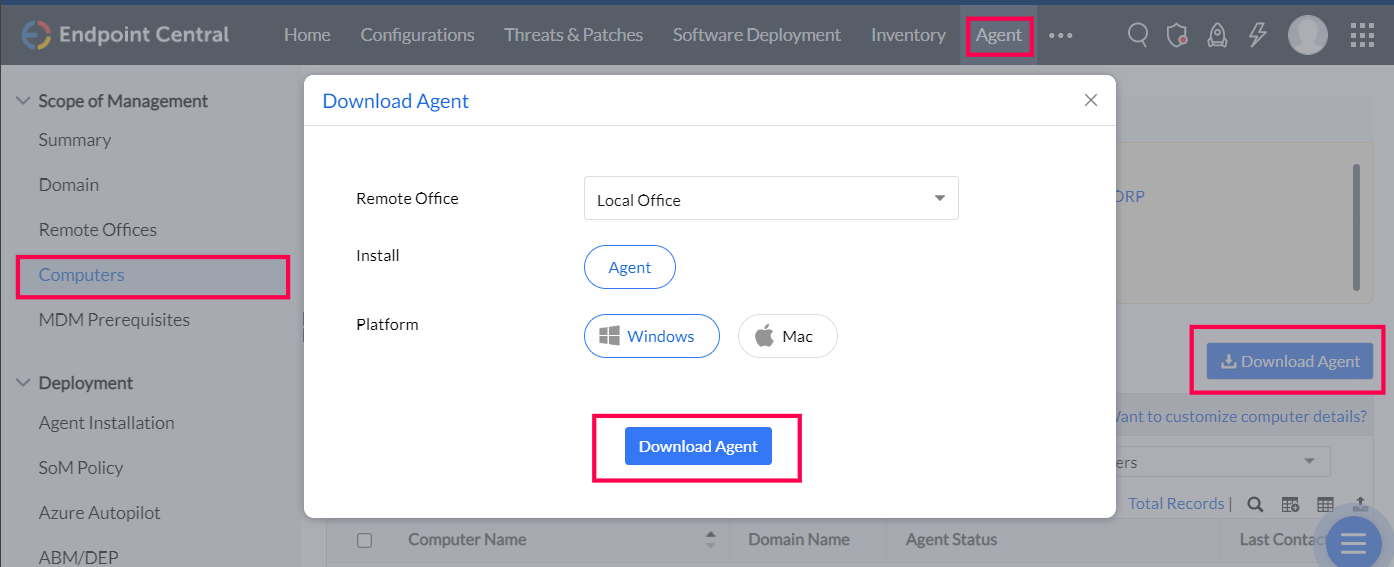
If you choose installation, For the agent installer EXE, follow these steps:
-
- Open the server web console.
- Navigate to Agent -> Computers
- Select the required remote office
- Click Download Agent and add the downloaded file in the tool.
If you choose uninstallation use the AgentCleanupToolClient.exe. Follow the steps given in this document to generate the Cleanup tool.

If you choose migration, use Agent Installer exe and AgentCleanupToolClient.exe. Follow the steps given in this document to generate the Cleanup tool.

For the agent installer EXE, follow these steps:
- Open the server web console.
- Navigate to Agent -> Computers
- Select the required remote office
- Click Download Agent and add the downloaded file in the tool.
3. Choose the Policy details
-
- Enter the Name of the GPO [eg : MEECAgentInstall ] -> Enter the policy type [Startup or scheduler ] -> Select the Script type [powershell script is always recommended]
![Enter the Name of the GPO [eg : MEECAgentInstall ] -> Enter the policy type [Startup or scheduler ] -> Select the Script type [powershell script is always recommended]](https://www.manageengine.com/za/products/desktop-central/images/gpo8.png)
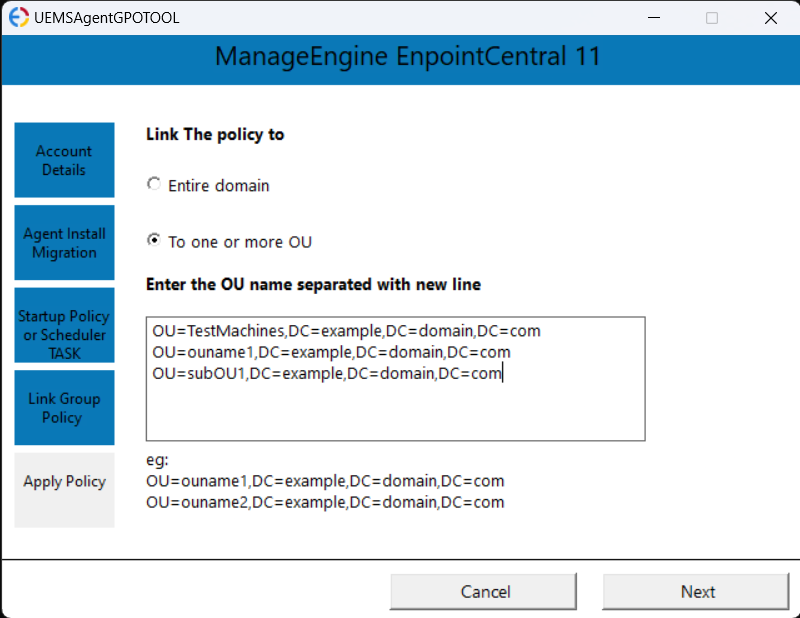
4. Link the GPO
-
- To apply policy to entire domain, select "Entire Domain".
- To apply the policy to a specific OU , enter the OU distinguished names and click next. (To obtain the OU distinguished name, refer to the first step.)
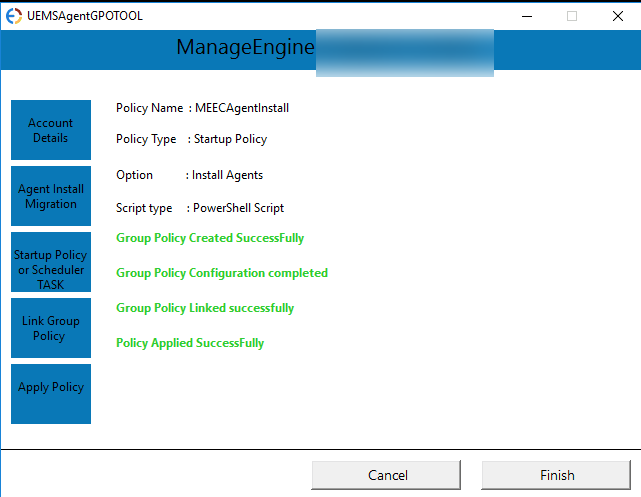
5. Confirm the details
-
- Confirm the policy details and click next
- The policy has been successfully created
Note: If the start up policy is configured, restart the endpoints and check the status and if the scheduler policy is created it will be applied in the endpoints within 90 mins.
To test the policy in a machine Immediately after creation, follow the steps below:
- Open the client machine -> Command prompt as an admin and execute the command gpupdate /force
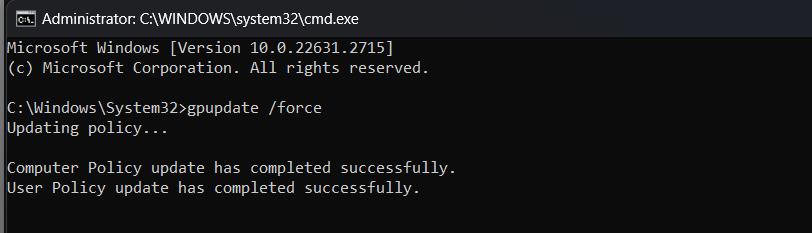
-
- Once the policy update is completed restart the machine if the "Start-up" policy is configured.
- For "Immediate Task" policy will be applied once the policy update is completed.
Listed below are a few possible issues that can be encountered during agent installation, and resolution steps for the same.
- Access is denied
- The network path was not found
- Logon Failure: Unknown user name or password
- No Network provider accepted the given Network Path
- Not enough server storage is available to process this command