The UIM feature in the Log360 UEBA add-on enables users create and manage mapping configurations so user identities across various domains in a network can be linked. Users are mapped across the network using their AD account as the basis and can be automatically mapped by specifying user account attributes in a mapping configuration rule. Unique identifier rules for each AD user can also be created to identify and map users with the AD account.
Under the settings tab in Log360 UEBA, select User Identity Mapping from the settings dropdown on the left column. Here you will find the imported list of all AD users (if domain(s) are already configured. Otherwise, configure the AD Domain in Domain settings). Perform actions such as "Hide from dashboard" and "Add to watch list" by selecting the icons in the Actions column. You can also select multiple users to perform group actions.
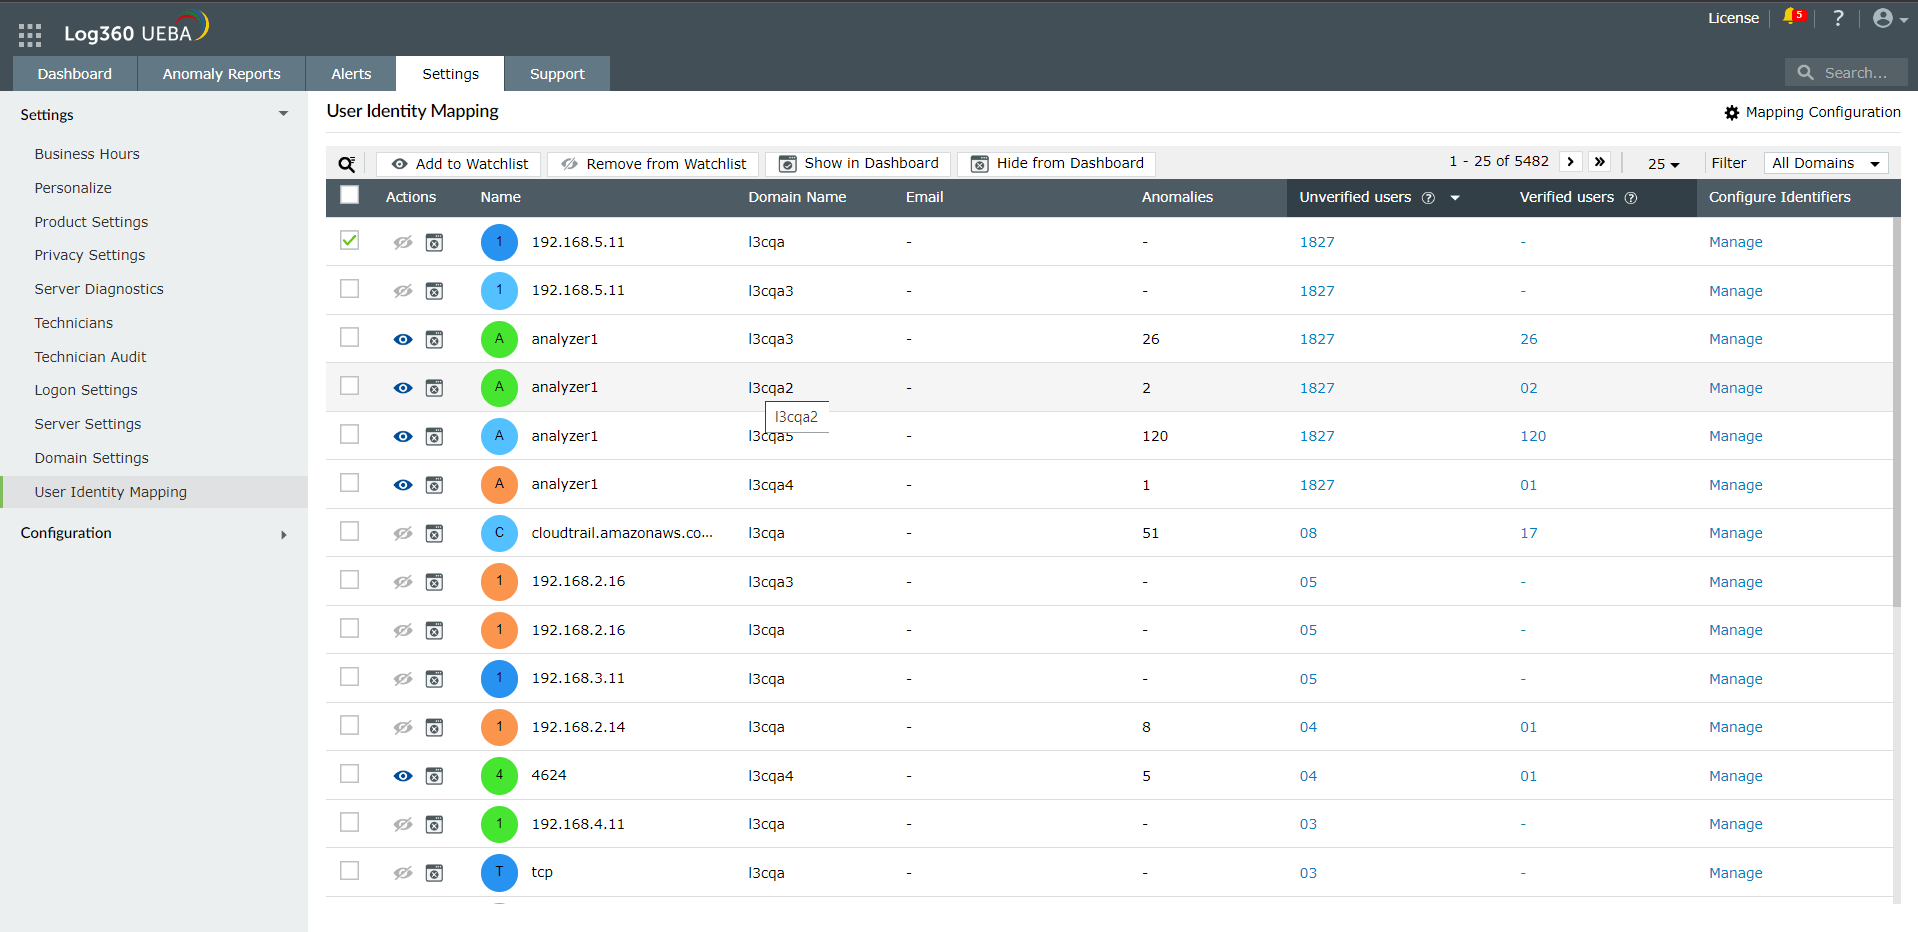
Anomalies: The anomalies column lists the number of anomalies identified from the AD User.
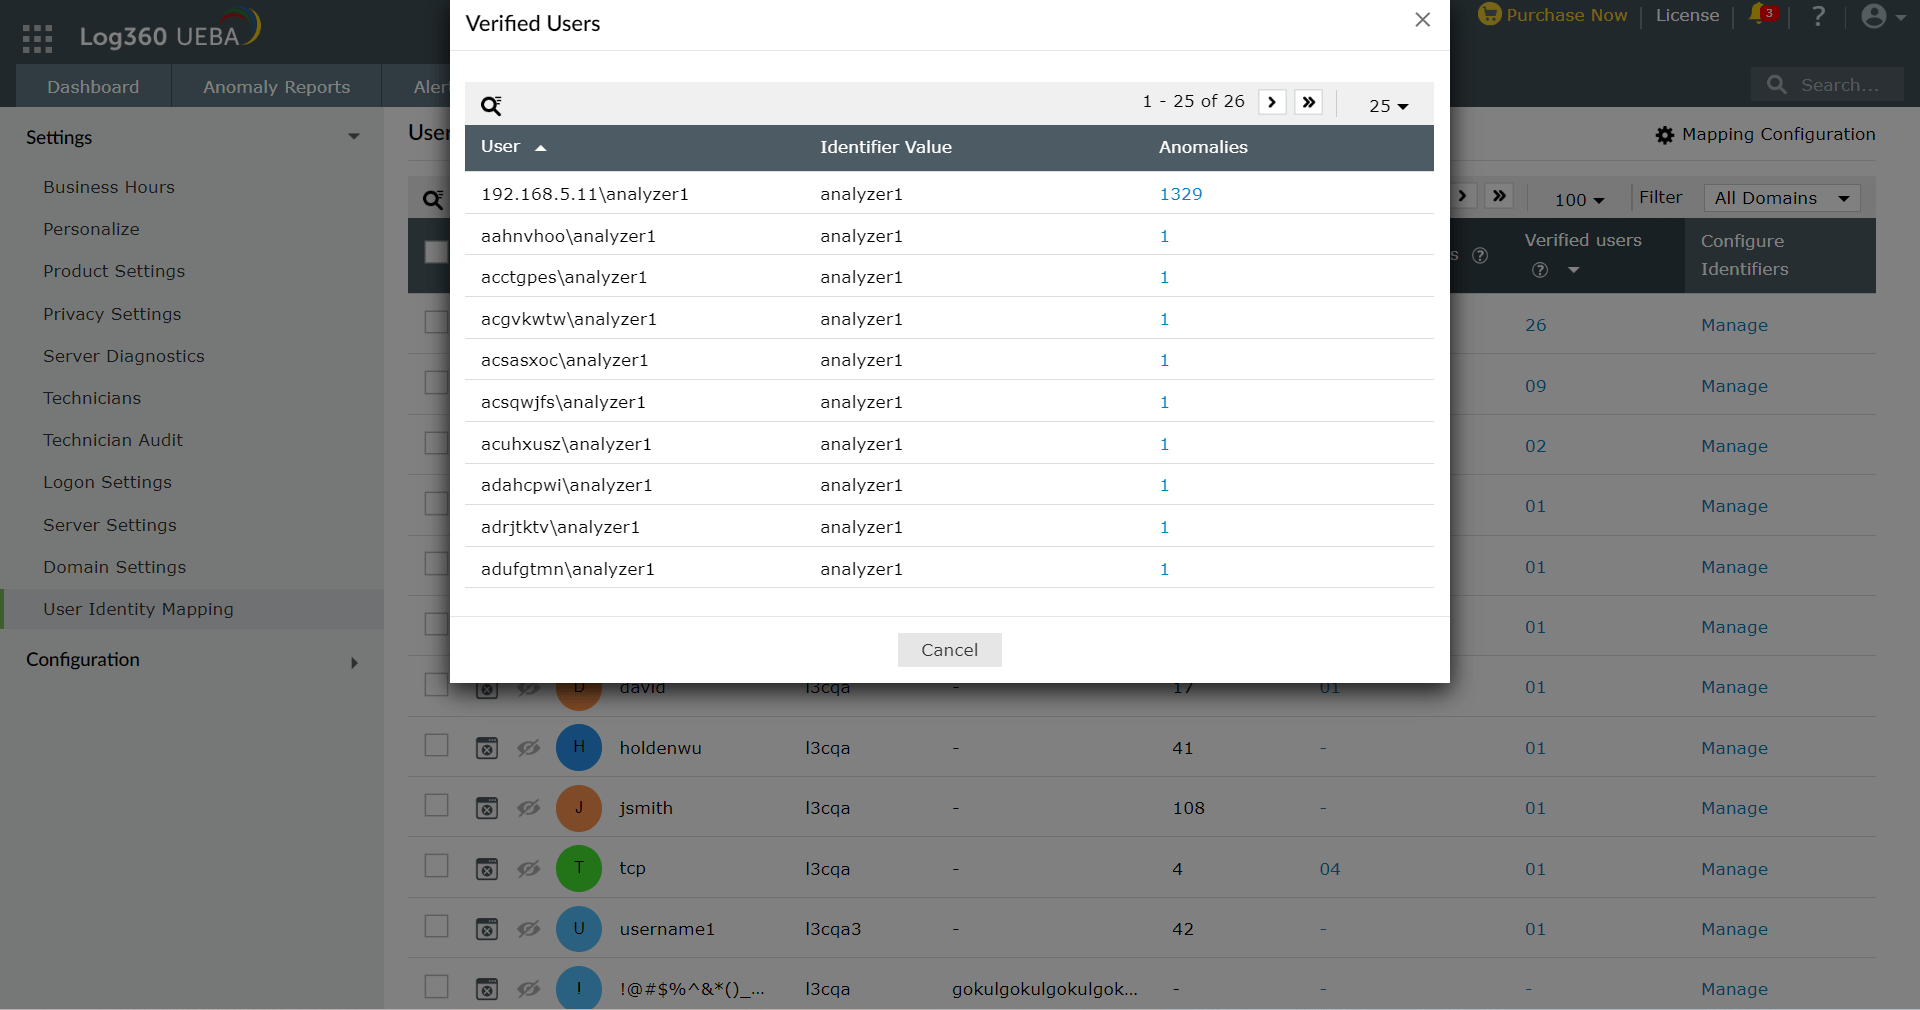
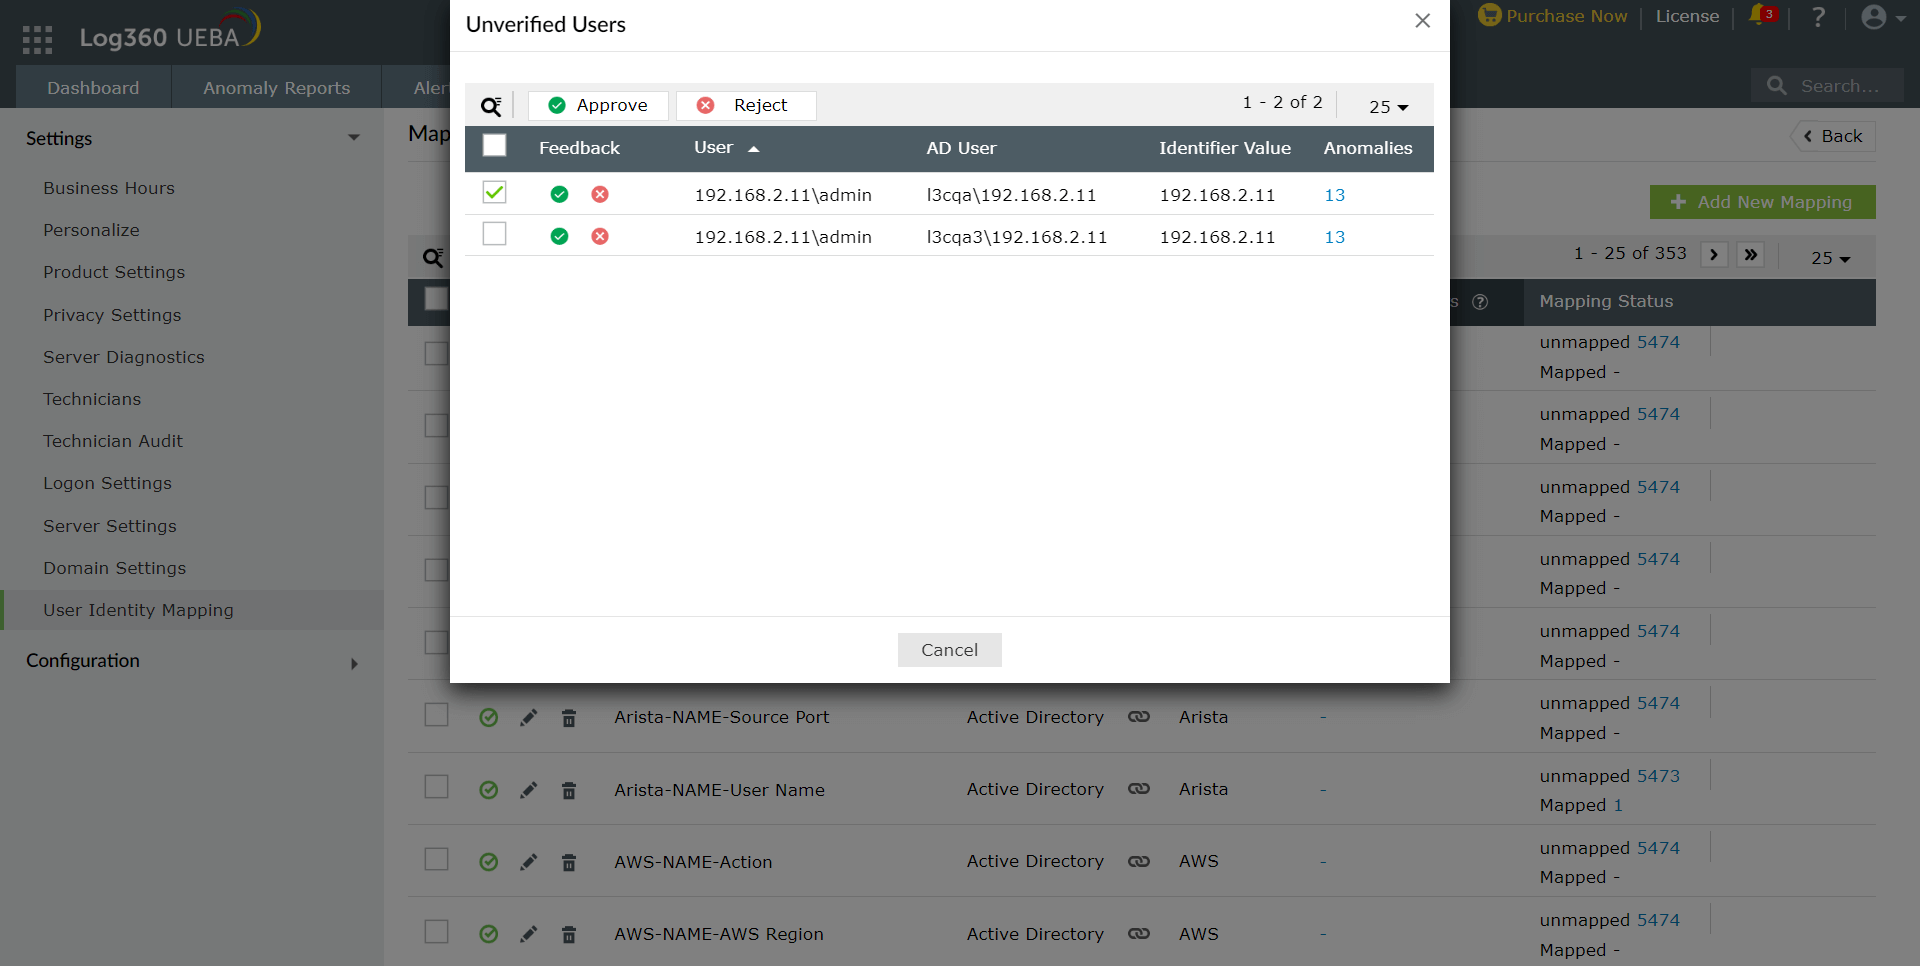
Unverified users: These are user accounts that have been mapped, but not verified by Admin belong to the AD user. Clicking on the number in the unverified users column pulls up the list of unverified users with their anomalies count. Here you can verify or reject users individually or in groups. Clicking on the anomalies count pulls up the list of anomalies of the corresponding user.
Verified users: These are user accounts that have been verified to belong to the same AD user by the Admin. Clicking on the anomalies count pulls up the list of anomalies of the corresponding user.
In the main UIM window, clicking Configure or Manage from the AD users list opens the AD User details tab, which displays a list of Identifiers categorized by the device. You can view the user's AD details by clicking on AD info. Clicking on Verified identifiers opens a tab with only the list of verified identifiers across different categories.
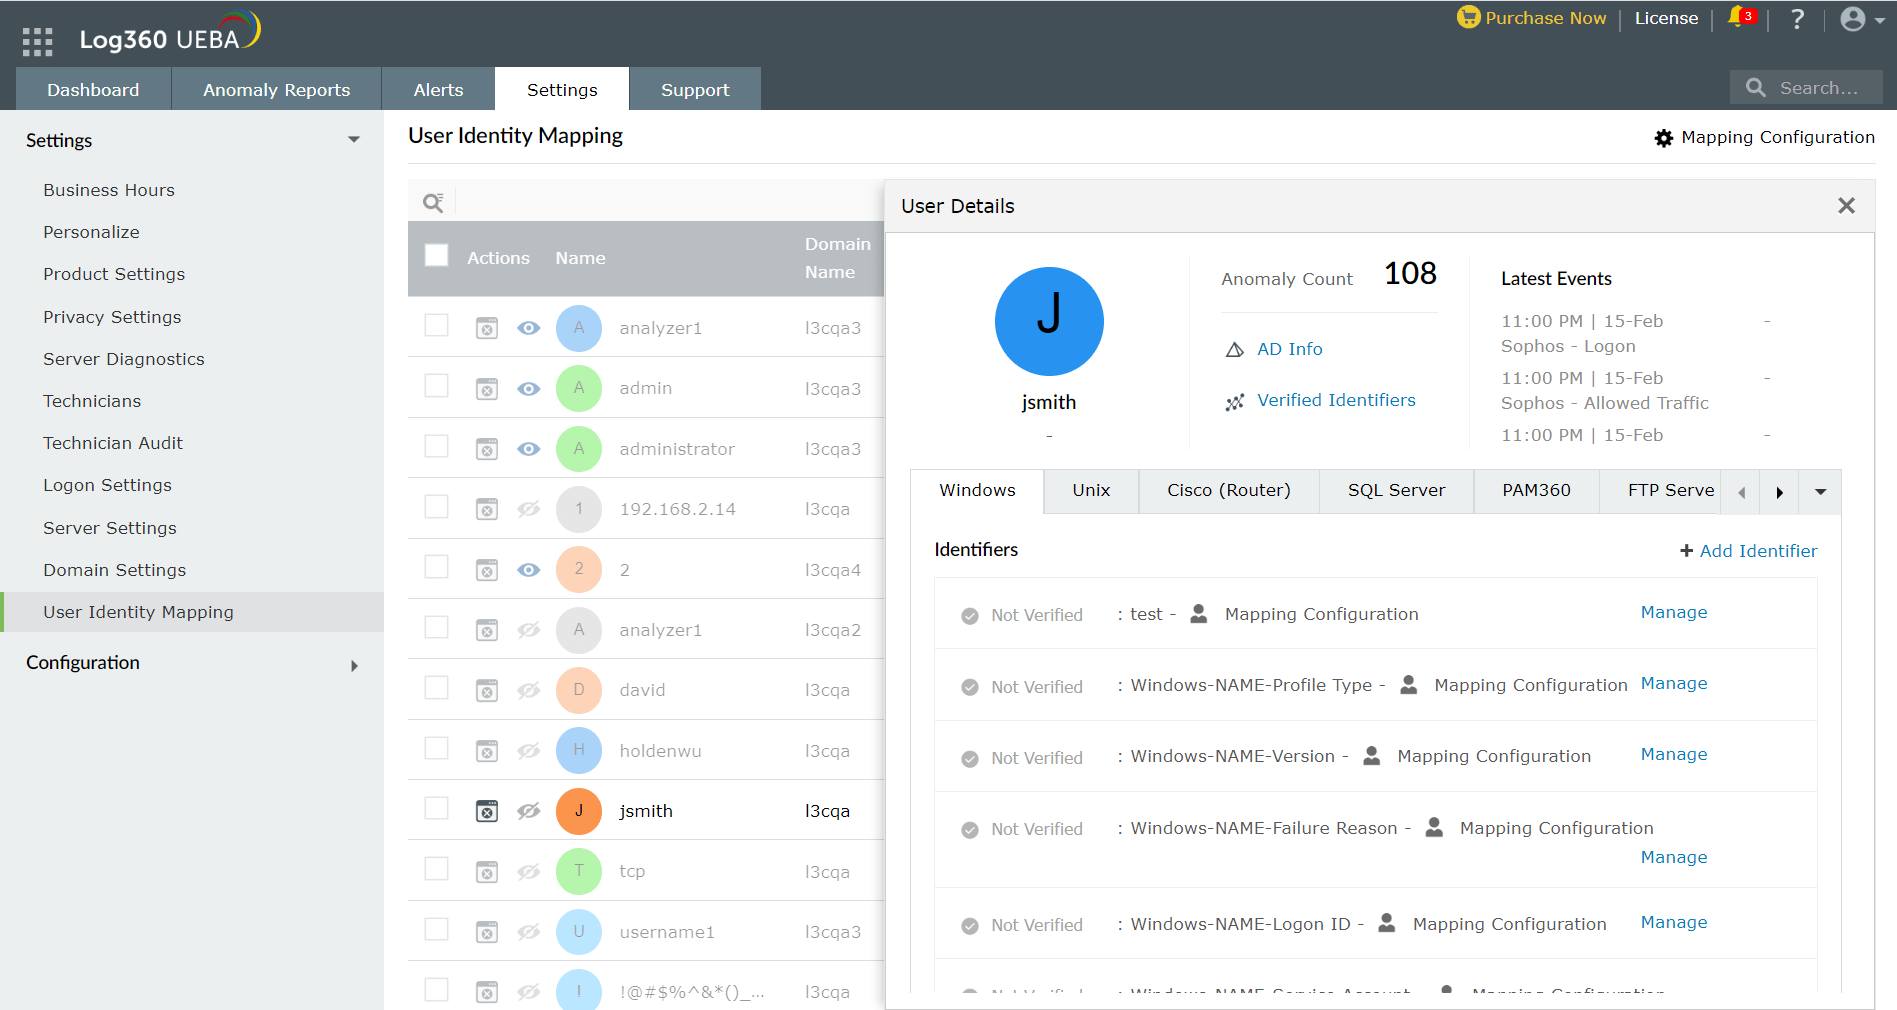
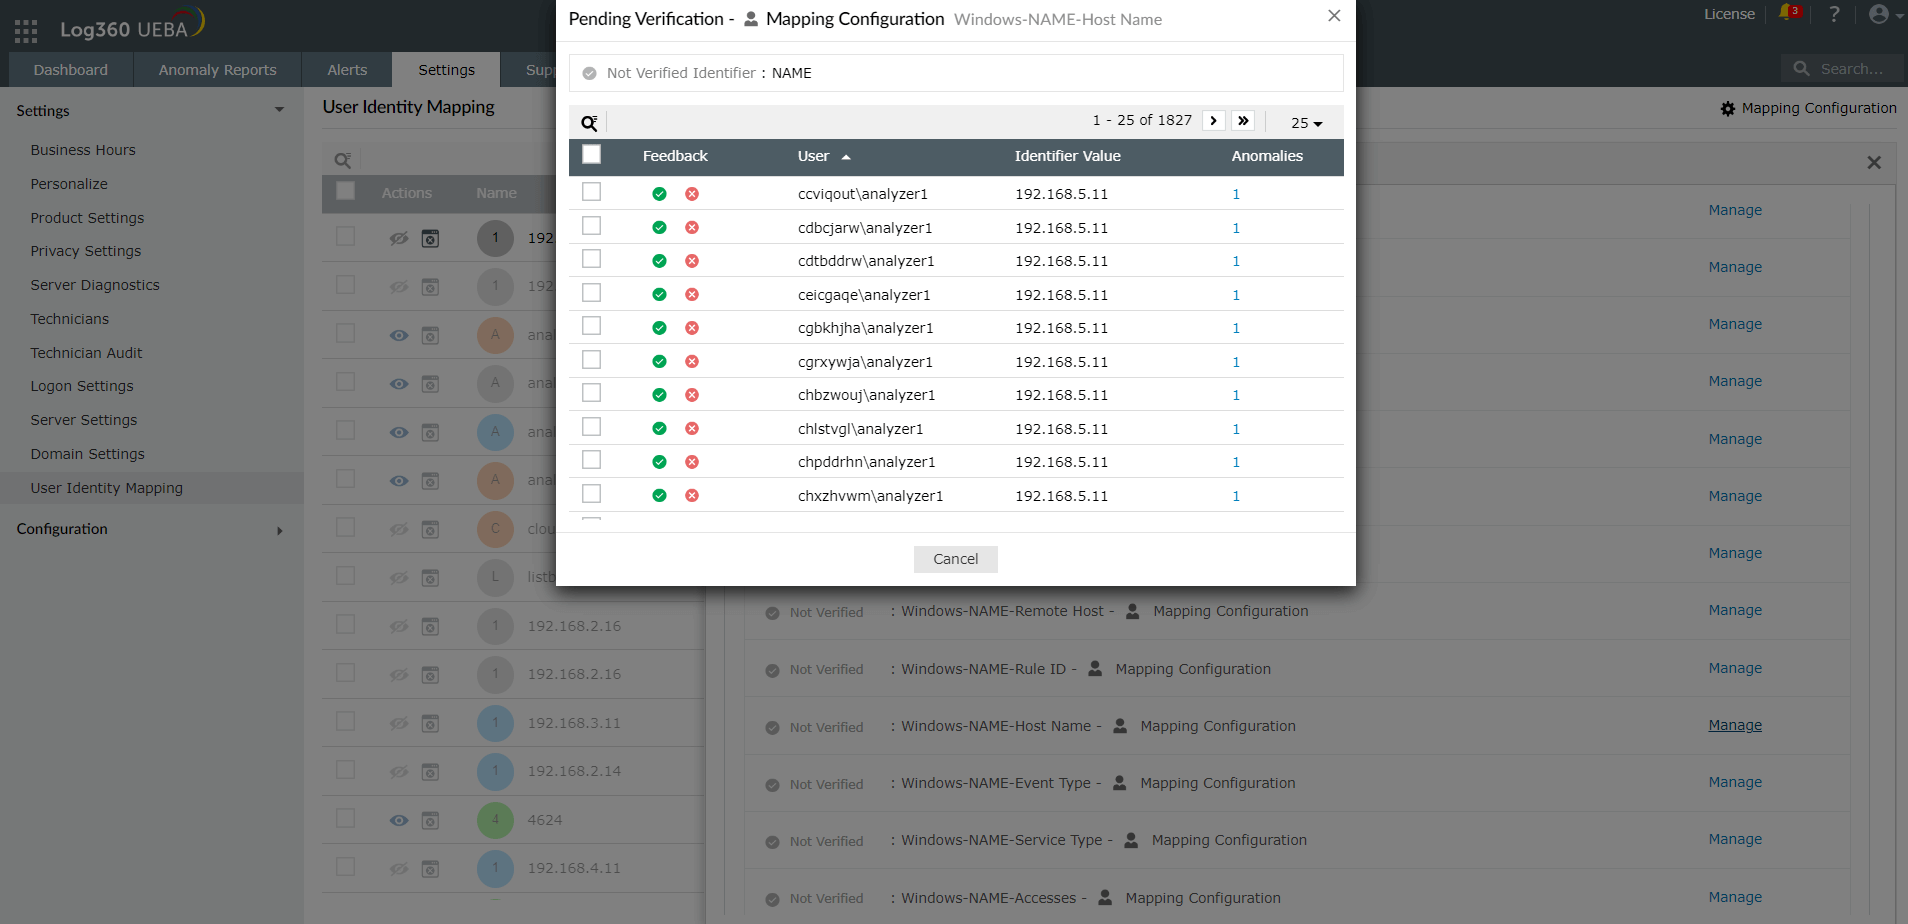
Admins can create individual identifier rules for each specific AD user to map different users accounts with that particular AD user. For Not verified and Partially verified identifiers, Click Manage from the identifiers list to view the list of users with their anomalies identified based on the particular identifier. Here you can verify or reject the users.
Click + Add Identifier at the top right of the identifiers list. In the Add New Mapping popup, create your custom rule and click Save. You can 🗑️ Delete or ✎ Edit a created identifier by hovering near the manage button of Not verified and Partially verified identifiers. Verified identifiers with mapped users cannot be edited or deleted.
Mapping configurations are rules that the Admins can create by specifying attributes of account target and account source across domains. Users identified by these specified attributes will be automatically mapped.
Under the settings tab in Log360 UEBA, select User Identity Mapping from the settings dropdown on the left column. This pulls the list of all AD users (if the domain(s) is already configured. Otherwise, configure the AD Domain in Domain settings). On the top right corner, click ⚙️ Mapping Configuration.
Here you can view the list of all the created mapping configurations.
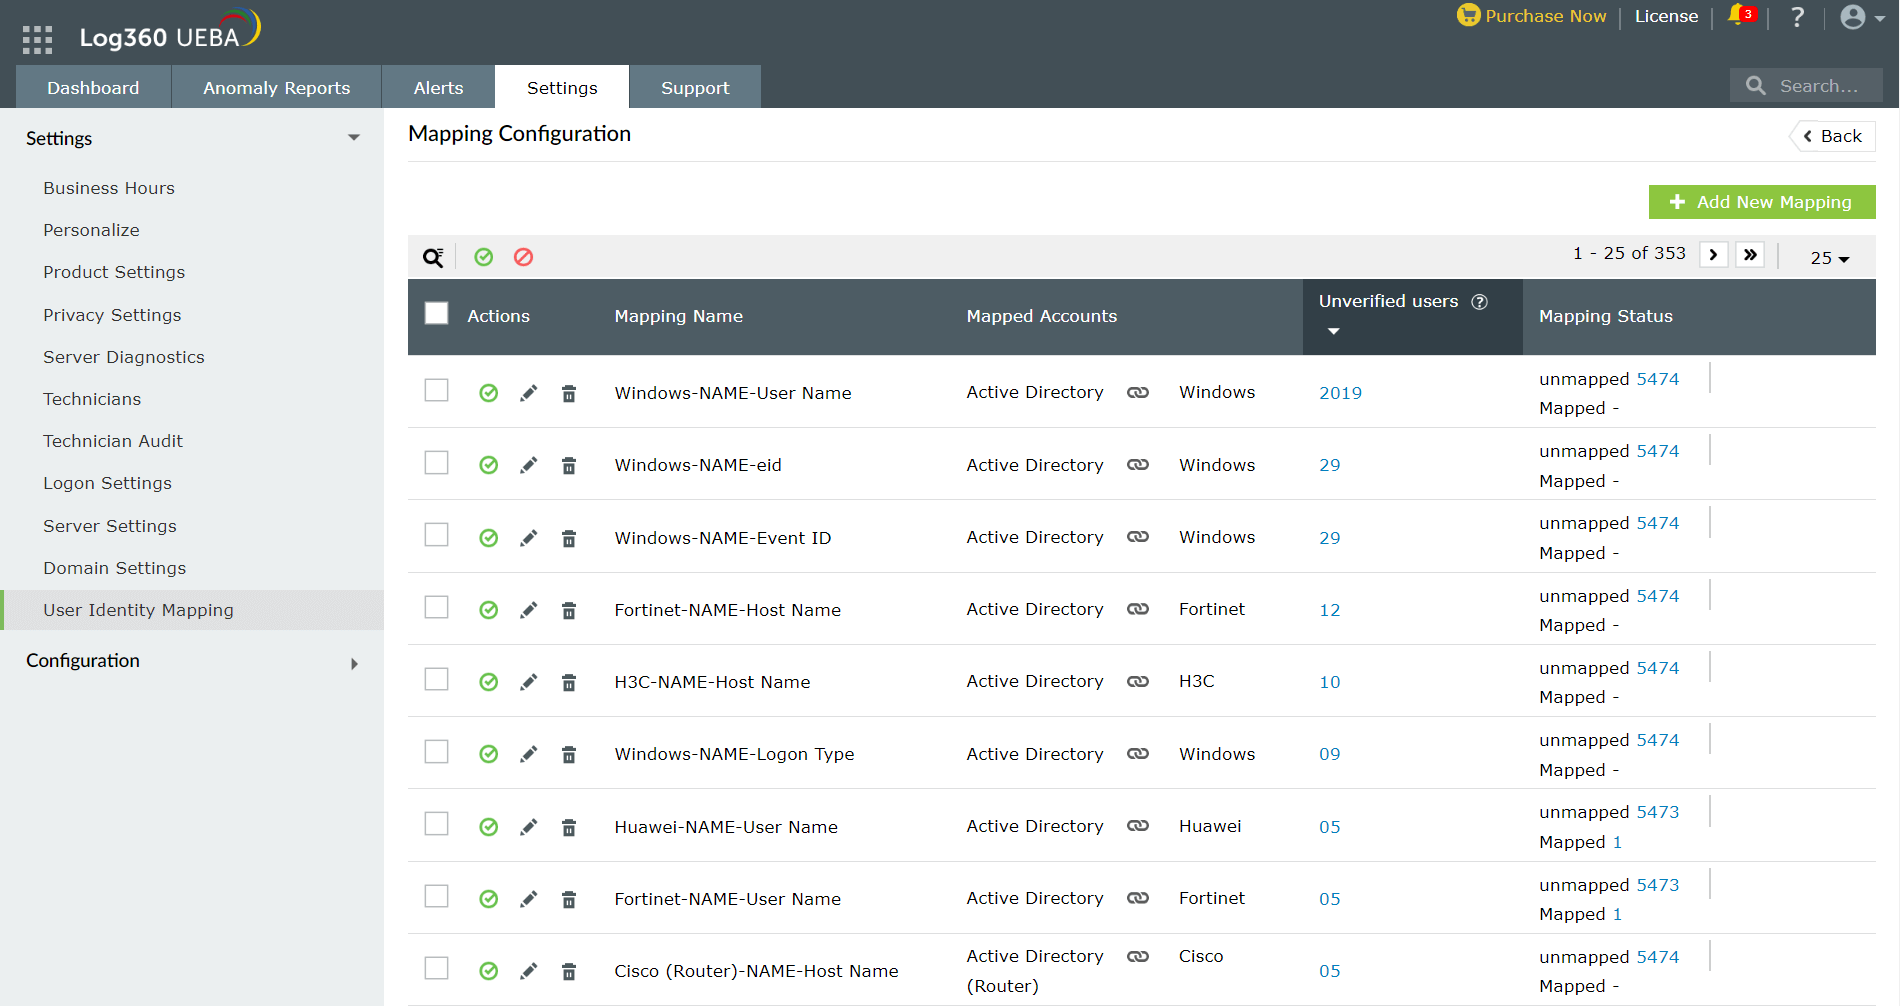
Unverified users: These are users who have been mapped by the particular mapping configurations but not verified by the Admin. Clicking the number in the unverified users column pulls up the list of unverified users who have been mapped.
Here you can approve or reject individually as well as in groups. Clicking on the anomalies count pulls up the list of anomalies of the corresponding user.
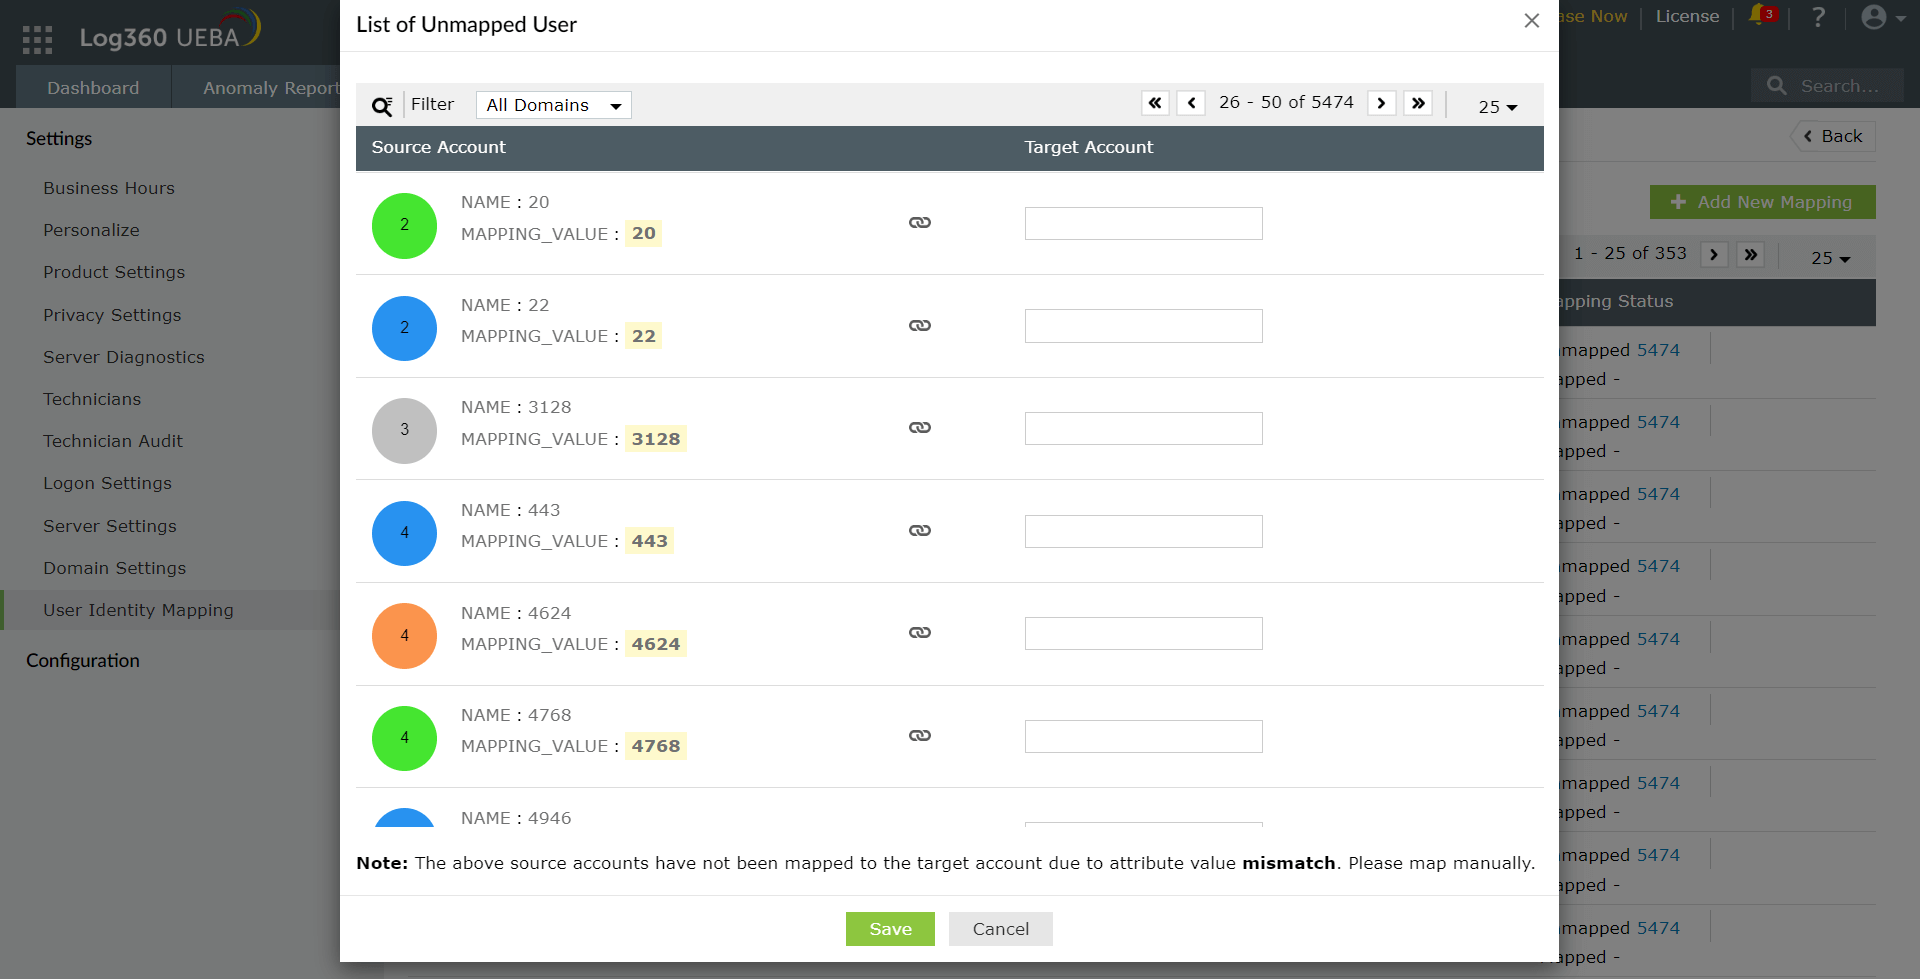
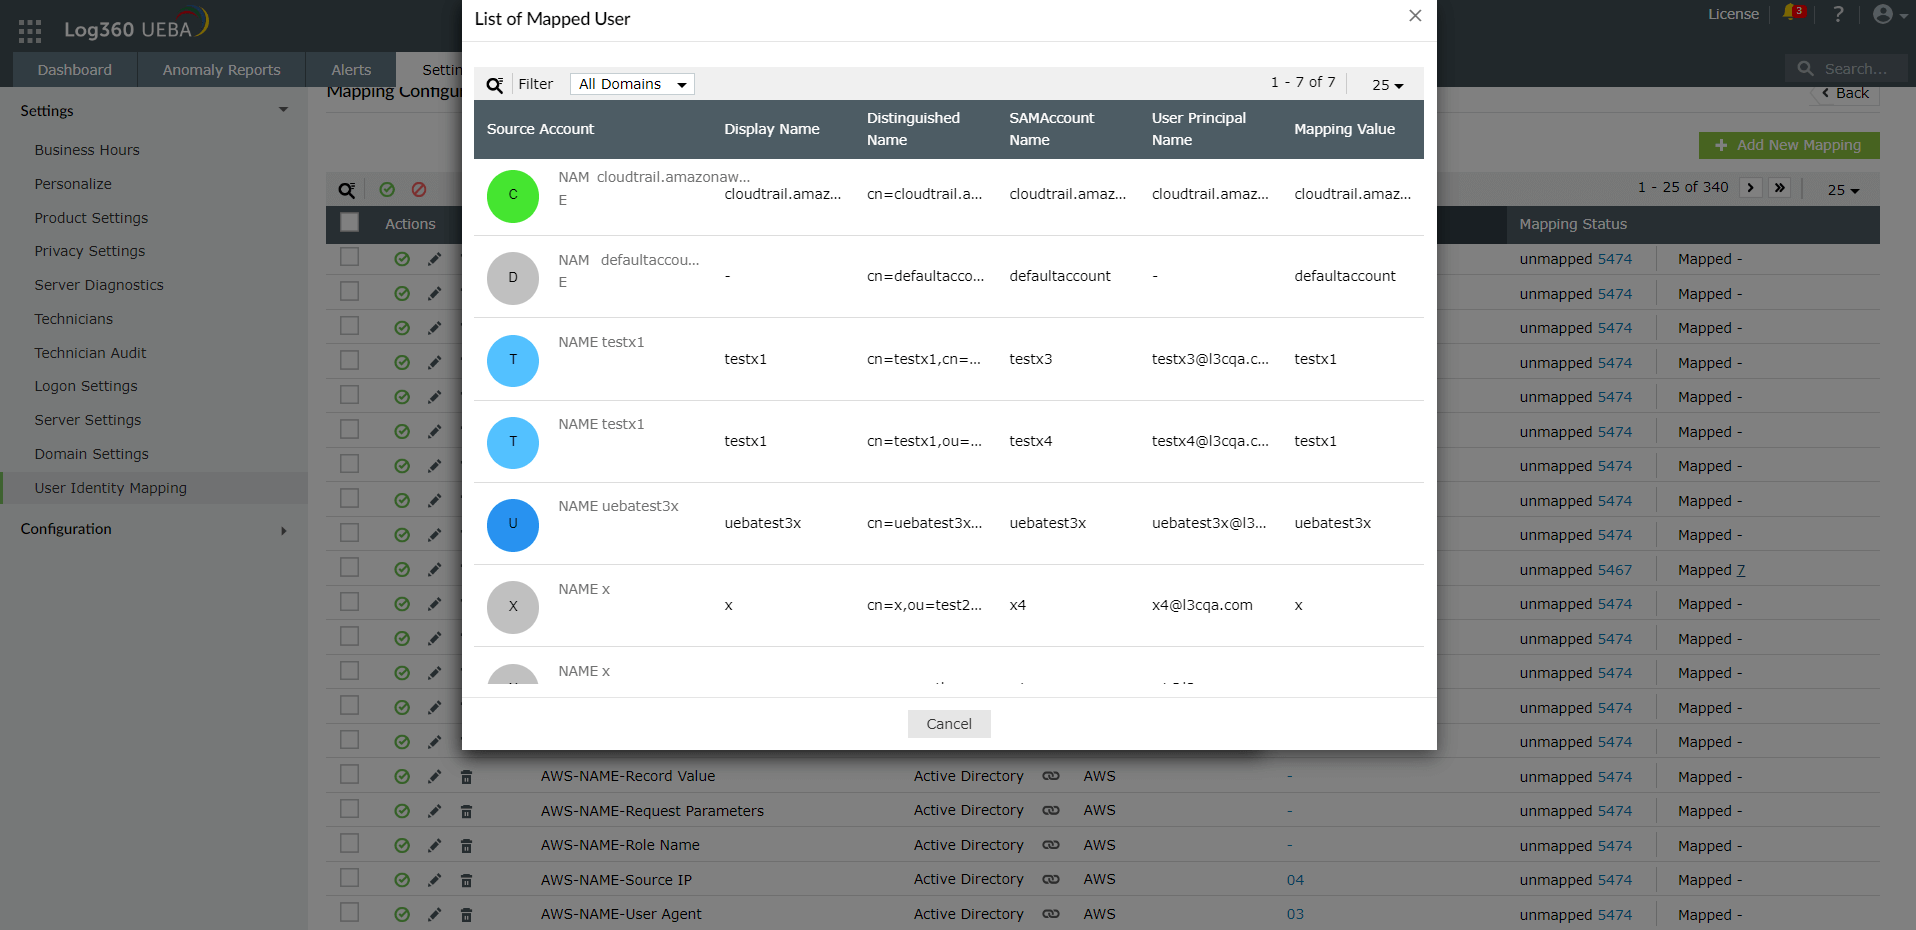
Mapping Status: Unmapped: These are users that have been identified but not mapped by the mapping configurations. Clicking on the number opens the mapped user details popup. You can manually enter the target account details for the source user account. Click Save to map the users.
Mapping status: Mapped: Users that the particular mapping configuration has mapped. Clicking on the number opens the mapped user details popup.
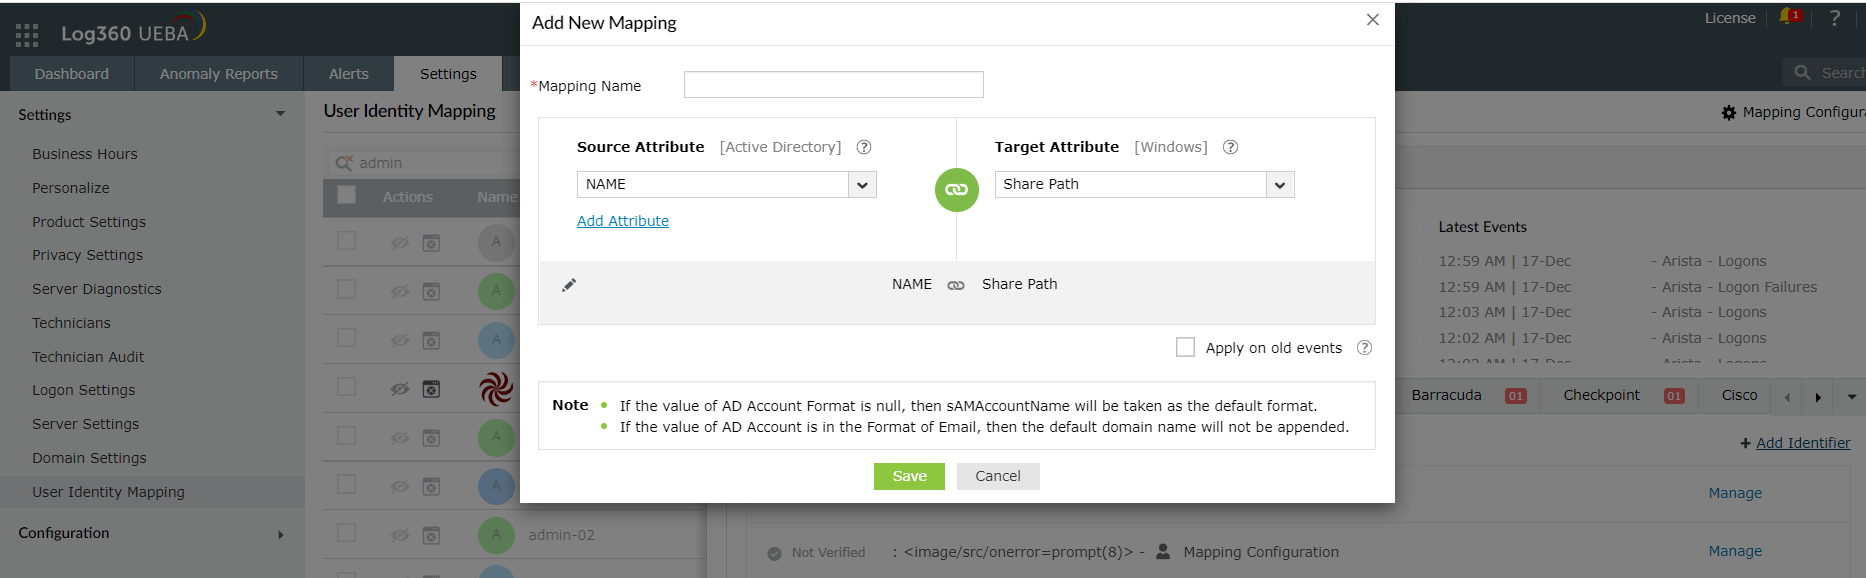
In the UIM page, go to ⚙️ Mapping configuration → Add New Mapping. The Add New Mapping popup will now appear. Enter the mapping name and select the account source and account target. Next to the Account Source field, click the ✎ icon to select the domain(s) from the domain filter dropdown.
Select the source and target attributes using the dropdowns in the corresponding columns. Click Add Attribute to add a new field in the source attribute column. To delete a field, hover on the right side of the related field and click the ️🗑️ icon. You can also manually edit the attribute by clicking the ✎ icon. Then click the 🖫 icon on left or press Enter to save the manually edited attributed value.
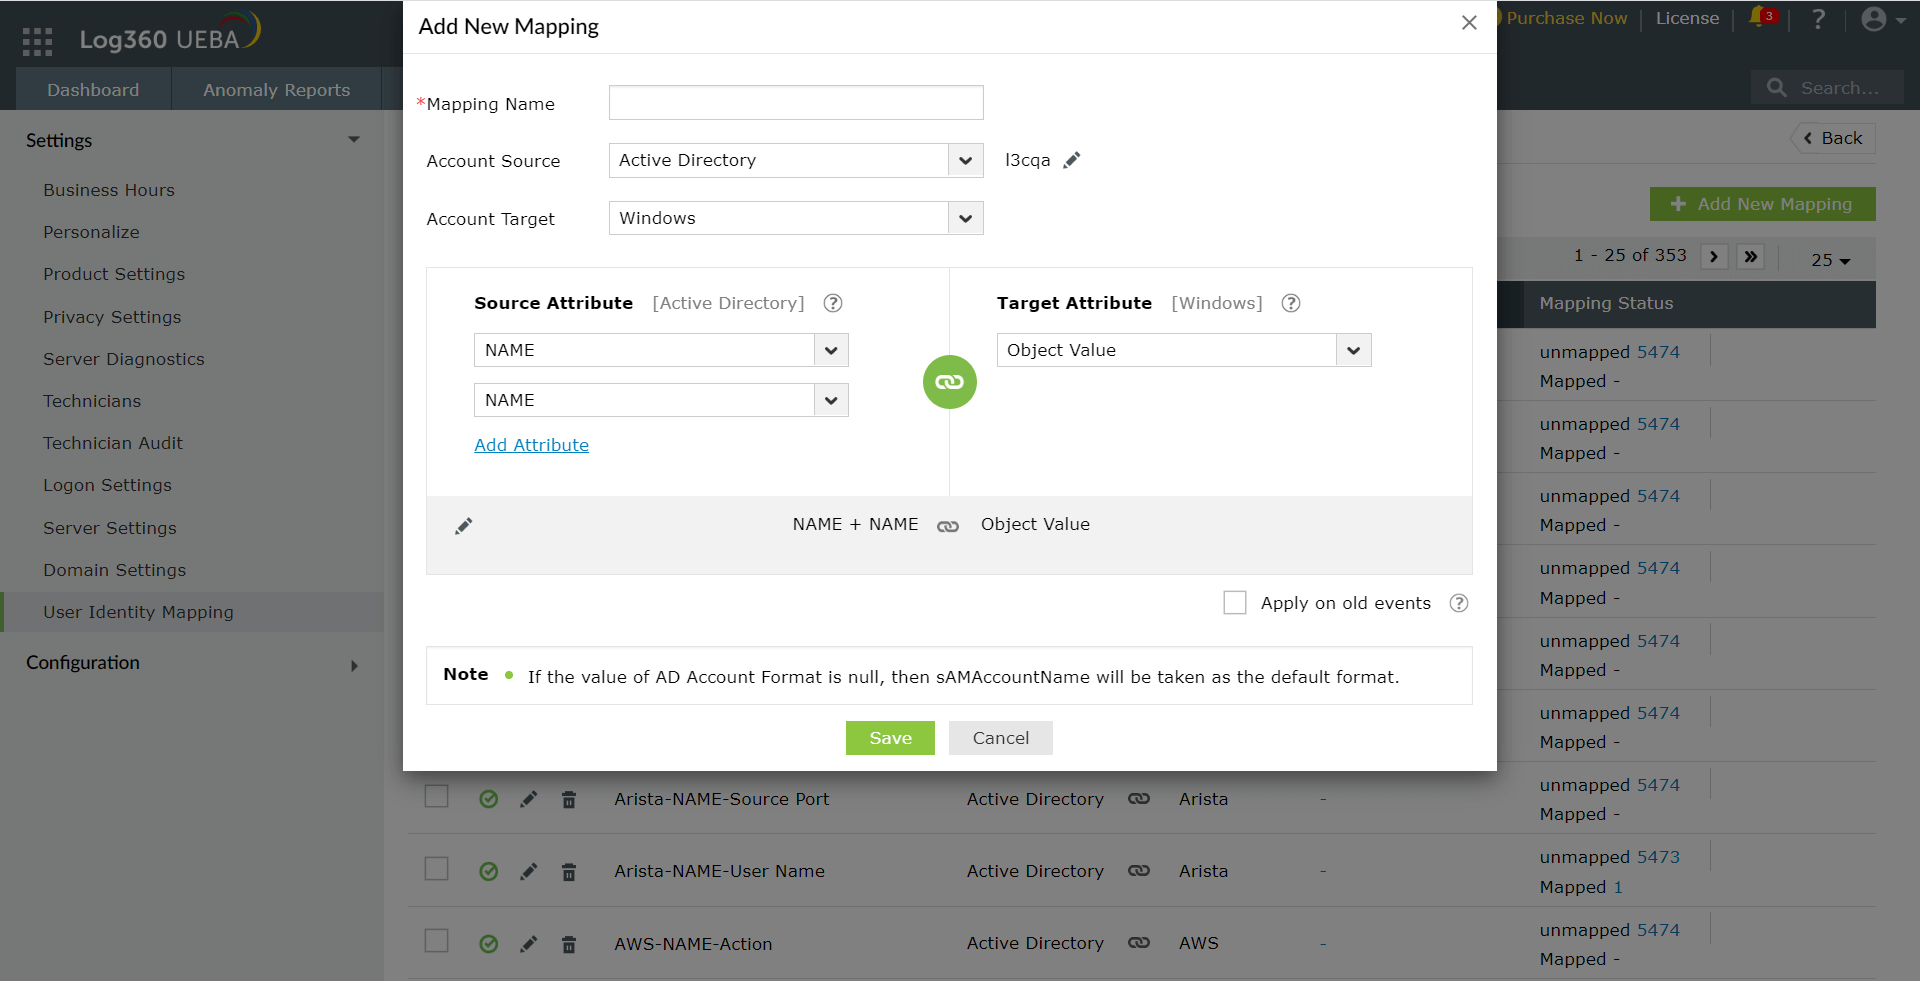
Check the Apply on old events checkbox to apply the mapping configurations for older anomalies.
Click Add to save the new mapping.