How to configure Mail Server settings using Gmail Account?
Description
This document explains the steps involved in using Gmail account to configure Mail Server Settings in Mobile Device Manager Plus.
Steps:
Note:
- Mobile Device Manager Plus currently does not support Two Factor Authentication (TFA) while using Gmail.
- Google has deprecated the basic authentication support for mail servers from 30 May 2022. Follow the steps given below to configure OAuth authentication.
Configuring Mail Server settings using Gmail Account - OAuth Authentication
- On the Mobile Device Manager Plus console, click on the Admin tab.
- Under Setting Up MDMP, click on Mail Server Settings.
- Specify the following details:
- Server Name: smtp.gmail.com
- Port :465 (SSL) / 587 (TLS) If port 587 is used, TLS needs to be enabled.
- Sender Email Address: Your Email Address
- Username: Username should be the same as sender email address.
- Test Email Address:Email Address where you want to receive test mails.
- Email Type: SMTP/SMTPS
- Enable TLS: Yes / No. If you choose No, then SSL will be set as default.
- Go to the Google Cloud Platform Console.
- From the projects list, select a project or create a new one.
- Open the console and select APIs & Services and click Credentials on the left.
- Click Create Credentials, then select OAuth client ID.
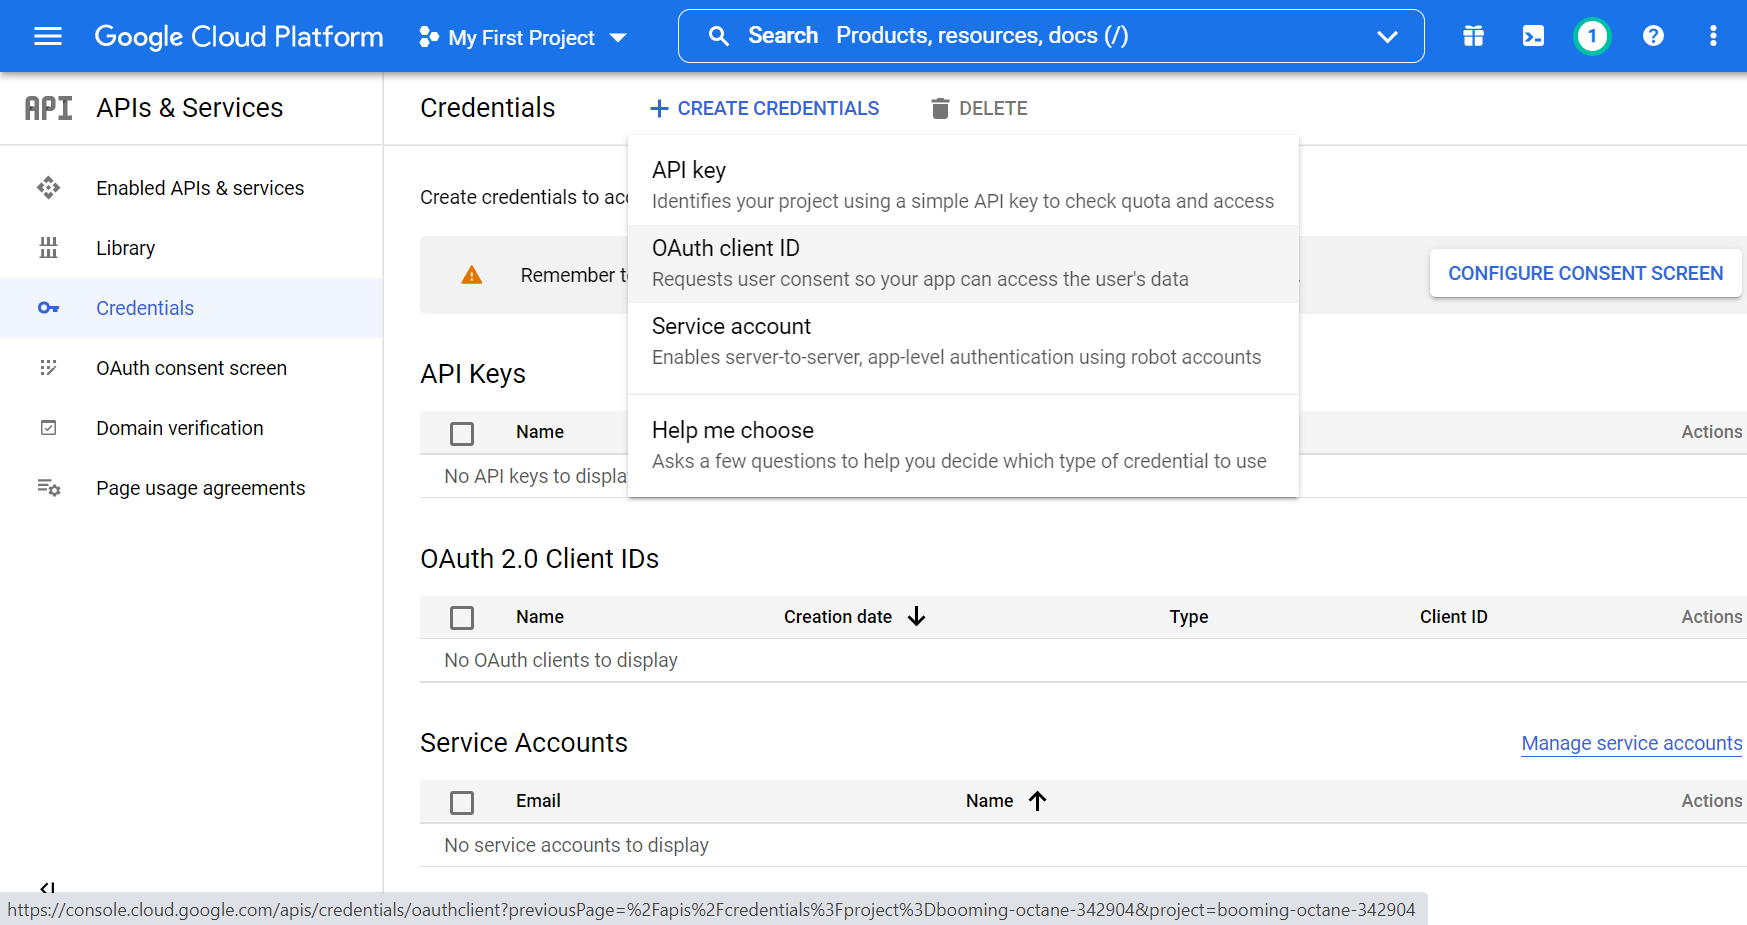
- Select the Application type as Web application.

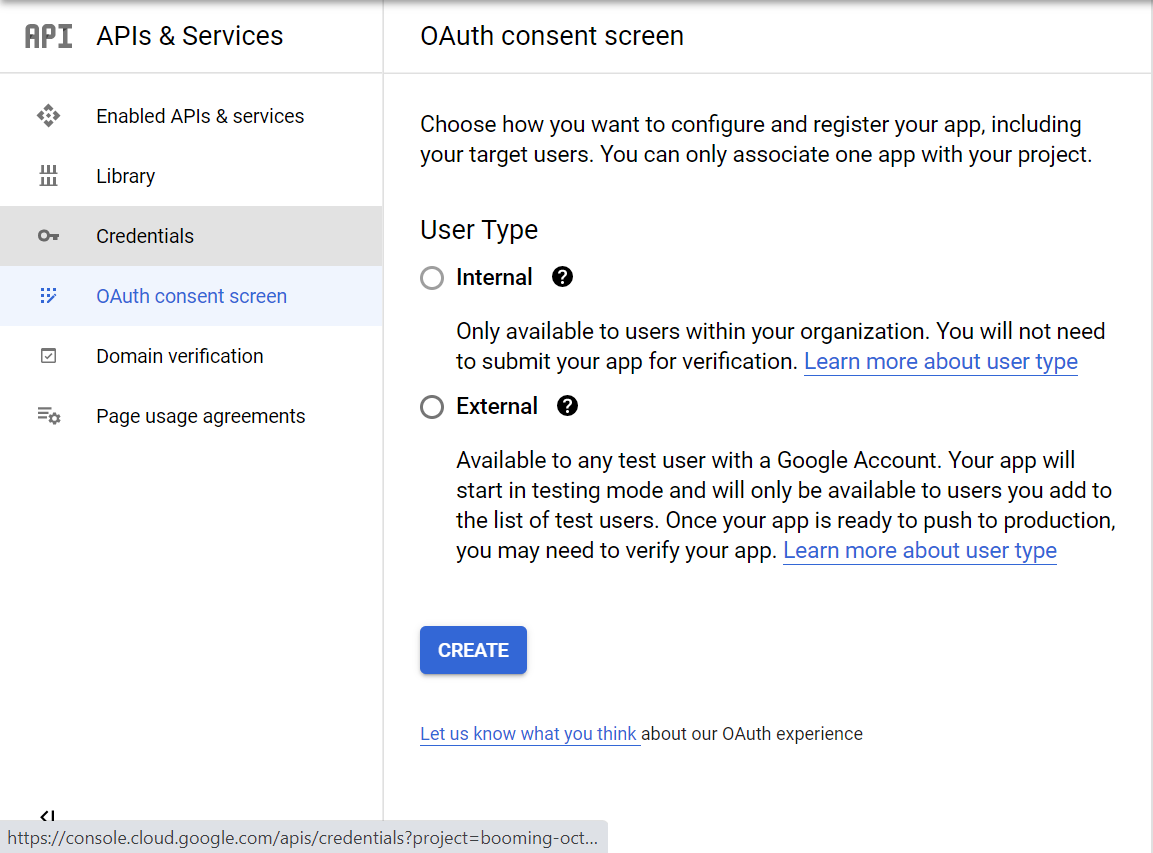
- You have to configure your consent screen if you are configuring for the first time.
- Add the redirect URIs in the following format under "Authorized Redirect URIs" and click Save.
- https://mobile_device_manager_plus_server_FQDN or localhost:port/html/oauth-verification.html?actionName=updateMailServerDetails
- https://mobile_device_manager_plus_server_FQDN or localhost:port/html/oauth-verification.html?actionName=sendTestMail
Note: If you specify "localhost", the entire configuration must be performed on the machine where the Mobile Device Manager Plus server is installed.

- You have successfully created the client ID and secret.

- Paste the created Client ID and Client Secret values in the Mobile Device Manager Plus console.
- Provide Redirect URL in the format: "https://mobile_dev_server_FQDN or localhost:port/html/oauth-verification.html" and click Save to finish the configuration.
Note: If you specify "localhost", the entire configuration must be performed on the machine where the Mobile Device Manager Plus server is installed.
- You have successfully configured the mail server using Gmail account, with OAuth Authentication.