Deploy Patches Manually
The Install/Uninstall Patch configuration enables you to manually install or uninstall patches from a central location. While systems running on Windows and macOS do not have any preconditions, certain Linux distributions demand the following prerequisites:
Prerequisites to patch Red Hat and SUSE Machines
To patch the systems running on these Linux distributions, configure the Red Hat Linux Settings and SUSE Linux Settings suitably
Follow the steps mentioned below to install/uninstall patches.
- Click on Patch Management in the web console.
- Under Deployment select Install/Uninstall Patch.
- Choose the operating system and then create a configuration that needs to be deployed.
Step 1: Name the Configuration
Provide a name and description for the Install/Uninstall Patch configuration.
Step 2: Define Configuration
Specify the operation type as Install Patch to install patches and define the following values:
| Parameter | Description |
|---|---|
Add Patches | Click on Add More Patches. From the window, select the patches that have to be applied. There is an option to view the missing patches or all patches, which can then be filtered based on the application and service pack. |
Scheduler Settings | Install After
|
Deployment Settings | Specify the following Deployment Settings: Installation/Uninstallation Option
Install Between
Allow Users to Skip Deployment
Reboot Policy
|
Step 3: Define Target
Using Define Target , define the targets for deploying the Install Patch configuration(s).
Step 4: Deploy Configuration
Click on Deploy to deploy the defined Install Patches Configuration in the defined targets. The deployment will be initiated during the next system startup.
To save the configuration as a draft, click Save as Draft.
Note:
Patch uninstallation is currently not supported for Mac and Linux machines.
Creating a configuration from Detailed View
If you are trying to create a configuration from Detailed View under All Patches, then the below-mentioned scenarios will come into effect. The detailed view will list every missing patch against every single computer in a separate row, which means if a single patch is missing in 5 computers, 5 rows will be listed.
When you have chosen to deploy more than one patch for more than one computer as mentioned below, then you might end up in deploying the patches to the computers which you never intended to deploy. 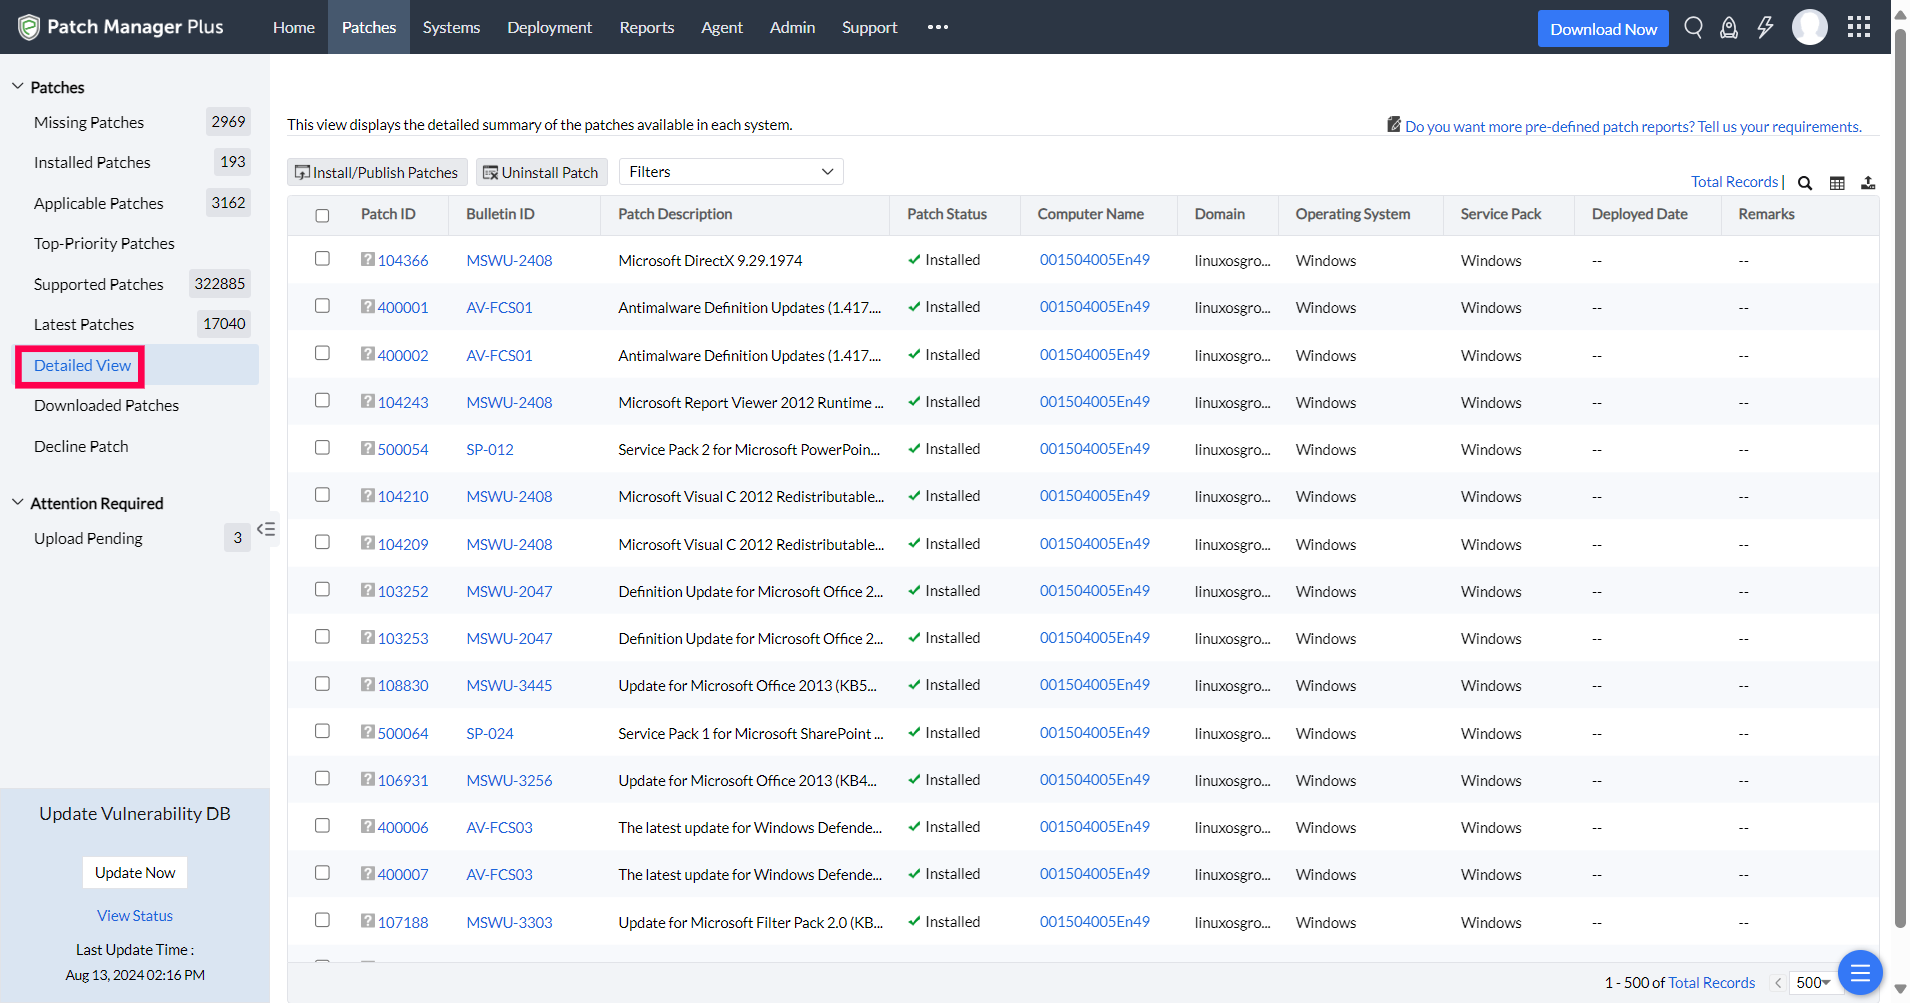
Creating a configuration based on the above selection will work as follows:
Selected Patches: Patch 1, Patch 2 and Patch 3.
Defined Target: Computer 1, Computer 2, and Computer 3.
Result of this Deployment:
Patch ID | Included Target | Intended target | Missing Patch | Deployment Initiated | Expected Result |
|---|---|---|---|---|---|
Patch 1 | Computer 1 | Yes | Yes | Yes | Will be deployed |
Patch 1 | Computer 2 | Yes | Yes | Yes | Will be deployed |
Patch 1 | Computer 3 | No | No | Yes | Will not be deployed |
Patch 2 | Computer 1 | No | Yes | Yes | Will be deployed |
Patch 2 | Computer 2 | Yes | Yes | Yes | Will be deployed |
Patch 2 | Computer 3 | No | No | Yes | Will not be deployed |
Patch 3 | Computer 1 | No | No | Yes | Will not be deployed |
Patch 3 | Computer 2 | No | No | Yes | Will not be deployed |
Patch 3 | Computer 3 | Yes | Yes | Yes | Will be deployed |
As per the above-mentioned table, the configuration will be deployed across to all the computers to which the patch is applicable. Patch 2 is applicable for Computer 1, but you never intended to deploy it, however, the deployment will happen on it since it is a missing patch.
In order to overcome this, it is recommended to deploy multiple patches to a single computer or single patch to multiple computers from Detailed View. If you want to deploy multiple patches for multiple computers, then it is recommended to create multiple configurations or initiate deployment from Missing Patches view.
Note:
When a Patch Management task is initiated, the agent residing on the client computer scans the computer for the missing patches and downloads only the applicable patches from the Patch Manager Plus server.
If you are managing computers in a remote office using a Distribution Server, then WAN agents will download the applicable patches from the Distribution Server. The deployed patches will be replicated to the Distribution Server (only for on-premise) irrespective of whether the patch is applicable for the remote office computers or not.
Delete or Suspend Manual Patch Deployment
There can be certain scenarios where manual patch deployment tasks need to be suspended for the time being or be deleted altogether. Here are the steps to:
Delete Manual Patch Deployment Configurations
Step 1: Head on to Deployment > Manual Deployment.
Step 2: Select the configurations that need to be deleted.
Step 3: Click on Move to Trash to delete the selected configurations.

Note:
- Once deleted (Move to Trash), the deployment configurations will cease to act:
- Immediately in systems connected through LAN/remote agents (except in systems with deployment in progress *) .
- As per the replication policy in systems under a distribution server.
- The deleted configurations can be viewed from Deployment > Trash.
- In Trash, under Status, you can see the latest status of the configurations before they were deleted.
- Immediately in systems connected through LAN/remote agents (except in systems with deployment in progress).
- As per the replication policy in systems under a distribution server.
Restore Deleted Configurations
Step 1: Click on Deployment > Trash.
Step 2: Click on the three horizontal dots corresponding to the respective configurations in the Action column.
Step 3: Click on Restore from the menu.
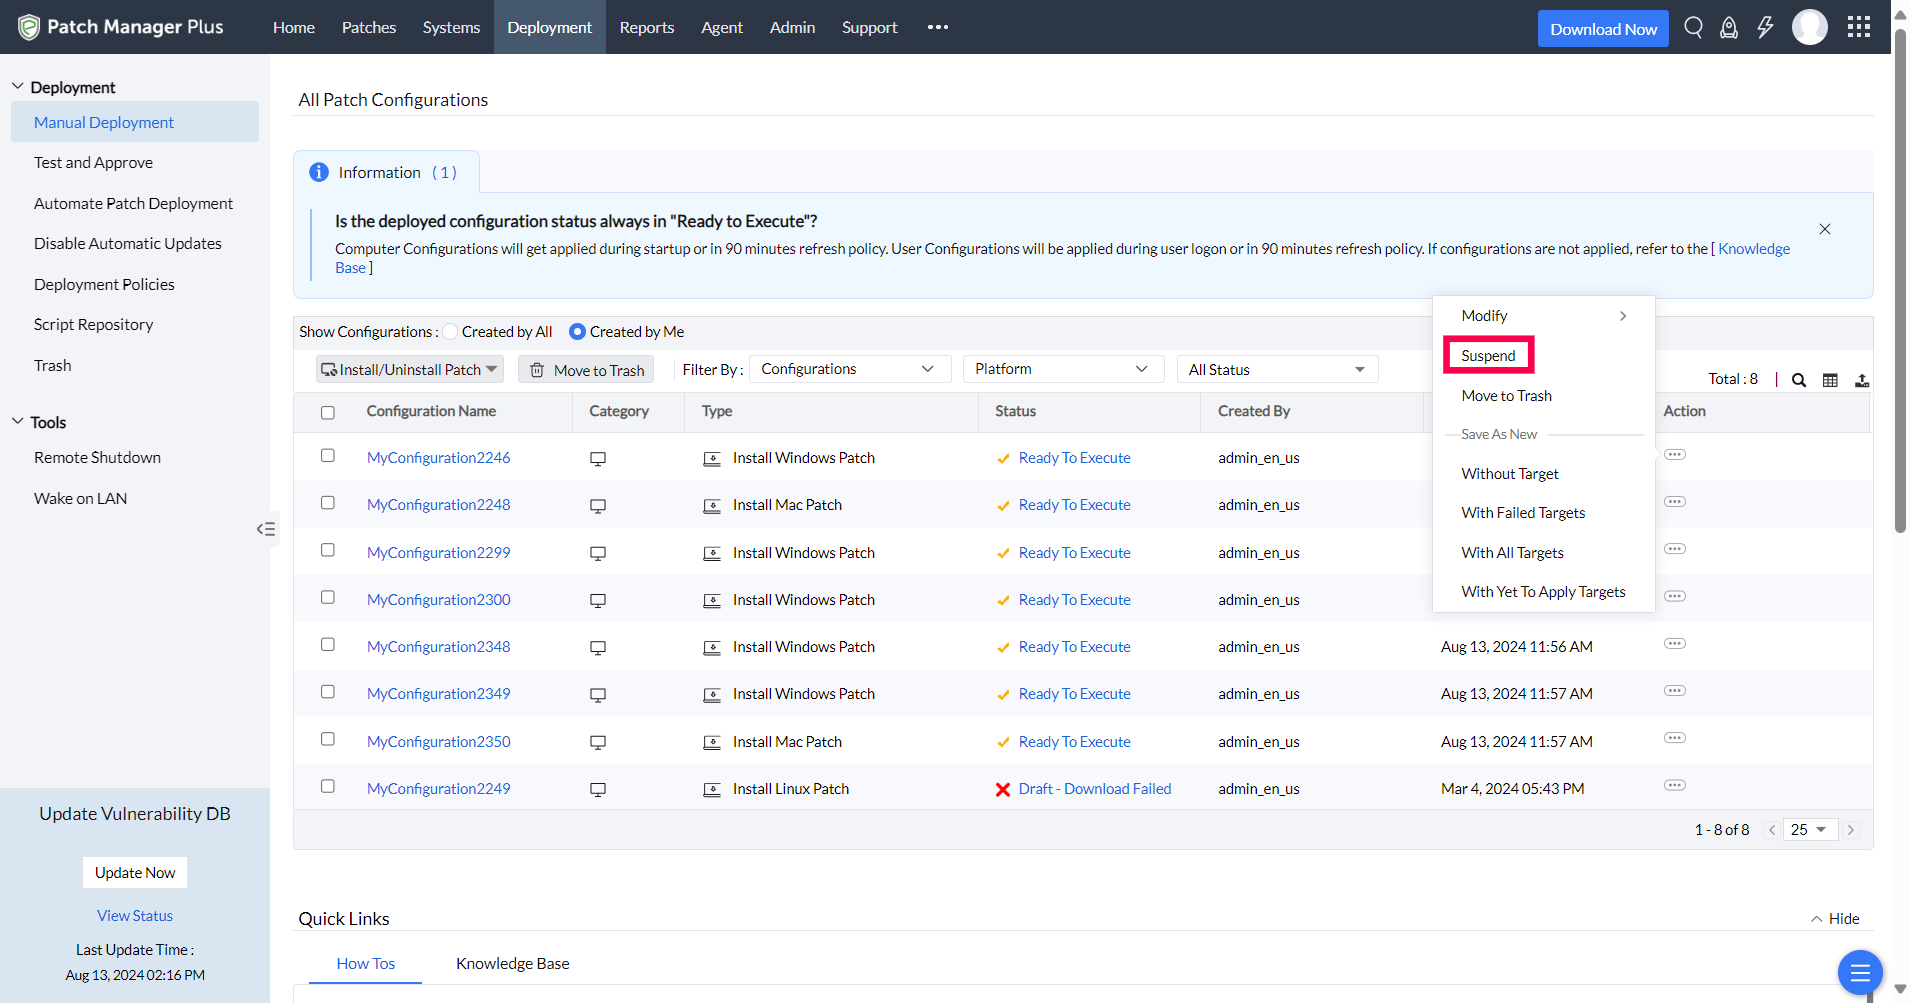
Suspend Manual Patch Deployment Configurations
Step 1: Head on to Deployment > Manual Deployment.
Step 2: Click on the three horizontal dots corresponding to the respective configurations in the Action column.
Step 3: Click on Suspend from the menu.
The suspended configurations can be resumed by following the steps 1 & 2 and then clicking on Resume.
Note:
The Suspend and Move to Trash actions take effect: