Pricing  Get Quote


Configuring the ADSelfService Plus login agent for machine MFA and password self-service in Linux

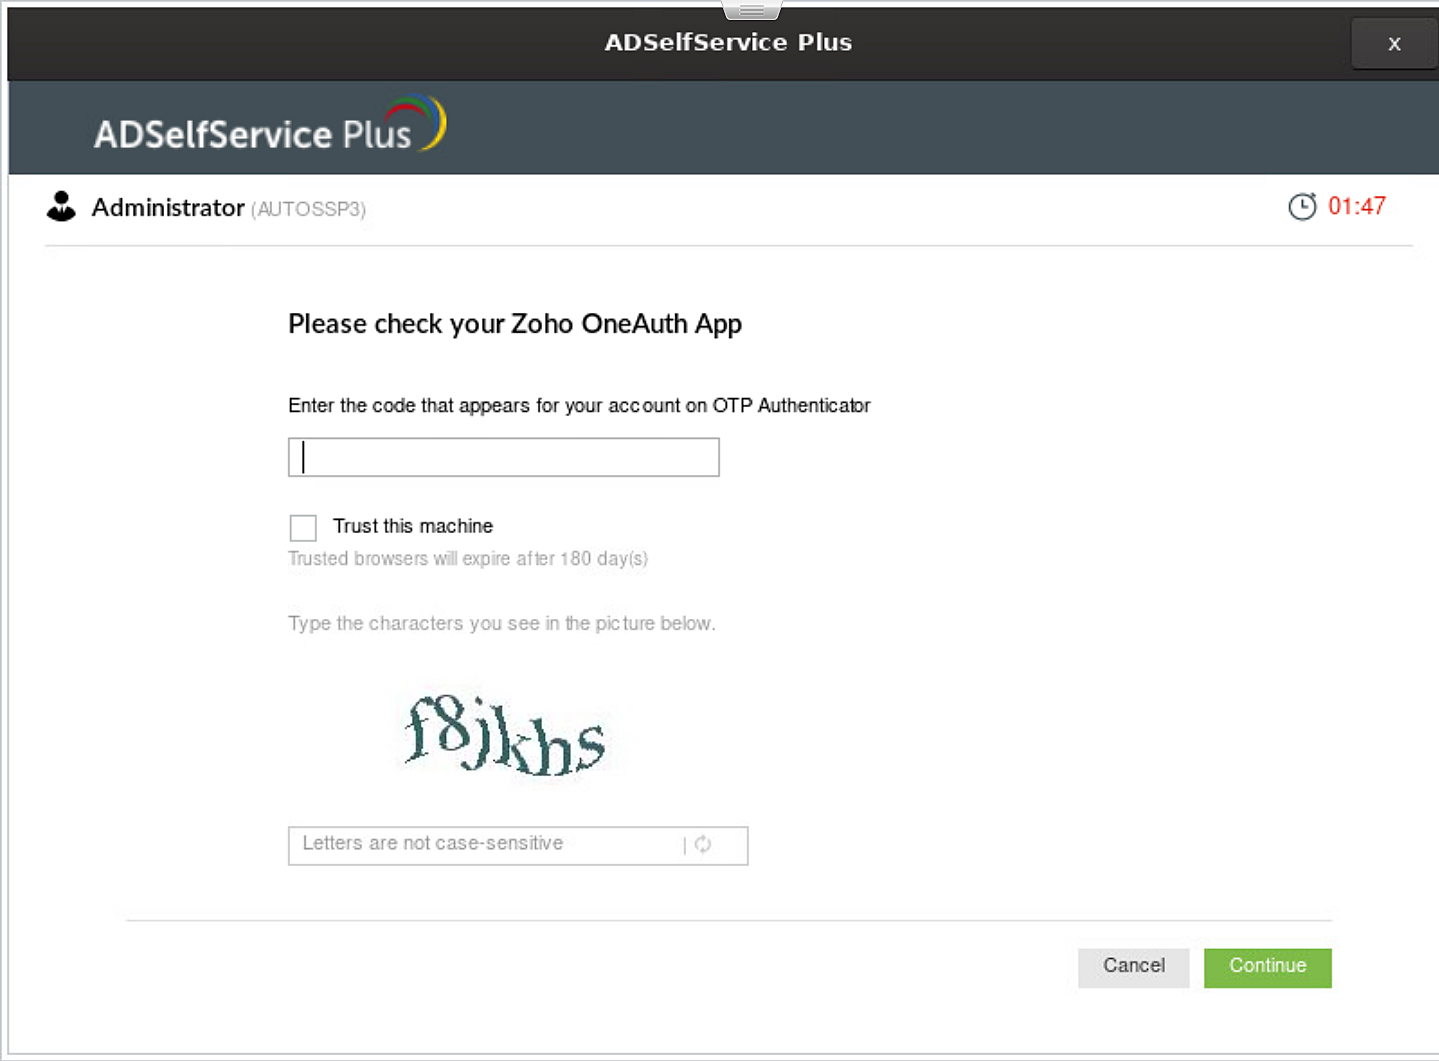
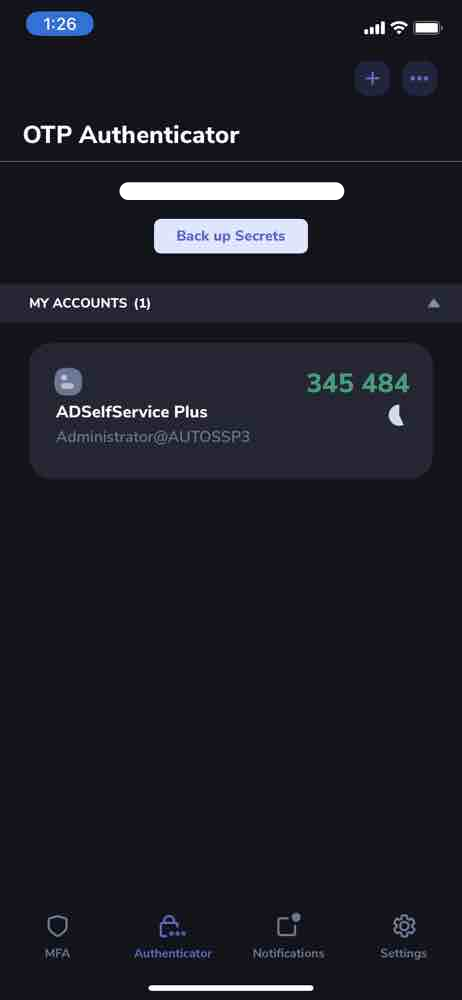
Securing data and resources on the corporate network is of paramount importance to organizations. In a world where most corporate attacks originate at an endpoint, ADSelfService Plus offers 20 MFA factors to protect endpoints by allowing access only after identity verification. These factors include biometrics and TOTPs, which can be deployed using the ADSelfService Plus login agent to secure workstations, servers, and other endpoint logins such as VPNs, RDPs and OWA logins.

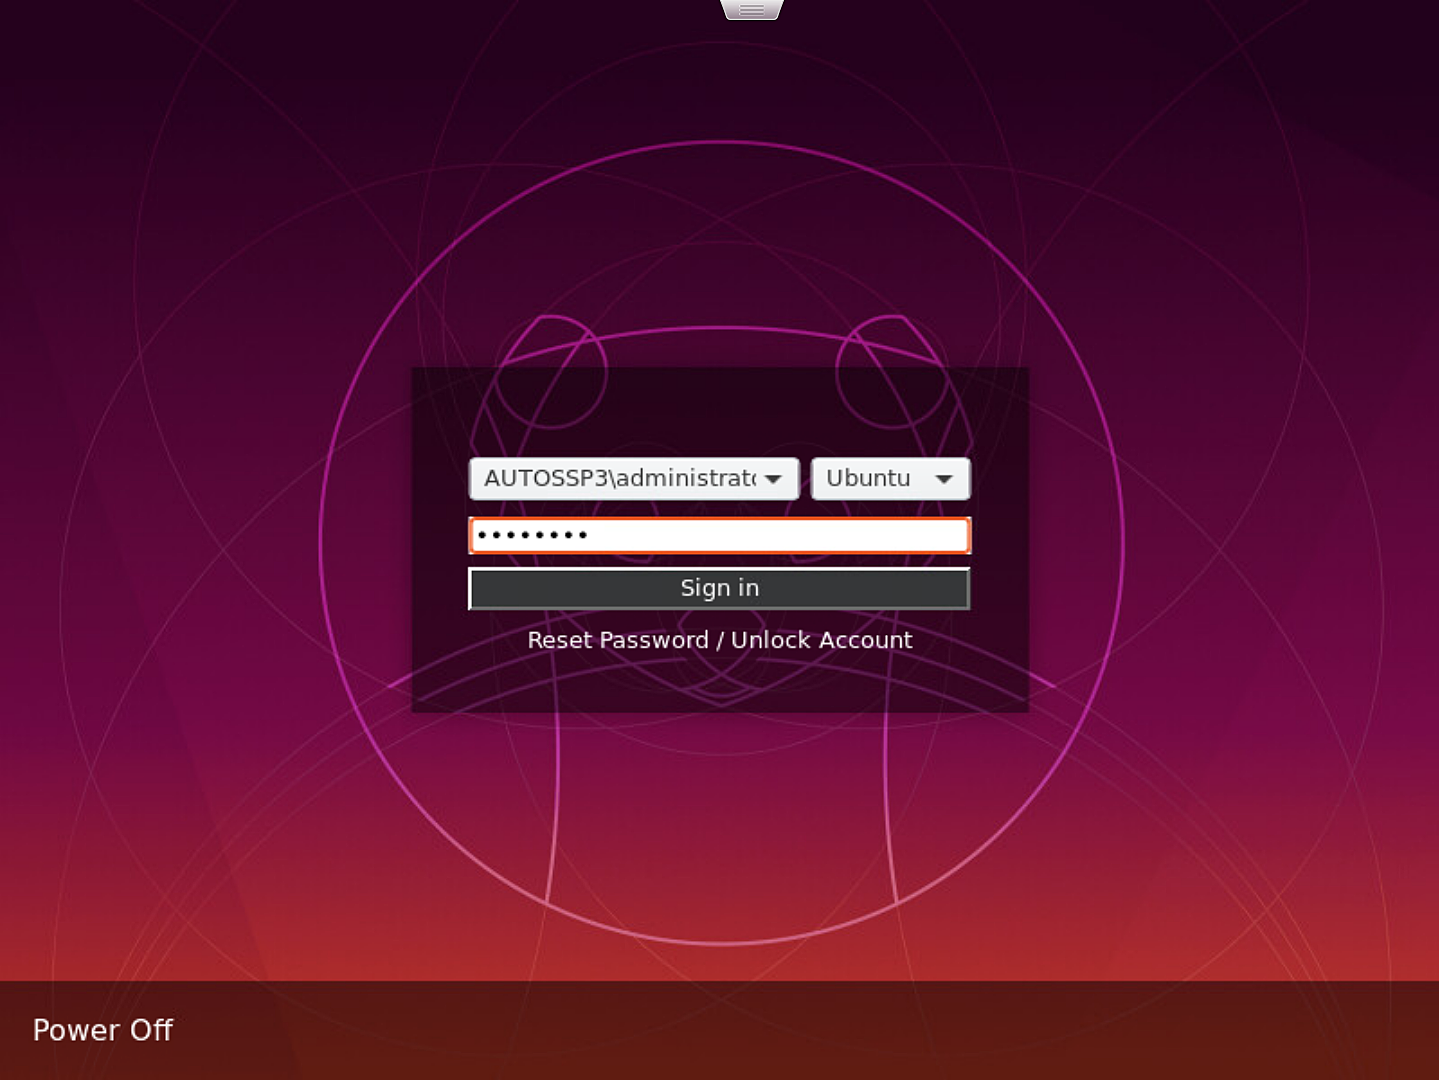
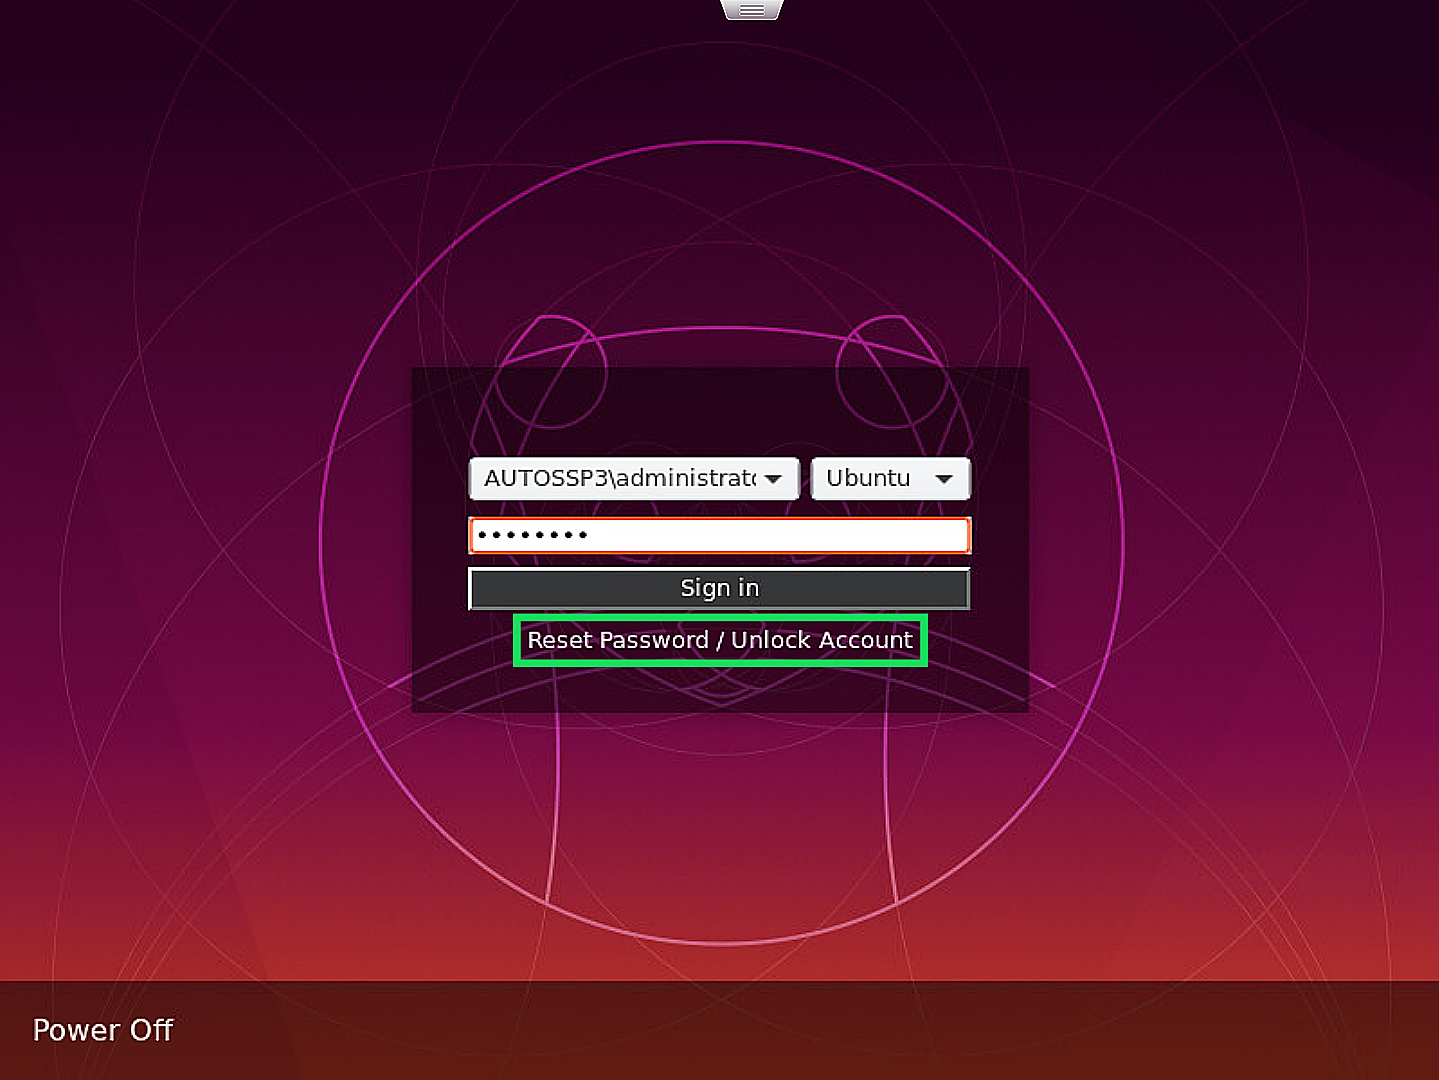
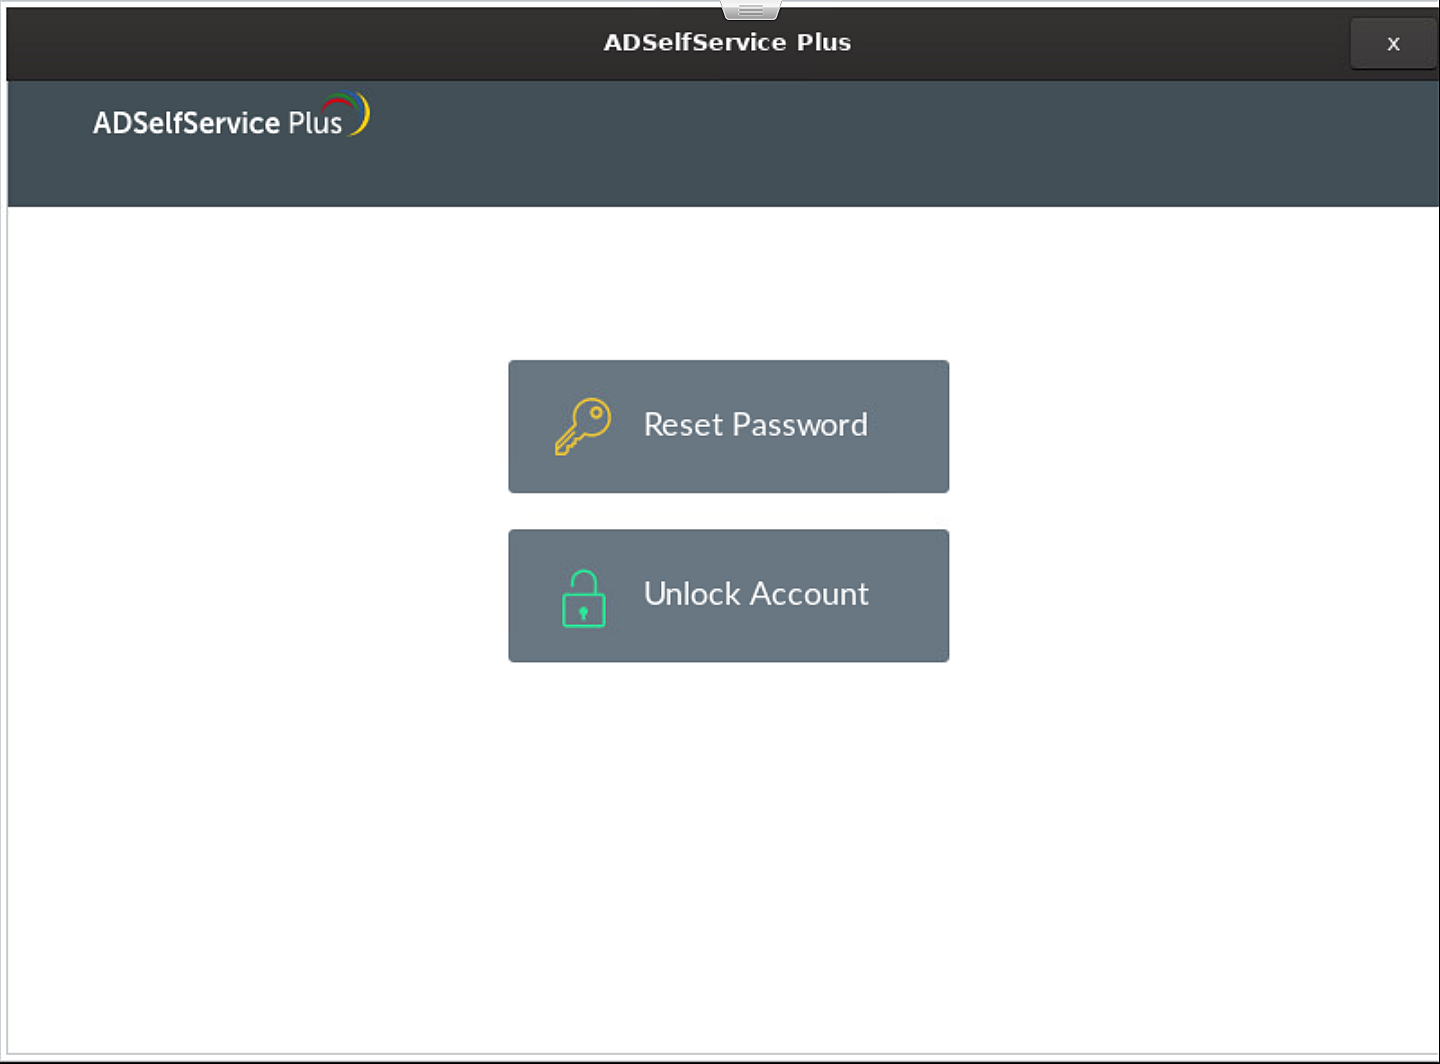
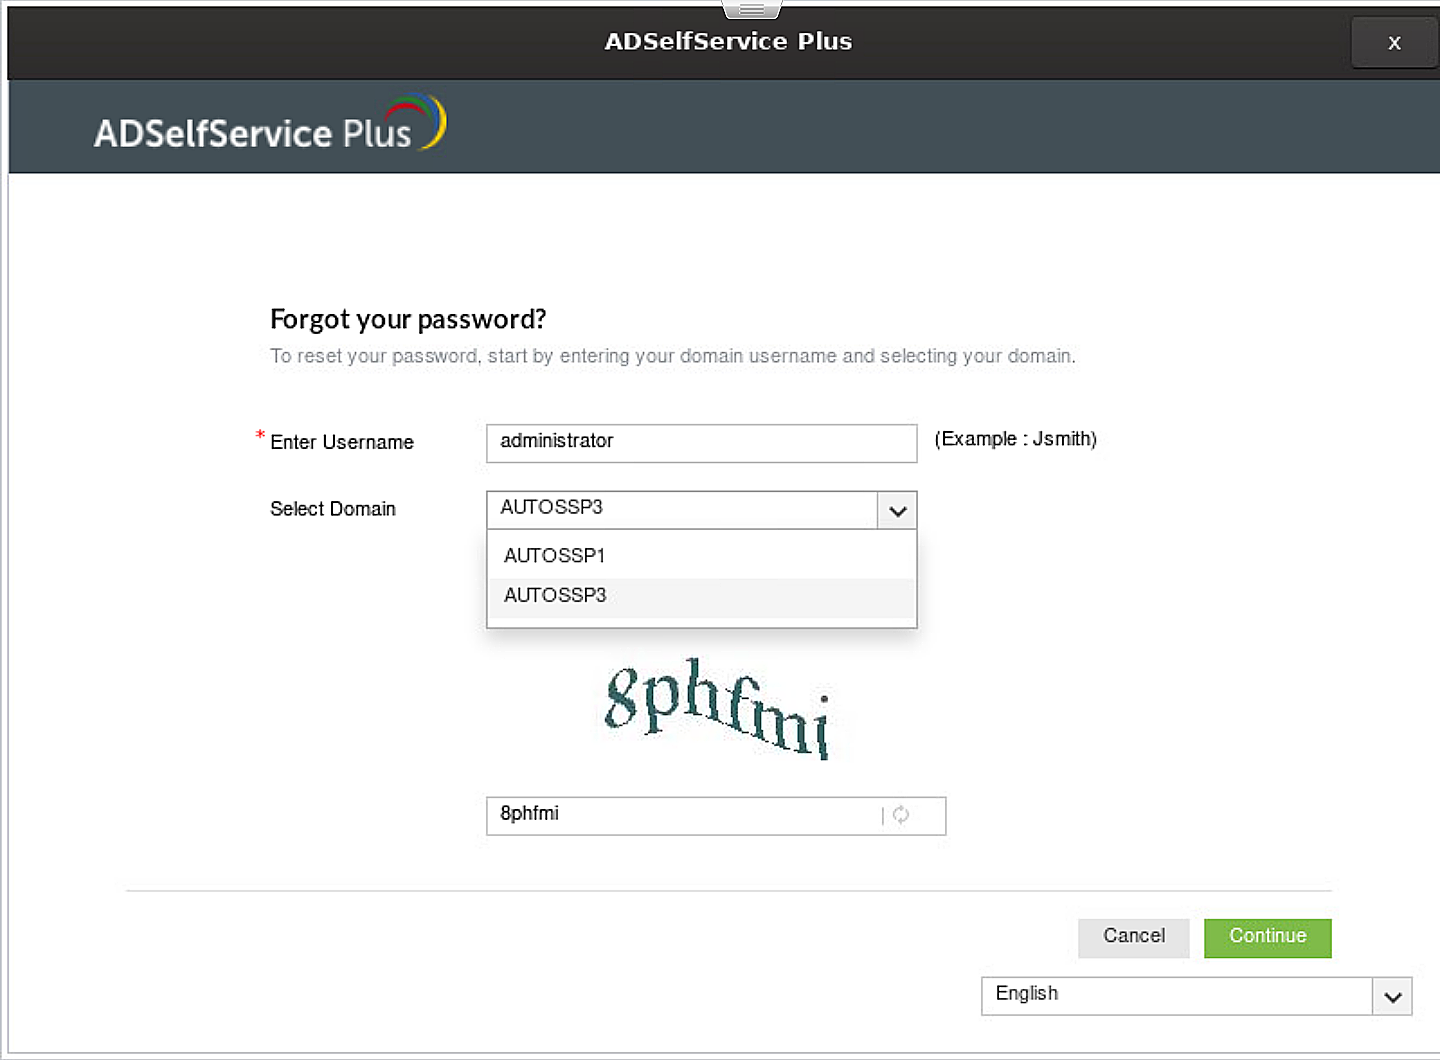
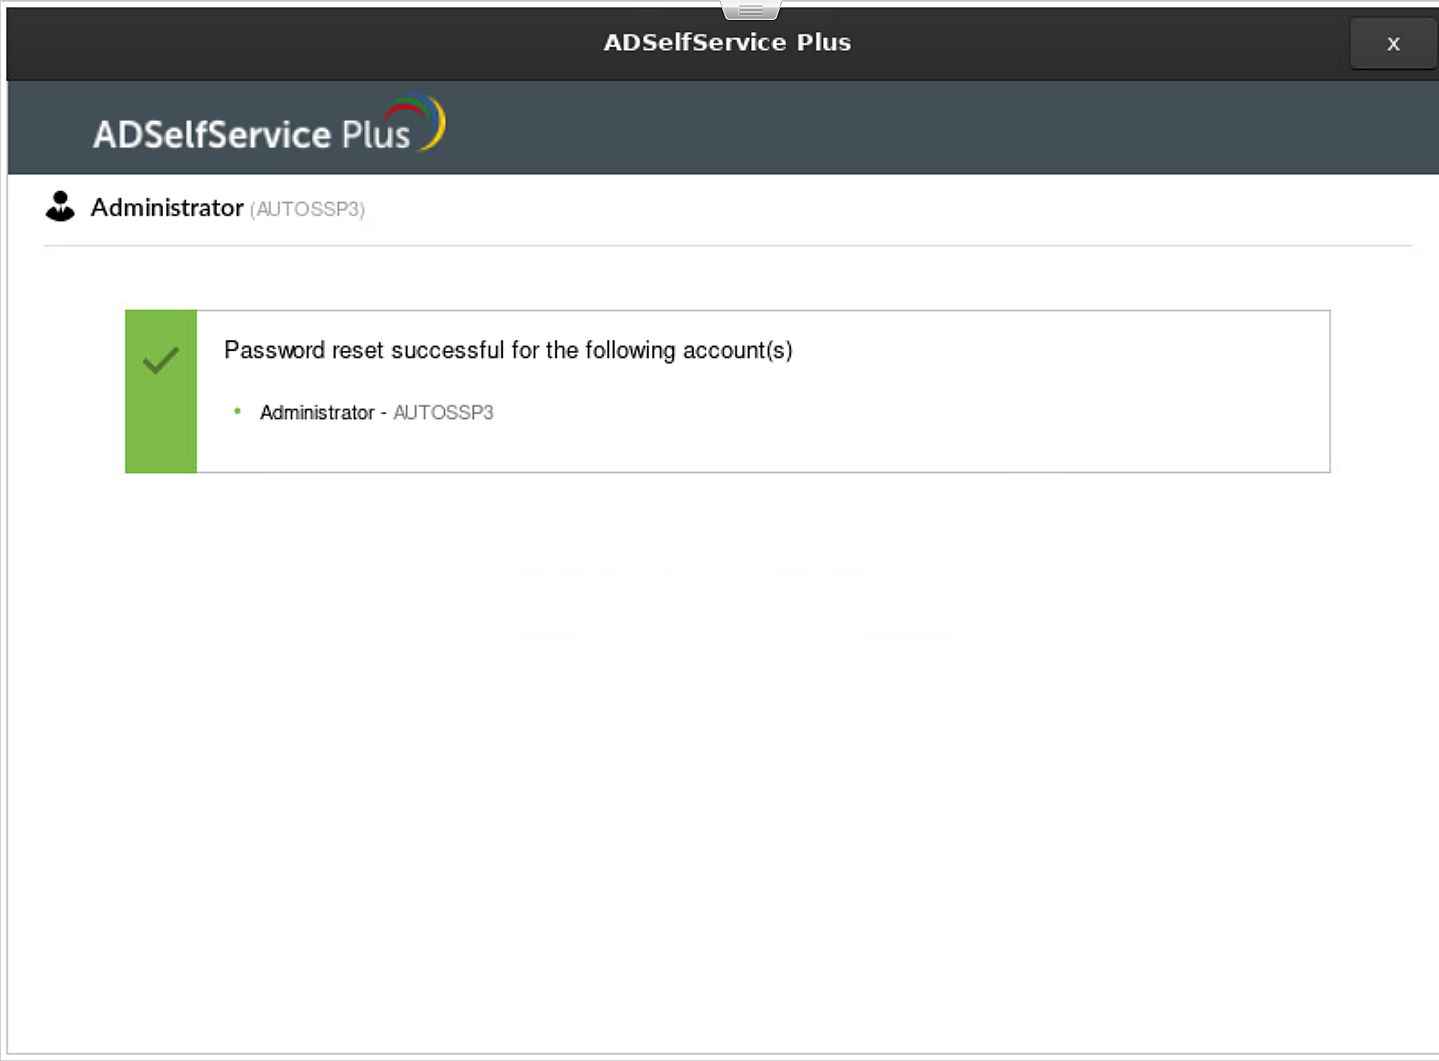
The ADSelfService Plus login agent also empowers users to securely reset their passwords and unlock their accounts right from the login screen of their computer. It achieves this by adding a Reset Password/Unlock Account button to the login screen.

This article shows how end-users can securely log into Linux workstations, as well as perform secure password resets and account unlocks directly from the login screen. It also provides instructions to install, uninstall, and reinstall the ADSelfService Plus login agent on Linux machines.

Supported Linux OS versions

  • Ubuntu 16.x-20.04.4
  • Fedora 27.x-31.x
  • CentOS 7.X

Note: While the ADSelfService Plus login agent has been officially tested and confirmed to run seamlessly on these three Linux distributions, it might support other Linux distributions as well. Please contact the support team (support@adselfserviceplus.com) to check if the Linux distribution used in your organization is supported.

End-user flow to securely login to Linux machines:

  1. The user types in their primary authentication credentials, which is their username and password.

    Primary authentication credentials

  2. Upon clicking Sign in, ADSelfService Plus' Linux login agent swings into action and prompts for secondary authentication using the authenticators chosen by the user during enrollment.

    ADSelfService Plus' Linux login agent

  3. The user will be allowed access to their machine only after they prove their identity using MFA. This user's account is protected with Zoho OneAuth.

    Self Service Password OTP Authenticator

    Self Service Password Zoho OneAuth

  4. They prove their identity by entering the correct TOTP and CAPTCHA, only after which they are given access to the machine. If the Trust this machine option is selected, this machine will be trusted for MFA for a maximum of 180 days before MFA is prompted again.

    Self Service Password Activities

Steps to reset passwords or unlock accounts from the Linux login screen:

  1. To reset their Windows AD passwords, the user should click the Reset Password/ Unlock Account link displayed in the login screen of their Linux machine.

    linux-desktop-login-agent

  2. In the self-service portal that opens up, they should click the appropriate option, either Reset Password or Unlock Account.

    adselfserviceplus-console

  3. Upon selecting the appropriate option, (here, the user is trying to reset their password using Zoho OneAuth), the login agent takes them through the MFA process to verify their identity.

    self-service-password-reset-console

  4. The user opens the Zoho OneAuth app on their phone and enters the TOTP that is displayed. These verification screens are also doubly secured using a CAPTCHA.

    Self Service Password OTP Authenticator

    Self Service Password OTP Authenticator

  5. Once their identity is verified, they'll be allowed to reset their password. A password strength bar helps the user enter a strong password, while the conditions displayed ensure that the new password meets your organization's password policy.

    Self Service Password Password Condition

  6. After their password is reset, they can close the wizard and login to the machine from the native login screen.

    Reset Password Success Message

The login agent installation key

The Installation Key links the ADSelfService Plus Server and Client securely and is a mandatory parameter while installing and reinstalling the login agent.

Login agent installation key

  1. Log into the ADSelfService Plus admin portal and navigate to Configuration > Administrative Tools > GINA /Mac/Linux (Ctrl+Alt+Del).
  2. Under the Installation Help Guide section, click on Manual Installation Steps.
  3. The installation key can be found in Step 4 of the Linux tab.

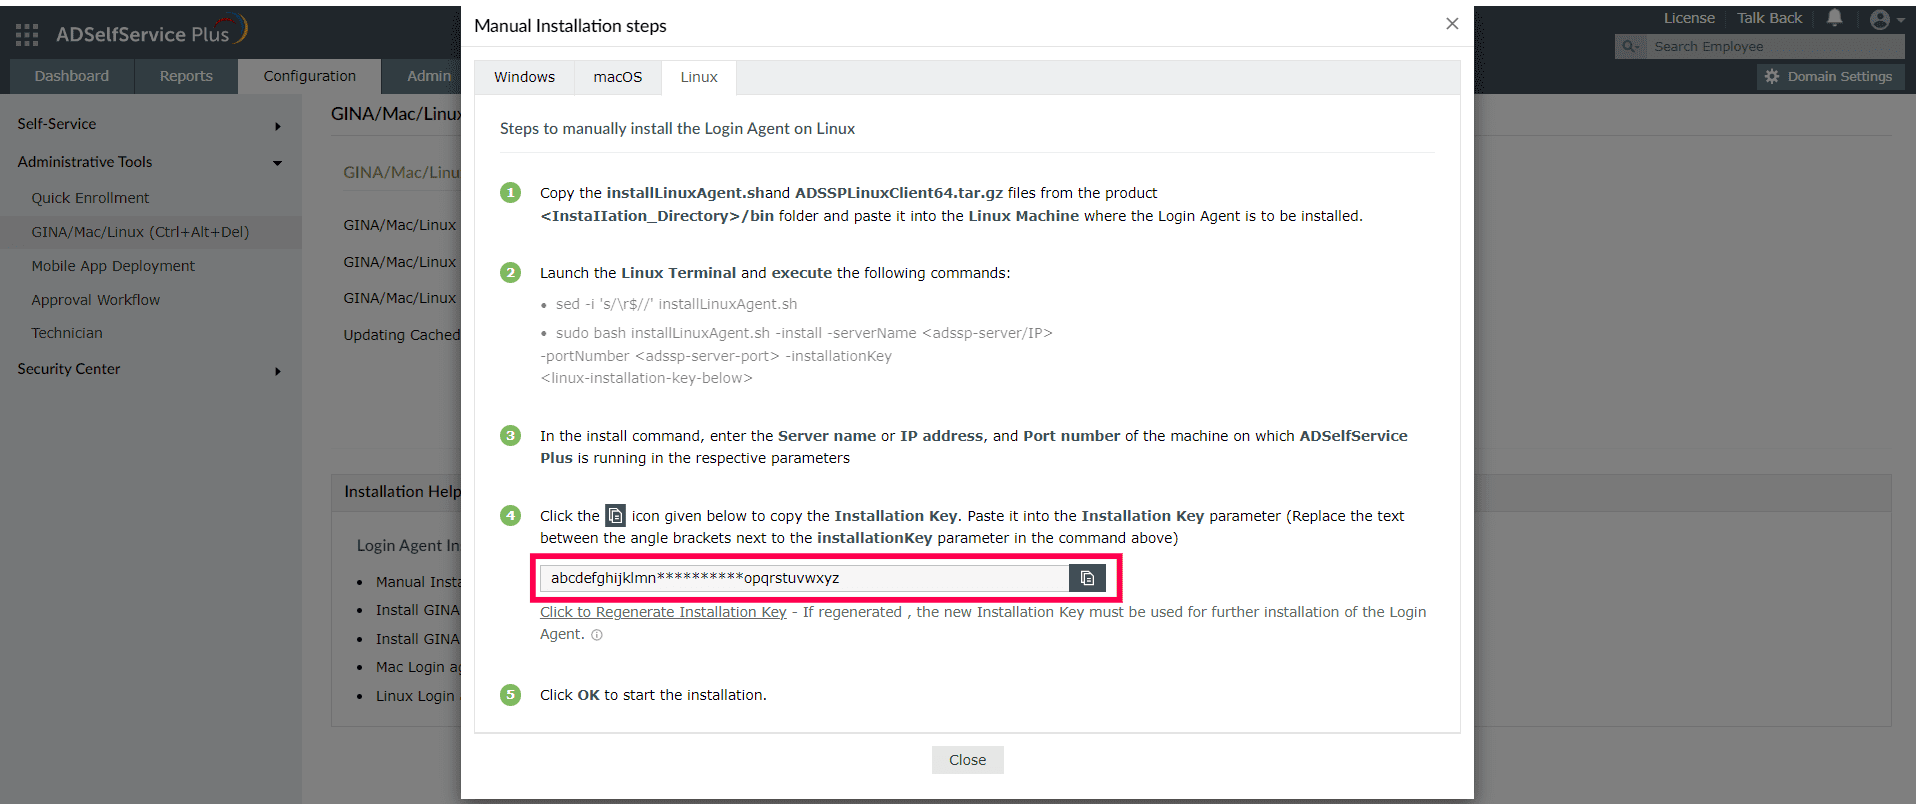
Note: Please treat the Installation Key like a password. It is sensitive information and must not be shared.

If the current Installation Key is compromised, you can regenerate a new installation key using the link in Step 4 of the Linux Manual Installation Steps. If regenerated, copy the command with the new Installation Key from the product admin portal and update the Installation Command field with the new command for all new installations.The generation of a new Installation Key will not affect the existing installations of the Login Agent on installed machines.

Installing the login agent

The ADSelfService Plus login Agent can be deployed on Linux machines in the following ways:

  1. Manual Installation.
  2. Using the ADSelfService Plus Admin Portal.

You can find the detailed steps to install the Linux login agent using these methods in this guide.

Note: The Linux login agent can also be installed using software deployment tools like ManageEngine Endpoint Central. Please find the deployment steps in this guide. For other tools, contact our support team at support@adselfserviceplus.com.

Uninstalling the Linux login agent

Uninstalling and reinstalling the Linux Login Agent can be done manually and via the ADSelfService Plus admin portal.

Manual uninstallation

  1. Copy the installLinuxAgent.sh and ADSSPLinuxClient.tar.gz files file from this folder: Install Directory>\bin (Default location: C:\Program Files\ManageEngine\ ADSelfService Plus\bin).

    Note: Please copy the ADSSPLinuxClient64.tar.gz file for 64 bit machines and ADSSPLinuxClient.tar.gz file for 32 bit machines.

  2. Paste the copied files in the Home folder of the Linux machine.
  3. Launch the Linux terminal and execute the following commands:
    sed -i 's/\r$//' installLinuxAgent.sh
    sudo bash installLinuxAgent.sh -uninstall
  4. Reboot the system.

Uninstallation via the ADSelfService Plus admin portal

Uninstallation via the ADSelfService Plus admin portal

  1. Log into the ADSelfService Plus admin portal and navigate to Configuration > Administrative Tools > GINA/Mac/Linux (Ctrl+Alt+Del) > Installed Machines.
  2. Select the Linux machines on which you want to uninstall the agent.
  3. Click Uninstall.

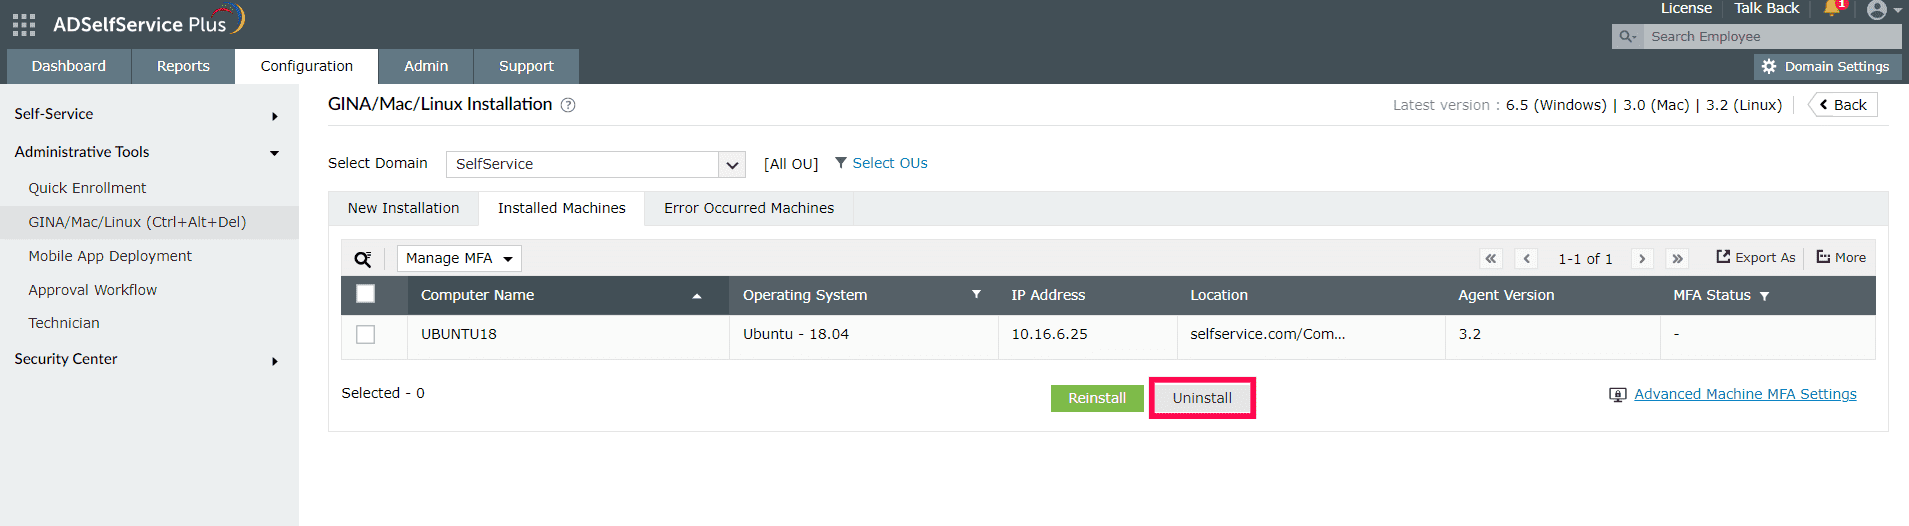
Note: The Linux login agent can also be uninstalled using software deployment tools like ManageEngine Endpoint Central. Please find the deployment steps in this guide. For other tools, contact our support team at support@adselfserviceplus.com.

Reinstalling the Linux Login Agent

Manual reinstallation

  1. Copy the installLinuxAgent.sh and ADSSPLinuxClient.tar.gz files file from this folder: Install Directory>\bin (Default location: C:\Program Files\ManageEngine\ADSelfService Plus\bin).
  2. Paste the copied files in the Home folder of the Linux machine.
  3. Launch the Linux terminal and execute the following commands:
    sed -i 's/\r$//' installLinuxAgent.sh
    sudo bash installLinuxAgent.sh -reinstall -serverName myserver -portNumber myport -installationKey "<installation_key>"
  4. Reboot the system.

Reinstallation via the ADSelfService Plus admin portal

Reinstallation via the ADSelfServicePlus admin portal

  1. Log into the ADSelfService Plus admin portal and navigate to Configuration > Administrative Tools > GINA/Mac/Linux (Ctrl+Alt+Del) > Installed Machines.
  2. Select the Linux machines on which you want to reinstall the agent.
  3. Click Reinstall.

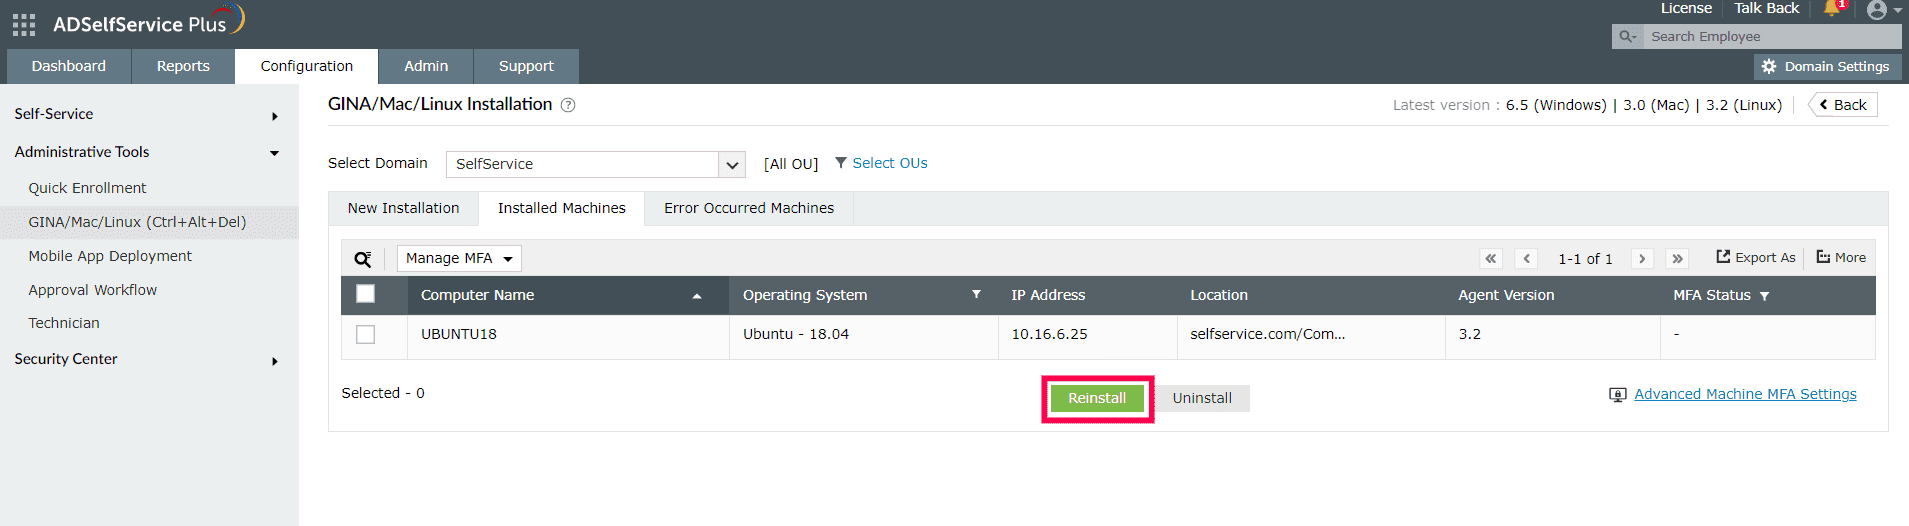
Note: The Linux login agent can also be reinstalled using software deployment tools. You can reinstall the agent using ManageEngine Endpoint Central using the steps in this guide. For other tools, contact our support team at support@adselfserviceplus.com.

Click here for more details on installing, customizing and scheduling installation of the ADSelfService Plus login agent.

Request for Support

Need further assistance? Fill this form, and we'll contact you rightaway.

  • Name
  •  
  • Business Email *
  •  
  • Phone *
  •  
  • Problem Description *
  •  
  • Country
  •  
  • By clicking 'Submit' you agree to processing of personal data according to the Privacy Policy.
Highlights

Password self-service

Free Active Directory users from attending lengthy help desk calls by allowing them to self-service their password resets/ account unlock tasks. Hassle-free password change for Active Directory users with ADSelfService Plus ‘Change Password’ console. 

One identity with Single sign-on

Get seamless one-click access to 100+ cloud applications. With enterprise single sign-on, users can access all their cloud applications with their Active Directory credentials. Thanks to ADSelfService Plus! 

Password/Account Expiry Notification

Intimate Active Directory users of their impending password/account expiry by mailing them these password/account expiry notifications.

Password Synchronizer

Synchronize Windows Active Directory user password/account changes across multiple systems, automatically, including Office 365, G Suite, IBM iSeries and more. 

Password Policy Enforcer

Ensure strong user passwords that resist various hacking threats with ADSelfService Plus by enforcing Active Directory users to adhere to compliant passwords via displaying password complexity requirements.

Directory Self-UpdateCorporate Search

Portal that lets Active Directory users update their latest information and a quick search facility to scout for information about peers by using search keys, like contact number, of the personality being searched.

ADSelfService Plus trusted by

Embark on a journey towards identity security and Zero Trust