ManageEngine Logo

NetFlow Analyzer

Traffic Analysis & Network Forensics

Professional Edition - NetFlow Analyzer
Enterprise Edition - NetFlow Analyzer
 
NetFlow Analyzer is a bandwidth monitoring and reporting software.
Success Stories
"NetFlow Analyzer helped us understand application network requirement & bandwidth usage."- Milan Modi, DHL » More Success Stories
 

NetFlow Analyzer - Enterprise Edition
Important: The latest version of NetFlow Analyzer Enterprise Edition is 6.5 (Build 6501). You can migrate older versions to 6.5 (Build 6501) using the following service pack.
How do I find out my build number? | What's New in 6.5?
If you currently running the Build ... Do the following to move to 6.5 (6501)
6000 / 6500

Install Service Pack to move to 6501

If you are using any other build and wish to upgrade, please contact netflowanalyzer-eesupport@manageengine.com


Instructions to Apply Service Pack

  1. Shut down NetFlow Analyzer Central Server. (If NetFlow Analyzer is running as a service, stop the service also). No need to Shut Down Collectors.
  2. Take a copy of the data folder present under <NetFlowCentral_Home/mysql/data> directory. This may take a long time depending on the size of the Data folder. (<NetFlowAnalyzer_Home>/mysql/data) Also please take a copy of the <Netflowcentral_Home>/temp directory and save it in a safe location.
  3. Open and check the data / temp folders to make sure nothing has been corrupted, please contact netflowanalyzer-eesupport@manageengine.com if you need any assistance during this process.
  4. Execute the UpdateManager.bat (.sh in case of Linux) file present in the <NetFlowAnalyzer_Home>/bin directory.
  5. Click Browse and select AdventNet_ManageEngine_NetFlow_ Analyzer_Enterprise_Edition_6_0_0_SP-1_1.ppm file that you have downloaded.
  6. Click Install to install the service pack. This may take several minutes depending on the amount of data that needs to be migrated.
  7. Wait until the service pack is fully installed. Contact us if you need any assistance during this process.
  8. Click Close and then click Exit to exit the Update Manager tool.
  9. Start the NetFlow Analyzer Central server. Never apply Service Pack manually on Collector. NetFlow Analyzer Central Server will apply it automatically on Collectors. 
  10. Once the Central server and the Collectors are started, please login and check the user interface of both the Central Server and the Collector.
  11. Since the run.bat and startDB.bat/.sh script files were changed in the latest version(6.5). You need to retune the Java and Mysql parameters (both in the central server and collector). Follow the below given steps:
  12. Java Tuning Steps for Central server :
  • Shut down the Central server.
  • "run.bat/sh" file contains the Java parameters which is present under the /bin directory of the Central Server installation. For your convenience we had already configured the same in the run.bat/.sh files. You just need to comment the not required and uncomment the required parameters.
    When installing as a Service in windows, follow the steps below for memory tuning:
  1. Open the file NetFlow-Home/conf/wrapper.conf in a editor and set the variables "wrapper.java.initmemory" and "wrapper.java.maxmemory" to the appropriate values as in run.bat/sh
  2. Open a command prompt and navigate to NetFlow-Home/bin folder
  3. Type "na_service -r" and press enter. (This uninstalls the service)
  4. And then type "na_service -i" and press enter. (This reinstalls the service with the updated memory settings).
    When installing as daemon in Linux:
  1. Edit the variables in file NetFlow-Home/conf/wrapper.conf as above.
  2. The CentralServer can be installed as daemon by logging in as root user and executing "NetFlow-Home/bin/startAsDaemon.sh".
  3. After which the CentralServer can be started using the command, "/etc/init.d/netflowcentralserver start" and stopped using the command "/etc/init.d/netflowcentralserver stop".
    Mysql Tuning Steps for Central server :

    Navigate into <NetFlowCentral>/conf directory and rename the file mysqlConf.txt to mysqlConf-old.txt and rename your requirement file as mysqlConf.txt

Example - If your machine is a 2 GB RAM Machine then Navigate into <NetFlowCentral>/conf directory and rename the file mysqlConf.txt to mysqlConf-old.txt and rename the mysqlConf_2GB to mysqlConf.txt and save the file.

13. Start the Central server.

    Java Tuning steps For Collector :

  • Shutdown the Collectors and follow the steps:
  • run.bat/sh file contains the Java parameters which is present under the /bin directory of the collector installation. run.bat tuning will not take effect while starting a service.
  • When installing as a Service in windows, follow the steps below for tuning,
    1. Open the file NetFlow-Home/conf/wrapper.conf in a editor and set the variables "wrapper.java.initmemory" and "wrapper.java.maxmemory" to the appropriate values as in run.bat/sh
    2. Open a command prompt and navigate to NetFlow-Home/bin folder
    3. Type "na_service -r" and press enter. (This uninstalls the service)
    4. And then type "na_service -i" and press enter. (This reinstalls the service with the updated memory settings.).
  • When installing as daemon in Linux,
    1. Edit the variables in file NetFlow-Home/conf/wrapper.conf as above.
    2. The Collector can be installed as daemon by logging in as root user and executing "NetFlow-Home /bin/startAsDaemon.sh".
    3. After which the Collector can be started using the command, "/etc/init.d/netflowcollector start" and stopped using the command "/etc/init.d/netflowcollector stop".
    Note - You do not have to tune the startDB.bat / .sh for the Collector .
  • Start the Collector.
 
Post Migration Check
Clear the web browser cache before trying to access the web client.

How do I find out my Build number?
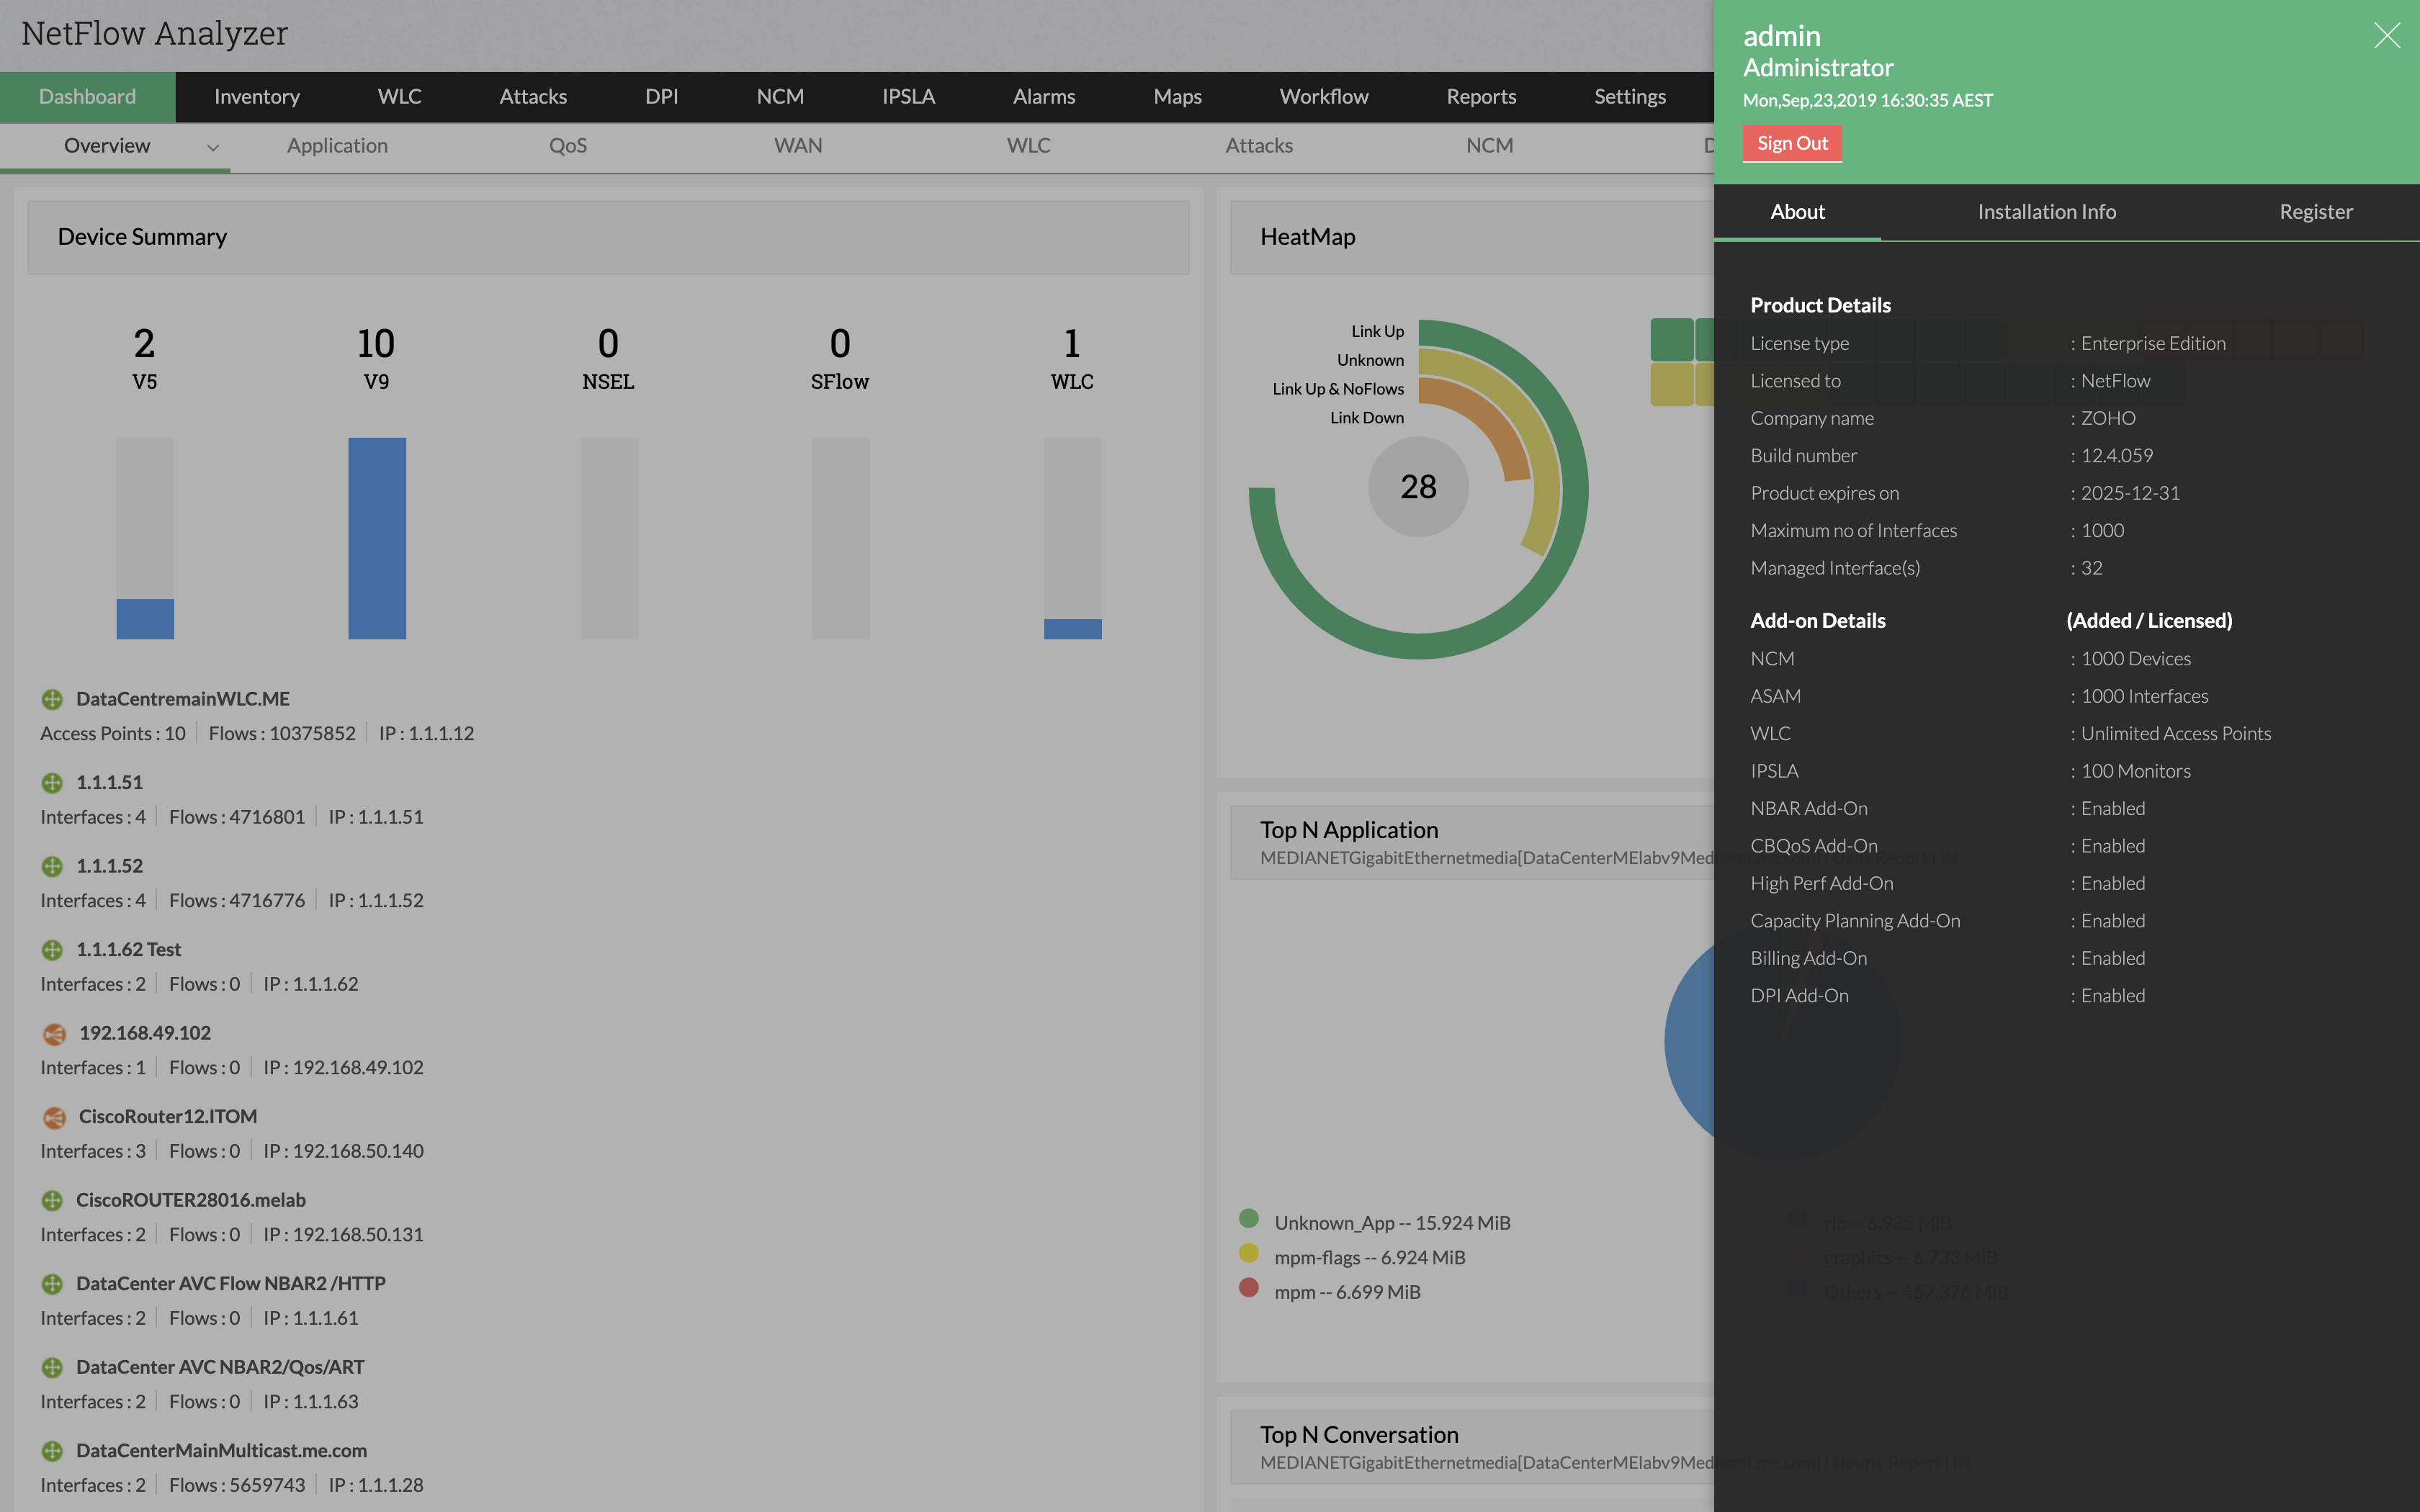
Log in to the NetFlow Analyzer web client, and click the About link in the top pane. You will find the build number mentioned below the version number. This is the build number of the currently installed NetFlow Analyzer.

NetFow Analyzer Download