How to deploy a Mac agent using Jamf ?
Description
Install Mac agents using Jamf
Steps
To successfully install a Mac agent using Jamf, follow the steps given below:
Prerequisites
- Login to the product web console and navigate to Agent --> Computers --> Download Agent.
- Choose the appropriate remote office and select the operating system as Mac.
- Navigate to the folder where the agent is downloaded. Extract the zip file and locate UEMS_MacAgent.pkg and serverinfo.plist file.
- Rename serverinfo.plist to com.manageengine.ems.plist.
Steps to deploy com.manageengine.ems.plist:
- In the Jamf console, Select Computers --> Configuration profiles --> New
- Select Application and Custom Settings and click Configure.
- Click Upload file.
- Enter the preference domain as com.manageengine.ems.
- Click Upload Plist file and then choose com.manageengine.ems.plist.
- Click the Scope tab and then modify the scope of the configuration profile.
- Click Save.
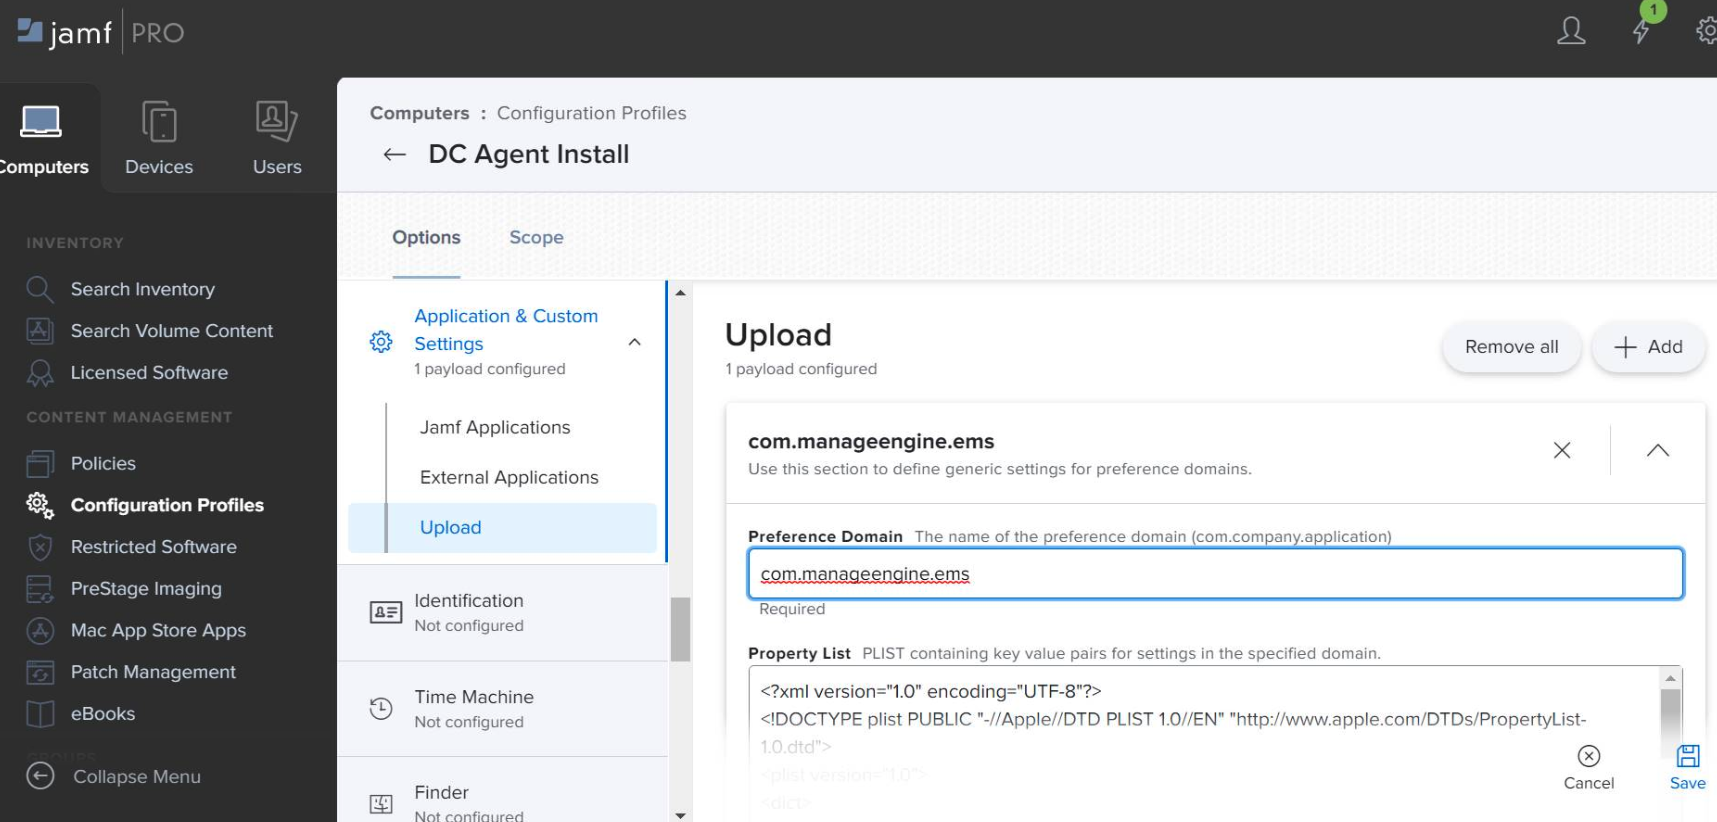
com.manageengine.ems.plist will be deployed to /Library/Managed Preferences/ folder in the mac machine. It can be verified there.
Steps to deploy UEMS_MacAgent.pkg:
- In the Jamf Console, Select Computers > Policies > New.
- Use the General payload to configure basic settings for the policy, including the trigger and execution frequency.
- Select the Packages payload and click Configure.
- Click Add to add the package you want to install.
- Configure the settings for the package.
- Click the Scope tab and configure the scope of the policy.
- Click Save.
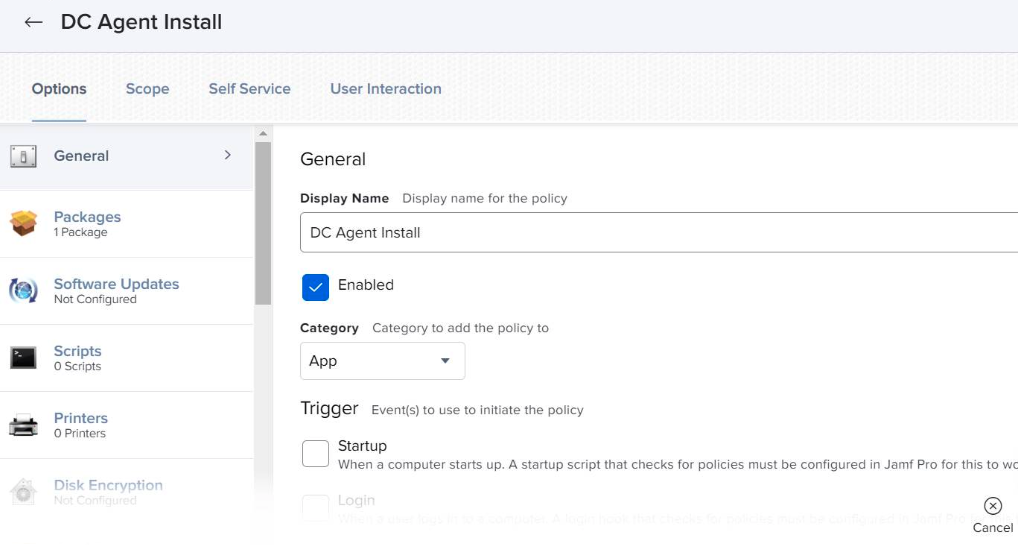
The pkg will find the preference plist deployed before and will install successfully.