How to install Mac agents using Mosyle?
Description
Install Mac agents using Mosyle
Steps
Prerequisites:
- Login to the product web console and navigate to Agent --> Computers --> Download Agent.
- Choose the appropriate remote office and select the operating system as Mac.
- Navigate to the folder where the agent is downloaded. Extract the zip file and locate UEMS_MacAgent.pkg and serverinfo.plist file.
- Rename serverinfo.plist to com.manageengine.ems.plist.
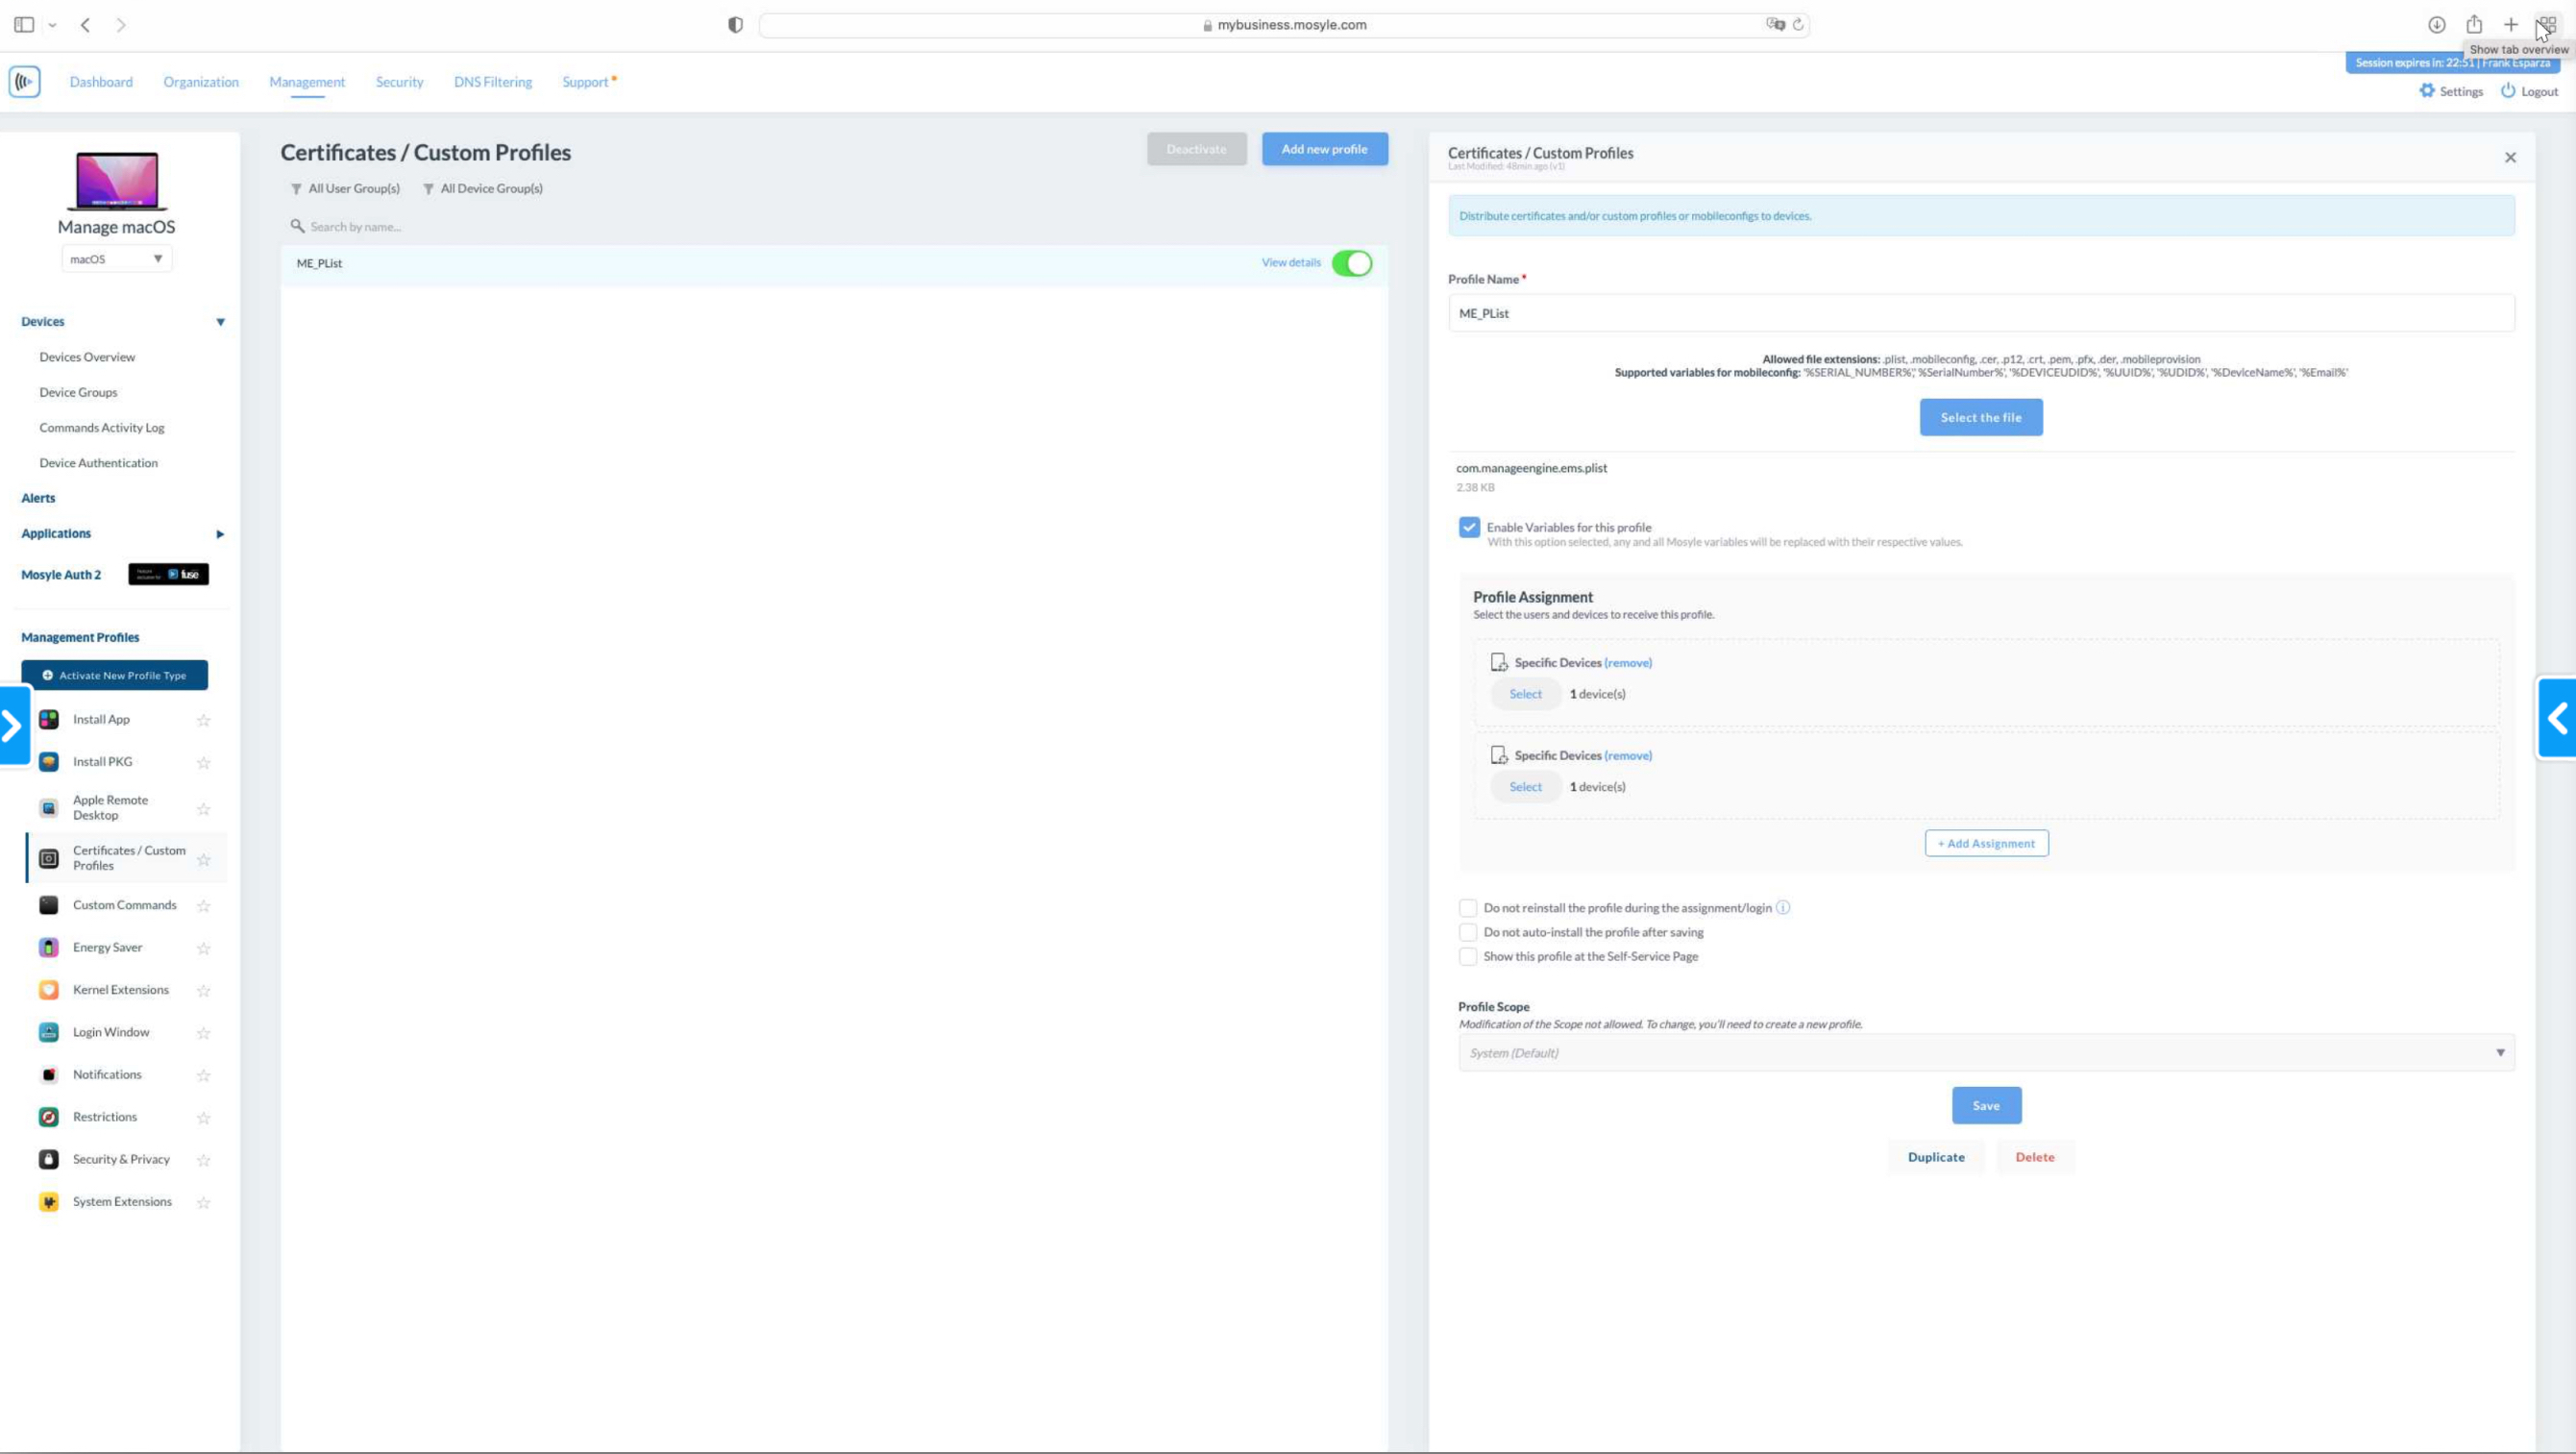
Steps to deploy com.manageengine.ems.plist
- In Mosyle, select Certificates/Custom Profiles from the left-hand side menu.
- Select Add New Profile. Enter a name for the profile and browse to com.manageengine.ems.plist file.
- Add an assignment to the profile and click Save.
- Open the device that you deployed the profile to and select System Preferences --> Profiles. You will see another profile in the list, this will be the .plist file that has been deployed from the above policy.
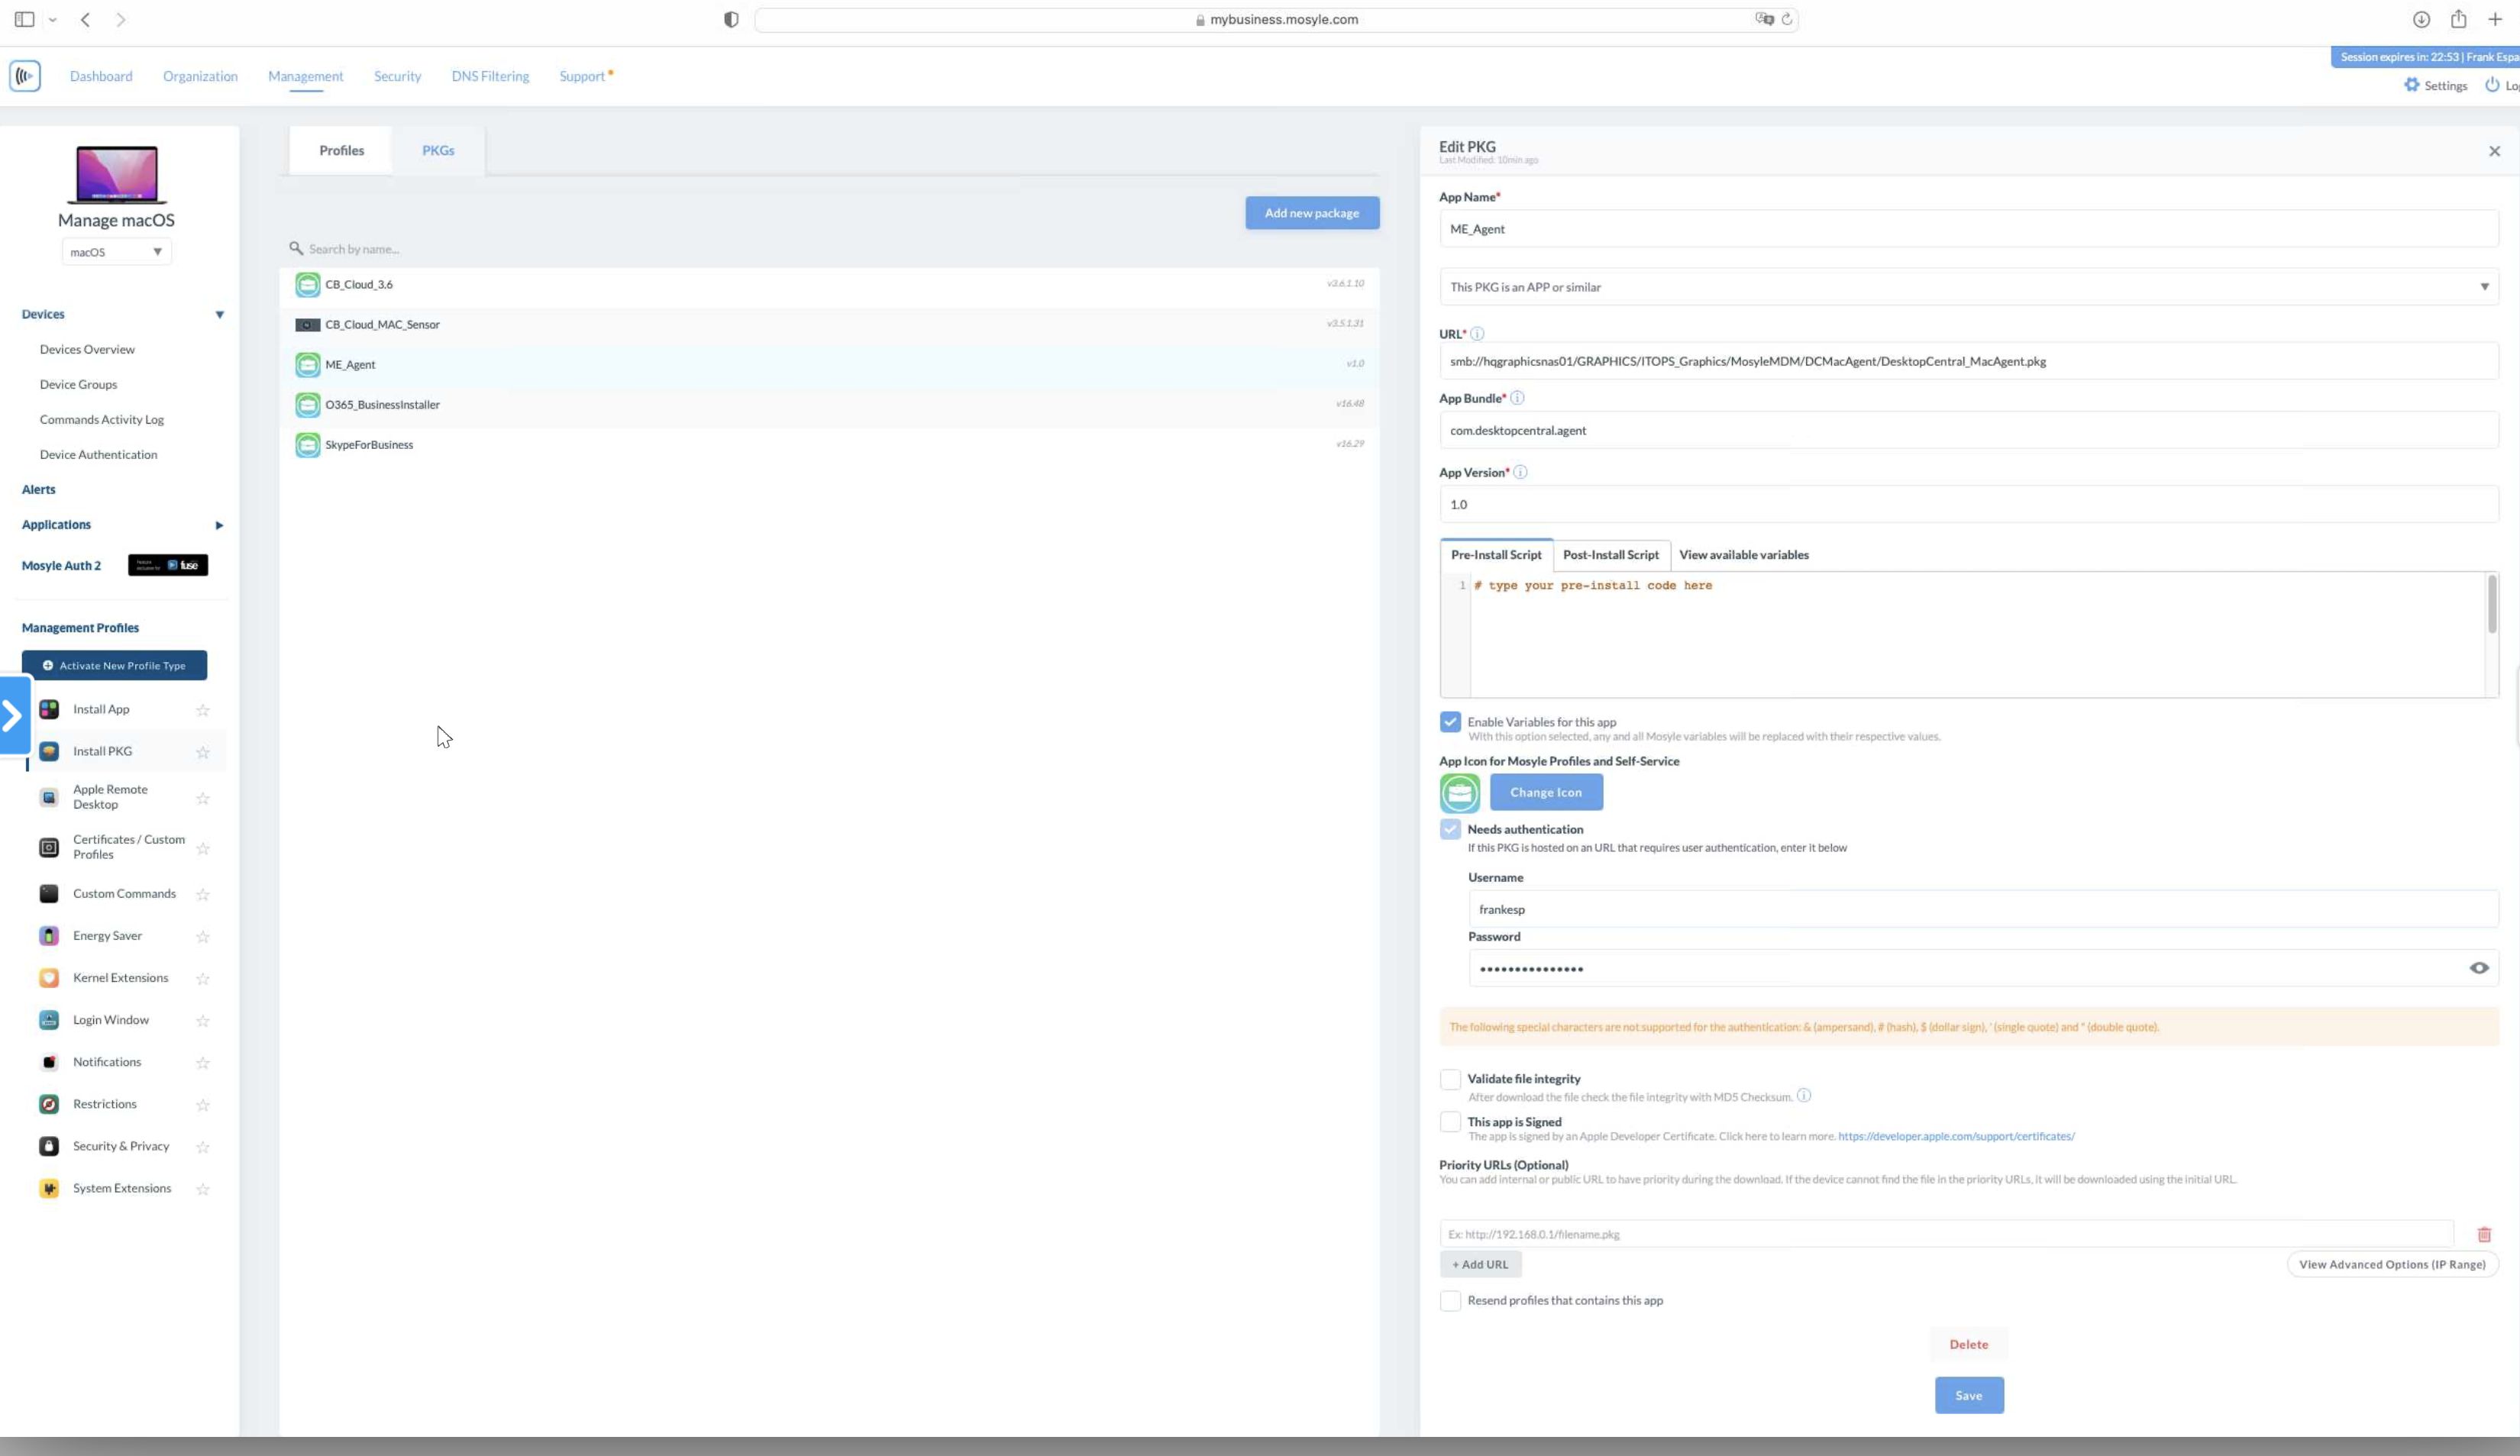
Steps to deploy UEMS_MacAgent.pkg:
- Add the pkg file to the MDM environment by selecting Management -> Install pkg from the left-hand side menu.
- Select the Pkgs tab and click Add New Package.
- Select option A or B depending on how you have hosted the pkg. Alternatively, if you have access to the Mosyle CDN, you can select the .pkg from there.
- Once selected, choose Add Enterprise app.
- Once added, the package will appear in the pkgs tab.
- Select the Profiles tab and choose Add New Profile.
- Add a name for the profile and select the previously added UEMS_MacAgent.pkg.
- Add an assignment and select the devices you want the package to be deployed to.
- Click Save to apply the changes.