Quarantine Compliance
Table of contents
Overview
In today's dynamic cybersecurity landscape, maintaining a secure and compliant IT environment is paramount. Network Access Control (NAC) plays an important role in this. You can configure Network Access Control with system quarantine policy. NAC is the process of filtering access to corporate data, by allowing only legit endpoints to access the data.
Benefits of using Endpoint Central's System Quarantine policy for Network Access Control (NAC) includes:
- Real-time Compliance Management: Ensure system compliance by proactively identifying security vulnerabilities and non-compliant issues
- Automated Enforcement: Streamline compliance enforcement with automated checks and actions. Mandate compliance policies for all systems present in the network
- Enhanced Security Posture: By quarantining non-compliant systems, NAC-based policies contributes to a robust security posture, safeguarding sensitive data and critical infrastructure.
Use Endpoint Central's System Quarantine policy to proactively manage system compliance, reduce vulnerabilities, and enhance overall security posture. You can configure settings to quarantine an endpoint from their network when it is found susceptible/does not fall under your organization's compliance policy.
Applies to:
- Windows
Rules in System Quarantine Policy
- OS patches: Ensure OS updates are deployed to systems within a specific period to enhance security.
- Software: Your system will be marked as non-compliant if certain applications are installed/uninstalled. Refer software name from Control Panel.
- Service: Your system will be marked as non-compliant if certain services are running/not running. Refer service name from Service Manager.
- Vulnerability: Your system will be marked as non-compliant if certain vulnerabilities are detected. You can categorize vulnerabilities based on their CVSS score and exploit availability.
- Registry and File checks: Your system will be marked as non-compliant if the given criteria for Registry Value, Registry Path, Folder Path, File Path, or File Version is not adhered to.
Execution Options
System Quarantine Policy has two primary options for enforcing compliance:
Audit Systems for Non-Compliance: Perform regular audits to identify systems that do not adhere to the compliance rules. Audit results provide insights into the non-compliance status, allowing for proactive remediation.
Quarantine Non-Compliant Systems: In cases of severe non-compliance, you have the authority to quarantine systems. Quarantined systems are isolated from the network to prevent potential security risks. You can perform the following network restrictions to isolate your systems:
- Block all network access: Your system will be isolated from the network except for the components of Endpoint Central
- Block only intranet in range: Your system will be isolated from the local network.
- Block custom domain & IP: Your system will be isolated from specific domains and IP.
- Allow access only to custom IP/VPN/Domains: Your system will be allowed to use only from specific domains,VPN or IP.
Steps to deploy System Quarantine Policy
Follow the following steps for successful deployment of system quarantine policy
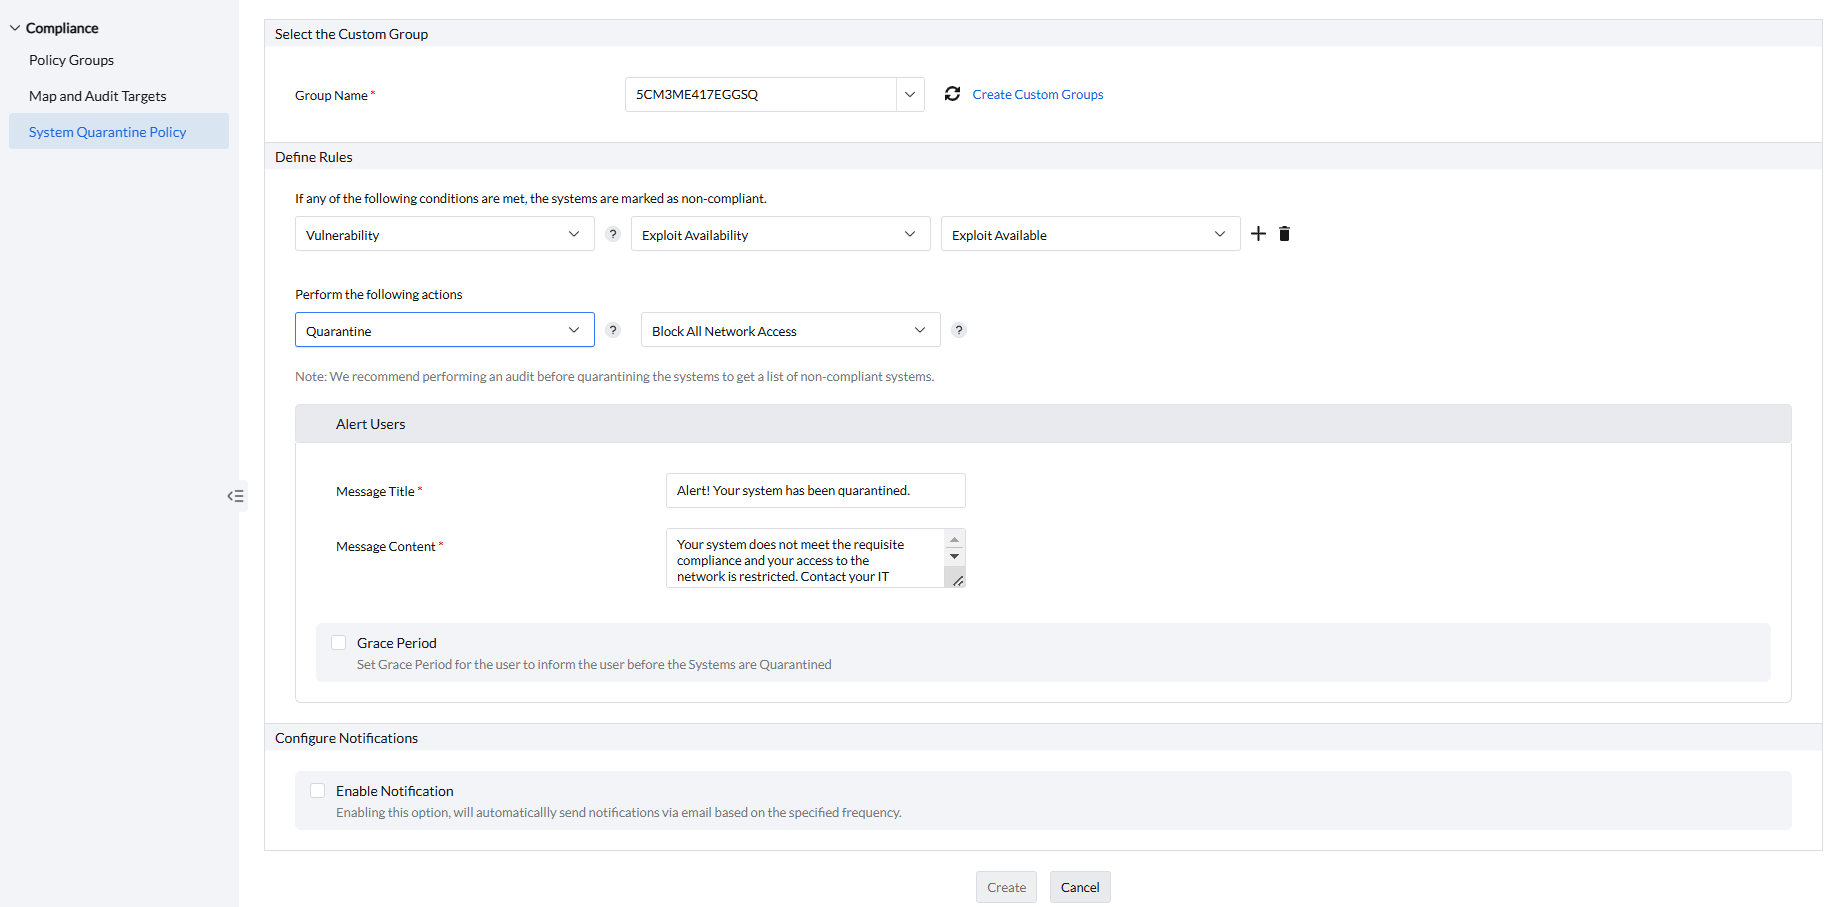
- Click on Threats & Patches → Complaince → System Quarantine Policy.
- Click on Create Policy.
- Under Select the Custom Group section, under Group Name select the custom group to deploy this system quarantine policy
- Start selecting the rules to conduct compliance checks according to your requirement under Define Rules section.
- If you want to audit the systems for compliance, choose Audit and set the warning message according to your requirement.
- If you want to quarantine the non-compliant systems, choose Quarantine and choose the type of network restriction.
- If you have given Quarantine, set the alert message and grace period for the end-user under Alert Users section.
- If you wish to receive notifications, under Configure Notifcations, select Enable Notifcations and mention the Email for notification.
- Click on Create to finish creating the policy.
- Once deployed, you can view the Status of the policy.
- You can also Modify, Suspend, and Delete the policy.
If you have any further questions, please refer to our Frequently Asked Questions section for more information.