Install and Uninstall - Firewall Analyzer
This document explains how to install and uninstall the Central and Probe for Firewall Analyzer enterprise edition.
This edition is available as a 64 bit version for both Windows and Linux platforms. For more information on supported versions and other specifications, look up System Requirements.
Installing Firewall Analyzer
The Installation procedure for various OS and CPU versions are as follows:
The Uninstallation procedure for the respective OS are as follows
Installing Firewall Analyzer
- Download the .exe version of Firewall Analyzer Enterprise edition from this link.This file can be configured to act as the Central server or Probe as per your requirement.
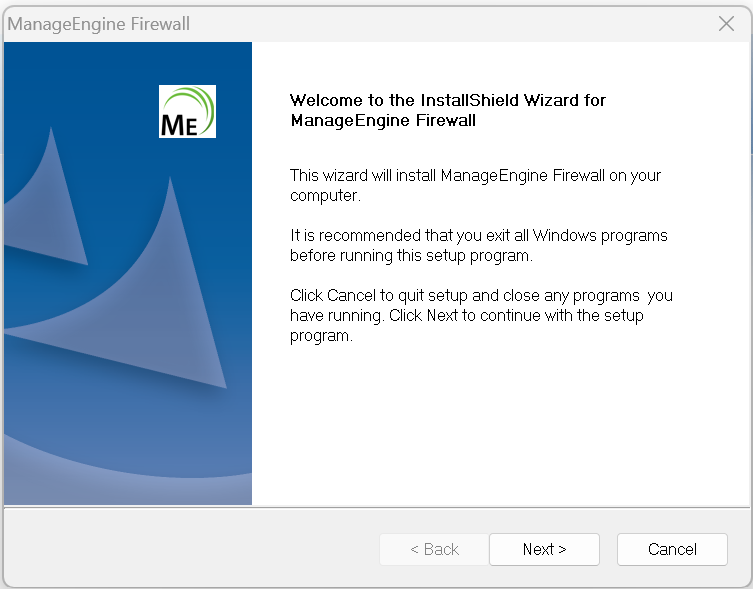
- Open the downloaded file to start the installation process.
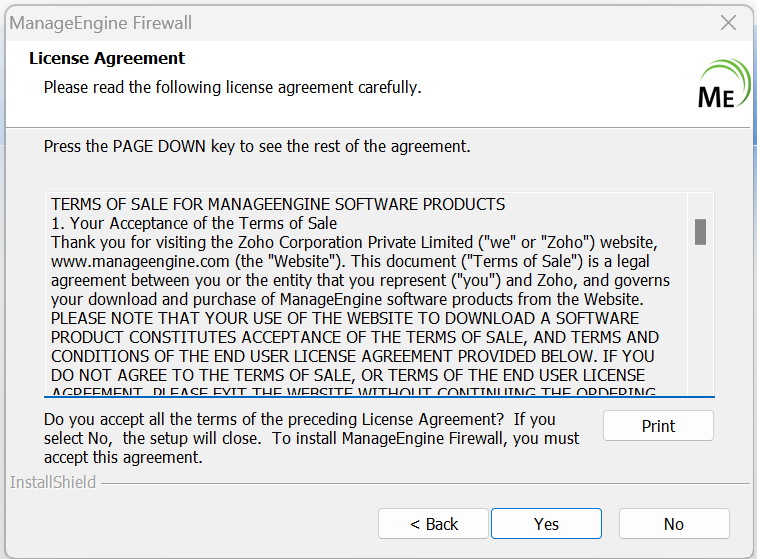
- Read through the License Agreement and click 'Yes' to continue.
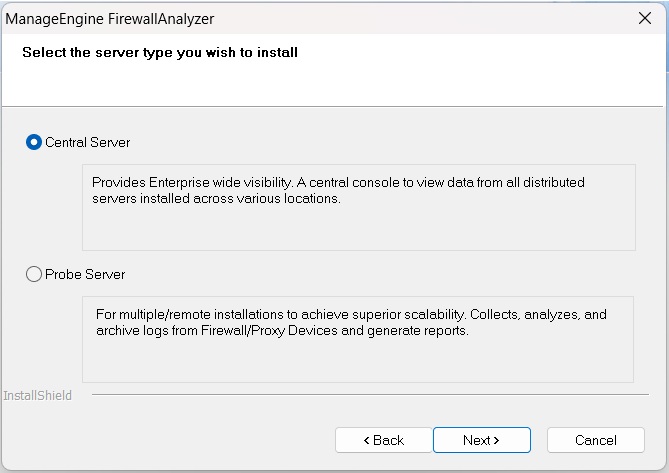
- Choose whether you want this setup to act as the Central or Probe and click 'Next'.
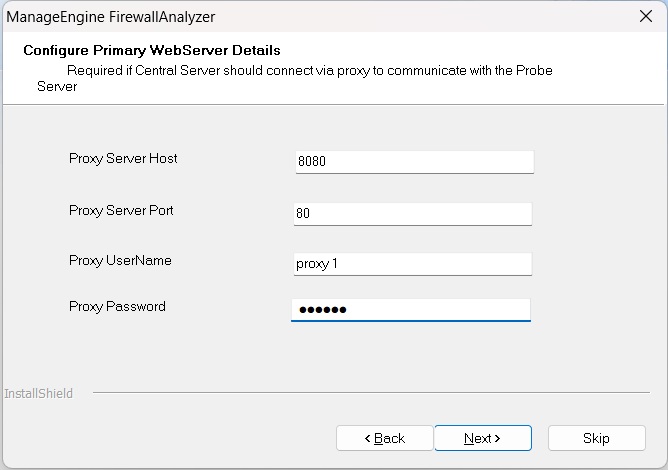
- Central:
- If you choose 'Central', Configure proxy server details and click 'Next' to proceed. Else, you can 'skip' this for now.
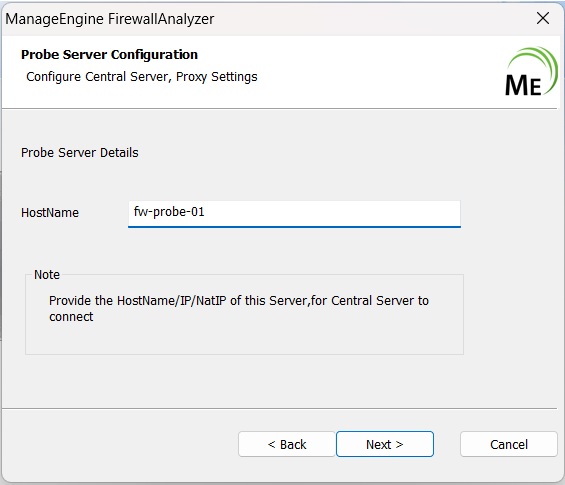
- Probe:
- If you choose 'Probe', fill in the Central information and click 'Next' If you wish to use a proxy server to connect with your Central, click on the checkbox and enter proxy server details.
- Enter the Host name and click 'Next' to proceed.

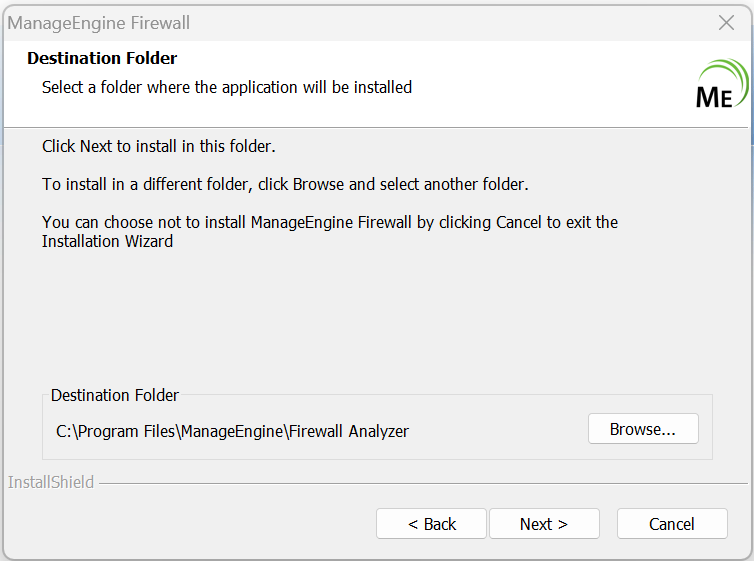
- Choose the destination folder for the installation and click 'Next' to proceed. Make sure you have sufficient storage for the installation. (check harddisk requirements here)
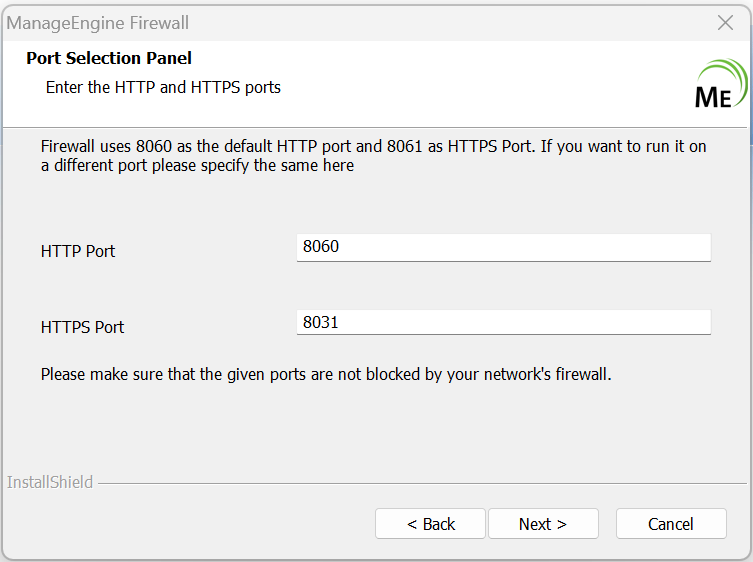
- If you want to change the default web server and SSL server port for the installation, enter the new port number and click 'Next' to proceed.
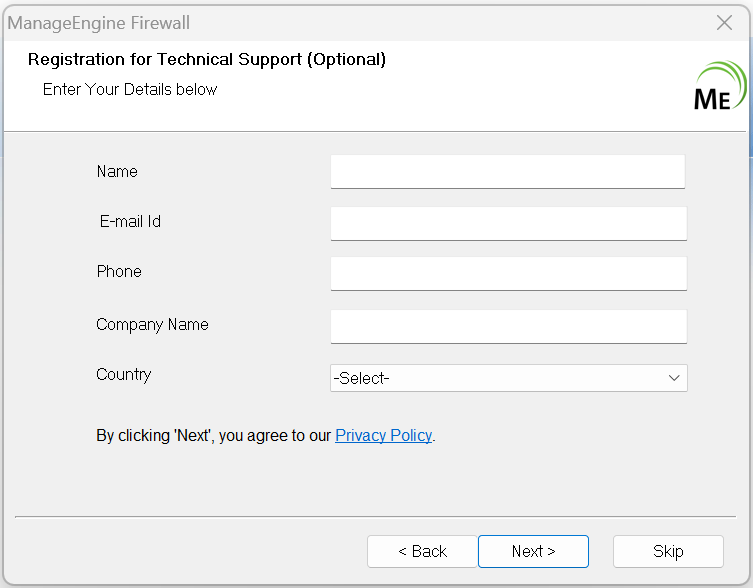
- If you wish to register for technical support fill in the requested information and click 'Next' to proceed. Else, click on 'Skip'.
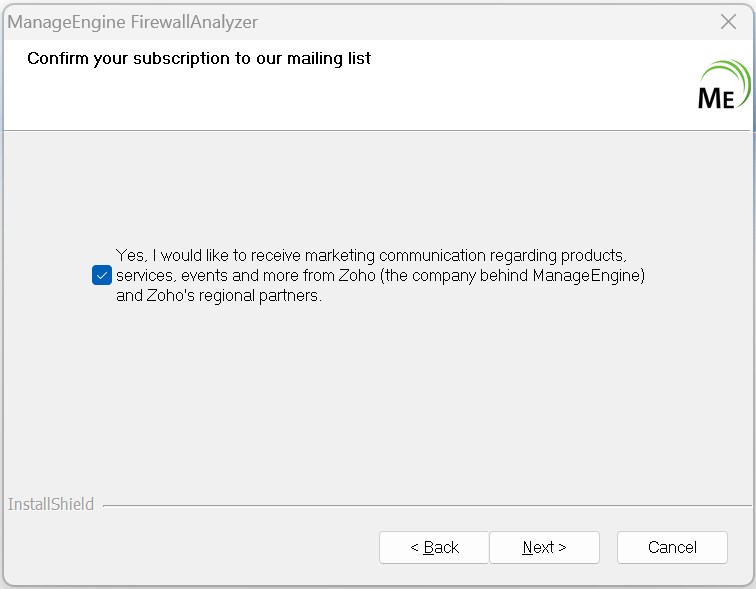
- Select the check box if you wish to subscribe to our marketing communication.
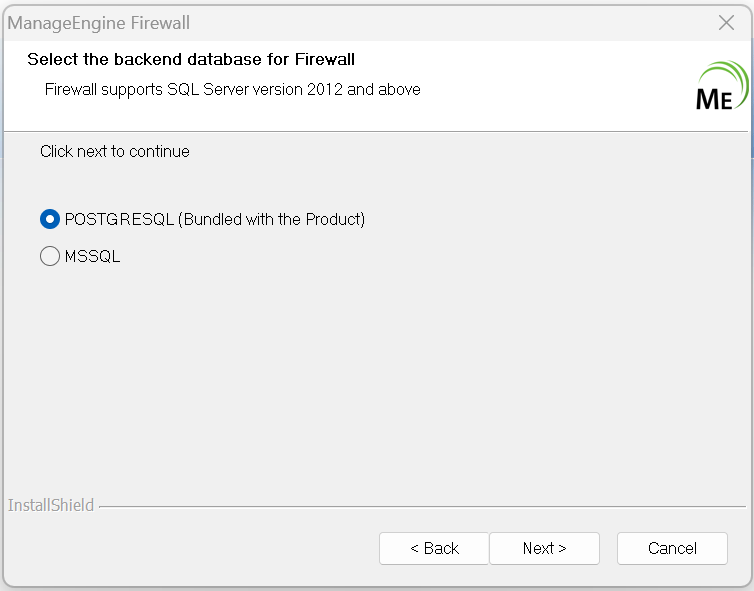
- Choose the backend database for Firewall. Your options include PGSQL (bundled with the product) and MSSQL.
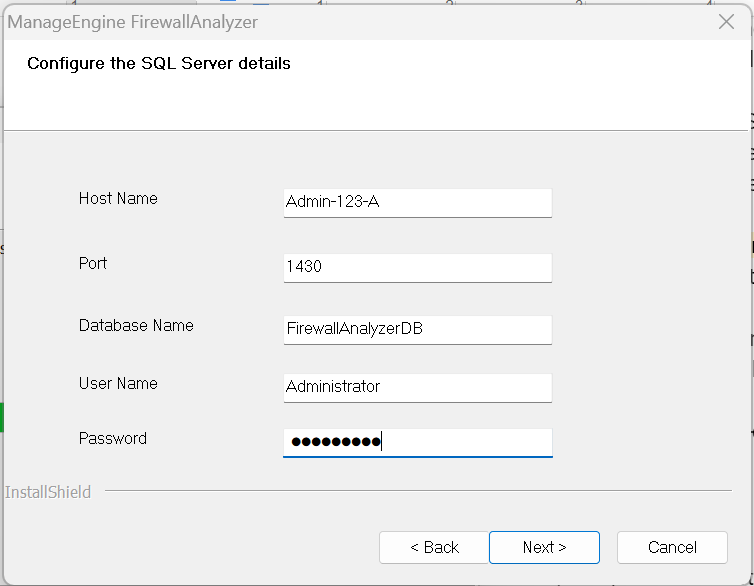
- If you choose MSSQL, enter the SQL server details, and click 'Next' to proceed and finish the installation.
- Open the installed Firewall Analyzer Enterprise edition by clicking on the shortcut from your desktop.
- You can view your Central details after you finish installing the Central in this screen.

Download Firewall Analyzer Linux 64 Bit version as a BIN file from this link.
Rest of the installation procedure is as follows:
- Download the BIN file, and assign execute permission using the command: chmod a+x <file_name>.bin
where <file_name> is the name of the downloaded BIN file. - Execute the following command: ./<file_name>.bin

During installation if you get an error message stating that the temp folder does not have enough space, try executing this command with the -is:tempdir<directory_name> option, where <directory_name> is the absolute path of an existing directory../<file_name>.bin -is:tempdir<directory_name>
- Follow the instructions as they appear on the screen.
This will install Firewall Analyzer on the respective machine.
Installing Firewall Analyzer Enterprise edition on Linux using console mode/silent mode
Central server
Step 1: Execute ManageEngine_FirewallAnalyzer_64bit.bin with administrator privileges (sudo) and -i console option.

Step 2: Go through the license agreement and enter 'Y' to proceed.
.</p>
<p><img alt=")
Step 3: Choose if you want technical support and fill in the required information (Name, Phone, Email, Company Name).

Step 4: Enter the preferred mode of installation.

Step 5: Choose the installation directory.

Step 6: Configure the web server port.

Step 7: Verify the installation details and press 'Enter' to complete the installation.

Probe server
Step 1: Execute ManageEngine_FirewallAnalyzer_64bit.bin with administrator privileges (sudo) and -i console option.

Step 2: Go through the license agreement and enter 'Y' to proceed.You can register for technical support by providing the required details. (Name, E-mail ID, Phone, Company Name)

Step 3: Choose between Central and Probe.

Step 4: Enter the Central server port.

Step 5: Configure probe server, choose the installation directory and configure the web server port.

Step 6: Verify the installation details and press 'Enter' to complete the installation.

Uninstalling Firewall Analyzer
- Navigate to the Program folder in which Firewall Analyzer has been installed. By default, this is Start > Programs > ManageEngine Firewall Analyzer x
- Select the option Uninstall Firewall Analyzer
- You will be asked to confirm your choice, after which Firewall Analyzer is uninstalled.
- Navigate to the <Firewall Analyzer Home>/server/_uninst directory.
- Execute the command
./uninstaller.bin - You will be asked to confirm your choice, after which Firewall Analyzer is uninstalled.
 | At the end of uninstallation you will be taken to the Uninstallation Feedback Form where you can provide reasons for your product uninstallation. This would help us improve this product. |