Firewall Configuration Change Management Reports
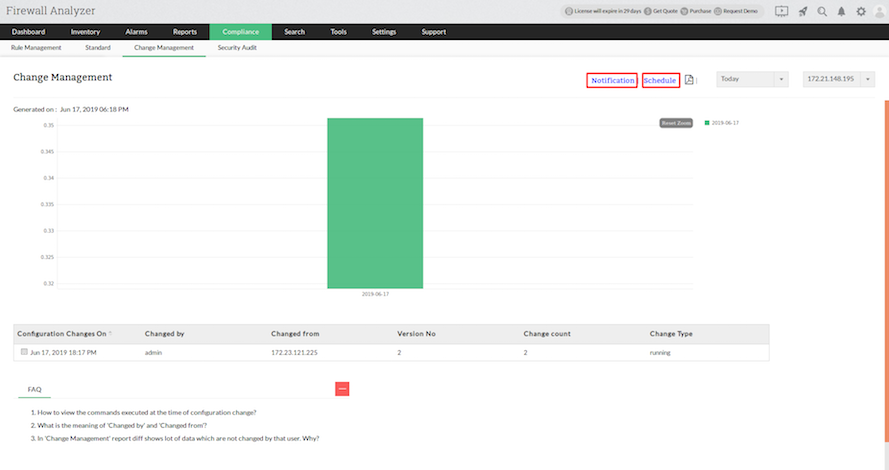
In the Change Management report, the device wise and date wise number of changes are displayed in the bar chart and table and the date & time of change, user who changed, changed from host, version number of the change done, total number of changes and the type of change details are listed in the table.
For complete list of devices supported for configuration change management reports, refer the Supported Firewalls page.
| Note: | Hardware requirement: 1 GB RAM exclusively required for Change Management |
Clicking on the date & time of change in the Change Management Report table , the changes will be displayed. The changes in configurations like Modified, Added and Deleted are highlighted in Blue, Green and Red colors respectively. Have a look at the snap shot of Configuration Difference screen below.

Notification of change management alarm and Scedule of change management report generation
In the Change Management report screen, on the right you will find, the Notification and Schedule links.

Notification of change management alarm
To configure the change management alarm notification, follow the steps given below:
- Click the Notification link.
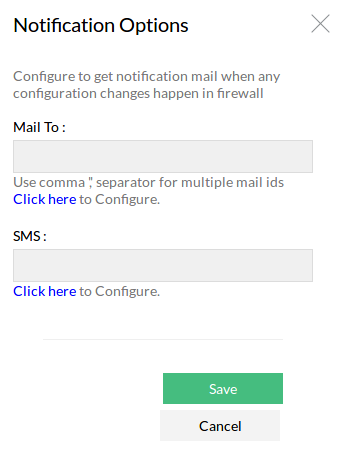
- The Notification Options screen appears.
- Enter one or more mail IDs in the Mail To field to get alarm notifications in the email. Click the Click here link below the field to configure the mail server settings.
- Enter one or more phone numbers to get SMS alarm notifications in your phone. Click the Click here link below the field to configure the SMS server settings.
- Click Save button to save the notification options.

Schedule change management report generation
To configure the periodical generation of change management reports, follow the steps given below:
- Click the Schedule link.
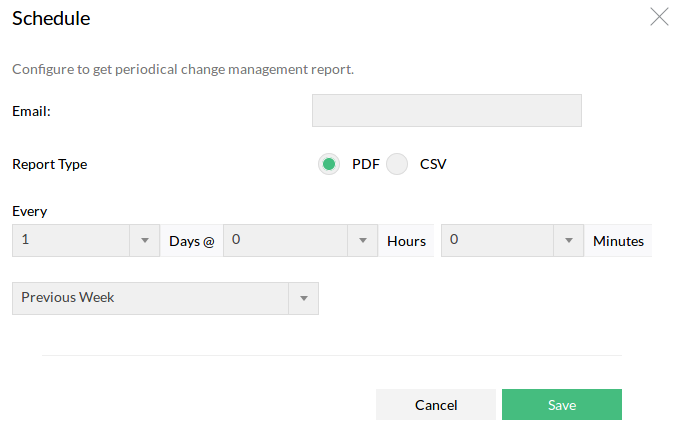
- The Schedule screen appears.
- Enter one or more mail IDs in the Email field to get the report via email.
- Choose the report type to be attached in the email. PDF or CSV.
- Enter the periodicity of report generation. Every _ Days @ _Hours _ Minutes. Enter day, hours and minutes.
- Enter the time period for which the report should be generated. Previous Week, Last 7 Days, Previous Month, Last 30 Days are the periods available.
- Click Save button to save the report schedule.

Rule Change Count
Rule Change Count refers to the number of changes made to the firewall’s rulebase over a specific period. It is a metric that tracks how often rules are added, modified, deleted, or reordered on your firewall devices.
Notification Objects
Notification Objects in Firewall Analyzer are predefined alert configurations that determine how and when alerts are sent, and to whom, when specific events (like rule changes, bandwidth spikes, or security incidents) occur.
They are essentially templates or containers for sending notifications via:
- SMS
Thank you for your feedback!