×![]()
×
×![]()
×
×
Focus Mode
Theme Switcher
How to migrate User Profiles
After creating a backup of the required User Account using the USMT tool, the next step is adding them to templates.
Note
Kindly note that User Profile feature is only available for On-premises environments.
The following steps will help you add User Accounts to templates and migrate them to target computers.
- Navigate to Customize tab -> Customize Deployment -> Deployment Template.
- Click Create Deployment Template. Select the user profile that you want to backup under User Profile Migration settings.
- You can choose the accounts that you want to migrate from the backup that you have chosen.
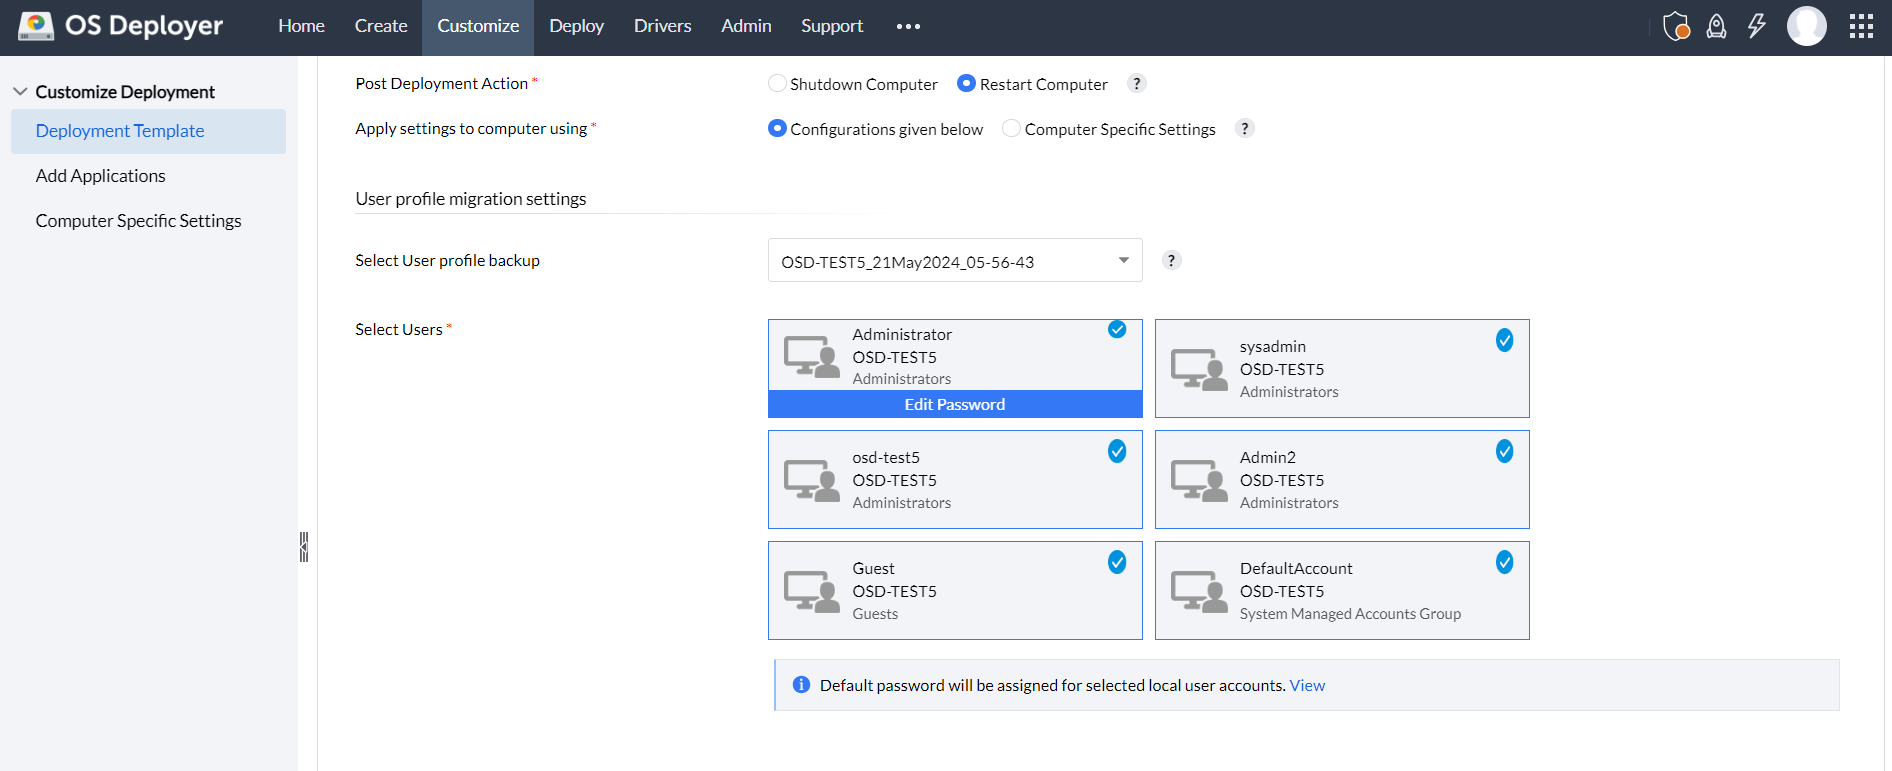
- You can also edit the login password of each local user account that you want to migrate by clicking the Edit Password option over the selected users. Otherwise, the default password will be applied to all User Accounts.NoteA default password can be assigned to all accounts. This default password will expire after the first login, and the user will have to reset the password immediately after the first login. To edit the default password go to Admin -> OS Deployment Settings -> User Profile Migration Settings.
- The domain of the target system will be retained from the User Account chosen. Editing the target computer's domain is not applicable since the domain will be updated based on the User Profile selected in the template.
- The applications whose data is collected in the backup should be added to the template under post-deployment settings.
- By clicking on the template name, you can view the User Profile Migration details including the password assigned for each account.
- Configure all the other required settings in the template and click Create Deployment Template. To know more about template creation, click template method or using task deployment.
To know more about how to perform Windows 11 migration in certain scenarios, click here.
 Yes No
Visit Community